|
|
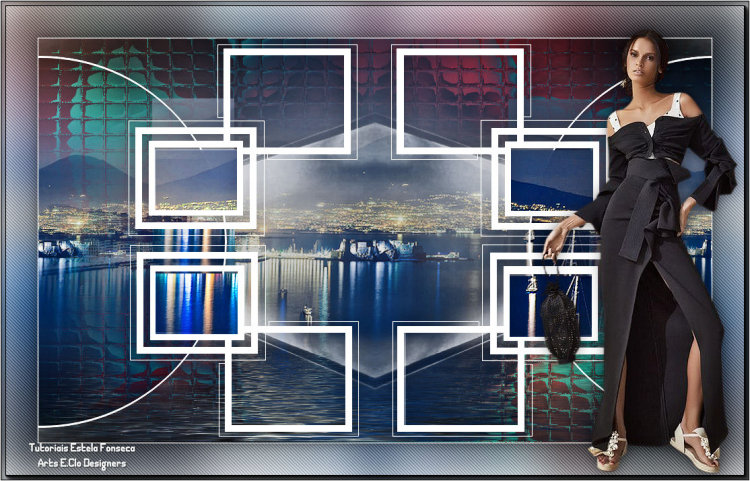
VESÚVIO
Meu especial agradecimento as maravilhosas tradutoras: Pinuccia, Clo e Hillu.
Tubes de Nara Pamplona, seu grupo, AQUI. Demais materiais feitos especialmente para este tutorial.
Plugins Utilizados: Simple / Pizza Slice Mirror VM Toobox / Tiler Flaming Pear / Flexify 2 e Flood FM Tile Tools / Saturation Emboss Carolaine and Sensibility / CS-DLines AAA Frames / Foto Frame
Preparação: Abra os tubes no PSP, duplique e feche os originais. Trabalhes com as cópias!!! Remova a marca d'água dos autores apenas das cópias. Copie as seleções para a pasta de seleções do PSP.
01-Abra uma imagem transparente de 1000 x 600 pixels. Selections / Select All
02- Abra a imagem <<Veruvio-Fundo>> Copie e Cole na seleção Selections / Select None
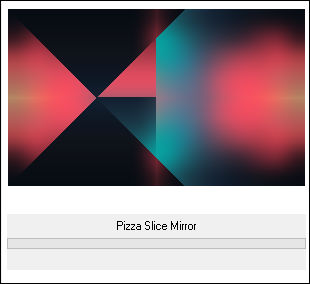
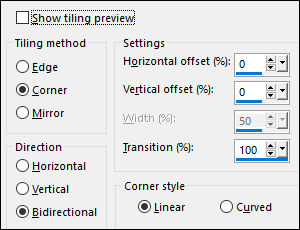
03- Layers / Duplicate Effects / Plugins / Simple / Pizza Slice Mirror
04- Effects / Image Effects / Seamless Tiling
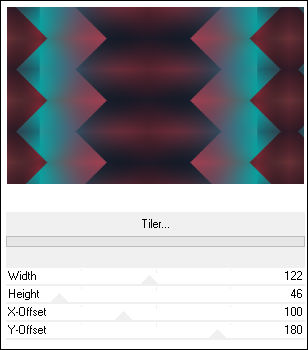
Effects / Plugins / VM Toobox / Tiler
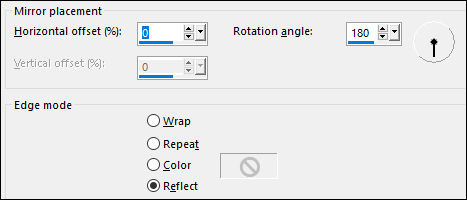
05- Effects / Reflection Effects / Rotating Mirror :
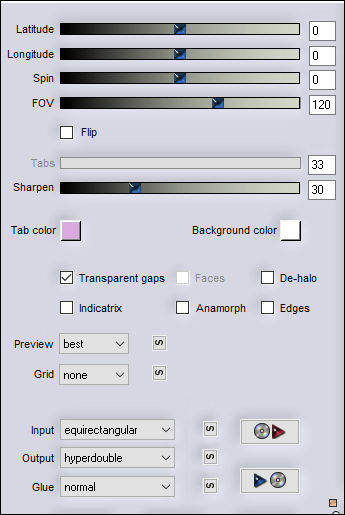
Effects / Plugins / Flaming Pear / Flexify 2
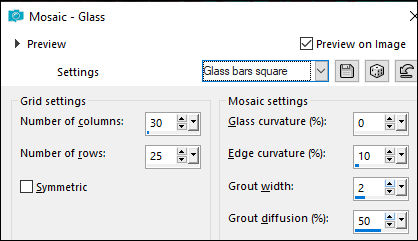
06- Effects / Texture Effects / Mosaic Glass
Ative o <<Deco1>> Copie e Cole como nova layer
07- Effects / 3D Effects / Drop Shadow: 0 / 0 / 50 / 30 / Cor #000000 Ative o tube << TubeNP 1346>> Copie e Cole como nova layer
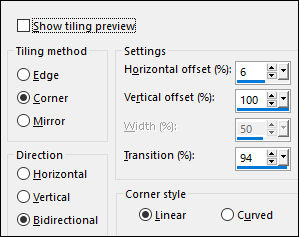
08- Layers / Arrange / Move Down Effects / Image Effects / Seamless Tiling / Side by Side
09- Ative a Layer do fundo Layers / Arrange / Move Up
10- Blend Mode / Overlay ( ou outro que combine com suas cores) Ative a Layer do Topo
11- Ative o <<Deco2>> Copie e Cole como nova layer Não Mova!
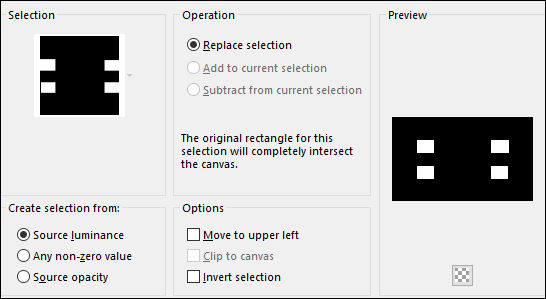
12- Selections / Load save selection / Load selection from disk: Vesuvio_1
Ative a Layer <<Raster 3>> (Layer do tube misted)
13- Selections / Promote selection to layer Layers / Arrange / Bring to top
14- Layers / Duplicate Effects / Plugins / FM Tile Tools / Saturation Emboss / Default
15- Ative a Layer <<Raster 2>> Delete no Teclado Selections / Select None
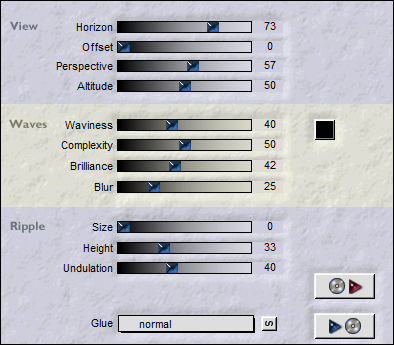
16- Ative a Layer <<Raster 3>> Effects / Plugins / Flaming Pear / Flood
17- Image / Add Borders / Symmetric Marcado / 1 Pixel cor branca (#ffffff) Copie!
18- Selections / Select All Image / Add Borders / Symmetric Marcado / 50 Pixels cor #ffffff
19- Selections / Invert Cole na seleção!
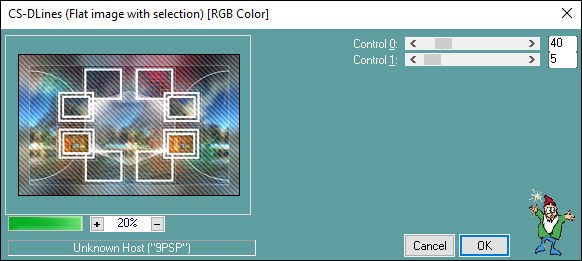
20- Adjust / Blur / Gaussian Blur / Radius 30 Effects / Plugins / Carolaine and Sensibility / CS-DLines
21- Selections / Invert Effects / 3D Effects / Drop Shadow: 0 / 0 / 50 / 30 / #000000
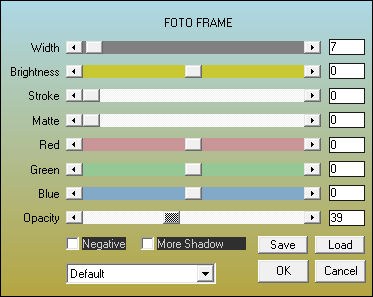
22- Selections / Select None Effects / Plugins / AAA Frames / Foto Frame:
23- Ative o tube da personagem, copie e cole como nova layer Image / Resize / 75%... Resize All Layers ... Desmarcado
24- Posicione Effects / 3D Effects / Drop Shadow: 0 / 0 / 50 / 30 / #000000
25- Image / Add Borders / Symmetric Marcado / 1 Pixel cor #ffffff Assine seu trabalho
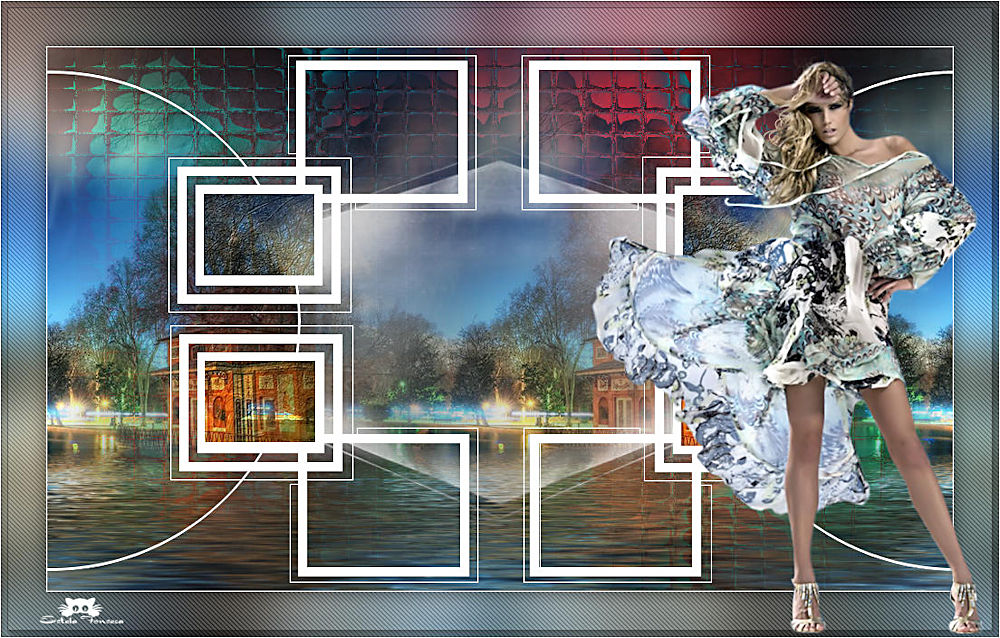
26- Layers / Merge / Merge All Salve Como JPG.
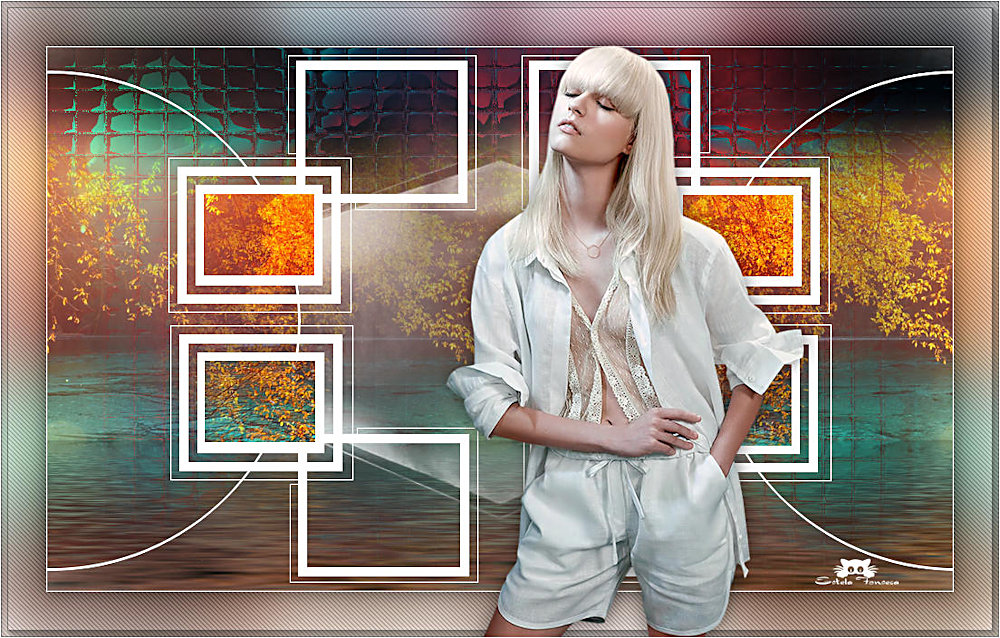
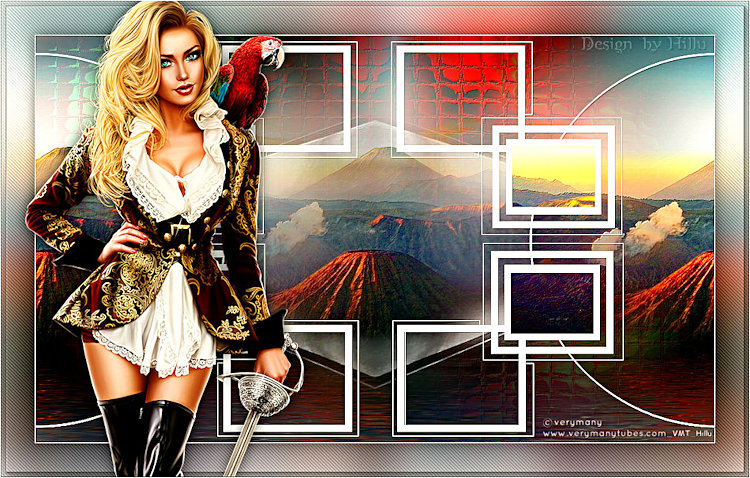
Versão 2: Tubes de Mentali e de Lily:
Versão de Pinuccia
Versão de Clo
Versão de Hillu:
©2019. Tutorial criado por Estela Fonseca. |