 |
PEIXE
Este tutorial foi realizado no Corel PaintShop Pro 2019.
Meu especial agradecimento as maravilhosas tradutoras: Pinuccia , Clo e Hillu.
Neste tutorial usei imagens do site Pinterest (os tubes estão na pasta do material)
** Agradeço as artistas por disponibilarem as suas lindas criações (Mask e Tubes e afins) Sem elas não seria possível a criação deste tutorial. **
Plugins Utilizados: Toadies / Band supressing noise e Weaver** Flaming Pear / Flood Simple / Left Right Wrap** Alien Skin Eye Candy 5 / Impact
** Dentro do Unlimited 2
Preparação: Abra as imagens no PSP, duplique e feche os originais. Copie a Textura para a pasta de texturas do PSP Copie o <<Picture tube>> para a pasta de Picture Tubes do PSP.
01-Abra uma imagem transparente de 1000 x 600 pixels. Selections / Select All
02- Abra a <<Imagem-Peixe-Pinterest >> Copie e Cole na seleção. Selections / Select None
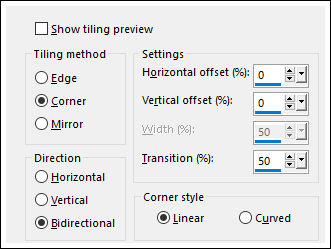
03- Effects / Image Effects / Seamless Tiling
Adjust / Blur / Gaussian Blur / Radius 35
04- Selections / Select All Selections / Modify / Contract 50 Pixels Edit / Cut ( a imagem ficará gravada na memória) Selections / Select None Cole como nova layer
05- Layers / Arrange / Move Down Layers / Duplicate Image / Resize / 50%... Resize All Layers ... Desmarcado Effects / Geometric Effects / Circle / Transparente
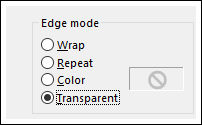
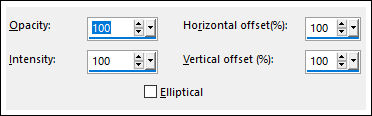
06- Effects / Edge Effects / Enhance Effects / Reflection Effects / Feedback
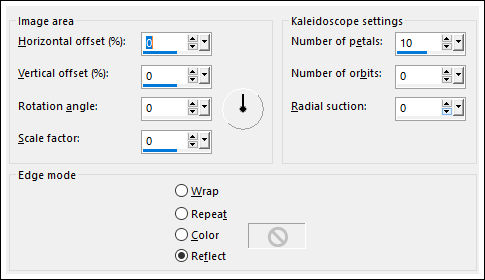
07- Image / Resize / 70%... Resize All Layers ... Desmarcado Effects / Reflection Effects / Kaleidoscope
Oculte esta layer
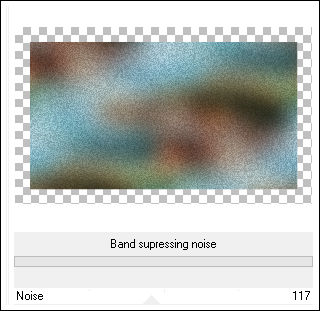
08- Ative a Layer do Fundo (Raster 2 ) Effects / Plugins / <I.C.NET Software> Filters Unlimited 2 / Toadies / Band supressing noise / Default
Layers / Duplicate
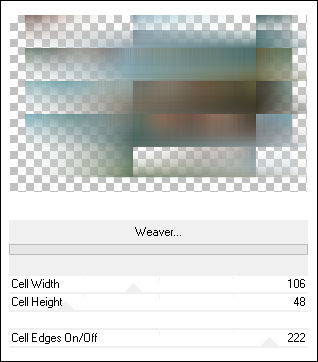
09- Effects / Plugins / <I.C.NET Software> Filters Unlimited 2 / Toadies / Weaver
Blend Mode / Hard Light Layers / Merge / Merge Down
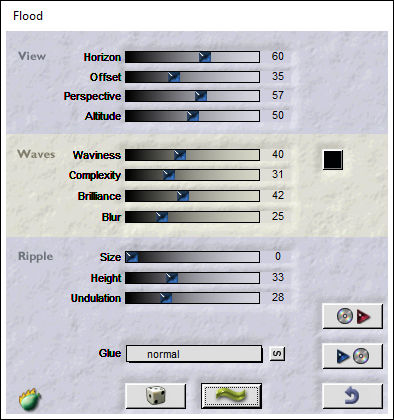
10- Effects / Plugins / Flaming Pear / Flood
Ative a Pick Tool (K) e expanda para ambos os lados (apagando assim as partes transparentes)
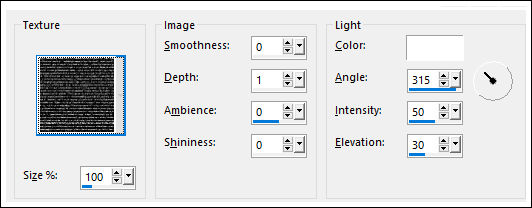
11- Ative a Layer do Topo Effects / Texture Effects / Texture (Lines)
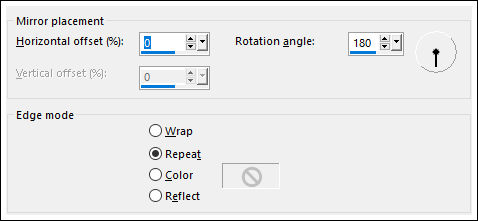
Effects / Reflection Effects / Feedback (como antes) Effects / Reflection Effects / Rotating Mirror
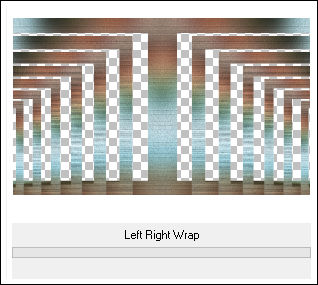
12- Effects / Plugins / <I.C.NET Software> Filters Unlimited 2 / Simple / Left Right Wrap
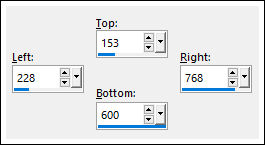
Selections Tool (S) / Custom Selection
Delete no Teclado Selections / Select None
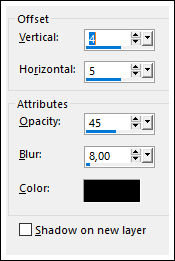
13- Effects / 3D Effects / Drop Shadow: Cor #000000
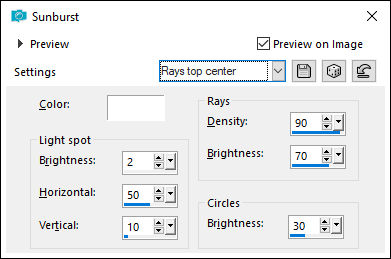
Effects / Illumination Effects / Sunburst
14- Ative a Layer do Meio e torne-a visível Effects / Plugins / Alien Skin Eye Candy 5 / Impact / Glass / Clear Image / Resize / 50%... Resize All Layers / Desmarcado Adjust / Sharpness / Sharpen
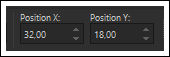
15- Layers / Arrange / Bring to Top Pick Tool (K) Posição X (32,00 ) Posição Y (18,00 ) Tecla "M" para sair da Pick Tool
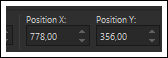
16- Layers / Duplicate Pick Tool (K) Posição X (778,00 ) Posição Y (356,00 ) Tecla "M" para sair da Pick Tool
17- Ferramenta <<Picture Tube>> procure o tube <<Metal>> configure como segue
Layers / New Raster Layer Carimbe o tube no centro da imagem, como segue:
Carimbe o <<picture tube>> Nas duas imagens
18- Effects / Plugins / Alien Skin Eye Candy 5 / Impact / Glass / Clear Ative a Layer do Fundo (Raster 2) Ative o tube <<Peixe>> Copie e Cole como nova Layer
19- Use a Ferramenta <<smudge Brush>> para uniformizar o tube com o fundo da tag
Blend Mode / Hard Light Opacidade / 56%
20- Ative o <<Deco-1>> Copie e Cole como nova layer Ative o Texto 1 e 2 Copie e Cole como nova layer Posicione no canto inferior à esquerda Layers / Merge / Merge Down Effects / 3D Effects / Drop Shadow: 1 / 1 / 45 / 1 Cor #000000
21- Image / Add Borders / Symmetric Marcado / 2 Pixesl cor #ffffff Image / Add Borders / Symmetric Marcado / 1 Pixel cor #5f7c79 Image / Add Borders / Symmetric Marcado / 30 Pixels cor #ffffff Layers / Merge / Merge Down (2 Vezes)
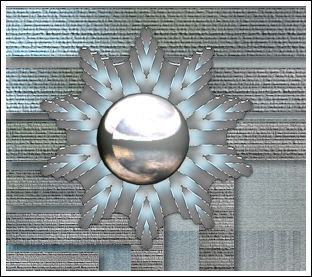
22- Assine seu trabalho Layers / Merge / Merge All Salve Como JPG.
Versão 2: Tube feito através da imagem de Pinterest:
Versões de Pinuccia
Versão de Clo
Versão de Hillu:
©2020. Tutorial criado por Estela Fonseca. |