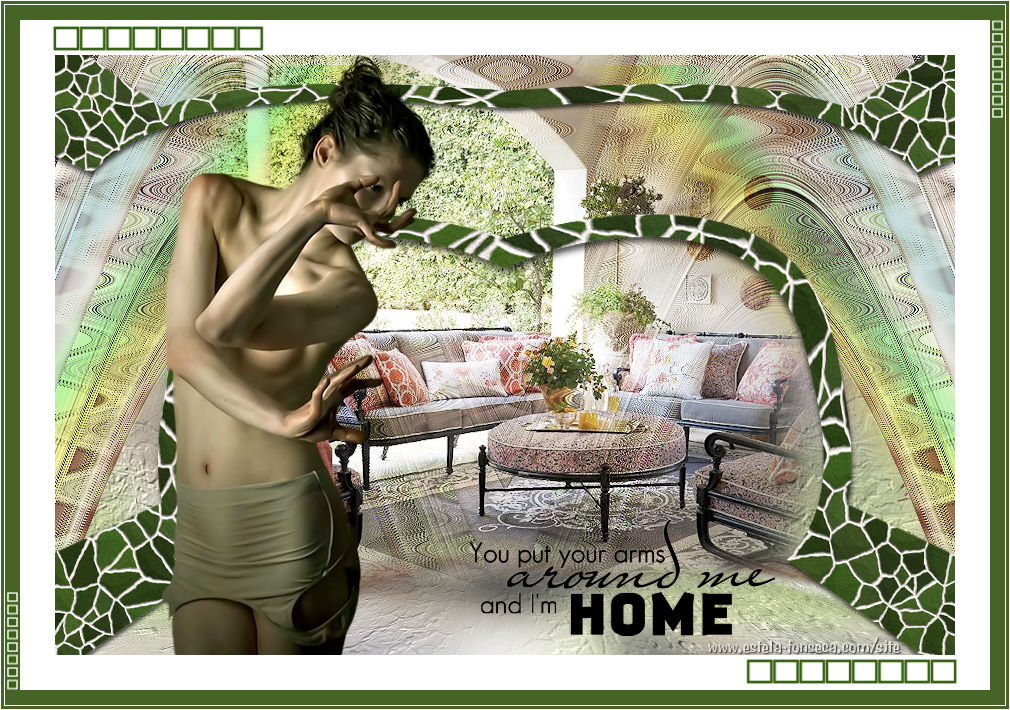
HOME
Agradeço as maravilhosas tradutoras: Clo e Sophie.
Tube de Luna Tube de LB-Tubes ♥ Agradeço por me permitir usar suas lindas criações (Mask e Tubes e afins) Não altere o nome nem remova a marca d'água. Não compartilhe em grupos ou ofereça-os em seus sites, blogs etc ... Seu uso nos tutoriais está sujeito a autorização dos autores. ♥
Plugins Utilizados: FM Tile Tools / Saturation Emboss Toadies / Weaver Alien Skin Eye Candy 5 / Texture
Abra os tubes no PSP, duplique e feche os originais. Coloque a Textura na pasta de Texturas do PSP Dê dois cliques no preset <<EF-Home_EC5-TSW ( ele será importado para a pasta do plugin)
Minhas Cores: #366775 / #bec5c3
Copie
02- Abra uma Nova Imagem transparente de 900/600 pixels Selections / Select All Cole na Seleção Selections / Select None
03- Effects / Image Effects / Seamless Tiling / Default Adjust / Blur / Gaussian Blur / Radius 25
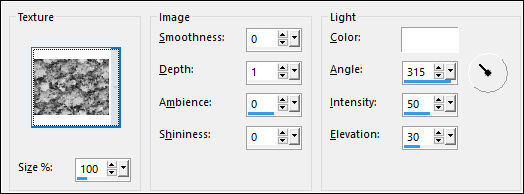
04- Effects / Texture Effects / Texture
Layers / Promote Background to Layer
05- Layers / Duplicate
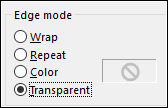
06- Effects / Geometric Effects / Circle / Transparente
07- Selections / Select All Selections / Float Selections / Defloat
08- Selections / Modify / Contract 30 pixels Selections / Invert Delete no teclado Selections / Invert
09- Layers / New Raster Layer Effects / 3D Effects / Cutout:
Selections / Select None
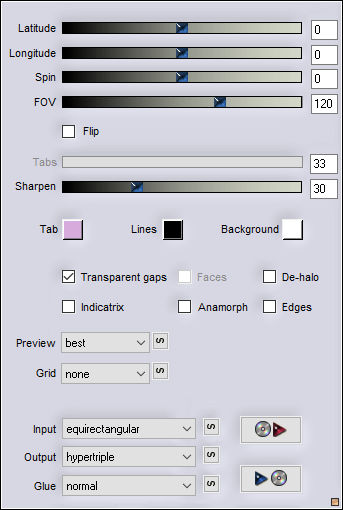
10- Effects / Plugins / Flaming Pear / Flexify 2
Effects / Image Effects / Seamless Tiling / Side by Side Effects / Edge Effects / Enhance
11- Layers / New Raster Layer Preencha com a cor do Primeiro Plano Selections / Select All Selections / Modify / Contract 5 pixels Delete no teclado
12- Selections / Modify / Contract 100 pixels Preencha com a cor do Primeiro Plano Selections / Modify / Contract 50 pixels Delete no teclado Selections / Select None
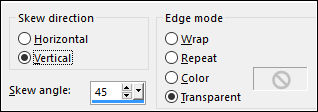
13- Effects / Geometric Effects / Skew
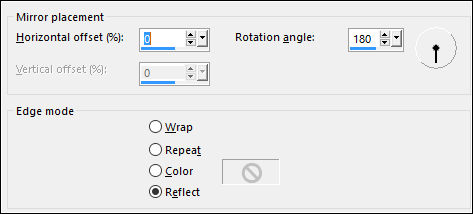
Effects / Reflection Effects / Rotating Mirror
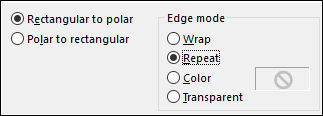
14- Effects / Distortion Effects / Polar Coordenates:
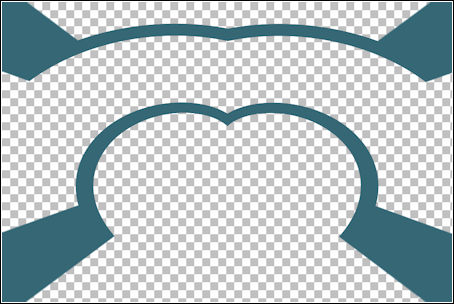
Image / Mirror / Mirror Vertical Ative a Ferramenta <<Erase Tool>>
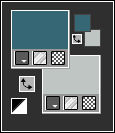
Apague o "coração" observe que na parte superior da layer há uma marca, apague ali também. Resultado:
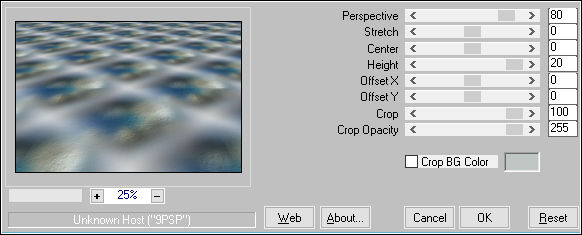
15- Ative a Layer do Fundo (Raster 1) Layers / Duplicate Effects / Plugins / Mura's meister / Perspective Tiling
Layers / Arrange / Move Up
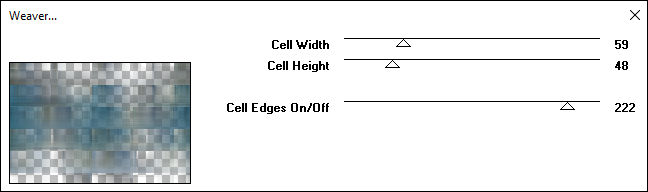
16- Ative a Layer <<Copy of Raster 1>> Effects / Plugins / Toadies / Weaver
Effects / Edge Effects / Enhance
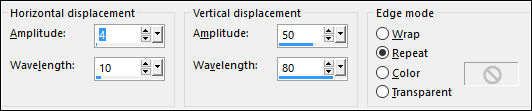
17- Effects / Distortion Effects / Wave
Effects / Reflection Effects / Rotating Mirror (mesmos valores de antes)
18- Layers / Duplicate Blend Mode / Overlay (Ou outro)
19- Ative a Layer do topo (Raster 2) Effects / Plugins / Alien Skin Eye Candy 5 / Texture / Stone Wall /Preset <<EF_Home_EC5_TSW>> Nota: Mude as Cores na Guia Basic, se trabalhar com cores diferentes. Effects / 3D Effects / Drop Shadow: #000000
20- Abra o tube << Luna572>> Copie e Cole Como Nova Layer Redimensione se necessário! Layers / Arrange / Move Down ( 2 vezes ) Effects / Plugins / FM Tile Tools / Saturation Emboss / Default (Opcional)
21- Ative a Layer do topo Effects / Distortion Effects / Punch / 75 Ative a Segunda Layer à partir da Layer do topo (copy of Raster 1) Ative a Varinha Mágica, configurada como segue:
Clique na parte transparente da Layers Pressione a tecla <<Delete>> 3 ou 4 vezes Selections / Select None Ative a Layer do topo (Raster 2)
22- Abra o tube<<Deco-Home>> Copie e Cole Como Nova Layer Blend Mode / Darken
23- Abra o tube <<2578-Couple_LB-TUBES >> Copie e Cole Como Nova Layer Image / Resize / 80%... Resize All Layers ... Desmarcado Posicione
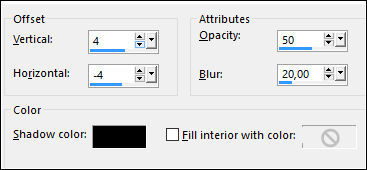
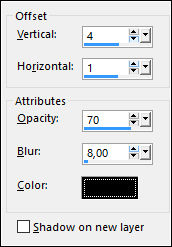
24- Abra o texto <<Lovelyquotes>> ... Copie e Cole como Nova Layer Image / Resize / 30% ... Resize all Layers ... Desmarcado Image / Resize / 80% ... Resize all Layers ... Desmarcado Image/ Negative Image Adjust / Sharpness / Sharpen Effects / 3D Effects / Drop Shadow: 4 /1 / 70 / 8,00/ Cor do Primeiro Plano (#366775) Posicione
25- Image / Add Borders / Symmetric Marcado / 35 pixels cor #ffffff Image / Add Borders / Symmetric Marcado / 15 pixels cor #366775
26- Abra o tube <<Deco2_Home>> Copie e Cole como nova layer Image / Add Borders / Symmetric Marcado / 1 pixel cor #ffffff Image / Add Borders / Symmetric Marcado / 3 pixels cor #366775 Image / Add Borders / Symmetric Marcado / 1 pixel cor #ffffff
27- Assine seu trabalho Salve como JPG
Versão com tube de Min@ e de Beatrice:
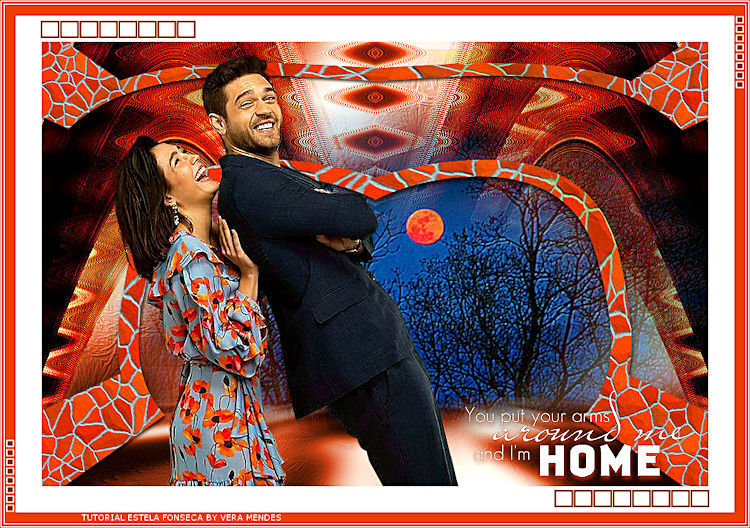
Testado por Vera Mendes:
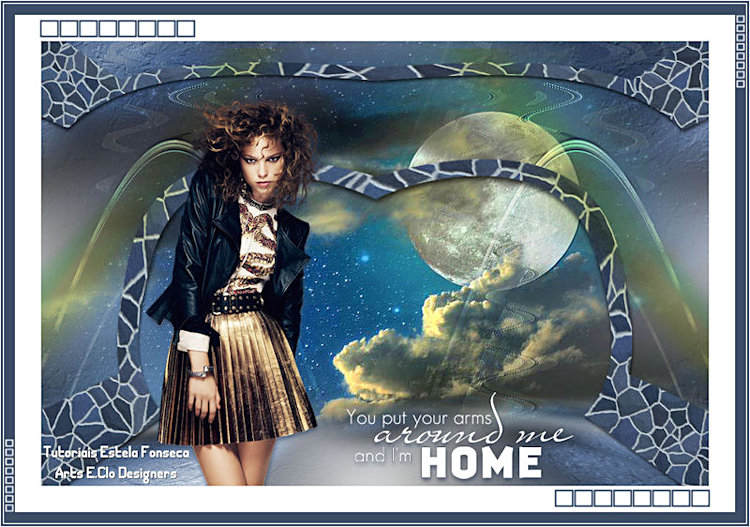
Versão de Clo:
Versão de Sophie:
©Tutorial criado por por Estela Fonseca em 22/06/2017. |