M.L. DidonetTutorial dedicado a Mara L Didinet.
Agradeço as tradutoras: Pinuccia e Clo.
Material Necessário:
Tube de Caugismo ... Paisagem... seu site aqui. Tube de Animabelle , seu site , Aqui.
Agradeço a todas as artistas que gentilmente cederam seus tubes e Masks tornando possível a execução deste trabalho.
Plugin Utilizados: Simple / Zoom Out and Flip* Unlimited 2 /Tile &Mirror / Mirror (Vertical)* FM Tile Tools Kang 2 / Mora5* Transparence Color Effex Pro 3 Alien Skin Eye Candy 5 / Impact ** Importados para o Unlimited 2
Preparação: Abra os tubes no PSP, duplique e feche os originais... trabalharemos nas cópias. Remova a Marca d'água apenas das cópias!
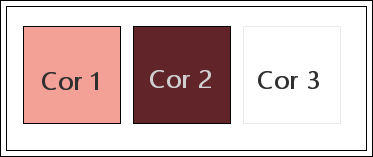
Cores para Referência:
Primeiro Plano cor 1 Segundo Plano cor 2
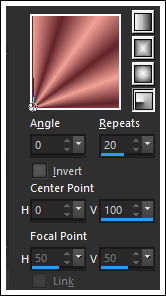
Gradiente <<Radial>> Configurado como segue:
1- Abra a layer transparente <<MLDidonet-Alpha>> Duplique e feche a original Preencha a imagem com o Gradiente
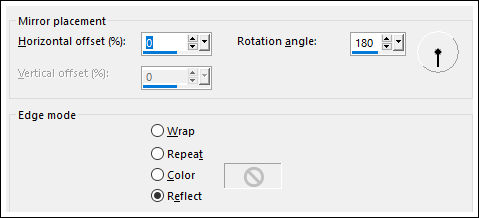
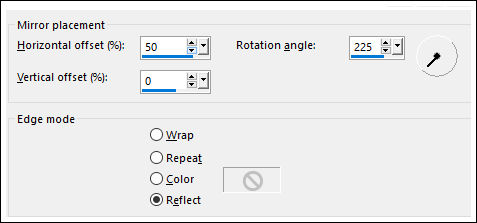
2- Effects / Reflection Effects / Rotating Mirror: ( 0 /180 / Reflect)
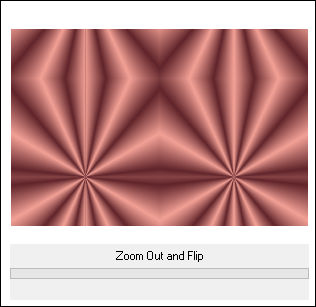
Effects / Plugins / Simple / Zoom Out and Flip
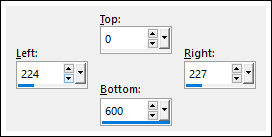
3- Layers / New Raster Layer Selections Tool (S) / Custom Selection
Preencha a seleção com a cor do Segundo Plano Selections / Select None
4- Layers / Duplicate Image / Mirror/ Mirror Horizontal Layers / Merge / Merge Visible
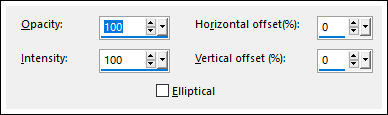
5- Effects / Reflection Effects / Feedback
Effects / Edge Effects / Dilate
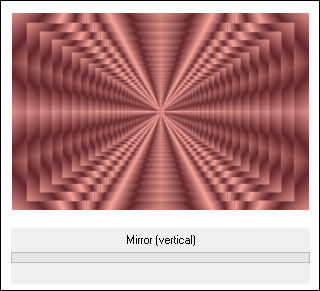
6- Effects /Plugins / <I.C.NET Software>> Filters Unlimited 2 / Tile &Mirror / Mirror (Vertical)
Ative o <<Deco 1>> Copie e Cole como nova layer
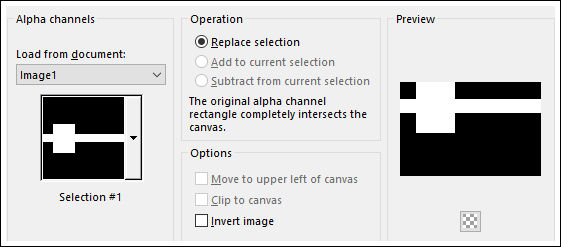
7- Selections / Load save selection / Load selection from Alpha Channel: Seleção #1
Ative a Layer <<Merged>> Selections / Promote selection to Layer
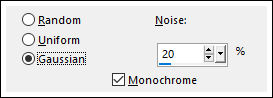
8- Adjust / Add Remove Noise / Add Noise
Effects / Plugins / FM Tile Tools / Blend Emboss / Default Selections / Select None Blend Mode / Multiply
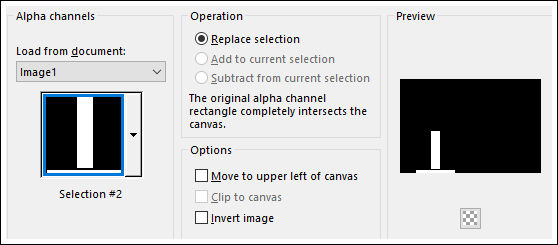
9- Ative a Layer do Fundo <<Merged>> Selections / Load save selection / Load selection from Alpha Channel: Seleção #2
Selections / Promote selection to Layer
10- Adjust / Add Remove Noise / Add Noise
Effects / Plugins / FM Tile Tools / Blend Emboss / Default Selections / Select None
11- Ative a Layer do Topo Effects / 3D Effects / Drop Shadow: 1 / 1 / 50 / 5,00 / Cor escura do Segundo Plano
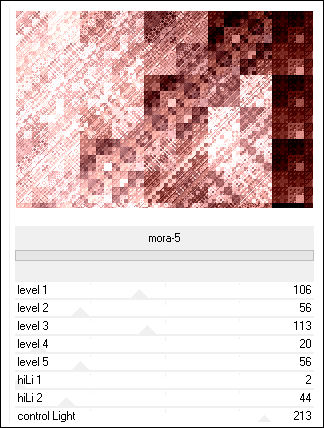
12- Ative a Layer <<Merged>> Layers / Duplicate Effects / Plugins /<I.C.NET Software>> Filters Unlimited 2/ Kang 2 / Mora5
13- Effects / Plugins / Transparency / Eliminate Black Effects / Image Effects / Seamless Tiling / Default Layers / Merge / Merge Visible Effects /Reflection Effects / Rotating Mirror
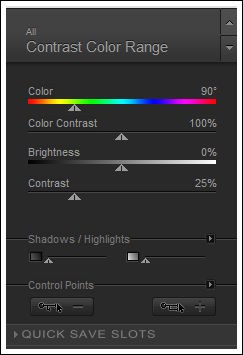
14- Effects / Plugins / Color Effex Pro 3.0 / Contrast Color Range (opcional)
Selections / Load save selection / Load selection from Alpha Channel: Seleção #1
15- Abra o tube << calguisSanDiegomisted29022012>> Copie e Cole como nova layer Posicione sobre a seleção Selections / Invert Delete no teclado Selections / Select None Blend Mode / Luminance Legacy
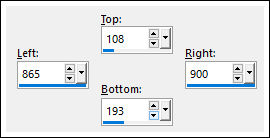
16- Selections Tool (S) / Custom Selection:
Delete no teclado Selections / Select None Layers / Duplicate Blend Mode / Multiply Opacidade 50
17- Ative o tube <<!cid_D240A60C-A135-4750-8791-7AE1A06EEFE1 >> Copie e Cole como nova layer Image / Resize /80% ... Resize all layers ...desmarcado Image / Resize /95% ... Resize all layers ...desmarcado Posicione
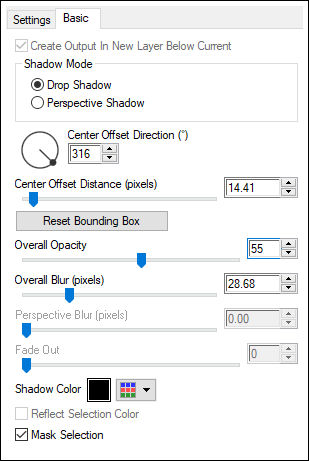
18- Effects / Plugins / Alien Skin Eye Candy 5 / Impact / Perspective Shadow / Drop Shadow Blurry / Na aba Basic mude apenas o valor de <<Overall Opacity>> como abaixo:
19- Image / Add Borders / Symmetric Marcado / 1 pixel cor segundo plano Image / Add Borders / Symmetric Marcado /5 pixels cor branca Image / Add Borders / Symmetric Marcado / 1 pixel cor segundo plano
Image / Add Borders / Symmetric Marcado /10 pixels cor do primeiro plano Image / Add Borders / Symmetric Marcado /1 pixel cor segundo plano Image / Add Borders / Symmetric Marcado /40 pixels cor branca
Image / Add Borders / Symmetric Marcado /1 pixel cor segundo plano Image / Add Borders / Symmetric Marcado /10 pixels cor do primeiro plano Image / Add Borders / Symmetric Marcado /1 pixel cor segundo plano
20- Ative o tube <<Deco 2>> Copie e Cole como nova layer Não esqueça de colorir se está trabalhando com cores diferentes das minhas! Assine seu trabalho Layers / Merge / Merge All
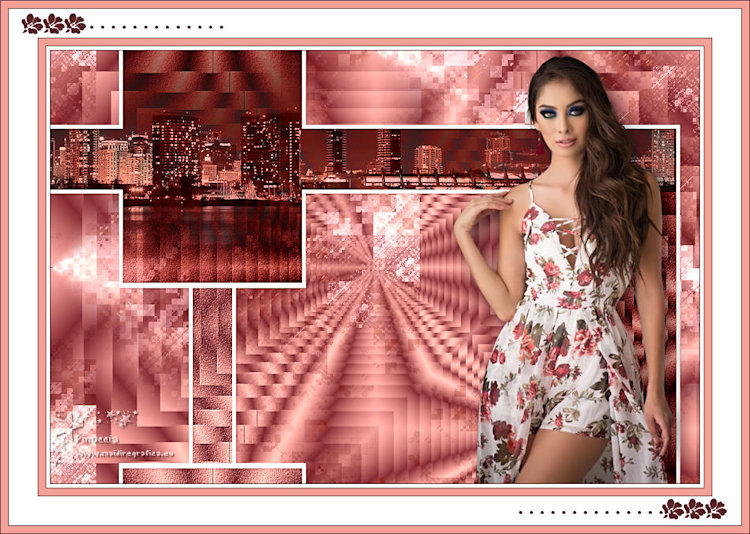
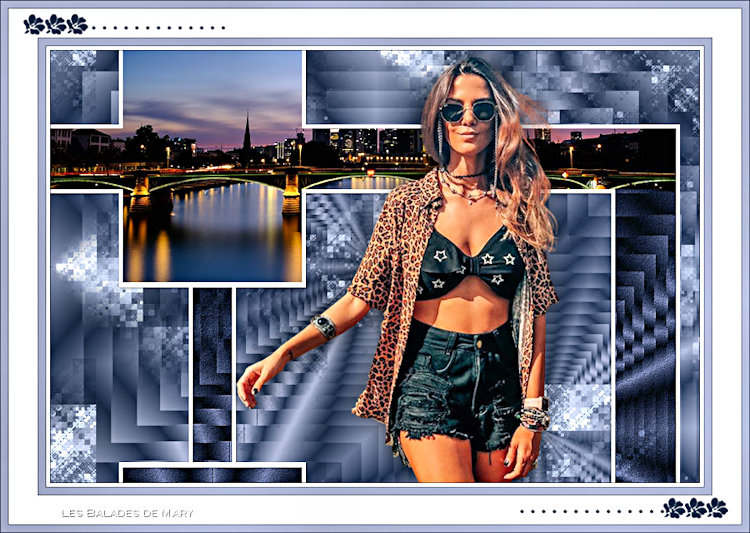
Versão com tube de Mentali (paisagem) e de Grisi (Mulher)
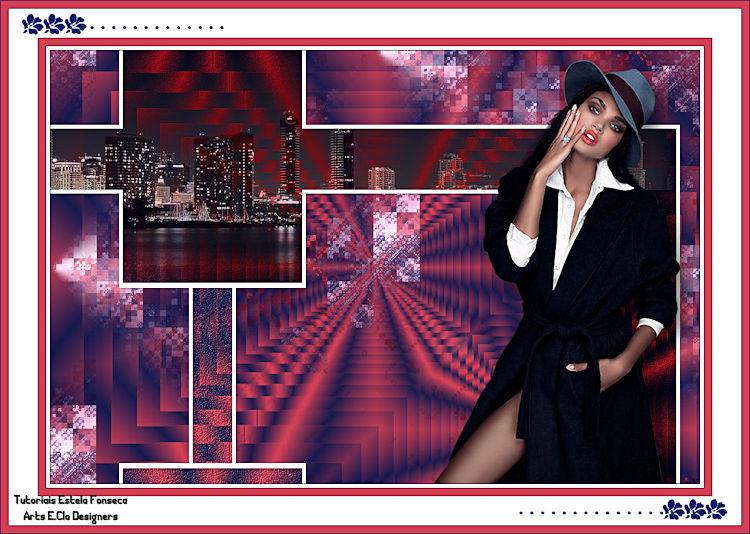
Pinuccia:
Clo:
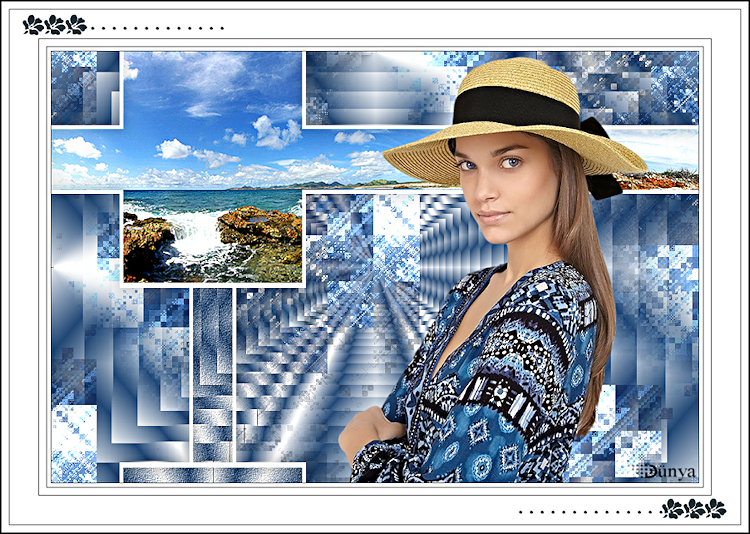
Dunya:
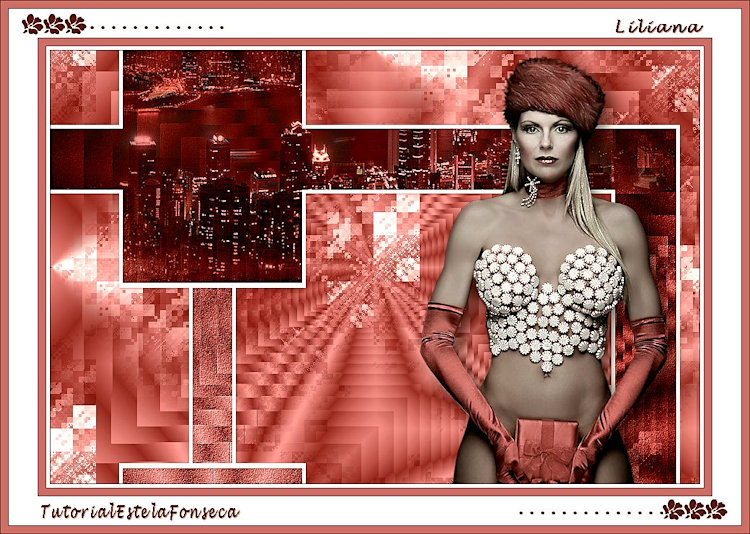
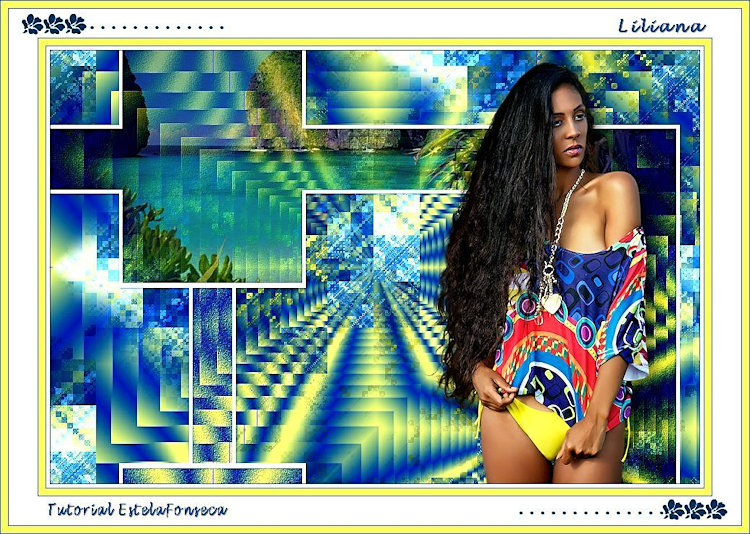
Liliana:
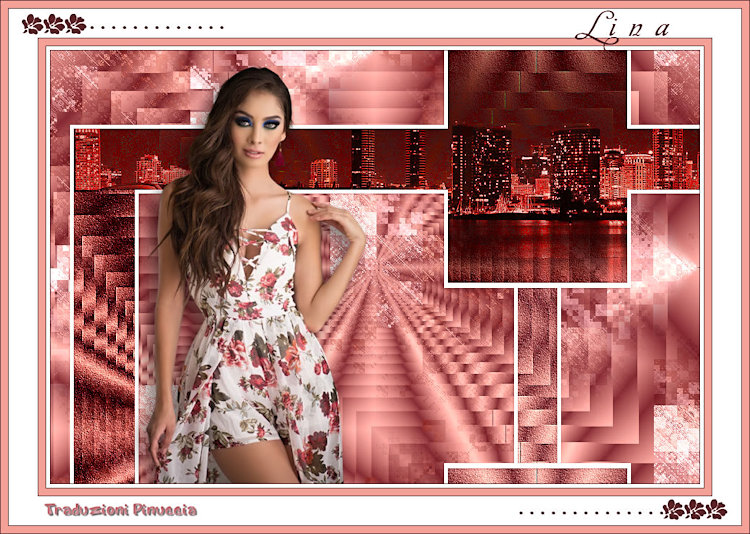
Lina:
MamieVal:
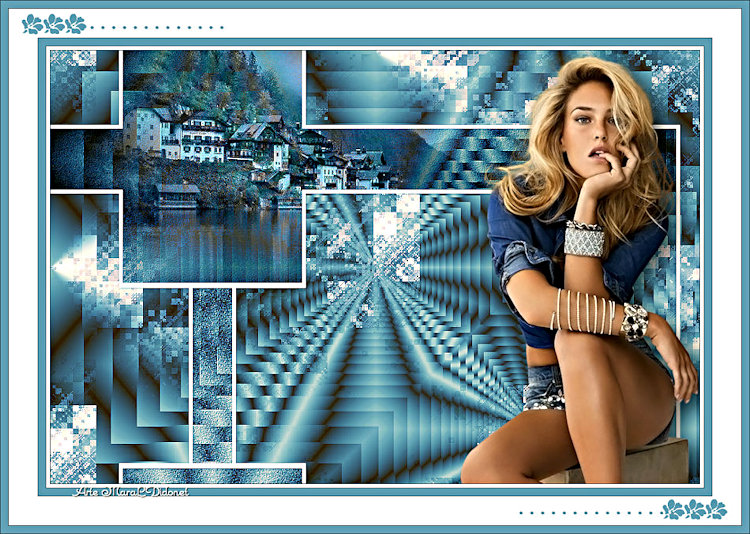
MaraL Didonet:
Mary:
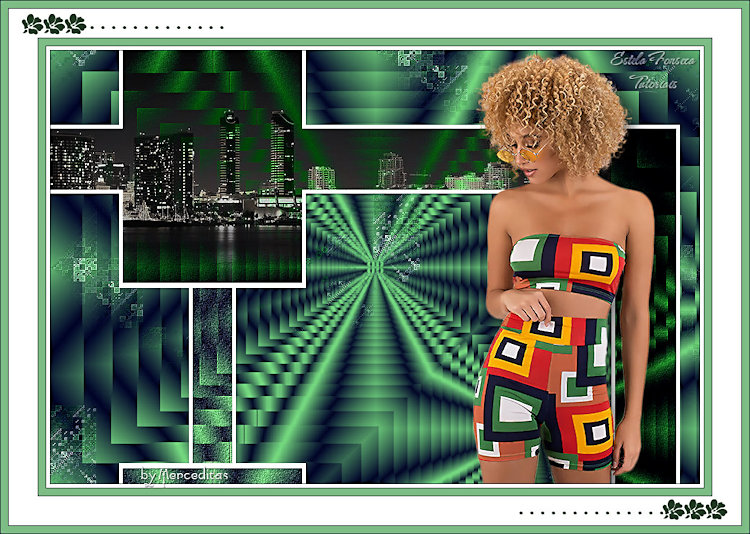
Merceditas:
???
Vera Jarude:
© Tutorial criado por por Estela Fonseca em 28/08/2018. |