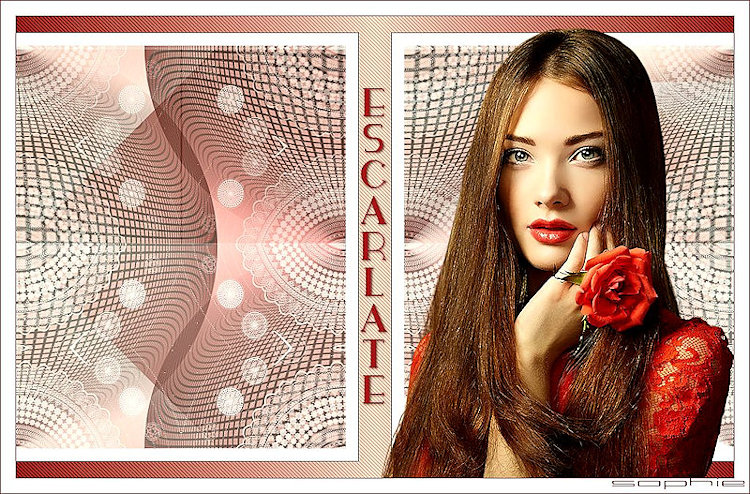
ESCARLATE
Agradeço a Maravilhosa tradutora: Sophie.
Material Necessário:
Para esse tutorial usei um tube de Calguismo.
Plugins Utilizados: < I.C.NET Software>Filters Unlimited 2.0 / RCS Filter Pak 1.0 / RCS ScreenWorks -Grid Fleming Pear / Flexify 2 <I.C.NET Software> Filters Unlimited 2.0 / Two Moon / PaperFold AAA Frame / Foto Frame <I.C.NET Software> Filters Unlimited 2 / Simple / Left Right Wrap Caroline and Sensibility /CS-Dlines
Preparação: Abra o tube no PSP, duplique e feche o original. Copie a seleção para a pasta de Seleções do PSP
Primeiro Plano cor #a5212d Segundo Plano cor #dcbbae
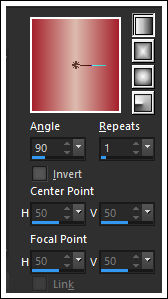
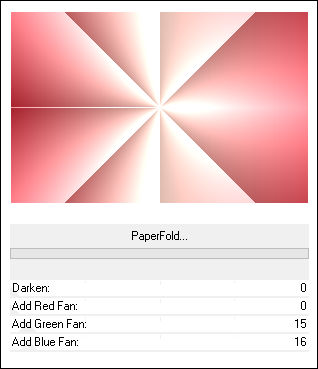
Gradiente estilo <<Linear>>
01- Abra uma imagem transparente de 900 / 550 pixels Preencha com o Gradiente.
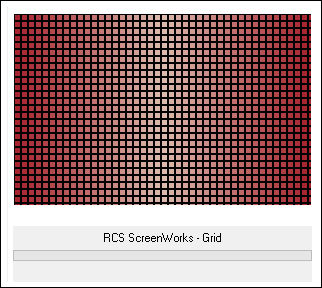
02- Effects / Plugins /< I.C.NET Software>Filters Unlimited 2.0 / RCS Filter Pak 1.0 / RCS ScreenWorks -Grid
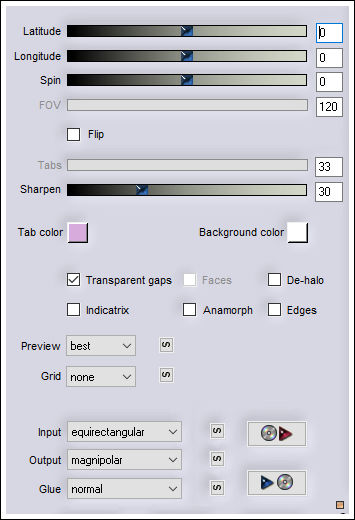
03- Effects / Plugins / Fleming Pear / Flexify 2
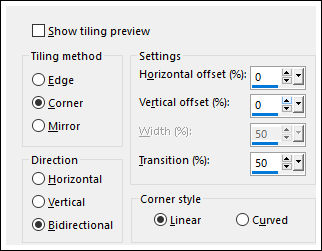
04- Effects / Image Effects / Seamless Tiling
05- Layers / New Raster Layer Layers / Arrange / Move Down Preencha com o mesmo gradiente.
06- Effects / Plugins /<I.C.NET Software> Filters Unlimited 2.0 / Two Moon / PaperFold
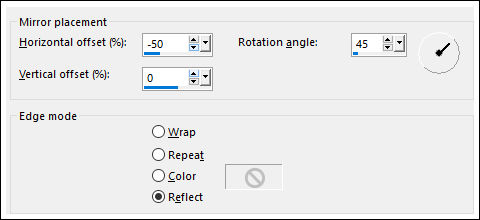
Effects / Reflection Effects / Rotating Mirror
Ative a Layer do Topo Opacidade / 71%
07- Ative o <<Deco-1>> Copie e Cole como Nova Layer Image / Add Borders / Symmetric Marcado / 40 pixels cor #ffffff Effects / Plugins / AAA Frame / Foto Frame
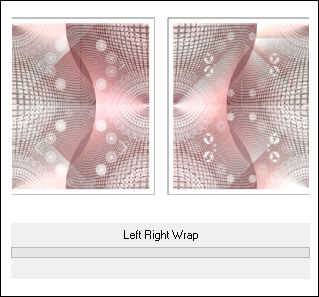
Effects / Plugins / <I.C.NET Software> Filters Unlimited 2 / Simple / Left Right Wrap
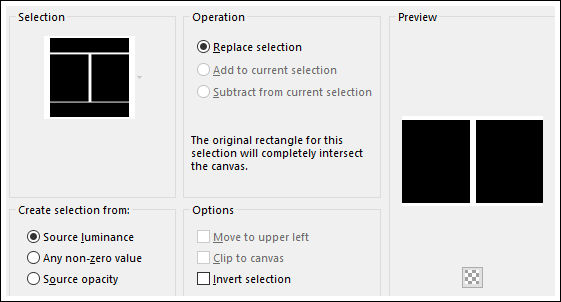
08- Selections / Load Save Selection / Load selection from disk: EF-Escarlate
Layers / New Raster Layer Preencha a seleção com o mesmo gradiente Selections / Select None
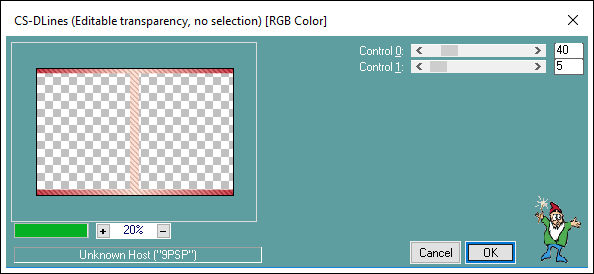
09- Effects / Plugins / Caroline and Sensibility /CS-Dlines
10- Abra o tube <<Joanie_Woman_11-06-2013 >>Copie e cole como nova layer. Image / Resize / 85%... Resize All Layers ... Marcado Posicione à gosto. Abra o tube <<Texto-Escarlate>> Copie e cole como nova layer Posicione Image / Add Borders / Symmetric Marcado / 20 pixels cor #ffffff Assine seu trabalho Layers / Merge / Merge All Salve seu trabalho como jpg.
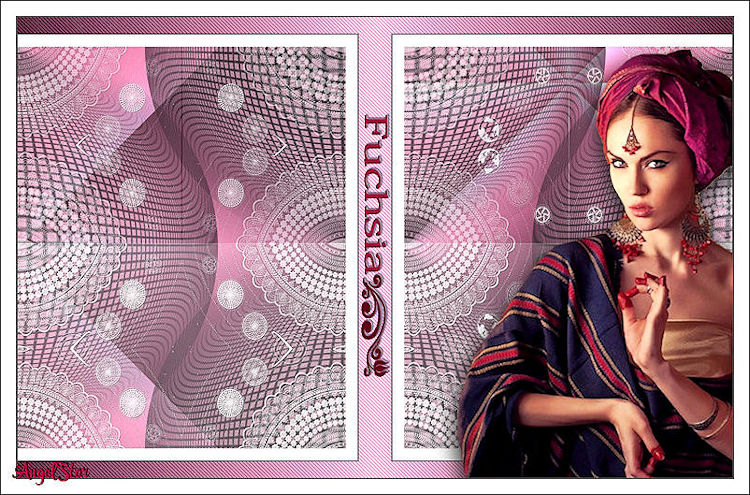
Versão com tube de Mentali
Sophie:
Angel Star:
©2018. Tutorial criado por Estela Fonseca. |