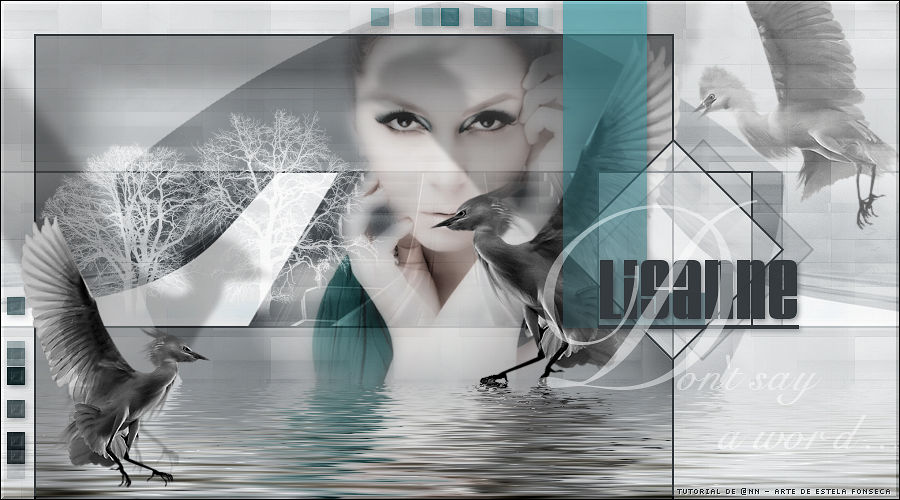
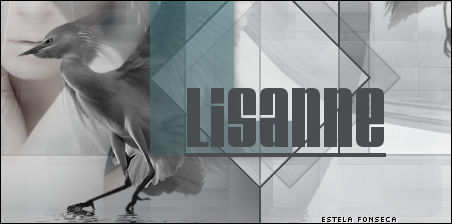
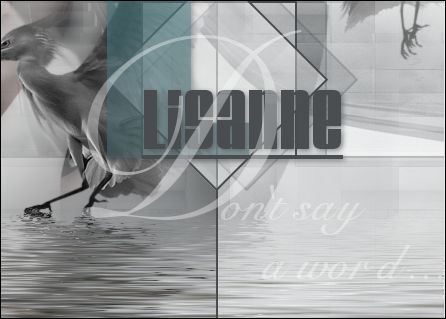
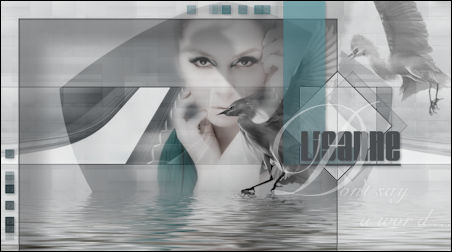
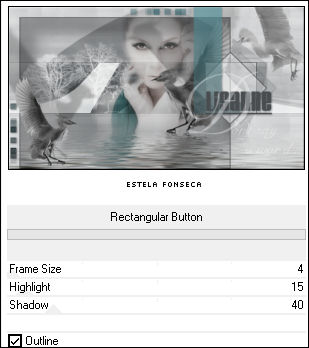
LISANNE
[ Tutorial de @nn TDstudio ]

O tutorial traduzido no Corel Paint Shop Pro 2022 Ultimate.
Material Necessário:
3 tubes: "@nn_170109_005_birds_JAG_tdstudio_grey.pspimage"
"@nn_170109_005_birds_JAG_tdstudio_grey_1BIRD.pspimage"
"@nn_170109_003_misted_woman_green_tdstudio_small.pspimage"
4 Seleções: "@nn_180109_Selectie004_Lisanne_tdstudio.PspSelection"
"@nn_180109_Selectie001_Lisanne_tdstudio.PspSelection"
"@nn_180109_Selectie002_Lisanne_tdstudio.PspSelection"
"@nn_180109_Selectie003_Lisanne_tdstudio.PspSelection"
1 image: escalator.jpg
5 Brushes: "@nn_2009_brush_Lisanne_000_tdstudio.PspBrush"
"@nn_2009_brush_Lisanne_002_tdstudio.PspBrush"
"@nn_2009_brush_Lisanne_003_tdstudio.PspBrush"
"@nn_brushes_tds_buttons_mmc.PspBrush"
"@nn_2009_brush_bomen_001_tdstudio.PspBrush"
1 textura: @nn_textuur__bloks_250109_tdstudio.bmp
1 preset flaming pear/flood preset: @nn_180109_Lisanne.q8r
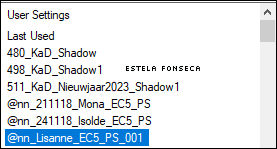
1 preset para EC 5: Impact - Perspective shadow: @nn_Lisanne_EC5_PS_001.f1s
1 preset para EC 5: Impact - Motion Trail: @nn_Lisanne_EC5_MT_001.f1s
Plugins:
Alien Skin Eye Candy 5 / Impact
Unlimited 2.0 / Buttons&Frames
Flaming Pear / Flood
Fotomatic / SkyGrad
Preparação:
Instale os filtros antes de abrir o PSP.
Primeiro Plano cor BRANCA , Segundo plano cor ESCURA #484c4f
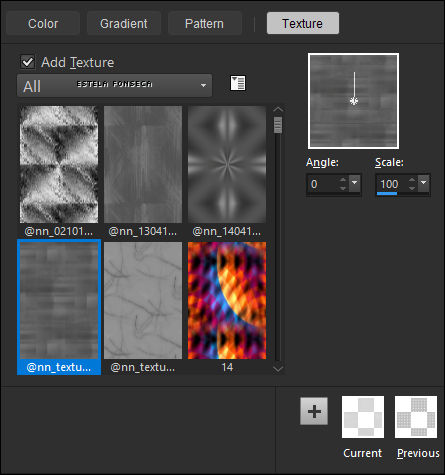
Coloque no Primeiro Plano a Textura "@nn_textuur__bloks_250109_tdstudio.bmp"
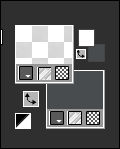
Sua paleta de materiais é a seguinte:
Cuidado ao usar outras cores:
Jogue com as opacidades das camadas e com os modos de misturas.
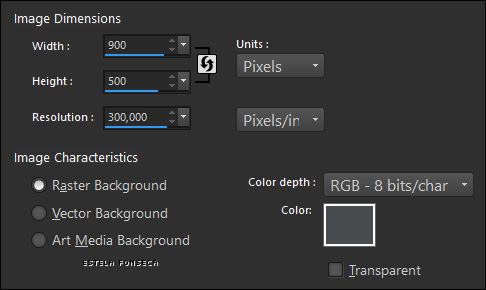
1- Abra uma Nova imagem "Raster cor Segundo Plano" de 900 / 500 Pixels
2- Layers / New Raster Layer
3- Preencha com a Textura do Primeiro Plano
4- Adjust / Sharpness / Sharpen
5- Layers / New Raster Layer
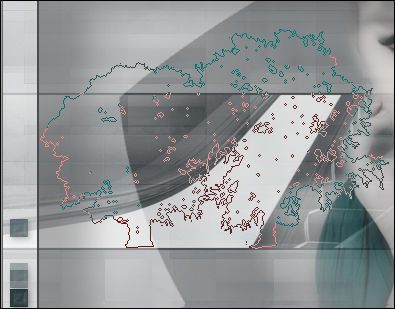
6- Selections / Load/save selection / Load selection from disk: Selection:
@nn_180109_Selection001_Lisanne_tdstudio
6- Ative a imagem: escalator.jpg
Copie
Volte ao seu trabalho e cole na seleção
Mantenha a seleção ativa
Blend Mode / Overlay ... Opacidade / 70
7- Layers / New raster layer
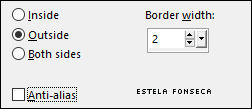
Selections / Modify / Select selection borders:
8- Preencha com a cor do Segundo Plano
9- Selections / Select None
Layers / New raster layer
10- Effects / Geometric Effects / Pentagon: Cor Branca
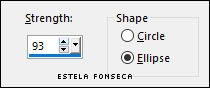
11- Effects / Geometric Effects / Spherize:
12- Blend Mode / Soft Light ... Opacidade /100
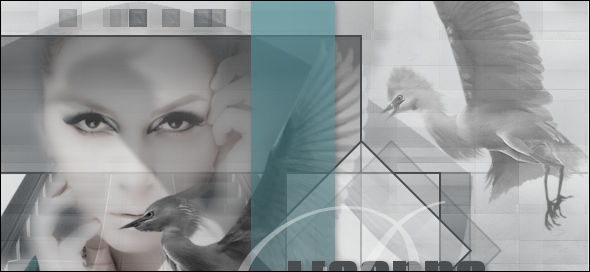
13- Ative o tube: @nn_170109_003_misted_woman_green_tdstudio_small.pspimage
14- Copie e Cole como nova layer
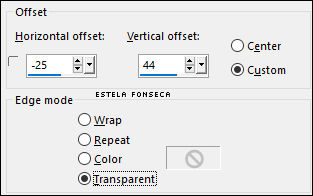
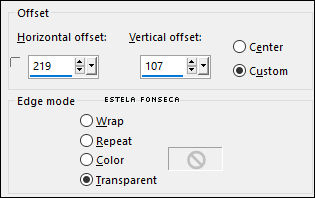
15- Effects / Image Effects / Offset:
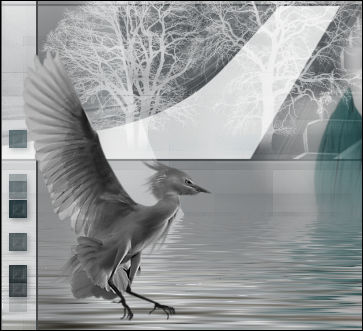
16- Ative o tube: @nn_170109_005_birds_JAG_tdstudio_grey.pspimage
Copie e Cole como nova layer
Effects / Image Effects / Offset:
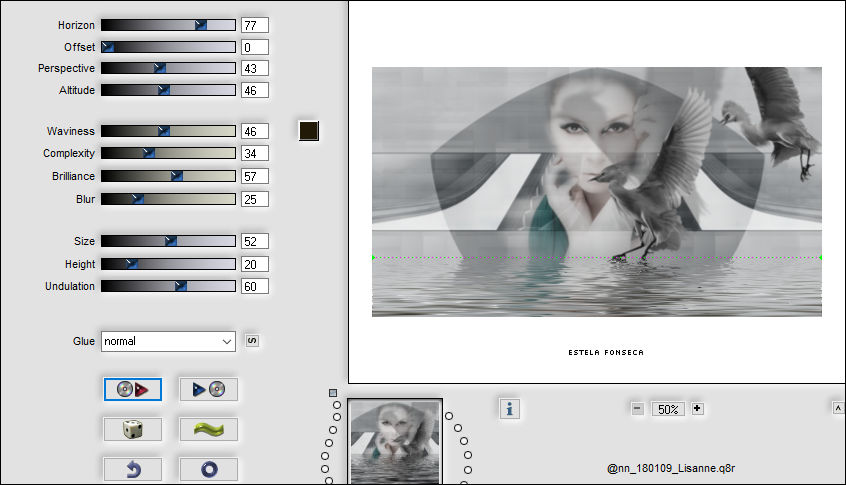
17- Effects / plugins / EC 5 impact / Perspective Shadow: preset @nn_Lisanne_EC5_PS_001:
18- Layers / Merge / Merge All
19- Effects / Plugins / Flaming Pear / Flood: Preset: @nn_180109_Lisanne.q8r
(clique na seta vermelha e localize na pasta do material o preset do Flood)
20- Layers / New raster layer
Selections / load/save selection / load selection from disk: @nn_180109_Selectie002_Lisanne_tdstudio
Preencha com a Textura do Primeiro Plano
Mantenha a seleção ativa!
Adjust / Sharpness / Sharpen
Layers / New raster layer
Selections / load/save selection / load selection from disk:@nn_180109_Selectie003_Lisanne_tdstudio
21- Preencha a seleção com a cor do Segundo Plano
Mantenha a seleção ativa
22- Layers / New raster layer
Selections / load/save selection / load selection from disk:@nn_180109_Selectie004_Lisanne_tdstudio
23- Preencha a seleção com a cor do Segundo Plano
Selections / Modify / Contract: 2 Pixels
Delete no Teclado
24- Preencha com a Textura do Primeiro Plano
Selections / Select None
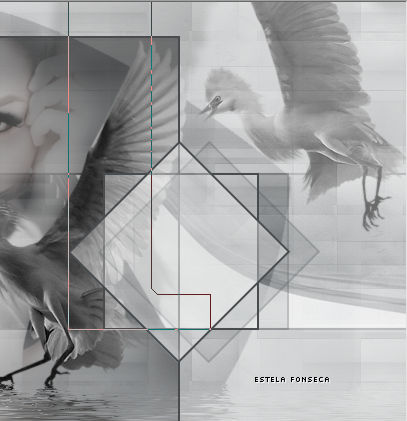
Resultado até aqui:
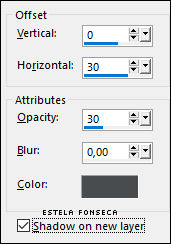
25 - Effects / 3D Effects / Drop Shadow : Cor do segundo plano (#484c4f) Shadow on new layer MARCADO
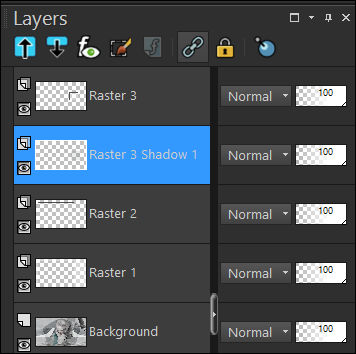
Esta é a paleta das Layers até agora:
26- Ative a Layer do Topo
Layers / Duplicate
Image / Free Rotate:
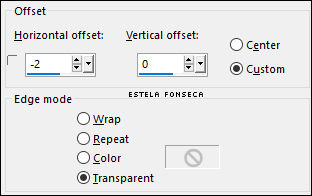
27- Effects / Image Effects / Offset:
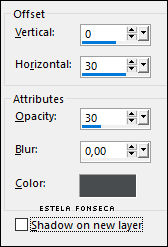
28- Effects / 3D Effects / Drop Shadow : Cor do segundo plano (#484c4f) Shadow on new layer DESMARCADO
29- Feche a Layer <<Background>> e Mantenha ativa a layer do topo
30- Layers / Merge / Merge Visible
31- Volte a Visibilidade da Layer do FUNDO e Mantenha ativa a layer do Topo
32- Ative a Varinha Mágica
33- Clique no meio desta layer
34- Layers / New raster layer
Effects / 3D Effects / Cutout / Cor Preta
35- Selections / Select None
Layers / New raster layer
Ative a Ferramenta Paint Brush(B) Localize o Brush:@nn_2009_brush_Lisanne_000_tdstudio.PspBrush
36- Carimbe com a cor do Segundo Plano
37- Effects / Plugins / Fotomatic / Skygrad:
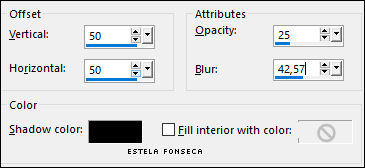
38- Effects / 3D Effects / Drop Shadow: 2 / 2 / 65 / 8,00 / Cor do Segundo Plano
39- Blend Mode / Normal ... Opacidade / 65
40- Layers / New Raster Layer
41- Ferramenta Paint Brush (B) localize o brush:@nn_2009_brush_Lisanne_002_tdstudio.PspBrush
42- Carimbe com a cor do segundo Plano:
43- Effects / 3D Effects / Drop Shadow: 2 / 2 / 65 / 8,00 / Cor do Segundo Plano
44- Layers / New raster layer
45- Ferramenta Paint Brush (B) localize o brush: @nn_2009_brush_Lisanne_003_tdstudio.PspBrush
46- Carimbe com a Textura do Primeiro Plano no seguinte local
47- Layers / New raster layer
48- Ferramenta Paint Brush (B) localize o brush:@nn_brushes_tds_buttons_mmc.PspBrush
49- Carimbe com a cor do Segundo Plano ( 2 toques) como segue:
50- Agora mude apenas a rotação do Brush para 90
51- Carimbe com a cor do Segundo Plano ( 2 Toques) na lateral esquerda inferior , como segue:
52- Effects / Plugins / Fotomatic / Skygrad:
53- Effects / 3D Effects / Drop Shadow: 2 / 2 / 65 / 8,00 / Cor do Segundo Plano
54- Resultado:
55- Layers / New raster layer
56- Ferramenta Paint Brush (B) localize o brush:@nn_2009_brush_trees_001_tdstudio.PspBrush
Atenção para o tamanho do Brush: 350.
57- Carimbe com a Textura do Primeiro Plano com segue:
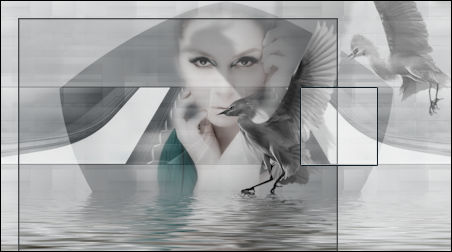
58- Agora com a Ferramenta de Seleção em Retangulo configurada como segue:
59- faça uma seleção como segue:
Delete no Teclado ... Selections / Select None
60- Ative o tube: @nn_170109_005_birds_JAG_tdstudio_grey_1BIRD.pspimage
Copie e Cole como nova layer
Posicione:
61- Effects - plug-ins - EC5 impact - motion trail and choose my preset in the SETTINGS tab:
62- Layers / Merge / Merge all
Effects / Plugins / Unlimited 2.0 / Buttons and Frames:
63- Salve como arquivo JPG.
Fim
Versão 2 com tubes de Próprios e de @nn:
©Tutorial traduzido por Estela Fonseca em 17/04/2023.
Não alterar nem repassar sem autorização.