KITTY
[ tutorial de @nn TDstudio 2015 ]

O tutorial traduzido no Corel Paint Shop Pro X9.
Material Necessário:
Pspimages_Kitty (Abra no PSP, duplique e feche o original)
Images_Kitty (Abra no PSP)
Brushes_Kitty (Copie para a pasta de Brushes do PSP)
Selections_Kitty (Copie para a pasta de Seleções do PSP)
gradient_Kitty (Copie para a pasta de gradientes do PSP)
Preset_EC5 (Dê dois cliques sobre o preset para instalá-lo automaticamente)
Plugins Utilizados:
Alien Skin Eye Candy 5 / Impact
I.C.NET Software / Filters Unlimited 2.0
Toadies *
Jeux de lignes
AP 01 Innovations
Mystic Night
VanDerLee / Unplugged X
Preparação:
Primeiro Plano cor #000000 / Segundo Plano cor #ffffff.
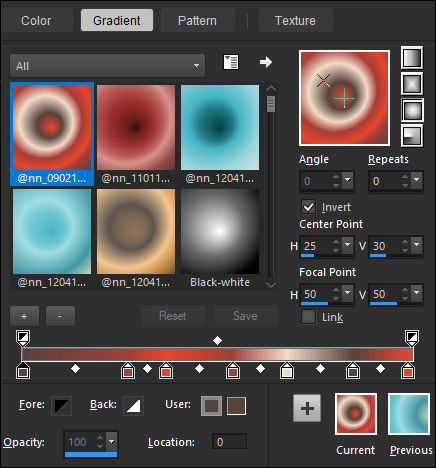
Gradiente Fore/background <<@nn_090215_GR_Kitty_tdstudio Gradient>> estilo <<Sunburst>>
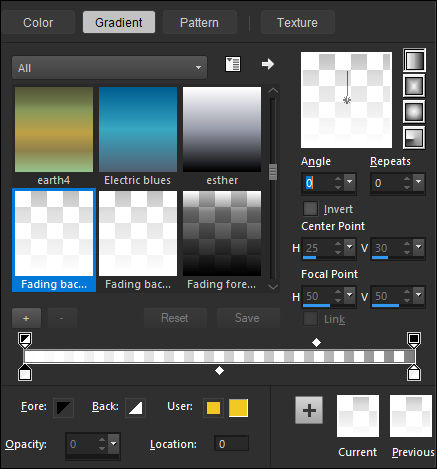
Forme um Gradiente <<Fading Background>> no Segundo Plano (Corel_06_025) estilo <<Linear>>
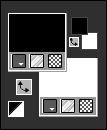
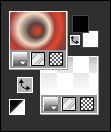
Sua Palete de Cores está assim:
NOTA: Se trabalha com outras imagens e tubes , torne-as do mesmo tamanho!!!
01- Abra uma nova imagem transparente 900/500 PixelsClique em color , localize o Gradiente <<@nn_090215_GR_Kitty_tdstudio Gradient>> e configure
Adjust / Blur / Gaussian Blur / Radius 20Layers / Duplicate
Effects / Plugins / <I.C.NET Software> / Filters Unlimited 2.0 / Toadies / Old Photo: 183/69/131
Effects / Plugins / Mystic Nights / Buttonize: 522/0/91
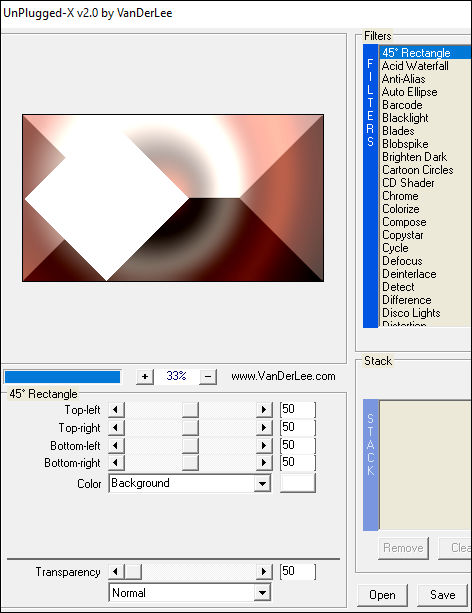
Effects / Plugins / VanDerLee / Unplugged X / 45°Rectangle :
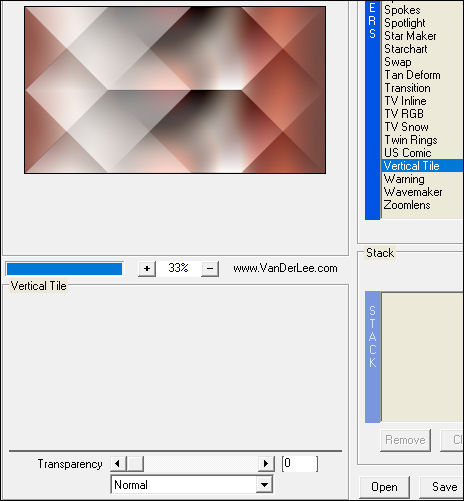
02- Effects / Plugins / VanDerLee / Unplugged X / Vertical Tile (Default)
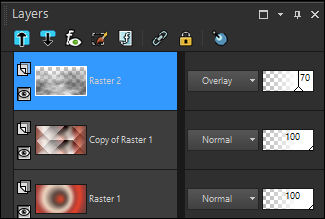
03- Layers / New Raster Layer !!!
Preencha com o Gradiente <<Fading Background >> do Segundo Plano
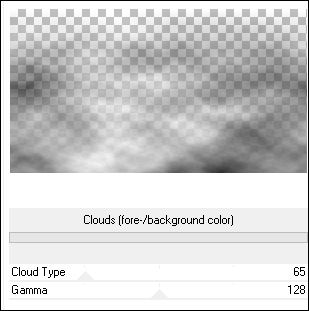
Effects / Plugins / <I.C.NET Software> / Filters Unlimited 2.0 / Render / Clouds (fore-/+background color): 65/128
Blend Mode / Overlay
Opacidade / 70%
Layers / Merge / Merge All (Flatten)
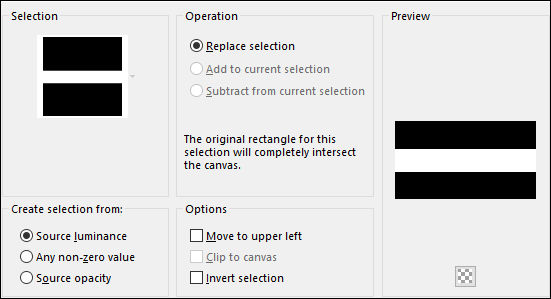
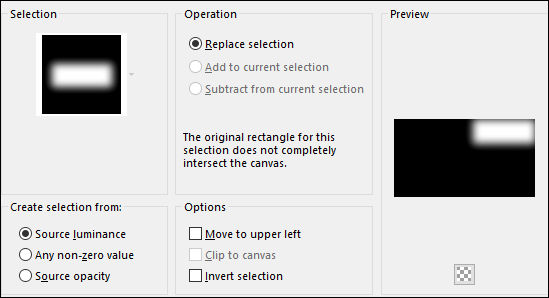
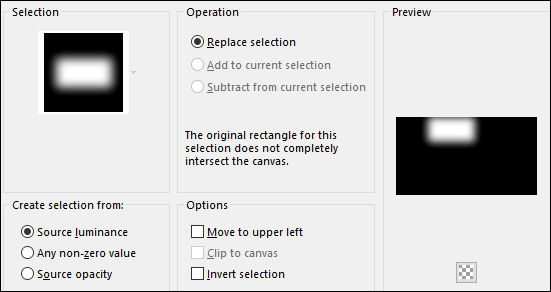
04- Selections / Load/Save Selection / Load Selection From Disk: @nn_110215_Selectie_001_Kitty_tdstudio.PspSelection
Adjust / Blur / Gaussian Blur / Radius 20
Selections / Select None
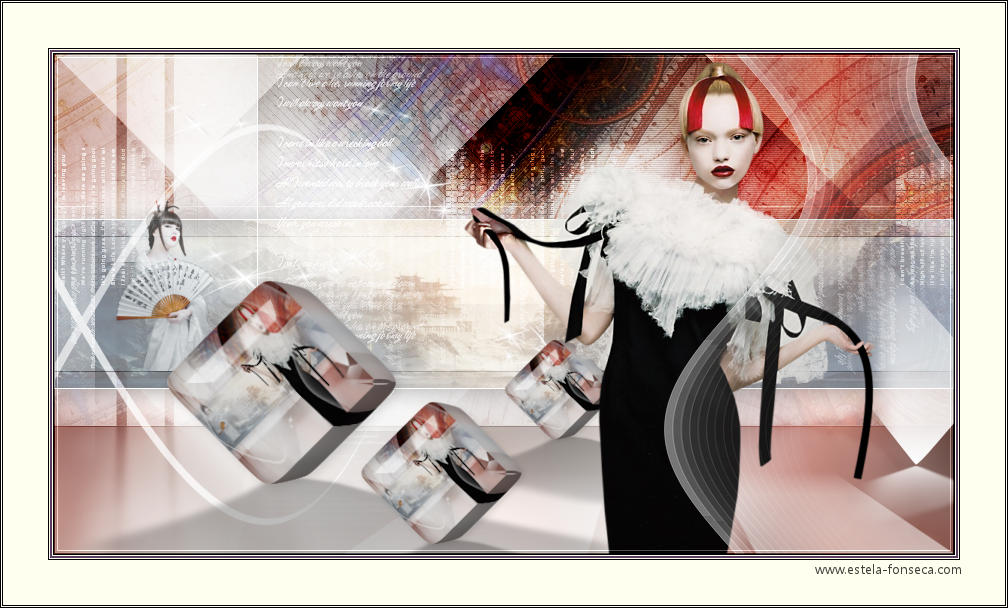
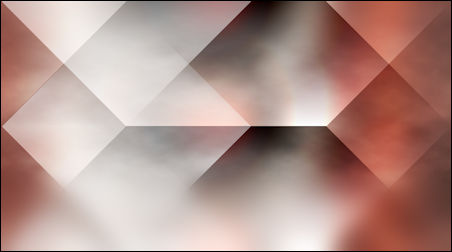
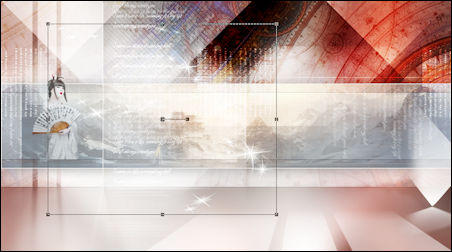
Resultado:
05- Ative << cirkels.jpg>> Copie e Cole como nova layer
Effects / Image Effects / Offset: 0/65/Custom/Transparent
Blend Mode / Soft Light
Opacidade / 70%
06- Desfaça o Gradiente do Segundo Plano e deixe a cor branca do Segundo Plano (#ffffff)
Layers / New Raster Layer
Paint Brush Tool <<@nn_110215_Brush_001_Kitty_tdstudio>> Carimbe com a cor do Segundo Plano
Clique no meio da imagem
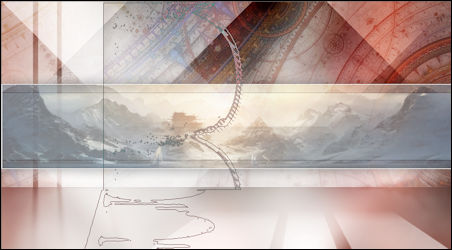
07- Mova para baixo e posicione como segue:
08- Layers / New Raster Layer
Paint Brush Tool <<@nn_110215_Brush_002_Kitty_tdstudio>> Carimbe com a cor do Segundo Plano
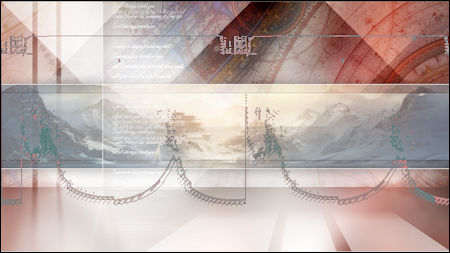
Atenção: A linha do primeiro brush deve estar assim:
09- Effects / 3D Effects / Drop Shadow: 5/10/75/30 Cor: #000000
Blend Mode / Soft Light
10- Layers / New Raster Layer
Paint Brush Tool <<@nn_110215_Brush_003_Kitty_tdstudio>> Carimbe com a cor do Segundo Plano
Opacidade / 75%
11- Layers / New Raster Layer
Selections / Load/Save Selection / Load Selection From Disk: @nn_110215_Selectie_002_Kitty_tdstudio.PspSelection
Preencha com a cor do Segundo Plano
Selections /Select None
12- Effects / Plugins / <I.C.NET Software> / Filters Unlimited 2.0 / Toadies / What Are You? ?: 18/10
Effects / Edge Effects / Enhance More
Opacidade / 75%
13- Ative <<image_001.jpg>> Copie e Cole como nova layer
Opacidade / 50%
Effects / 3D Effects / Drop Shadow: 0/0/75/35 Cor: #000000
14- Layers / New Raster Layer
Selections / Load/Save Selection / Load Selection From Disk: @nn_110215_Selectie_003_Kitty_tdstudio.PspSelection
Preencha com a cor do Segundo Plano
Selections / Select None
15- Layers / New Raster Layer
Paint Brush Tool <<@nn_110215_Brush_004_Kitty_tdstudio>> Carimbe com a cor do Segundo Plano
Layers / Duplicate
16- Layers / New Raster Layer
Paint Brush Tool <<@nn_110215_Brush_005_Kitty_tdstudio>> Carimbe com a cor do Segundo Plano
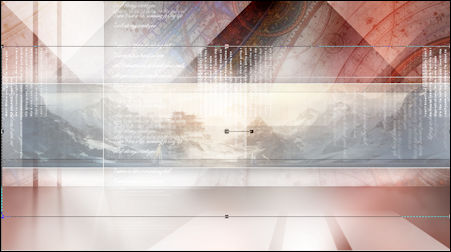
Posicione no meio da imagem:
Agora mova para baixo, essas linhas centrais , devem ficar 5 pixels aproximadamente uma da outra como segue:
Blend Mode / Overlay
Opacidade / 80%
17- Layers / New Raster Layer
Paint Brush Tool <<@nn_110215_Brush_006_Kitty_tdstudio>> Carimbe com a cor do Segundo Plano
Layers / Merge / Merge All (Flatten)
Resultado:
18- Selections / Load/Save Selection / Load Selection From Disk: @nn_110215_Selectie_004_Kitty_tdstudio.PspSelection
Selections / Promote Selection to Layer
Selections / Select None
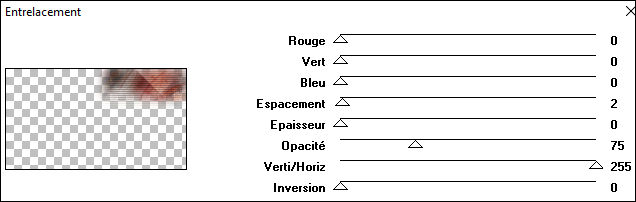
Effects / Plugins / Jeux de lignes / Entrelacement: 0/0/0/2/0/75/255/0
Blend Mode / Hard Light
19- Ative a Layer do Fundo
Selections / Load/Save Selection / Load Selection From Disk:@nn_110215_Selectie_005_Kitty_tdstudio.PspSelection
Selections / Promote Selection to Layer
Selections / Select None
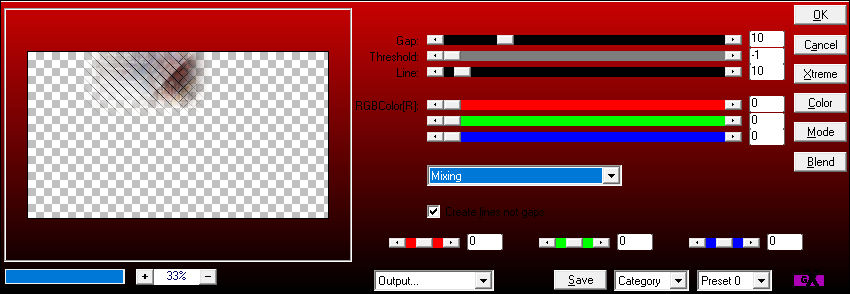
Effects / Plugins / AP 01 Innovations / Lines -Silverlining:
20- Blend Mode / Burn
Opacidade / 50%
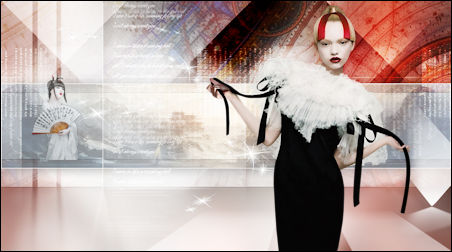
21- Ative a Layer do Topo!
Ative o tube <<kittys-Vengeance_small.pspimage>> (Eu reduzi os tubes deste tutorial)
Copie e Cole como nova layer
Posicione à esquerda
Opacidade / 70%
22- Ative o tube <<@nn_110215_stars_Kitty_tdstudio.pspimage>> Copie e Cole como nova layer
Mova para a esquerda!
23- Ative o tube <<Alies 11VR90-woman-21122012_small.pspimage>> Copie e Cole como nova layer
Mova para a direita!
24- Effects / 3D Effects / Drop Shadow: 0/25/20/15 Cor: #000000
Ative o tube <<@nn_110215_waves_Kitty_tdstudio.pspimage>>
Copie e Cole como nova layer
Mova para a Borda direita!
25- Layers / New Raster Layer
Paint Brush Tool <<@nn_110215_Brush_007_Kitty_tdstudio>> Carimbe com a cor do Segundo Plano
Blend Mode / Overlay
Opacidade / 75%
Window / Duplicate (ou shift+D)
Mimimize o original e continue trabalhando na cópia.
Layers / Merge / Merge All (Flatten)
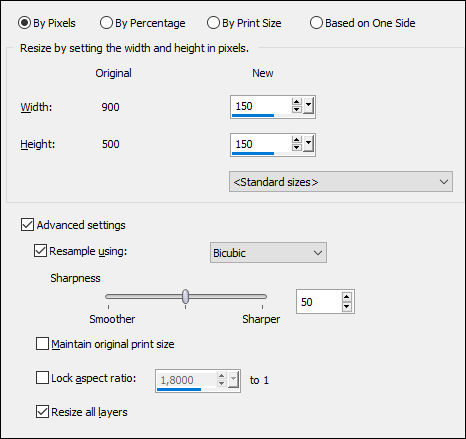
26- Image / Resize / 150 pixels de largura por 150 pixels de altura:
Copie !
De volta ao seu trabalho original
Cole como nova layer
Não Mova!
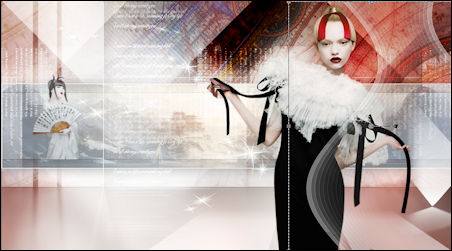
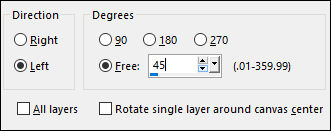
27- Image / Free Rotate / Left / Free / 45°
28- Effects / Plugins / Alien Skin Eye Candy 5 / Impact / Extrude / Preset @nn_130215_Kitty_EC5_Ex_tdstudio.f1s
Effects / Plugins / Alien Skin Eye Candy 5 / Impact / Glass / Preset @nn_130215_Kitty_EC5_Glass_tdstudio.f1s
Effects /Plugins /Alien Skin Eye Candy 5 /Impact / Perspective Shadow / Preset @nn_130215_Kitty_EC5_PS_tdstudio.f1s
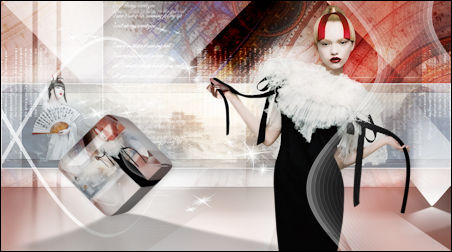
Posicione como segue:
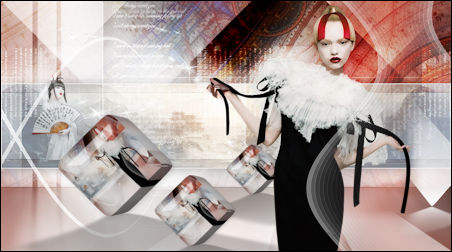
29- Layers / Duplicate
Image / Resize / 70% ... Resize All Layers ... Desmarcado
Posicione
Layers / Duplicate
Image / Resize / 70% ... Resize All Layers ... Desmarcado
Posicione
Mova para baixo do tube da personagem maior.
30- Layers / Merge / Merge All (Flatten)
Effects / Plugins / <I.C.NET Software> / Filters Unlimited 2.0 / Buttons & Frames / Glass Frame 2: 5/128
Copie
Ative a Frame <<@nn_110215_frame_Kitty_tdstudio.pspimage)>> Cole como nova layer
Layers / Merge / Merge All (Flatten)
31- Adicione a sua marca d'água ou o seu nome
Salve como JPG.
©Tutorial traduzido por Estela Fonseca em 10/10/2019.
Não alterar nem repassar sem autorização.