IYANTHY
[ tutorial de @nn TDstudio 2015 ]

O tutorial traduzido no Corel Paint Shop Pro X9.
Material Necessário:
Images_Iyanthy: Abra no PSP
Pspimages_Iyanthy: Abra no PSP
Maskers_Iyanthy: Copie para a pasta de Masks do PSP
Brushes_Iyanthy: Copie para a pasta de Brushes do PSP
Selecties_Iyanthy: Copie para a pasta de Seleções do PSP
Presets_Alien Skin Eye Candy 5 - _Iyanthy: Dê dois cliques nos presets para importá-los para a pasta do Plugins
Plugins Utilizados:
AAA Frames
Color Rave
Mehdi
MuRa's Meister
Alien Skin Eye Candy 5 - Impact
Alien Skin Eye Candy 5 - Nature
Graphics Plus
Flaming Pear Flood
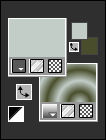
Preparação:Primeiro Plano cor #c2cdc8 / Segundo Plano cor #494e2d.
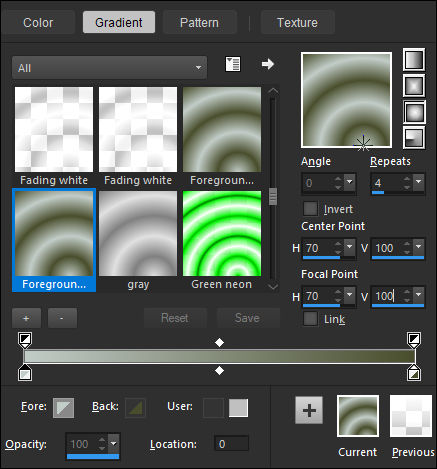
Forme no segundo plano um Gradiente Foreground/Background (Corel_06_029) - Estilo: Sunburst
NOTA: Se trabalha com outras imagens e tubes , torne-as do mesmo tamanho!!!
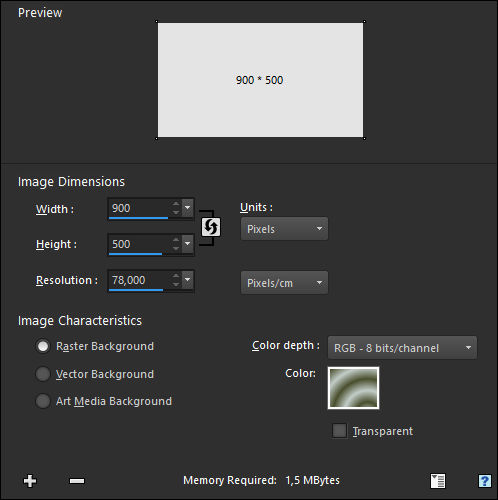
01- Abra uma nova imagem de 900/500 PixelsCloque em <<Color> e configure o gradiente no segundo Plano.
02- Adjust / Blur / Gaussian Blur / Radius: 12
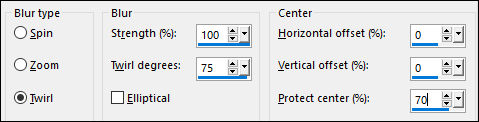
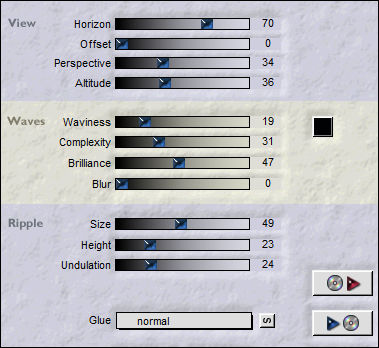
Adjust / Blur / Radial Blur:
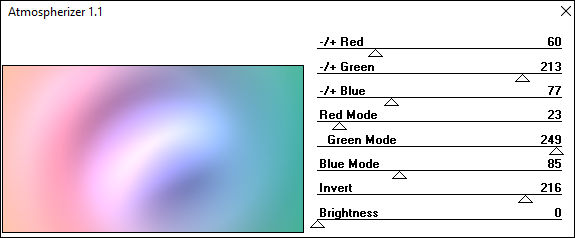
Layers / Duplicate03- Effects / Plugins / Color Rave / Atmospherizer
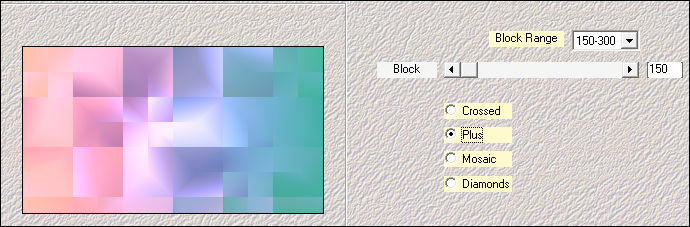
Effects / Plugins / Mehdi / Sorting Tiles:
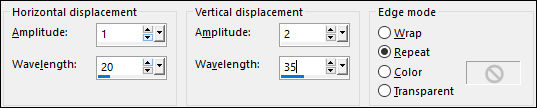
Effects / Distortion Effects / Wave:
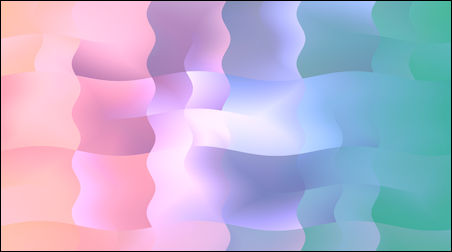
Resultado:
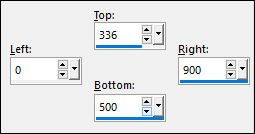
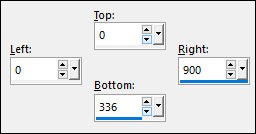
04- Selection Tool / Rectangle / Custom Selection:
Edit / Cut (Ou Delete no Teclado)Selections / Select None
05- Effects / Plugins / Alien Skin Eye Candy 5 / Impact / Perspective Shadow / Preset @nn_060515_Iyanthy_Alien Skin Eye Candy 5 - _PS_001.f1s
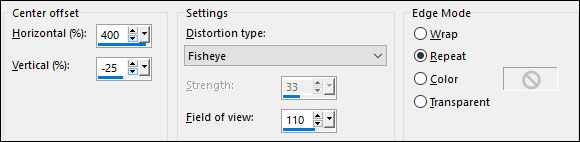
Effects / Distortion Effects / Lens Distortion :
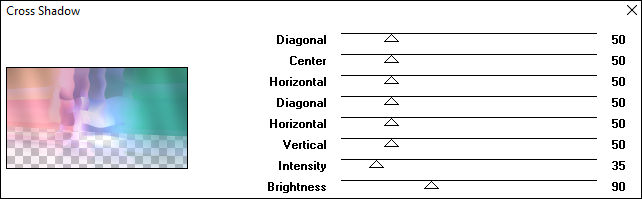
Effects / Plugins / Graphics Plus / Cross shadow: 50/50/50/50/50/50/35/90
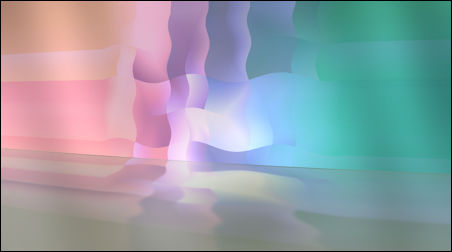
Resultado:
Opacidade / 70 %
06- Layers / Duplicate
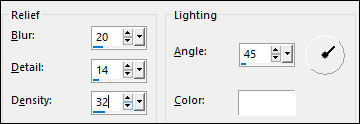
Effects / Texture Effects / Soft Plastic / Cor: #ffffff:
Opacidade / 15 %
07- Primeiro Plano cor (#ffffff)
Layers / New Raster Layer
Preencha com a cor do Primeiro plano
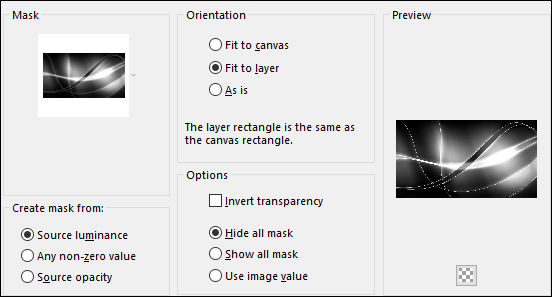
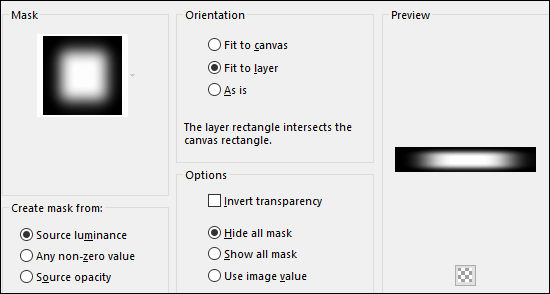
Layers / Load/Save Mask / Load Mask from Disk: @nn_040515_mask_Iyanthy_tdstudio.jpg
Layers / Merge / Merge Group
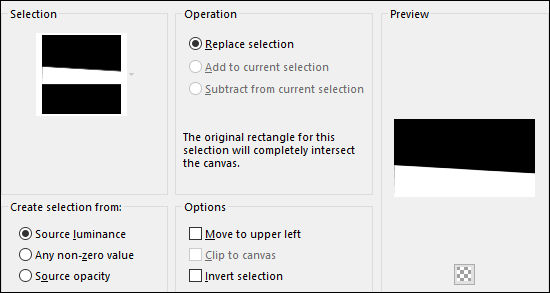
08- Selections / Load/Save Selection / Load Selection From Disk: @nn_060515_Selectie_001_Iyanthy_tdstudio
Edit / Cut (Ou Delete no teclado)
Selections / Select None
Opacidade / 50 %
Layers / Merge / Merge all (Flatten)
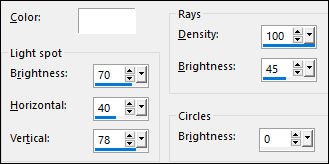
09- Effects / Illuminations Effects / Sunburst :
Layers /Duplicate
Effects / Plugins / Flaming Pear / Flood:
Selection Tool / Rectangle / Custom Selection: :
Edit / Cut (Ou delete no teclado)
Selections / Select None
Layers / Load/Save Mask / Load Mask from Disk @nn_130912_mask_162_tdstudio
Layers / Merge / Merge Group
10- Layers / Duplicate
Blend Mode / "Hard Light"
Opacidade / 30%
Resultado:
11- Ative <<@nn_060515_Palm-Beach_Iyanthy_tdstudio.pspimage>> Copie e Cole como nova layer
Posicione à direita, como segue:
Blend Mode / "Overlay"
12- Ative <<@nn_060515_Basis-Cirkel_Iyanthy_tdstudio.pspimage>> Copie e Cole como nova layer
Magic Wand Tool - Configurada como abaixo:
Clique dentro do Círculo
Ative <<foto_woman.jpg>> Copie e Cole como nova layer
Selections / Invert
Edit / Cut (Ou delete no teclado)
Selections / Select None
Effects / Plugins / Alien Skin Eye Candy 5 / Nature / Water Drops / Preset Ann_060515_Iyanthy_Alien Skin Eye Candy 5 - _N_WD.f1s
Effects /Plugins / Alien Skin Eye Candy 5 /Impact / Glass /Preset @nn_060515_Iyanthy_Alien Skin Eye Candy 5 - _Glass_tdstudio.f1s
Layers / Merge / Merge Down
Resultado:

13- Effects / Plugins / Alien Skin Eye Candy 5 / Impact / Backlight / Preset @nn_060515_Iyanthy_Alien Skin Eye Candy 5 - _BL_tdstudio.f1s
Effects /Plugins /Alien Skin Eye Candy 5 /Impact /Gradient Glow /Preset @nn_060515_Iyanthy_Alien Skin Eye Candy 5 -
_GG_tdstudio.f1s
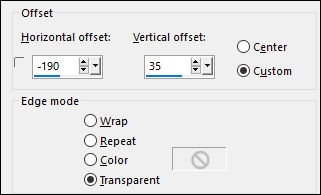
Effects / Image Effects / Offset:
14- Layers / New Raster Layer
Paint Brush Tool <<@nn_060515_Brush_001_Iyanthy_tdstudio >>
Carimbe com a cor do Primeiro Plano como segue:
15- Layers / New Raster Layer
Paint Brush Tool <<@nn_060515_Brush_002_Iyanthy_tdstudio >>
Carimbe o brush com a cor do primeiro plano na borda esquerda:
Blend Mode / "Hard Light"
Opacidade / 65%
16- Layers / New Raster Layer
Paint Brush Tool <<@nn_060515_Brush_003_Iyanthy_tdstudio>>
Carimbe o Brush com a cor do Primeiro Plano como no modelo.
17- Layers / New Raster Layer
Paint Brush Tool <<@nn_060515_Brush_004_Iyanthy_tdstudio >>
Carimbe o brush com a cor do Primeiro Plano como segue:
18- Ative <<@nn_060515_text_Iyanthy_tdstudio.pspimage>>
Copie e Cole como nova layer
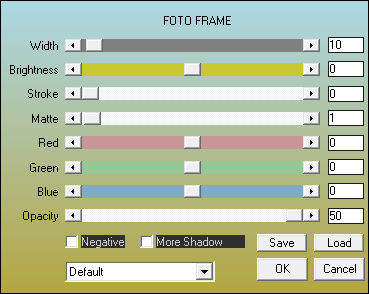
19- Ative <<small_frame_flowers.jpg>>
Na Imagem:
Effects / Plugins / AAA Frames / Foto Frame:
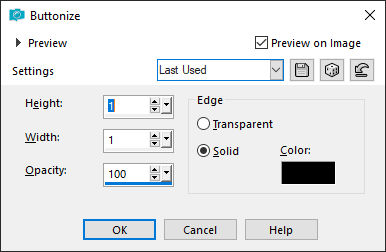
Effects /3D Effects / Buttonize / Cor- BLACK (#000000)
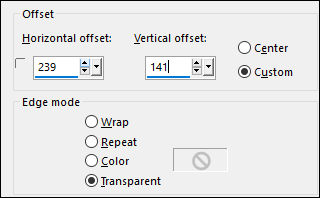
Copie e Cole como nova layer no seu trabalho
Effects / Image Effects / Offset:
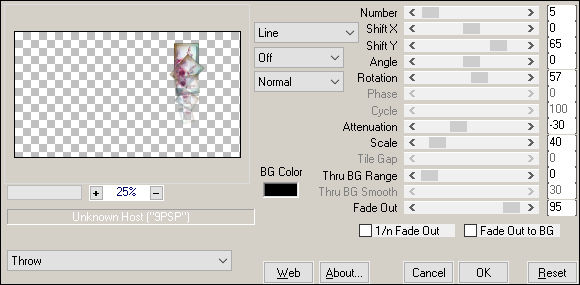
20- Layers / Duplicate
Effects / Plugins / MuRa's Meister / Copies:
Layers / Arrange / Move Down
Ative a Layer do topo
Layers / Merge /Merge Down
21- Layers / Duplicate
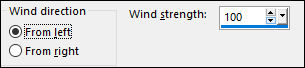
Effects / Distortion Effects / Wind / From Left marcado / Wind Strength: 100
Layers / Arrange / Move Down
Opacidade / 75%
22- Ative a Layer do Topo
Effects / 3D Effects / Drop Shadow : 0/5/30/12 Cor #000000
23- Ative <<@nn_060515_Deco-001_Iyanthy_tdstudio.pspimage>>
Copie e Cole como nova layer
24- Ative <<@nn_060515_message-in-a-bottle_Iyanthy_tdstudio.pspimage>>
Copie e Cole como nova layer
Posicione!
25- Na palete das layers , feche a cor do Segundo Plano
Mantenha a cor branca no Primeiro Plano
Pen Tool configurada como segue:
Desenhe uma linha da seguinte maneira:
26- Feche a cor do Primeiro Plano e Deixe a cor do Segundo Plano ativa (#FFFFFF)
Ative a Ferramenta TEXT TOOL e aplique as seguintes configurações:
Coloque o cursor do mouse no fim da linha que desenhou e quando aparecer um arcoDigite <<Iyanthy, my heart is and always will be yours.... ou outro texto de sua preferência)
Oculte a layer << New Path>> , clique sobre a layer com o botão direito do << Vector 1>> e Convert to Raster layer
27- Effects / 3D Effects / Drop Shadow : 0/2/35/2 Cor #000000
Layers / Merge / Merge All (Flatten)
Copie
28- Ative a Frame <<@nn_060515_Frame_Iyanthy_tdstudio.pspimage>>
Cole como nova layer
Layers / Arrange / Move Down
Ative a Layer do Topo
Assine seu trabalho!
Layers / Merge / Merge All
Salve como JPG.
©Tutorial traduzido por Estela Fonseca em 15/10/2019.
Não alterar nem repassar sem autorização.