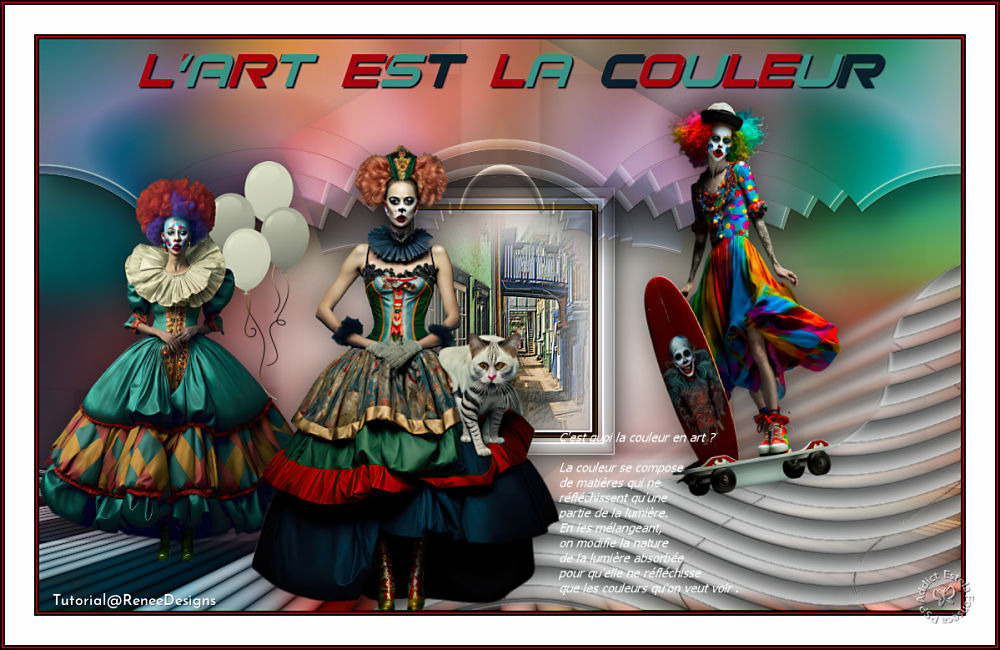
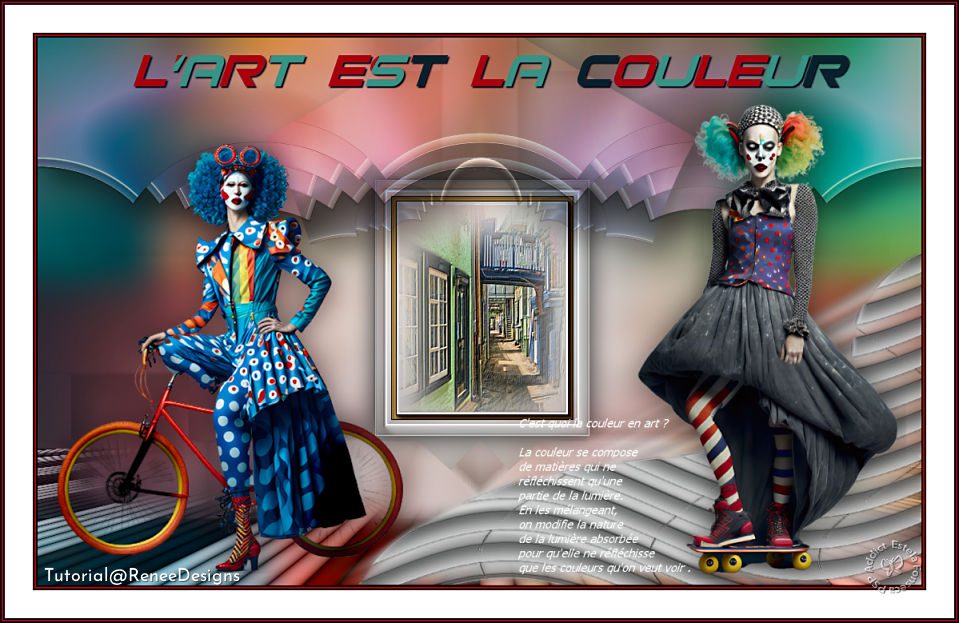
ART EST LA COULEUR
Tutorial de Renée Graphic , original, Aqui.
O tutorial foi traduzido na versão Corel Paint shop Pro 2022 Ultimate, mas ele pode ser feito com outras versões.
Materiais Necessários:
Tubes de Renée...
ATENÇÃO:
Aviso de Renée*
Se for sua intenção compartilhar esses tubes ou essas lições em grupo, peça permissão ao proprietário.
O tube não pode ser enviado sem a aula. Por favor, não faça alterações no tube, pois este tube foi feito apenas paraesta lição.
É proibido compartilhar este tutorial sem link para a lição original.
Muito obrigado Renée.
Eles estão a disposição em seu site: AQUI.
PLUGINS
Atenção
Lembrete Se você usar o Filter Unlimited 2.3, de Renée, ele consiste em 3 pastas
Dê uma olhada nas pastas antes de adicionar uma predefinição.
Medhi
VM Natural
Mystics Nights
Mura’s Meister
Vanderlee – UnpluggeX
Alien Skin EyeCandy 5 – Impact
FM Tile Tools
Flaming Pear
AAA Frame
**
Todos os Plugins você encontrará na Página de Plugins de Renée Designs.
Preparação:
Coloque o gradiente na pasta de Gradientes do PSP.
Coloque as seleções na pasta de seleções do PSP.
Salve a Fonte.
Abra a Mask no PSP e Minimize-a.
Dê dois cliques sobre o preset para instalá-lo automaticamente.
Verifique se tem todos os plugins antes de começar o seu trabalho.
L'art est la couleur - Arte é Cor
Cores do Tutorial:
1. Abra a imagem "Fond-is-color" / Promote Background Layer ...Raster 1
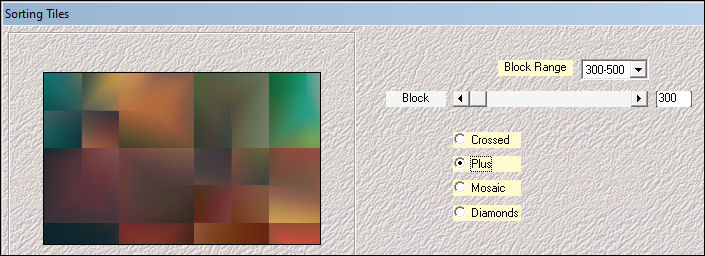
2. Effects / Plugins / Medhi / Sorting Tiles:
3. Effects / Edge Effects / Enhance.
4. Effects / Plugins / VM Natural / Starmaker :
5. Adjust / Blur / Gaussian Blur / Radius 22
6. Layers / Duplicate
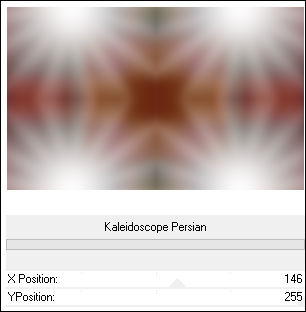
7. Effects / Plugins / Filters Unlimited 2.0 / &<Bkg Kaleidoscope> / Kaleidoscope Persian: 146 /255
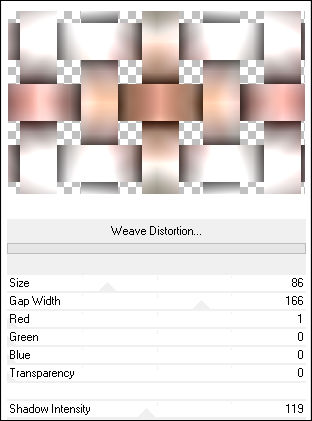
8. Effects / Plugins / Filters Unlimited 2.0 / VM Natural / Weave Distortion:
9. Blend Mode / Overlay ... Opacidade / 63%
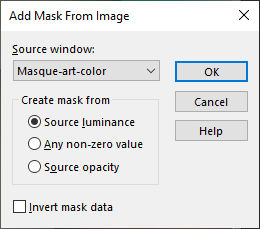
10. Layers / New Mask Layer / From Image : "Masque-art-color"
Layers / Merge / Merge Group
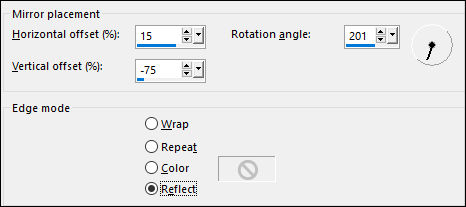
11. Effects / Reflection Effects / Rotating Mirror:
12. Effects / Plugins / Mystics Nights / Zoom : 8
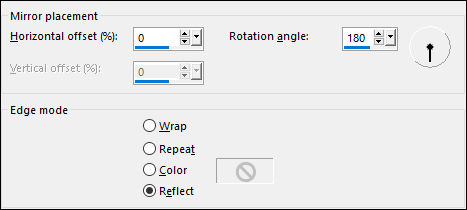
13. Effects / Reflection Effects / Rotating Mirror:
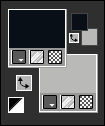
Primeiro Plano Cor (1) #0b1018 Plano de Fundo cor (2) #b9b9b7
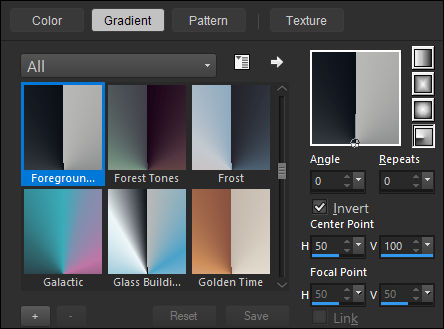
Prepare no Primeiro Plano um Gradiente Radial e Configure como segue:
14. Layers / New Raster Layer
15. Preencha a layer com o Gradiente
16. Effects / Plugins / Filters Unlimited 2.0 / MuRa's Seamless / Stripe of Cylinder:
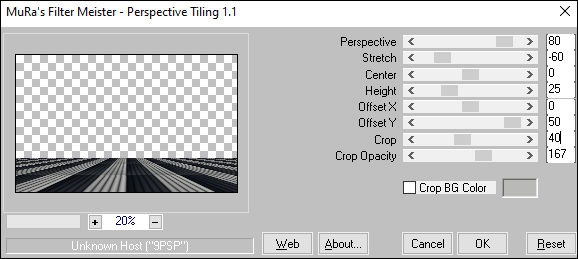
17. Effects / Plugins / Mura’s Meister / Perspective Tiling:
18. Selections / load/save selection / load selection from disk: Art-is-color-1
Pressione a Tecla <<Delete>> 5 VezesSelections / Select None
19. Blend Mode / Luminance (Legacy)
20. Layers / New Raster Layer
Primeiro Plano cor (4) #ffffff21. Selections / Load/save selection / Load selection from disk: Art-is-color-2
22. Flood Fill Tool ... Opacidade 20%
Preencha a seleção com a cor (4) #ffffff
Mantenha a seleção!!!!
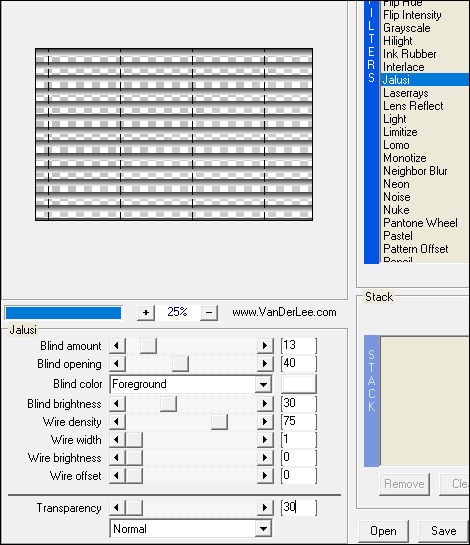
23. Effects / Plugins / Vanderlee / UnPlugged-X / Jalusi :
24. Effects / Edge Effects / Enhance
Selections / Select None
25. Effects / Distortion Effects / Waves:
26. Image / Resize / 75 % ...Resize all layers ...Desmarcado
27. Pick Tool (K) : Posição X: 402,00 / Posição Y: 214,00 / Pressione (M) para desativar a Pick Tool28. Na Paleta das Layers , ative a layer Raster 1
Selections / Select All
Image / Crop to SelectionAtive a Layer do Topo (Raster 3)
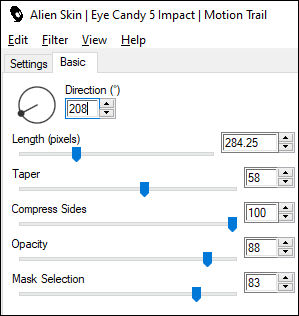
29. Effects / Plugins / Alien Skin Eye Candy 5 / Impact / Motion Trail / Preset "Art is color-Motion Trail"
30. Effects / Plugins / FM Tile Tools / Metallic Emboss / Default
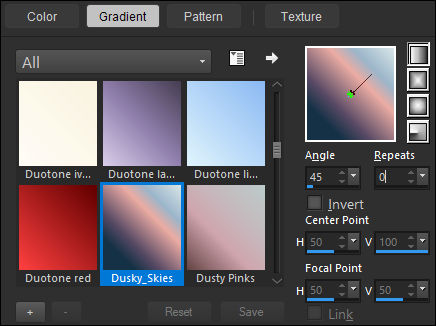
Coloque no Primeiro Plano o Gradiente "Dusky_Skies" configure o estilo para Linear como abaixo:
31. Layers / New Raster Layer
32. Flood Fill Tool / Opacidade 100%Preencha a Layer com o Gradiente
33. Adjust / Blur / Radial Blur:
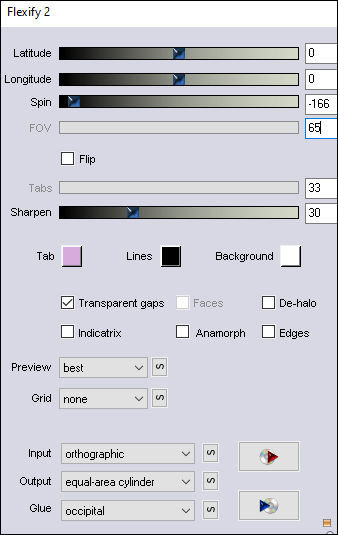
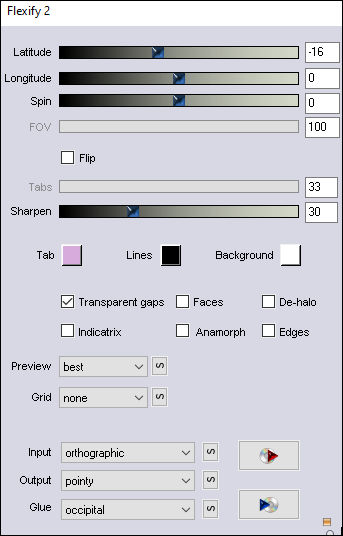
34. Effects / Plugins / Flaming Pear / Flexify 2 :
35. Image / Resize / 60 % ... Resize All Layers ... Desmarcado36. Selections / Select All
Selections / Float
Selections / Defloat
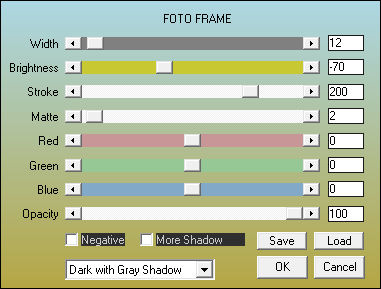
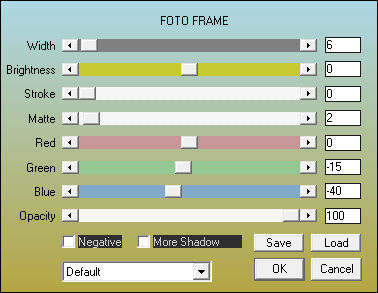
37. Effects / Plugins / AAA Frame / Foto Frame:
Selections / Select None
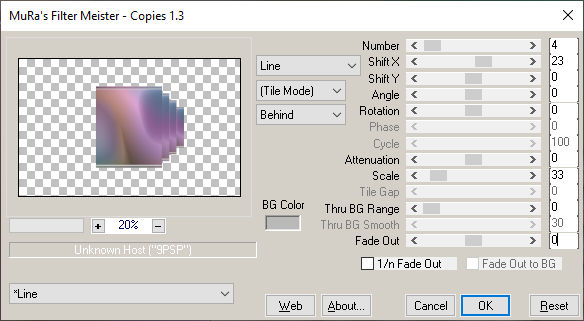
38. Effects / Plugins / MuRa's Meister / Copies:
39. Effects /3D Effects / Drop Shadow: 2/2/100/3 Cor Preta
Repita o / Drop Shadow : -2/-2
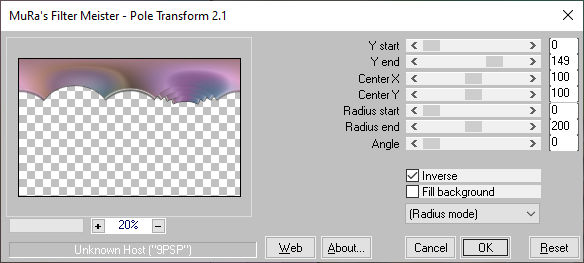
40. Effects / Plugins / Mura's Meister / Pole Transform :
41. Effects / Reflection Effects / Rotating Mirror/ Default
42. Blend Mode / Hard Light
Opacidade / 55%
43. Layers / Duplicate
44. Effects / Plugins / Flaming Pear / Flexify 2:
45. Pick Tool (K) : Pivot Y: 115,00 / Posição X: 284,00 / Posição Y: -30,00 / Pressione (M) para desativar a Pick Tool
46. Blend Mode / Hard Light... Opacidade / 40%
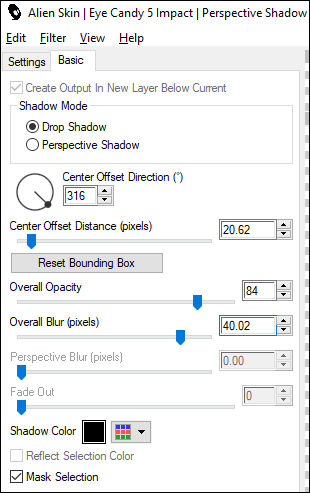
47. Effects / Plugins / Alien Skin Eye Candy 5 / Impact / Perspective Shadow:
48. Ative a Layer Raster 4
Repita: Effects / Plugins / Alien Skin Eye Candy 5 / Impact / Perspective Shadow (mesmas configurações)
Ative a Layer Raster 1
49. Selections / Load/save selection / Load selection from disk: Art-is-color-3
50. Selections / Promote Selection to Layer
51. Layers / Arrange / Bring to Top
52. Effects / Plugins / AAA Frame / Foto Frame:
53. Selections / Modify / Contract / 20 Pixels
54. Effects / Plugins / AAA Frame / Foto Frame:
55. Selections / Modify / Contract / 10 Pixels
56. Abra o Tube "Art-couleur-paysage-cap" Copie e Cole na seleção
57. Effects / Plugins / FM Tile Tools / Blend Emboss / DefaultSelections / Select None
58. Effects /3D Effects / Drop Shadow: 0/0/100/45 Cor #00000059. Layers / Arrange / Move down ( duas vezes) essa layer ficará sob a layer Raster 4
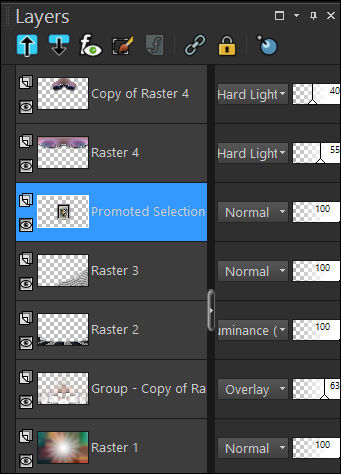
Esta é a sua palete das layers até agora
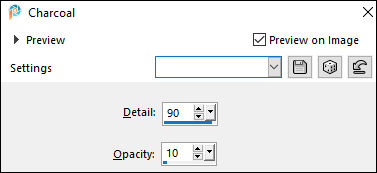
60. Effects / Art Media Effects / Charcoal:
61. Ative a Layer do Topo
Escolha dois tubes, copie e cole como nova layer ... redimensione e posicione a seu gosto.
62. Aplique uma sombra a seu gosto.
63. Ative a Ferramente de Texto escolha a fonte Bitsumis.TTF (Incluída no material) ou escolha outra fonte
Escreva seu texto. Ou o Texto de Renée.
64.Image / Add borders /Symmetric Marcado / 2 Pixels Cor #000000Image / Add borders /Symmetric Marcado / 2 Pixels Cor #9e041e
Image / Add borders /Symmetric Marcado / 2 Pixels Cor #000000
Image / Add borders /Symmetric Marcado / 35 Pixels Cor #ffffff
Image / Add borders /Symmetric Marcado / 2 Pixels Cor #0000000Image / Add borders /Symmetric Marcado / 2 Pixels Cor #9e041e
IImage / Add borders /Symmetric Marcado / 2 Pixels Cor #000000
65. Assine seu trabalho e coloque também a marca d'água de Renée.
66. Layers / Merge / Merge All ( Flatten)
67. Image / Resize / 1005 Pixels de Largura ... Resize all Layers Marcado
68. Abra o tube "texte-sur-couleur" Copie e Cole como nova layerPosicione como preferir
Layers / Merge / Merge All ( Flatten)
Salve como arquivo .JPG otimizado.
Versão com tubes de Renée...
©Tutorial traduzido por Estela Fonseca em 01/11/2023.
Não alterar nem repassar sem autorização.
