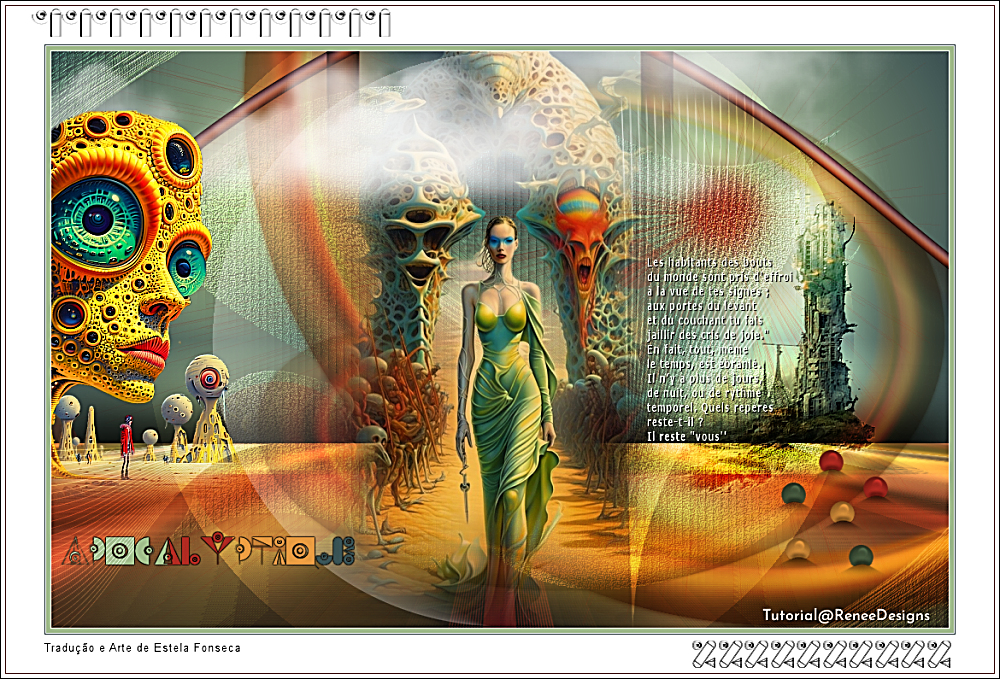
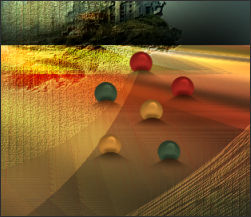
POST APOCALYPTIQUE
Tutorial de Renée Graphic , original, Aqui.
O tutorial foi traduzido na versão Corel Paint shop Pro 2022 Ultimate, mas ele pode ser feito com outras versões.
Materiais Necessários:
Tubes de Renée...
ATENÇÃO:
Não compartilhe os tubes de Renée em sites ou blog ...etc
Eles estão a disposição em seu site: AQUI.
PLUGINS
Atenção
Lembrete Se você usar o Filter Unlimited 2.3, de Renée, ele consiste em 3 pastas
Dê uma olhada nas pastas antes de adicionar uma predefinição.
Simple
MuRa's Meister
Creativity
FM Tile Tools
Alien Skin EyeCandy 5 – Impact
L & K’s
***
Página de Plugins de Renée.
Post-Apocalyptique
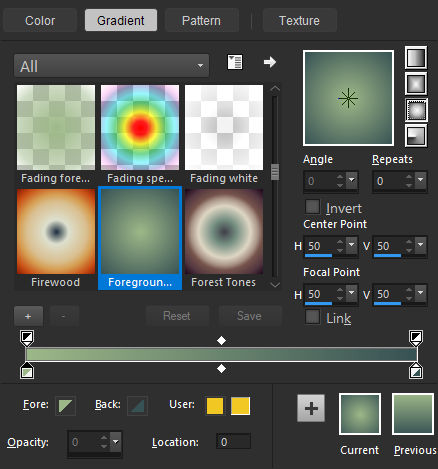
Primeiro Plano cor Nº 2 e Plano de Fundo cor Nº 3
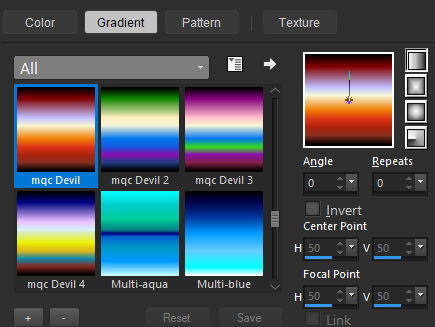
Prepare um Gradiente - Sunburst – Configure como segue:
1. Abra uma nova imagem transparente de 1050 x 675 Pixels .
2. Baldinho de Pintura – Preencha com o Gradiente
3. Effects - Plugins - Filters Unlimited 2.0 - &<Bkg Kaleidoscope> - Cake Mix: 169 /169
4. Selections - Load/Save Selections - Load selections from disk: Post-Apocalyptique-1
5. Selections – Promote selection to layer
Selections - Select None
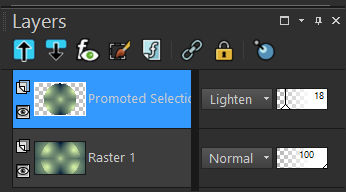
6. Blend Mode – Lighten – Opacidade 18
7. Effects – Plugins – Simple – Diamonds
8. Layers – Duplicate
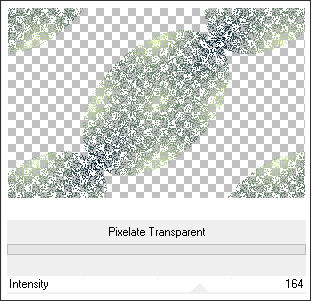
9. Effects - Plugins - Filters Unlimited 2.0 - MediaSpark Filters - Pixelate Transparent: 164
10. Blend Mode - Hard Light - Opacidade 100
11. Layers – Merge - Merge Down12. Blend Mode - Hard Light – Opacidade 61
13. Effects – Distortion Effects – Wave
14. Effects – 3D Effects - Drop Shadow: 0 / 0/ 60 / 50 Cor #000000
15. Effects – Texture Effects – Blinds ( Cor branca)
16. Effects - Plugins - Filters Unlimited 2.0 – Graphic Plus – Emboss - Default
17. Ative o arquivo <<Image-Post-Apocalyptique-fond>> Copie e cole como nova layer
18. Effects – Plugins – Simple - Blintz
19. Effects – Plugins – Simple - Half Wrap
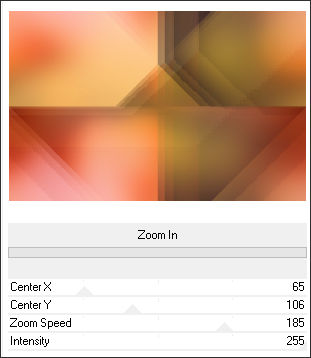
20. Effects - Plugins - Filters Unlimited 2.0 - Filter Factory Gallery A – Zoom In: 65/ 106 / 186 /255
21. Effects – Reflection Effects – Rotating Mirror - Default
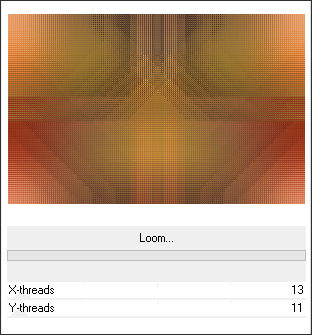
22. Effects - Plugins - Filters Unlimited 2.0 - Filter Factory Gallery M – Loom
23. Effects - Plugins - Filters Unlimited 2.0 &<Background Designers IV> @Night Shadow Pool – Default
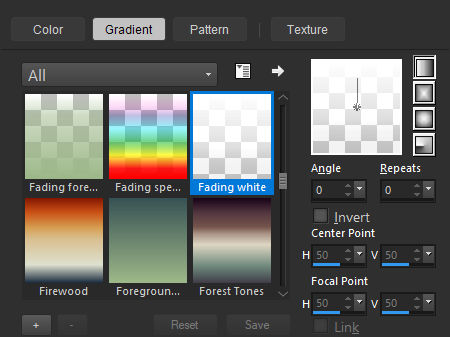
Defina a cor do primeiro plano como Gradiente e selecione: Fading White (Corel_06_028) estilo Linear
24. Layers – New Raster Layer25. Selections - Load/Save Selections - Load selections from disk: Post-Apocalyptique-2
26. Baldinho de Pintura – Preencha com o Gradiente
Selections - Select None
27. Opacidade 48
Layers - Merge - Merge Down
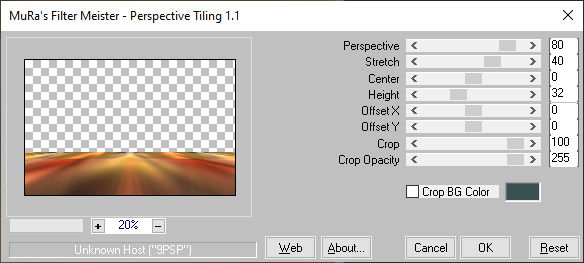
28. Effects – Plugins – MuRa's Meister – Perspective Tiling
29. Blend Mode - Hard Light30. Effects – 3D Effects – Drop Shadow: -24 / 3 / 78 /100 Preto
Ative a Layer << Raster 1>>
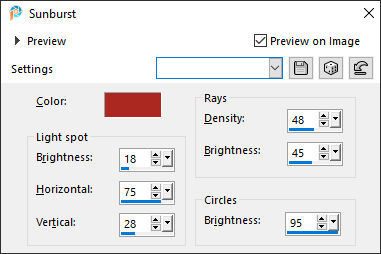
31. Effects – Illumination Effects - Sunburst - Cor Nº 4
Refaça uma segunda vez utilizando os mesmos parâmetrosAtive a Layer do Topo
32. Ative o arquivo <<Post-Apocalyptique- Image 1>> Copie e cole como nova layer
33. Image - Resize - 74% - Resize All Layers - Desmarcado
Não Mova
Coloque no Primeiro Plano o Gradiente <<mqc Devil>> Estilo Linear
34.Layers - New Raster Layer
35. Selections - Load/Save Selections - Load selections from disk: Post-Apocalyptique-3
36. Baldinho de Pintura – Preencha com o Gradiente
37. Adjust – Blur- Gaussian Blur - Radius 4
Selections - Select None
38. Effects – Distortion Effects – Warp
39. Layers – Duplicate
40. Image – Mirror - Mirror Horizontal
41. Layers - Merge - Merge Down
42. Layers- Duplicate
43. Image – Rotate Right
44. Effects – Distortion Effects – Wind - From Left - Strenght 100
45. Image – Rotate Left
46. Blend Mode - Multiply
47. Layers – New Raster Layer
48. Selections - Load/Save Selections - Load selections from disk: Post-Apocalyptique-4
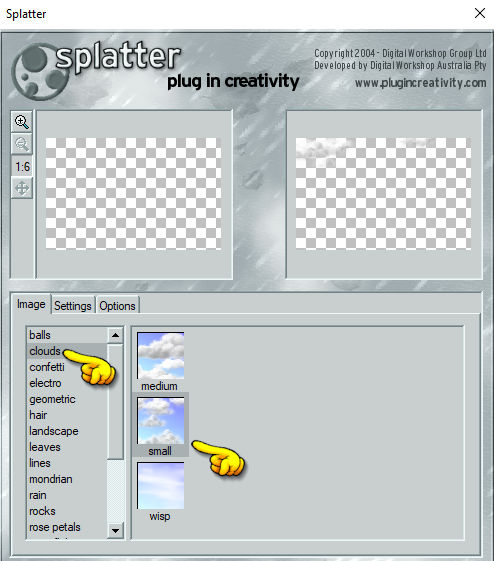
49. Effects – Plugins – Creativity – Splatter – Clouds
* Clique em CLOUD
* Clique em SMALL
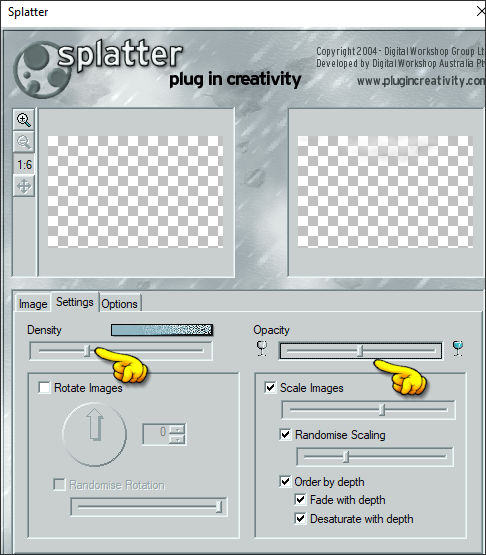
* Na aba Configurações ajuste os valores
(eles são aproximados, você tem que brincar com os controles deslizantes até ficar satisfeito com o resultado)
Density : Posicione o cursor
Opacity : Posicione o cursor
Scales Image : Marcado
Randomise Scaling : Posicione o cursor
Order by Depth : marque todas as opções e clique em ok para confirmar.50. Blend Mode – Screen
51. Abra <<Post-Apocalyptique- Image 2>> Copie e cole como nova layer
52. Pick Tool (K) - Position X (720,00) / Posição Y(159,00) Desative a Pick clique na letra "M" do teclado.
53. Effects – Plugins – FM Tile Tools – Saturation Emboss - Deault
54. Effects – 3D Effects - Drop Shadow: -55 /0 / 55 / 77 / Cor #ffffff
55. Abra <<Post-Apocalyptique- Image 3>> Copie e Cole como nova layer
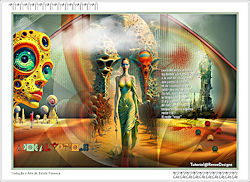
Posicione como na imagem final.
56. Abra <<Post-Apocalyptique-Texte.png>> Copie e cole como nova layer
Posicione à gosto.Ative a Layer << Raster 2>>
57. Selections - Load/Save Selections - Load selections from disk: Post-Apocalyptique-5
58. Selections – Promote selection to layerSelections - Select None
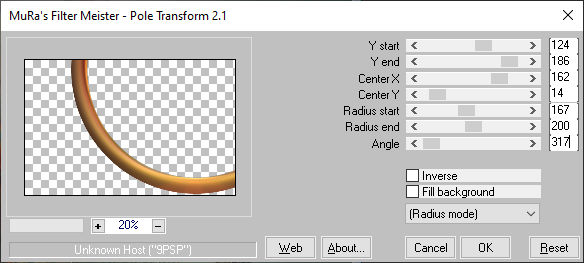
59. Effects - Plugins – MuRa’s Meister – Pole Transform
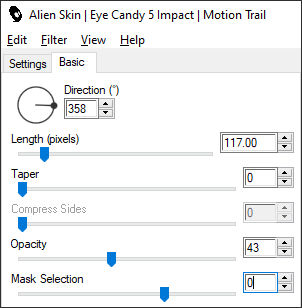
60. Effects - Plugins - Alien Skin EyeCandy 5 – Impact – Motion Trail
61. Blend Mode - Hard Light
62. Layers – Duplicate
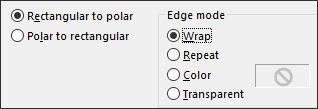
63. Effects – Distortion Effects – Polar Coordinate
64. Blend Mode - Hard Light – Opacidade 55
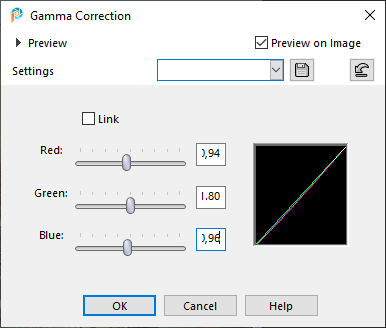
65. Correction Gamma (no teclado pressione as teclas Shift + G) para abrir esta ferramenta / Desmarcar link
Coloque as medidas (a adaptar caso use outras cores)
Ative a Layer do Topo66. Layers - New Raster Layer
67. Selections - Load/Save Selections - Load selections from disk: Post-Apocalyptique-6
68. Baldinho de Pintura – Preencha com a cor branca (#ffffff)
Selections / Select None
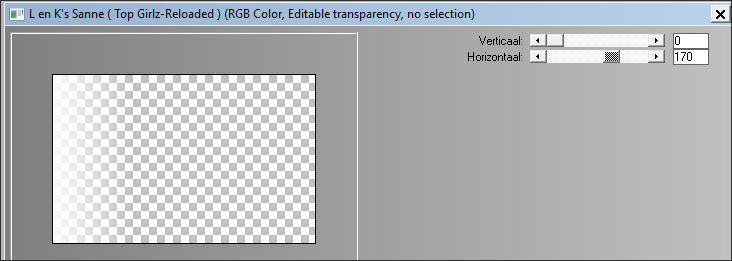
67. Effects – Plugins – L & K’s – Sanne : 0 / 170
68. Effects – Geometric Effects – Circle – Transparent (Marcado)
69. Blend Mode - Screen – Opacidade 26
70. Abra o tube <<Post-Apocalyptique- Image 4>>
Image - Resize - 45 % ... Resize All Layers - Marcado
Copie e Cole como nova layer - Posicione como na imagem final71. Effects – Plugins – FM Tile Tools – Saturation Emboss - Default
72. Ative a Fonte – "badabum" Tamanho 36 - Digite com a cor branca no Plano de Fundo << Apocalyptique >>
73. Effects – 3D Effects – Drop Shadow: 0 /0 /100/ 2 / Cor #000000
Ferramenta de seleção <<Rectangle >> Selecione parte da palavra e com a Ferramenta <<Color Changer>>Clique dentro da Seleção usando a cor verde , por exemplo.
Desative a Seleção e selecione outra parte da palavra e pinte com outra cor ...
Repita repita este processo com outras cores e outras partes do texto.
Quando você estiver satisfeito com o resultado...74. Effects – 3D Effects – Drop Shadow: 0 /0 /100/ 0 / Cor #000000
75. Ative << Post-Apocalyptique- Image 5 >> Copie e cole como nova layer.76. Objects – Align - Left
77. Blend Mode - Overlay – Opacidade 63
78. Image - Add Bordes / Symmetric Marcado / 1 Pixel cor Nº1
Image - Add Bordes / Symmetric Marcado / 5 Pixels Cor Nº 2
Image - Add Bordes / Symmetric Marcado / 1 Pixel cor Nº1Image - Add Bordes / Symmetric Marcado / 1 Pixel Cor Nº 3
Image - Add Bordes / Symmetric Marcado / 45 Pixels Cor Nº 1Image - Add Bordes / Symmetric Marcado / 1 Pixel Cor Nº 4
Image - Add Bordes / Symmetric Marcado / 5 Pixels Cor Nº1
Image - Add Bordes / Symmetric Marcado / 1 Pixel Cor Nº 6
79. Layers / New Raster Layer e decore com os logotipos escolhidos
A Moldura - Decoraçã o- é feita com a fonte anexada digitando números (de sua preferência)
Copie e Cole a assinatura de Renée
80. Layers - Merge - Merge All (Flatten)
81. Image - Resize - 1005 Pixels de largura - Resize All Layers - Marcado
82. Adjust - Sharpness - Unsharp Mask (Não obrigatorio)
Salve como JPG
©Tutorial traduzido por Estela Fonseca em 18/04/2024.
Não alterar nem repassar sem autorização.
