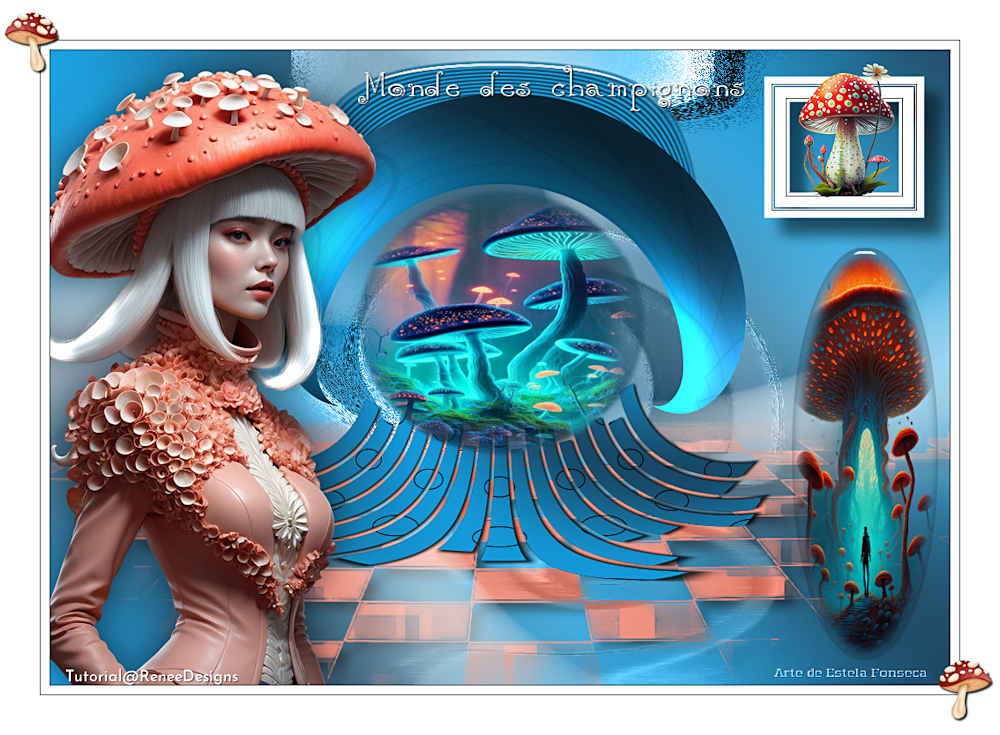
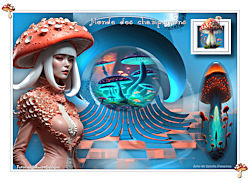
MONDE DES CHAMPIGNONS
Tutorial de Renée Graphic , original, Aqui.
O tutorial foi traduzido na versão Corel Paint shop Pro 2022 Ultimate, mas ele pode ser feito com outras versões.
Materiais Necessários:
Tubes de Renée...
ATENÇÃO:
Aviso de Renée*
Se for sua intenção compartilhar esses tubes ou essas lições em grupo, peça permissão ao proprietário.
O tube não pode ser enviado sem a aula. Por favor, não faça alterações no tube, pois este tube foi feito apenas paraesta lição.
É proibido compartilhar este tutorial sem link para a lição original.
Muito obrigado Renée.
Eles estão a disposição em seu site: AQUI.
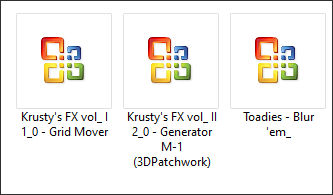
PLUGINS
Atenção
Lembrete Se você usar o Filter Unlimited 2.3, de Renée, ele consiste em 3 pastas
Dê uma olhada nas pastas antes de adicionar uma predefinição.
Alien Skin Eye Candy 5
VM Extravaganza
Flaming Pear – Flexify 2
AAA Frame*
Você pode encontrar os filtros no site de Renée, AQUI
As cores podem variar significativamente dependendo do Psp utilizado. . .
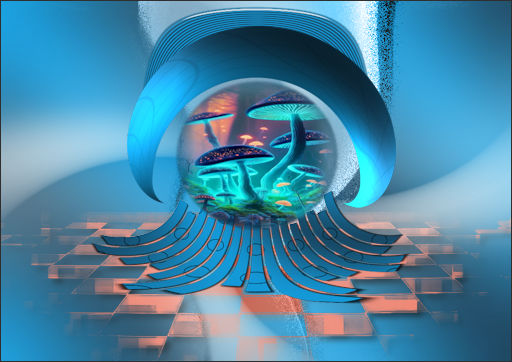
Monde des champignons - Mundo dos Cogumelos.
Preparação:Primeiro Plano cor Nº 1 / Plano de Fundo cor Nº 2.
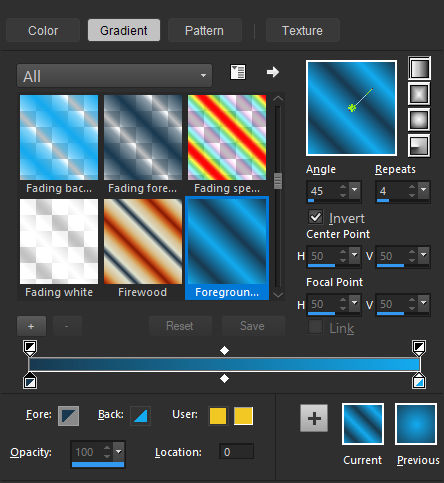
Forme no Primeiro Plano um Gradiente Linear Angle 45 / Repeats 4 / Invert Marcado.
1. Abra uma nova imagem transparente de1020 x 720 Pixels. (Raster 1)
2. Preencha com o Gradiente
3. Adjust / Blur / Gaussian Blur / Radius 504. Layers / Duplicate
5. Effects / Plugins/ Filters Unlimited 2.0 /Krusty's FX vol. I 1.0 / Grid Mover / Default.
6. Layers / Duplicate
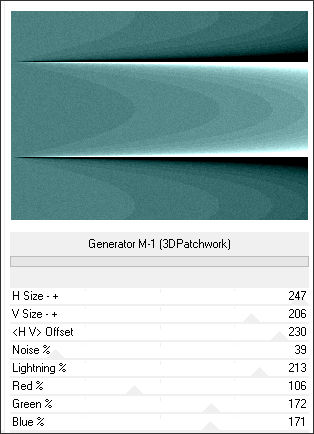
7. Effects / Plugins / Filters Unlimited 2.0 / Krusty's FX vol. II 2.0 / Generator M-1 (3DPatchwork):
8. Image / Free Rotate / Left ...90°
9. Image / Resize / 73% ... Resize all layers... Desmarcado.10. Blend Mode / Luminance
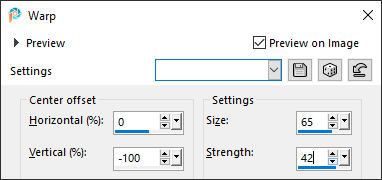
11. Effects / Distortion Effects / Warp : 0 /-100 ... 65/42
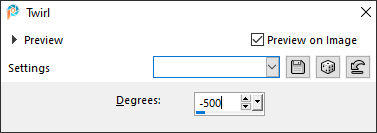
12. Effects / Distortion Effects / Twirl : Degrees: 54
13. Selections / Load/save selection / Load selection from disk: Champignons-Renee-1Delete
Selections / Select None
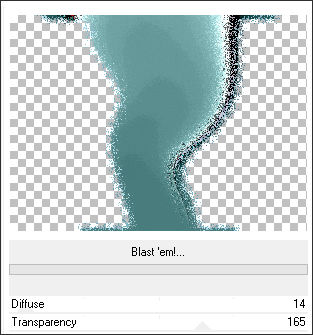
15. Effects / Plugins / Filters Unlimited 2.0 / Toadies / Blast 'em!... : 14 /165
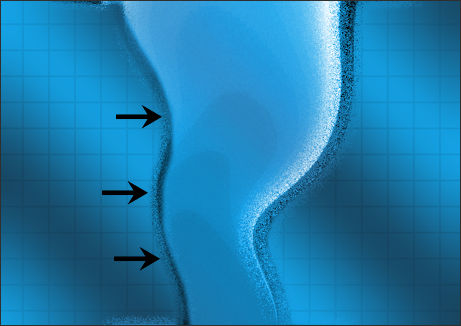
16. Ferramenta: Lighten/Darken Brush (L) configurada como segue:
Passe por toda a borda esquerda da Forma - segurando o botão esquerdo do mouse.
17. Selections / Load/save selection / Load selection from disk: Champignons-Renee-0Delete no Teclado / Selections / Select None
Ative a Layer << Copy of Raster 1>>
18. Selections / Load/save selection / Load selection from disk: Champignons-Renee-2Layers / New Raster Layer
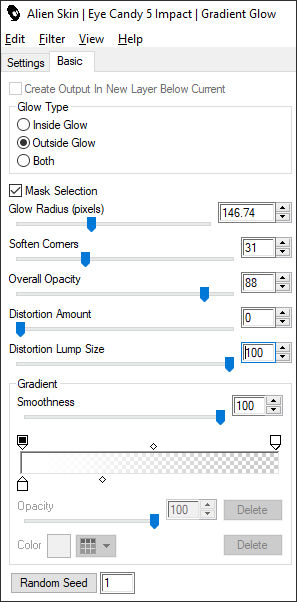
19. Effects / Plugins/ Alien Skin Eye Candy 5 / Impact / Gradient Glow:
Selections / Select None
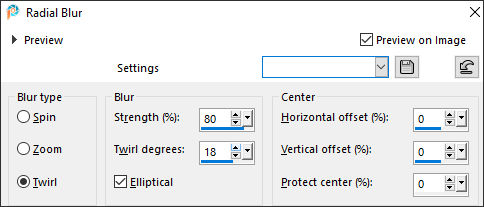
20. Adjust / Blur/ Radial Blur:
Ative a Layer do Fundo << Raster 1>>
21. Selections / Load/save selection / Load selection from disk: Champignons-Renee-322. Selections /Promote Selection to Layer
23. Layers / Arrange / Bring to Top
24. Effects / Plugins / VM Extravaganza / shoutin’ ! :
Selections / Select None
25. Effects / 3D-Effects / Drop Shadow : 3/ 3/ 85 / 5 Cor #000000
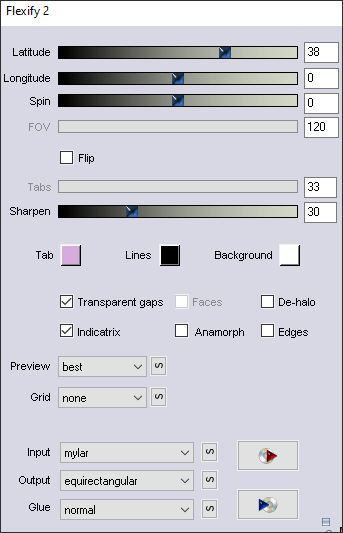
26. Effects / Plugins / Flaming Pear / Flexify 2 :
Ative a Layer << Copy of Raster 1>>
27. Layers / Arrange / Bring to Top
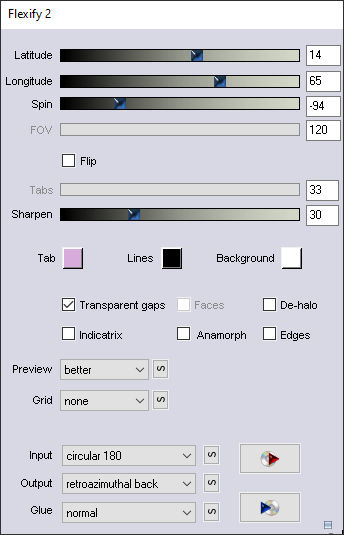
28. Effects / Plugins / Flaming Pear / Flexify 2:
29. Layers / New Raster Layer
30. Selections / Load/save selection / Load selection from disk: Champignons-Renee-4
31. Preencha a seleção com a cor Nº 2
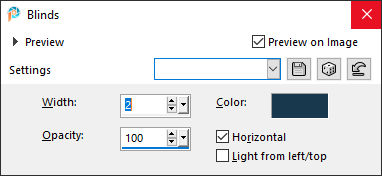
32. Effects / Texture Effects / Blinds: Cor Nº 1
Selections / Select None
33. Effects / 3D Effects / Drop Shadow: (Na Memória)
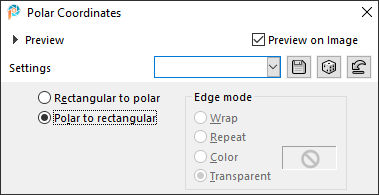
33. Effects / Distortion Effects / Polar Coordinates / Polar to Rectangular
34. Objects / Align / Top
35. Layers / Arrange / Move Down
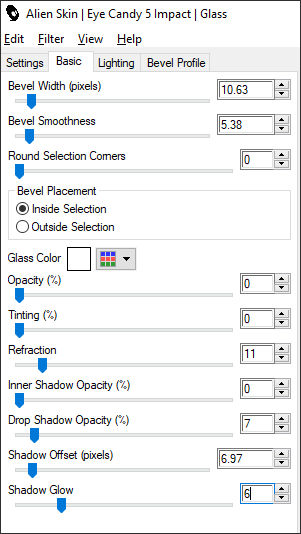
36. Effects / Plugins / Alien Skin Eye Candy 5 / Impact / Glass:
Ative a Layer (Copy of Raster 1)
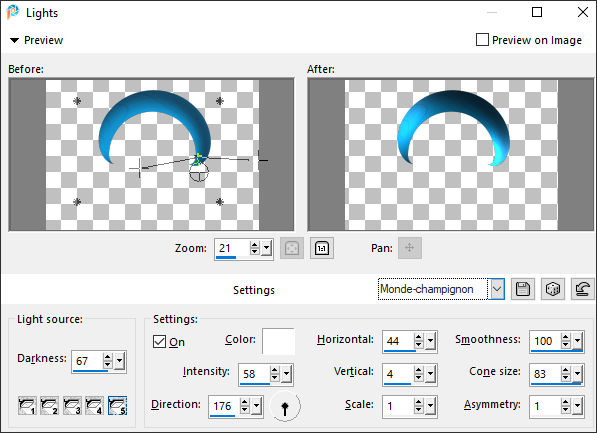
37. Effects / Illumination Effects/ Lights / Preset <<Monde-champignon>>
38. Layers / New Raster Layer
39. Selections / Load/save selection / Load selection from disk: Champignons-Renee-540. Abra o tube : Renee-Tubes-Monde-des-champignons-Image1
Copie e cole na seleção.
41. Layers / New Raster Layer
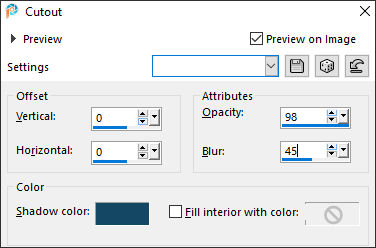
42. Effects / 3D Effects / Cutout : Cor Nº 1
Selections / Select None
Ative a layer do Fundo <<Raster 1>>
43. Layers / New Raster Layer
Primeiro Plano cor Nº344. Preencha a seleção com a cor Nº 3
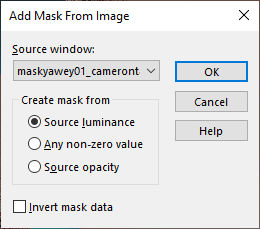
45. Layers / New Mask Layer / From Image: maskyawey01_camerontags
Layers / Merge / Merge Group
46. Effects / 3D Effects / Drop Shadow: 10/10/60/15 Cor #000000
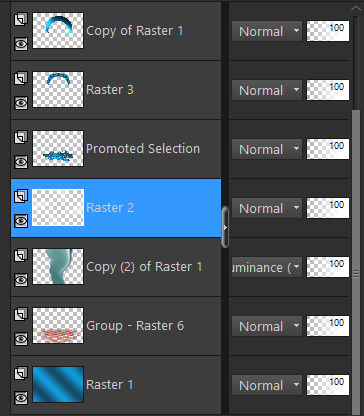
Seu trabalho e paleta de layer agora devem estar assim: (Organize as camadas corretamente)
Ative a Layer << Copy 2 of Raster 1>>
47. Effects / Distortion Effects / Twirl :
Na mesma layer
48. Selections / Load/save selection / Load selection from disk: Champignons-Renee-6
49. Effects / Distortion Effects / Twirl ... Mesmas configurações de antes.
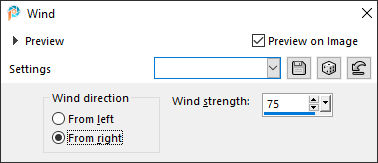
50. Effects / Distortion Effects / Wind:
Selections / Select None
Ative a Layer do Topo51. Layers / New Raster Layer
52. Selections / Load/save selection / Load selection from disk: Champignons-Renee-753. Preencha a seleção com a cor Nº 5
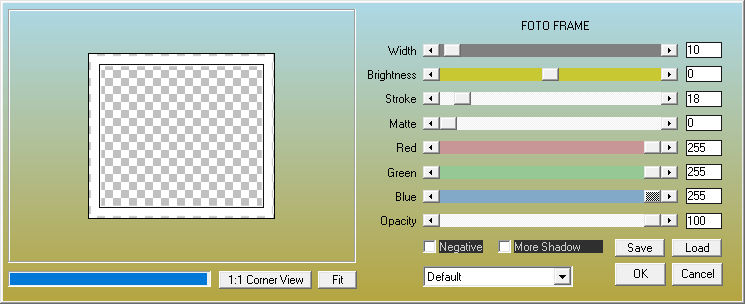
54. Effects / Plugins / AAA Frame / Foto Frame:
Selections / Select None
55. Ative a Varinha Mágica – Tolerance em 0 e Feather em 0 / Clique dentro da Frame56. Preencha com a cor Nº 4
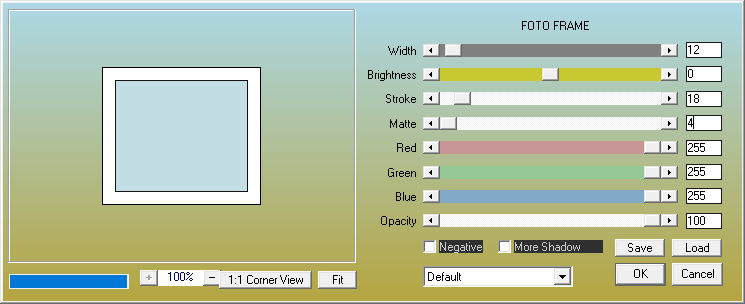
57. Effects / Plugins / AAA Frame / Foto Frame:
Selections / Select None
57. Ative a Varinha Mágica – Tolerance em 0 e Feather em 0 / Clique dentro do quadrado na pare em azul claro
Delete no tecladoSelections / Select None
58. Effects / 3D Effects / Drop Shadow: 19/19/60/22 Cor #000000
59. Abra o tube: Renee-Tubes-Monde-des-champignons-Image2Copie e cole como nova layer
Adjust / Smart Photo Fix (facultativo)
Posicione no quadro, veja a imagem final.
60. Abra o tube: Renee-TUBES-Champignon-Femme 1 (ou outro de sua escolha)Copie e cole como nova layer
Image / Resize / 70%... Resize All Layers ... Desmarcado
Posicione à esquerda como na imagem final.
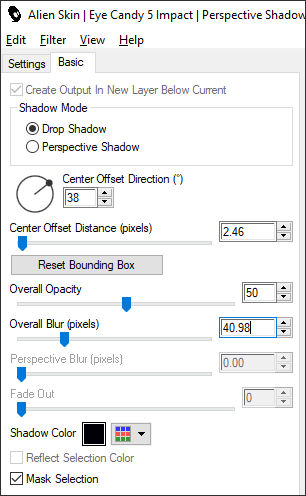
61. Effects / Plugins / Alien Skin Eye Candy 5 / Impact / Perspective Shadow:
62. Layers / New Raster Layer
63. Selections / Load/save selection / Load selection from disk: Champignons-Renee-864. Abra o tube: Renee-Tubes-Monde-des-champignons-Image3
Copie e cole na seleção
65. Layers / New Raster Layer
66. Selections / Modify / Expand / 10 Pixels
67. Effects / Plugins / Alien Skin EyeCandy 5 / Impact / Glass: Preset : Clear, No Drop Shadow
Selections / Select None
68. Ative a Ferramenta Text Tool / Fonte ‘’Rebecca’’ / Tamanho: 36 / Primeiro Plano e Plano de Fundo Cor brancaDigite: Monde des champignons e Posicione como na imagem final.
69. Effects / 3D Effects / Drop Shadow: 1/1/100/2 Cor #000000
70. Image / Add Borders / Symmmetric Marcado / 1 Pixel Cor Nº 1
Image / Add Borders / Symmmetric Marcado /10 Pixels Cor Nº 5
Image / Add Borders / Symmmetric Marcado /1 Pixel Cor Nº 1
Image / Add Borders / Symmmetric Marcado /45 Pixels Cor Nº 5
71. Abra o tube: deco cadreCopie e cole como nova layer (não mova)
Adicione a marca d'água do autor e a sua marca d'água.
72. Layers / Merge / Merge All ( flatten)
73. Image / Resize / 85% / Resize all layers marcada.
Salve como JPG
©Tutorial traduzido por Estela Fonseca em 05/06/2024.
Não alterar nem repassar sem autorização.
