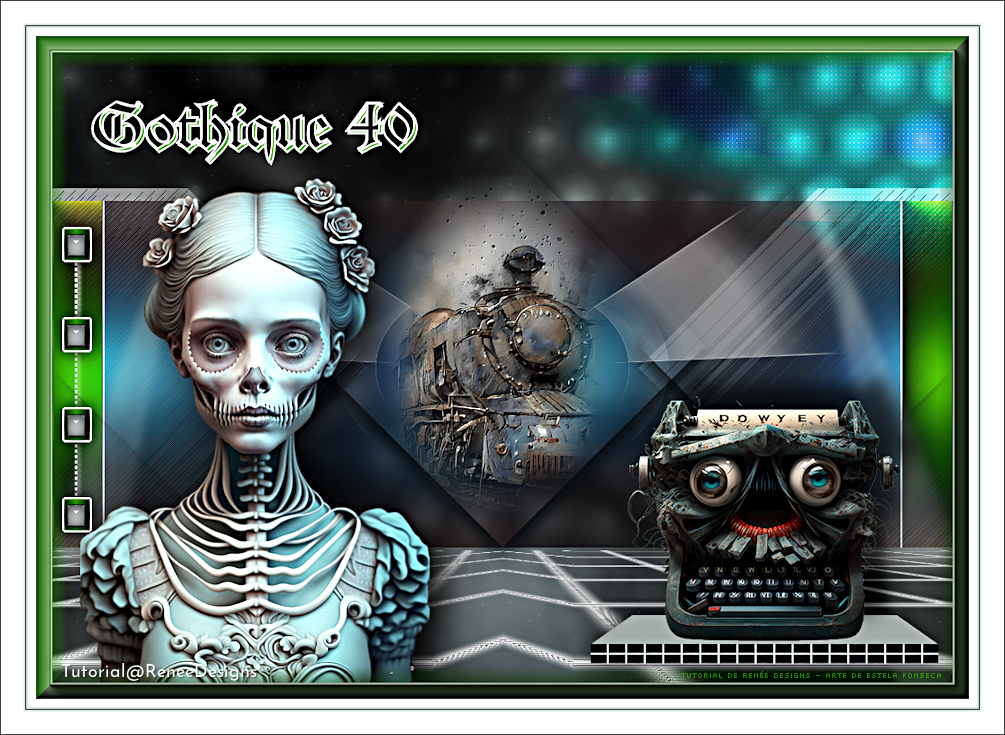
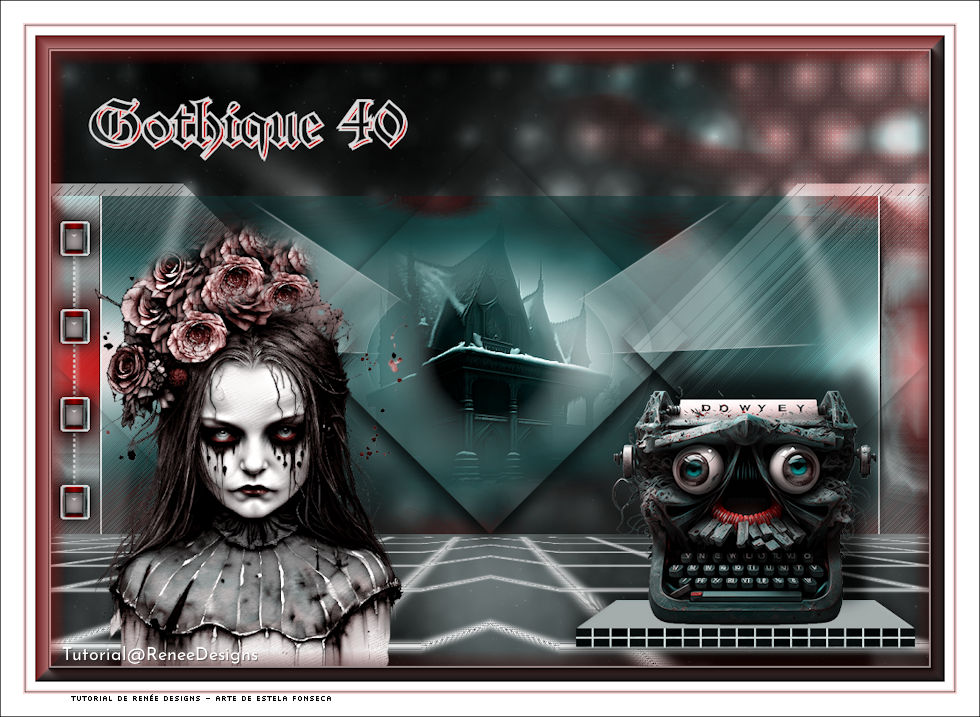
GOTHIQUE 40
Tutorial de Renée Graphic , original, Aqui.
O tutorial foi traduzido na versão Corel Paint shop Pro 2022 Ultimate, mas ele pode ser feito com outras versões.
Materiais Necessários:
Tubes de Renée...
ATENÇÃO:
Não compartilhe os tubes de Renée em sites ou blog ...etc
Eles estão a disposição em seu site: AQUI.
PLUGINS
Flaming Pear – Gliterrato (codigo de ativação 81421037)
Simple
FM Tile Tools
Mura’s Meister
AAA Frame
Alien Skin EyeCandy 5 - Impact
Alien Skin EyeCandy 5 – Textures
AP
Páginas de Plugins de Renée ... AQUI
Preparação:Copie as seleções para a pasta de seleções do PSP.
Abra o material, duplique e feche os originais.
As cores podem variar significativamente dependendo do Psp usado.
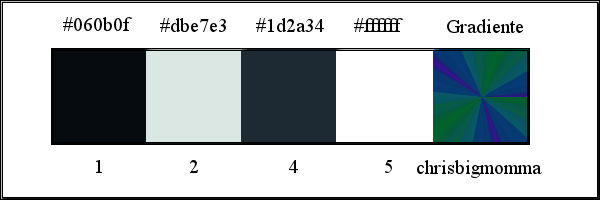
Primeiro Plano Cor (1) #060b0fSegundo Plano cor (2) #dbe7e3
1. Abra uma nova imagem transparente de 1000 x 700 Pixels.
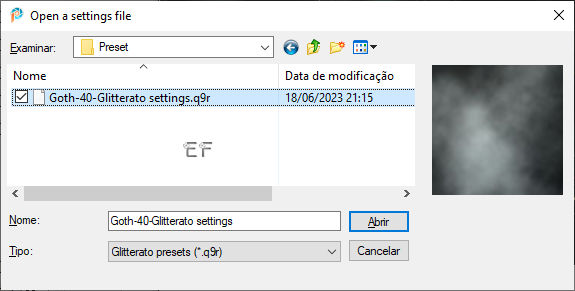
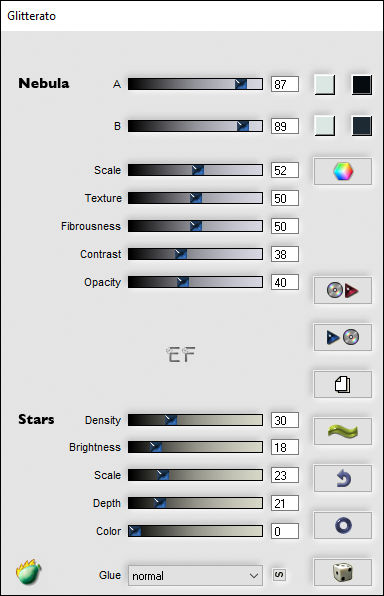
2. Effects / Plugins / Flaming Pear / Gliterrato / Preset «Goth-40-Glitterato»( clique no triângulo vermelho e localize na pasta do material o Preset «Goth-40-Glitterato»
3. Layers / New Raster LayerColoque no Primeiro Plano a cor (4) #ffffff
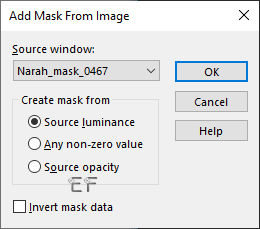
4. Preencha com a cor (4) #ffffff5. Layers / New Mask Layer /From Image: «Narah_mask_0467»
Layers / Duplicate
Layers / Merge / Merge Group
6. Adjust / Blur / Gaussian Blur / Radius 15%
7. Blend Mode / Hard LightOpacidade / 75%
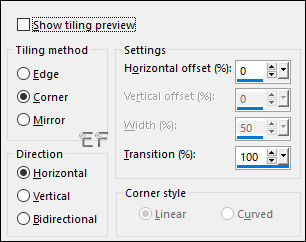
8. Abra o tube «Renee-Tubes-Goth-40- Image1» Copie e Cole como nova layer9. Effects / Image Effects / Seamless Tiling:
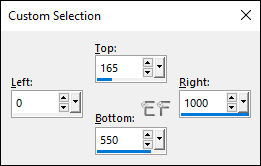
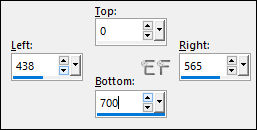
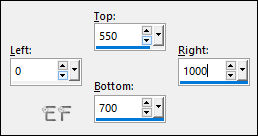
10. Selection Tool (s) / Custom Selection
11. Selections / Invert
Delete no Teclado
12. Selections / Invert
13. Adjust / Blur / Gaussian Blur / Radius 25
Selections / Select None
14. Layers / Duplicate
Ative a Layer «Raster 2»
15. Effects / Plugins / Simple / Pizza Slice mirror ( 2 vezes)16. Selection Tool (s) / Custom Selection
Delete no Teclado
Selections / Select None
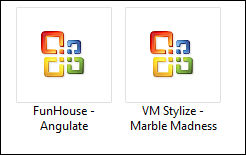
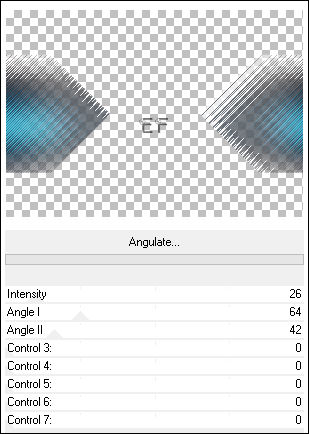
17. Effects / Plugins / Filters Unlimited 2.0 / FunHouse / Angulate: (26 / 64 / 42 todos os outros valores 0)
18. Effects / Edge Effects / Edge Enhance
19. Effects / 3D Effects / Drop Shadow: 21 / 0 / 60 /25 Cor BrancaAtive a layer do Topo
20. Layers / New Raster Layer
21. Selections /load/save selection / Load selection from Disk: «Gothique-40-1»
22. Primeiro Plano cor (1) #060b0fPreencha com a cor (1) #060b0f
Selections / Select None
23. Abra o tube «Renee-Tubes-Goth-40- Image-0»
Copie e Cole como nova layer
Não Mova, está no lugar certo
24. Effects / Plugins / Filters Unlimited 2.0 / Funhouse / Loom (141/82 ) todos os outros valores zero
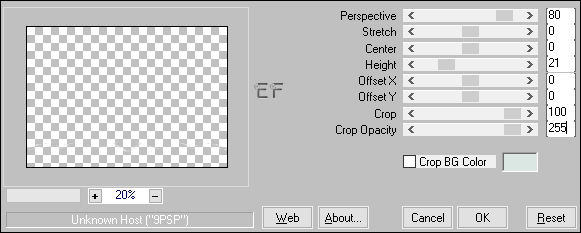
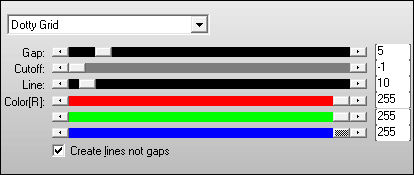
25. Effects / Plugins / Mura’s Meister / Perspective Tiling:
26. Layers / Duplicate
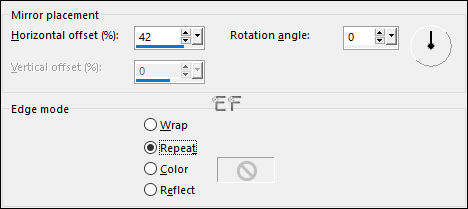
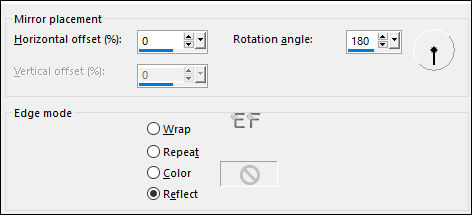
27. Effects / Reflection Effects / Rotating Mirror:
28. Effects / Reflection Effects / Rotating Mirror:
29. Layers / Merge / Merge Down
30. Abra o tube «Renee-Tubes-Goth-40- Image2»
Image / Resize / 50% ... Resize All Layers ... Marcado
Copie e Cole como nova layer
Coloque este tube no meio (veja a imagem finalizada)
31. Effects / Plugins / FM Tile Tools / Saturation Emboss / Default
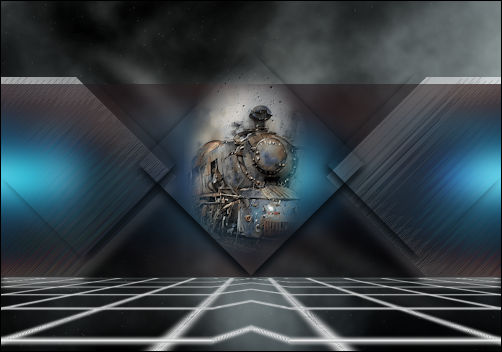
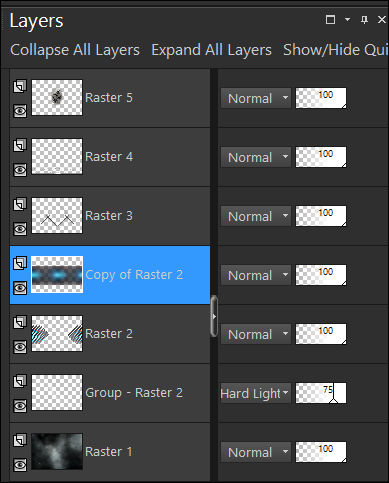
Seu trabalho e paleta de camadas estão assim agora ... você deve ter este resultado
Ative a layer « Copy of Raster 2»
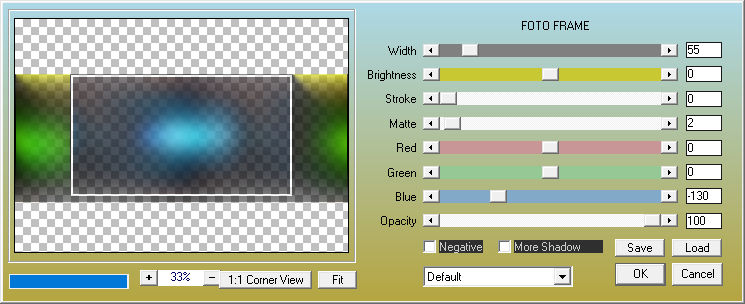
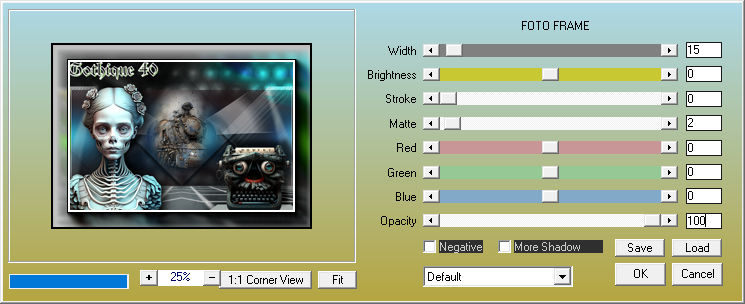
32. Effects / Plugins /AAA Frame / Foto Frame:
Ative a Layer do Topo
33. Layers / New Raster Layer
34. Selections /load/save selection / Load selection from Disk: «Gothique-40-2»
35. Preencha com a cor (2) #dbe7e3Selections / Select None
36. Adjust / Blur / Gaussian Blur / Radius 5%
37. Layers / New Raster Layer
38. Selections /load/save selection / Load selection from Disk: «Gothique-40-3»
39. Primeiro Plano cor (4) #ffffffPreencha a seleção com a cor (4) #ffffff
Selections / Select None
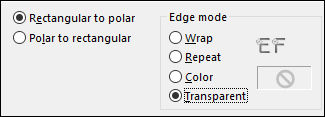
40. Effects / Distortion Effects / Polar Coordinates / Rectangular to polar /Transparent
41. Opacidade / 55%(Reposicione a locomotiva no centro )
42. Layers / New Raster Layer
43. Selections /load/save selection / Load selection from Disk: «Gothique-40-4»
44. Primeiro Plano cor (1) #060b0fPreencha com a cor do Primeiro Plano cor (1) #060b0f
Selections / Select None
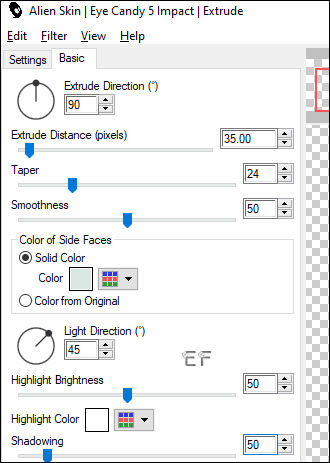
45. Effects / Plugins / Alien Skin Eye Candy 5 / Impact / Extrude: Cor (2) #dbe7e3 e Cor (4) #ffffff
46. Selections /load/save selection / Load selection from Disk: «Gothique-40-4»
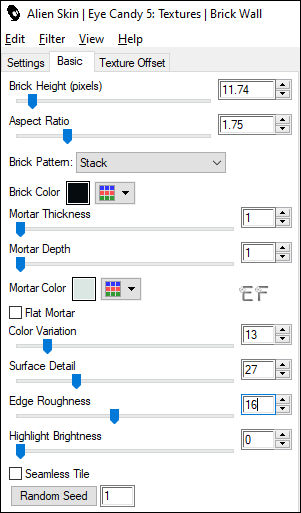
47. Effects / Plugins / Alien Skin EyeCandy 5 / Textures / Brick Wall : Cor (1) #060b0f e Cor (2) #dbe7e3
Selections / Select None
48. Effects / 3D Effects / Drop Shadow: 0 / 0 / 68 / 28,64 / Cor #00000049. Abra o Tube « Renee-Tubes-Goth-40-6»
Image / Resize / 50% ... Resize All Layers ...Marcado
Copie e Cole como nova layerMova o tube para a direita , veja imagem final
50. Effects / 3D Effects / Drop Shadow: -27 / 26 / 68 /25,68 / Cor #000000
Ative a Layer do «Raster 1»
51. Layers / Duplicate
52. Effects / Plugins / Filters Unlimited 2.0 / VM Stylize / Marble Madness: 9/22/105/255
53. Selection Tool (S) Custom Selection:
Delete no Teclado
Selections / Select None
54. Blend Mode / Overlay
Opacidade / 42%
Ative a Layer do Topo
55. Abra o Tube «Renee-Tubes-Goth-40- Image3» Copie e Cole como nova layer
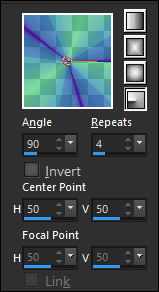
Mova para o lado esquerdoColoque no Primeiro Plano o Gradiente «chrisbigmomma» Configure o estilo pra «Radial» como segue:
56. Layers / New Raster Layer
57. Selections /load/save selection / Load selection from Disk: «Gothique-40-5»
58. Preencha com o GradienteSelections / Select None
59. Adjust / Blur / Gaussian Blur / Radius 15%
60. Effects / Distortion Effects / Wind / Strength 100% / From Left (2 vezes)
61. Blend Mode / Hard Light ... Opacidade 59% ou Blend Mode / Overlay ... Opacidade /9362. Effects / Plugins / AP[Lines] / Lines – Silverlining:
63. Abra o Tube «Renee-Tubes-Goth-40-9»
Image / Resize / 68 % ... Resize All Layers ... Marcado
Copie e cole como nova layer em seu trabalhoPosicione a gosto
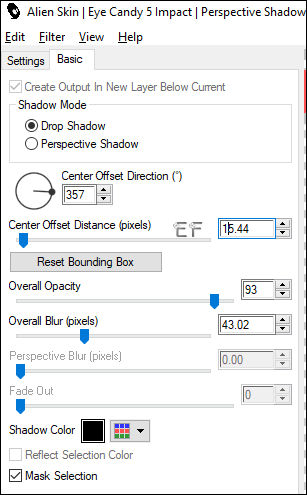
64. Effects / Plugins / Alien Skin EyeCandy 5 / Impact / Perspective Shadow:
65. Text tool / Escreva o título com a fonte «AlteSchwabacher-Shadow» (incluída no material)
Ou com outra fonte de sua escolha
Primeiro Plano cor (4) #ffffff / Segundo Plano cor (2) #dbe7e3
66. Image / Add borders / Symmetric Marcado / 2 Pixels cor (1) #060b0fImage / Add borders / Symmetric Marcado / 25 Pixels cor (4) #ffffff
Image / Add borders / Symmetric Marcado / 2 Pixels cor (2) #dbe7e3
Image / Add borders / Symmetric Marcado / 1 Pixel cor (1) #060b0f
Image / Add borders / Symmetric Marcado / 2 Pixels cor (2) #dbe7e3
Image / Add borders / Symmetric Marcado / 25 Pixels cor (4) #ffffffImage / Add borders / Symmetric Marcado / 1 Pixel cor (1) #060b0f
67. Selections / Select All
68. Selections / Modify / Contract / 40 Pixels
69. Effects / Plugins / AAA Frames / Foto Frame:
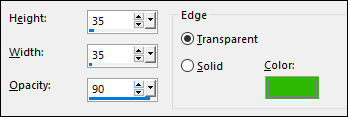
70. Effects / 3D Effects / Buttonize: Cor #2dba00
Selections / Select None
71. Image / Resize / 1005 Pixels de Largura ... Resize All Layers ... Marcado
72. Coloque a marca d'água do Autor e a sua Marca d'água
73. Layers / Merge / Merge All ( Flatten)
Salve como arquivo JPEG
Versão:Tubes de Renée ...
©Tutorial traduzido por Estela Fonseca em 29/06/2023.
Não alterar nem repassar sem autorização.
