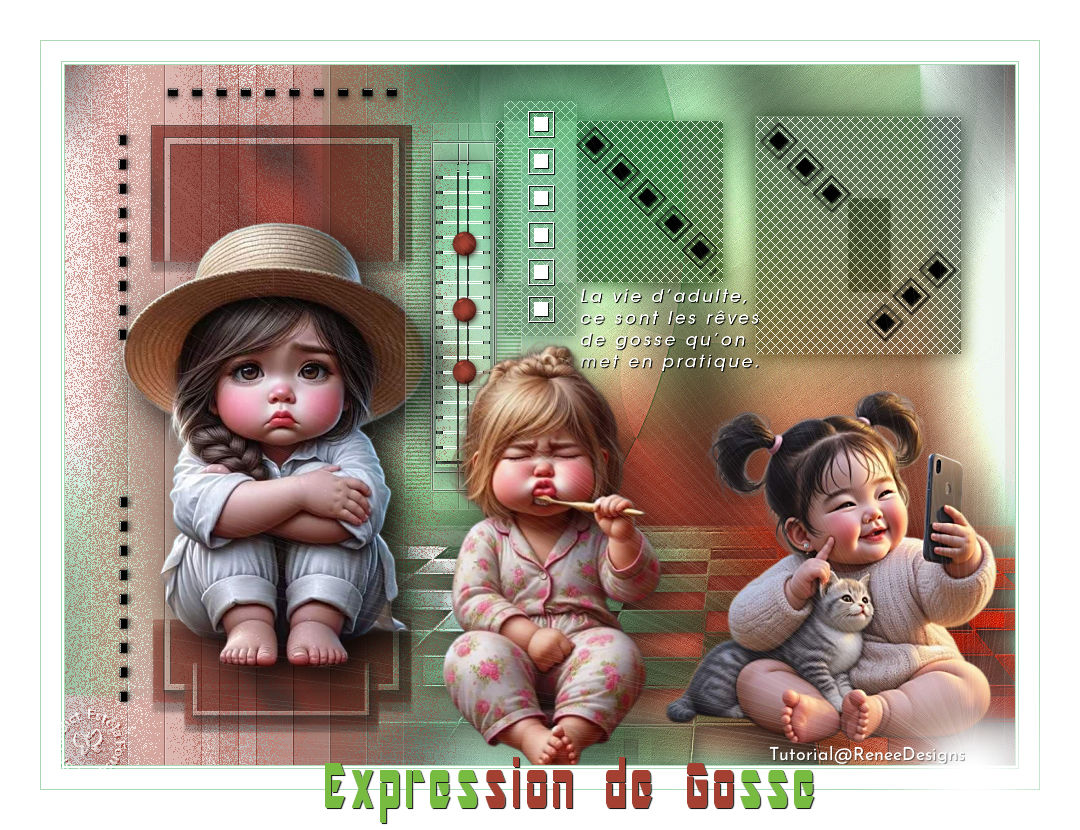
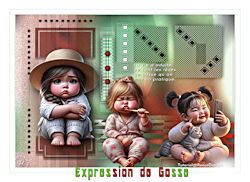
EXPRESSION DE GOSSE
Tutorial de Renée Graphic , original, Aqui.
O tutorial foi traduzido na versão Corel Paint shop Pro 2022 Ultimate, mas ele pode ser feito com outras versões.
Materiais Necessários:
Tubes de Renée...
ATENÇÃO:
Não compartilhe os tubes de Renée em sites ou blog ...etc
Eles estão a disposição em seu site: AQUI.
PLUGINS
Atenção
Lembrete Se você usar o Filter Unlimited 2.3, de Renée, ele consiste em 3 pastas
Dê uma olhada nas pastas antes de adicionar uma predefinição.
Medhi
Fantastic machine Pain Engine
Toadies
AAA Frame
Alien Skin Eye Candy 5 Impact
Flaming Pear
Simple
Filtres AP
**
Você pode encontrar meus Plugins na Página de Plugins do meu site - AQUI.
As cores podem variar significativamente dependendo do PSP utilizado.
Expressão Infantil
Primeiro Plano cor Nº1 - Plano de Fundo cor Nº2
1. Abra uma nova imagem transparente de 950 x 700 Pixels - Raster 1
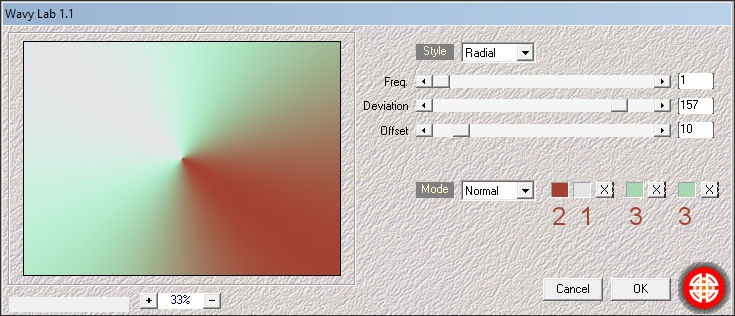
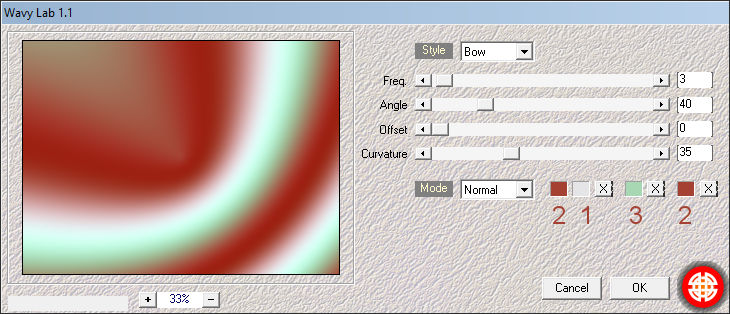
2. Effects- Plugins Medhi - Wavy Lab 1:
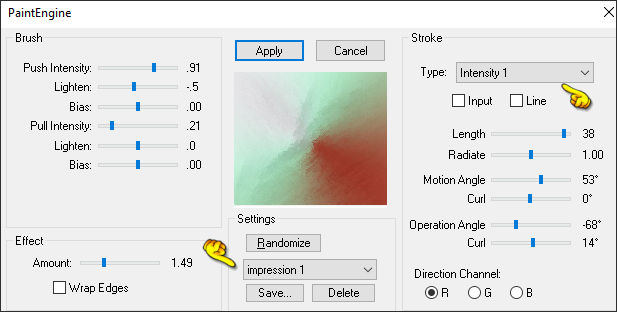
3. Effects - Plugins Fantastic Machine Paint Engine:
4. Effects - Edge Effects - Enhance
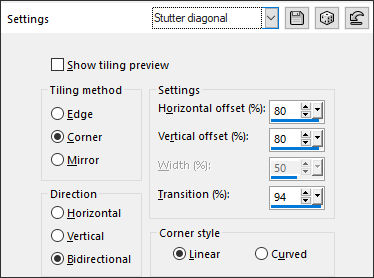
5. Effects - Image Effects - Seamless Tiling:
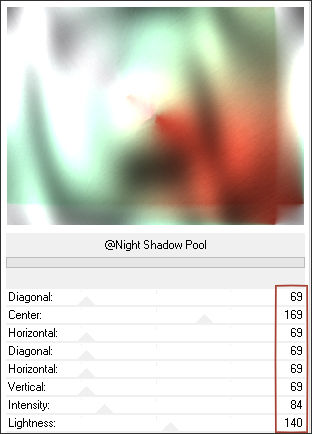
6. Effects - Plugins - Filters Unlimited 2.0 - &<Background Designers IV> - @Night Shadow :
7. Layers - New Raster Layer
8. Selections Load/Save selection Load selection from disk: "Expression-de-gosse 1"
9. Baldinho de Pintura Preencha a seleção com a cor Nº 2
Selections - Select None
10. Effects - Plugins - Filters Unlimited 2.0 - &<Bkg Designer sf10 I> - Blur 'em!: 70/12
11. Layers - New Raster Layer
12. Repita !!! Selections Load/Save selection Load selection from disk: "Expression-de-gosse 1"
13. Baldinho de Pintura Preencha a seleção com a cor Nº 1
Selections - Select None
14. Effects - Plugins Toadies What are you : 20/20
Repita : Effects - Plugins Toadies What are you : 20/20
15. Layers - Duplicate
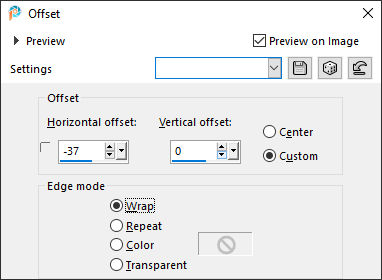
16. Effects - Image Effects - Offset:
17. Blend Mode - Overlay
18. Layers - Merge - Merge Down
19. Effects - Edge Effects- Enhance More
20. Blend Mode - Normal - Opacidade 44%
21. Layers - New Raster Layer
22. Selections Load/Save selection Load selection from disk: "Expression-de-gosse 2"
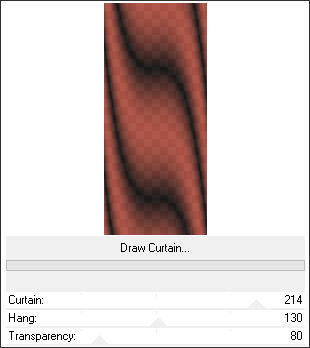
23. Effects - Plugins - Filters Unlimited 2.0 Willy Draw Curtain: 214/ 130 /80Tenha cuidado, este filtro tira a cor de fundo da sua paleta de cores
24. Adjust - Blur - Gaussian Blur - Radius 10
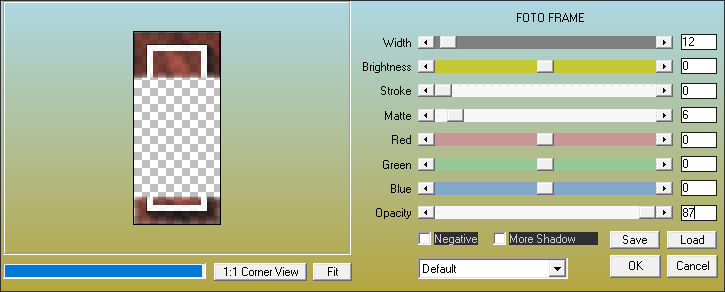
25. Effects - Plugins AAA Frame - Foto Frame:
Selections - Select None
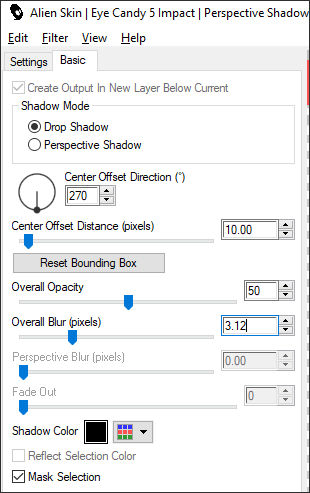
26. Effects - Plugins - Alien Skin Eye Candy 5 Impact Perspective Shadow:
27. Layers - Duplicate
28. Image - Resize - 75 % - Resize all layers - Desmarcado
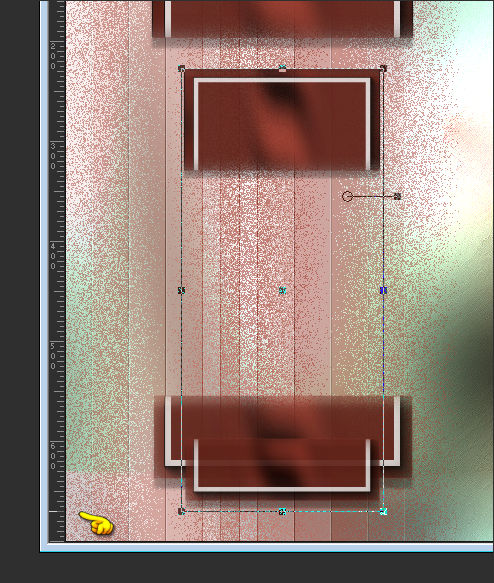
29. Pick Tool (K) - Position X (115,00) - Position Y (87,00) - Desative a Pick Tool ( Letra M do Teclado)
Pick Tool (K) - Mode Scale - Puxe para baixo até 670 Pixels.
Desative a Pick Tool - Pressione ( M ) no Teclado.
30. Layers - Merge - Merge Down
31. Blend Mode - Multiply - Opacidade 63%
32. Effects - Plugins - FM Tile Tools - Saturation Emboss - Default
33. Ative o Tube "Renee-TUBES-Expression-de-gosse-17."( Pasta Gosse Tubes ou escolha outro tube de acordo com seu gosto)Image - Resize - 60 % .. Resize All Layers - Marcado.
Copie e cole como nova layer - Posicione34. Effects- Plugins - Alien Skin Eye Candy 5 Impact Perspective Shadow Preset : Drop Shadow Blurry
Ative a Layer do Fundo - Raster 1
35. Layers - Duplicate
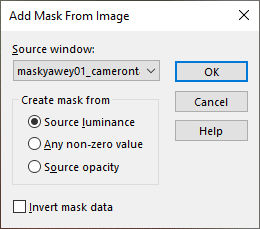
36. Layers- New Mask Layer - From Image : maskyawey01_camerontags
Layers - Merge - Merge Group
37. Effects- 3D Effects - Drop Shadow : 1/1/60/25 Cor #000000
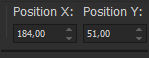
38. Pick Tool (K) - Position X (184,00) - Position Y (51,00) - Desative a Pick Tool ( Letra M do Teclado)
39. Effects - Plugins - FM Tile Tools - Saturation Emboss - Default
Primeiro Plano cor Nº 4 Plano de Fundo cor Nº 3
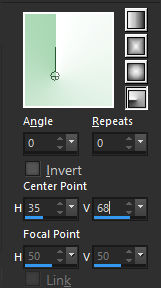
Forme no Primeiro Plano um gradiente Radial e configure como segue:
Ative a Layer do Fundo - Raster 1
40. Layers - New Raster Layer
41. Baldinho de Pintura Preencha com o Gradiente
42. Effects- Plugins - Filters Unlimited 2.0 - Tile & Mirror - XY Offset 50% (positive)
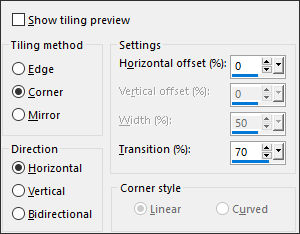
43. Effects - Image Effects - Seamless Tiling:
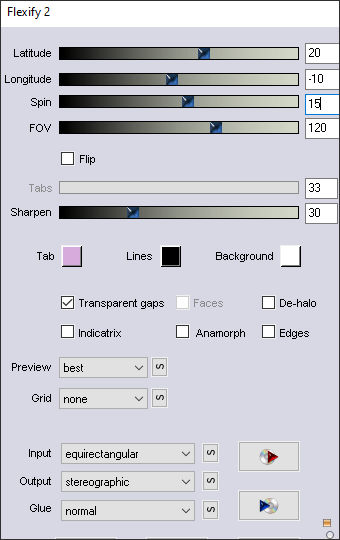
44. Effects - Plugins Flaming Pear Flexify 2:
45. Image - Resize - 73 % - Resize all layers - Desmarcado
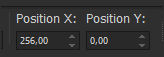
46. Pick Tool (K) - Position X (256,00) - Position Y (0,00) - Desative a Pick Tool ( Letra M do Teclado)
47. Effects - Edge Effects- Enhance More
48. Blend Mode - MultiplyAtive a Layer do topo
49. Abra o Tube "Expression-de-gosse-Image 1" - Copie e Cole como nova layer
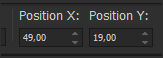
50. Pick Tool (K) - Position X (49,00) - Position Y (19,00) - Desative a Pick Tool (Letra M do Teclado)
51. Layers- New Raster Layer
52. Effects- Plugins Medhi - Wavy Lab 1:
53. Effects- Plugins Simple Pizza Slice Mirror
54. Effects- Plugins Simple Blintz
55. Image - Mirror - Mirror Horizontal
56. Effects- Plugins Simple Blintz
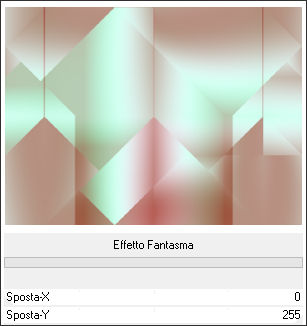
57. Effects- Plugins - Filters Unlimited 2.0 - It@lian Editors Effect - Effetto Fantasma: 0/255
58. Effects- Edge Effects- Enhance
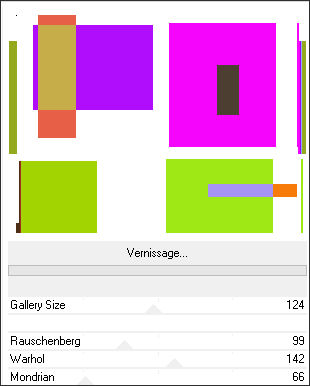
59. Effects- Plugins - Filters Unlimited 2.0 VM Instant Art Vernissage
60. Effects - Plugins - Transparency - Eliminate White
Se tiver problema com esse plugin há na pasta de material uma layer com o efeito
61. Image - Resize - 60% - Resize all layers - desmarcado
62. Selections Load/Save selection Load selection from disk: "Expression-de-gosse 3"Delete - Selections - Select None
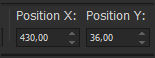
63. Pick Tool (K) - Position X (430,00) - Position Y (36,00) - Desative a Pick Tool (Letra M do Teclado)
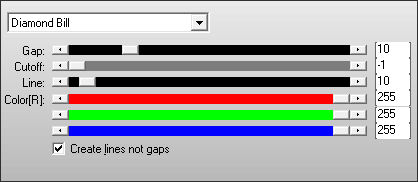
64. Effects - Plugins - AP[Lines] - Lines Silverlining :
65. Blend Mode - Luminance Legacy
66. Effects- 3D Effects - Drop Shadow: 1-1-60-25 Cor #00000067. Layers - New Raster Layer
68. Selections Load/Save selection Load selection from disk: "Expression-de-gosse 4"
Primeiro Plano cor Nº1 Plano de Fundo Cor Nº469. Baldinho de Pintura Preencha a seleção com a cor Nº1
Selections / Select None
70. Effects - Plugins - Filters Unlimited 2.0 - It@lian Editors Effect - Effetto Fantasma: 8/8
71. Effects - Plugins - Filters Unlimited 2.0 - It@lian Editors Effect - Effetto Fantasma: 7/7
Primeiro Plano cor Nº 4 Plano de Fundo cor Nº 3
72. Effects - Plugins - Filters Unlimited 2.0 - Distortion Filters - Scanline Shifter : 49/23
73. Effects - Edge Effects - Enhance More
Nesta mesma layer74. Selections Load/Save selection Load selection from disk: "Expression-de-gosse 5"
75. Effects- Plugins - Filters Unlimited 2.0 Toadies - Rasterline - Default
76. Effects - Edge Effects - Enhance More
77. Effects- 3D Effects - Drop Shadow: 3/ -2 /65 / 40 Cor #000000
78. Effects - Plugins AAA Frame Foto Frame:
79. Selections- Promote Selection to Layer
Selections / Select None
80. Image - Mirror - Mirror Horizontal
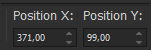
81. Pick Tool (K) - Position X (371,00) - Position Y (99,00) - Desative a Pick Tool (Letra M do Teclado)
82. Layers - Merge- Merge Down
83. Abra o tube "Expression-de-gosse-Image 2" - Copie e Cole como nova layer
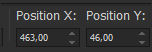
84. Pick Tool (K) - Position X (463,00) - Position Y (46,00) - Desative a Pick Tool (Letra M do Teclado)
85. Abra o tube "Expression-de-gosse-Image 3" - Copie e Cole como nova layer
Posicione como na imagem final86. Abra o Tube ''Expresion-de-gosse-texte'' - Copie e Cole como nova layer - Posicione à gosto.
87. Copie e Cole um tube ou vários de sua escolha redimensione se necessário e aplique a sombra de sua escolha
88. Image - Add Borders - Symmetric Marcado - 1 Pixel Cor Nº3
Image - Add Borders - Symmetric Marcado - 2 Pixels Cor Nº4
Image - Add Borders - Symmetric Marcado - 1 Pixel Cor Nº3
Image - Add Borders- Symmetric Marcado - 20 Pixels Cor Nº4
Image - Add Borders - Symmetric Marcado - 1 Pixel Cor Nº2
Image - Add Borders - Symmetric Marcado - 40 Pixels Cor Nº4
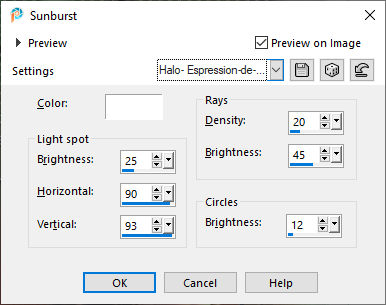
89. Effects - Illumination Effects - Sunburst Preset "Halo-expression-de-goose"Ou configure manualmente como segue:
90. Fonte anexada se quiser escrever o título ou colar o meu
91. Assine seu trabalho - Coloque a Marca D'água de Renée
92. Layers- Merge- Merge All ( flatten)
96. Image - Resize - 95% - Resize all layers marcado
Salve como JPG
©Tutorial traduzido por Estela Fonseca em 23/03/2024.
Não alterar nem repassar sem autorização.