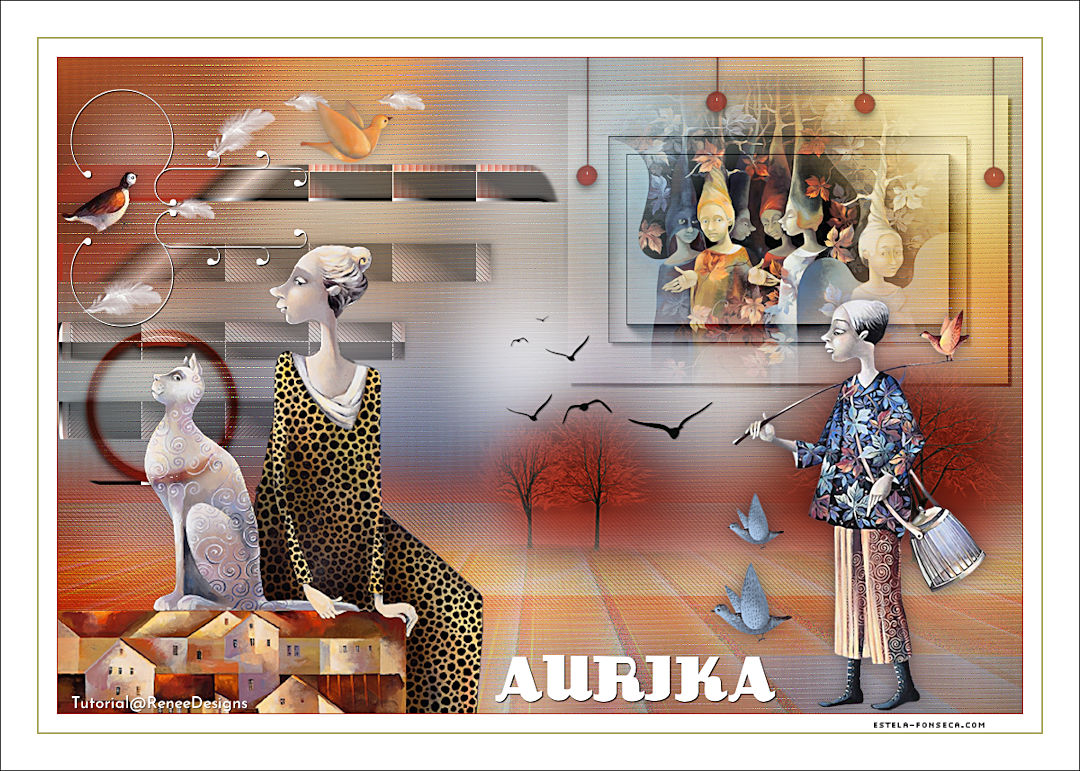
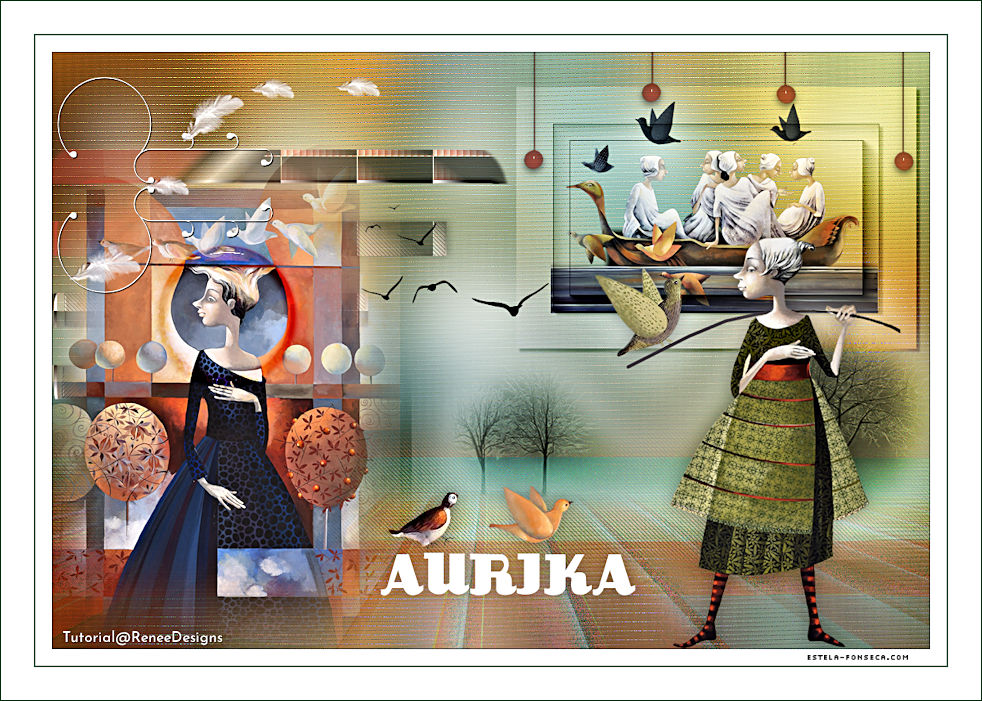
AURIKA
Tutorial de Renée Graphic , original, Aqui.
O tutorial foi traduzido na versão Corel Paint shop Pro X9 Ultimate, mas ele pode ser feito com outras versões.
Materiais Necessários:
Tubes de Renée
ATENÇÃO:
Não compartilhe os tubes de Renée em sites ou blog ...etc
Eles estão a disposição em seu site: AQUI.
Plugins Utilizados: AQUI
PLUGINS
AAA FiltersVanderlee- Unplugged X
VM Extravaganza
Medhi
Mura’s Meister
Carolaine and Sensibility
AP(Patched)
Alien Skin EyeCandy 5 / Impact
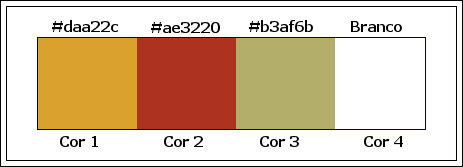
Cores:
Preparação:
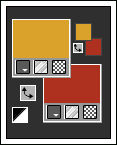
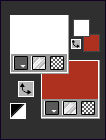
Primeiro Plano cor (1) #daa22c / Segundo Plano cor (2) #ae3220
1.Abra o << Fond-Aurika >> Promote Background Layer
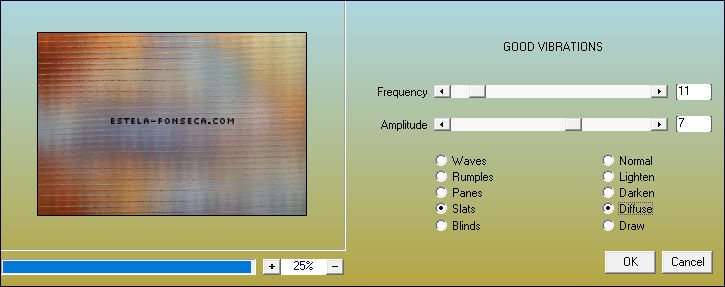
2. Effects / Plugins / AAA Filters / Good Vibrations:
3. Effects / Edge Effects / Enhance
4. Layers / New Raster Layer
5. Selections / Select All
6. Selections / Modify / Contract / 45 Pixels
7. Ferramenta <<Flood Fill Tool>> Preencha a seleção com a cor nº1Selections / Select None
8. Effects / Distortion Effects / Wind / From Left / Wind Strength: 100
Effects / Distortion Effects / Wind / From Right / Wind Strength: 100
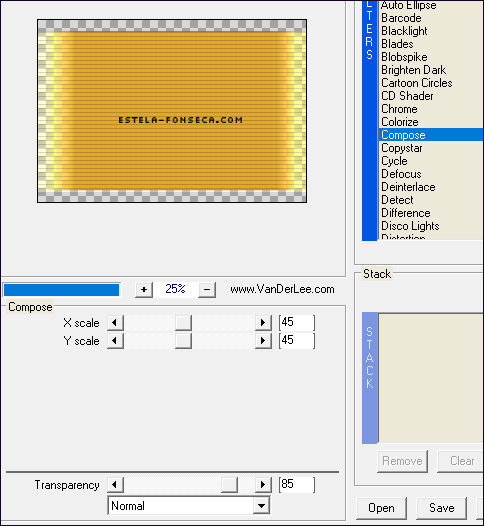
9. Effects / Plugins / Vanderlee / Unplugged X / Compose
10. Blend Mode / Soft Light
11. Effects / Plugins / VM Extravaganza / James Bondage
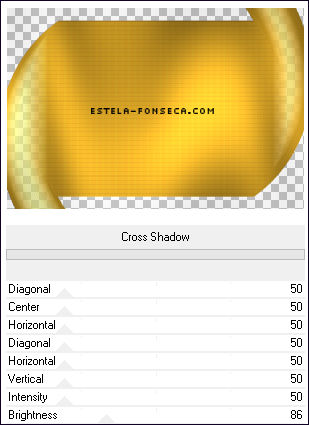
12. Effects / Plugins / <I.C.NET Software> Filters Unlimited 2.0 / Graphics Plus / Cross Shadow
13. Effects / 3D Effects / Drop Shadow: 0 / 0 / 85 / 55 / Cor #000000
14. Effects / Distortion Effects / Wave
15. Effects / Plugins / Medhi / Weaver
16. Effects / Edge Effects / Enhance
17. Effects / Edge Effects / Dilate
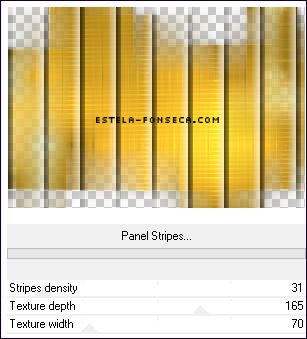
18. Effects / Plugins / <I.C.NET Software> Filters Unlimited 2.0 / Tramages / Panel Stripes (31/165/70)
19. Abra o Tube <<Aurika-Image 1>> Copie/Cole como nova layer20. Adjust / Blur / Radial Blur:
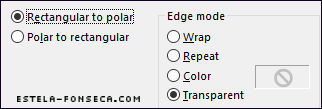
21.Effects / Distortion Effects / Polar Coordinates / Rectangular to Polar / Transparente
22. Blend Mode / Hard Light
23. Layers / Merge / Merge Down
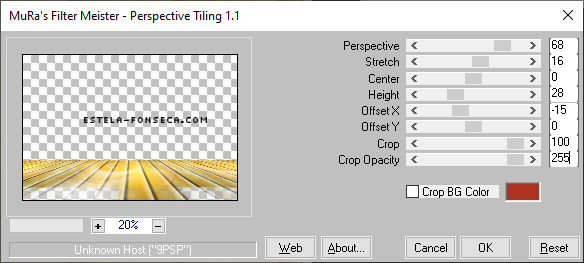
24. Effects / Plugins / Mura’s Meister / Perspective Tiling
25. Ferramenta <<Magic Wand>> Feather 45 / Clique na parte transparente
Delete no Teclado 5 Vezes
Selections / Select None
26. Effects / User Defined Filter / Emboss 4
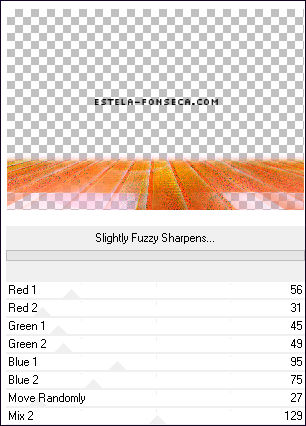
27. Effects / Plugins / Unlimited 2.0 / Andrew's Filters 51 / Slightly Fuzzy Sharpens
Ative a Layer RASTER 1
28. Abra o Tube <<Aurika-Image 1>>Copie/Cole Como Nova Layer
29. Adjust / Blur / Gaussian Blur / Radius 42
30. Blend Mode / Screen ... Opacidade /85%Ative a layer RASTER 1
31. Selections / Load/Save selection / Load selection From Disk: Aurika-1
32. Selections / Promote selection to Layer
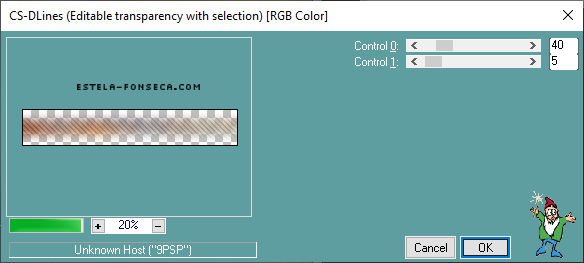
33. Effects / Plugins / Carolaine and Sensibility / CS-DLines (40/5)
34. Effects / Edge Effects / Enhance
35.Layers / Arrange / Bring to TopSelections / Select None
36. Effects / Plugins / Toadies / What are you ? (32/26)
37. Blend Mode / Hard Light
Ative a Layer RASTER 1
38. Selections / Load/Save selection / Load selection From Disk: Aurika-2
39. Selections / Promote selection to Layer
40.Layers / Arrange / Bring to Top
41. Adjust / Blur / Gaussian Blur / Radius 4242. Effects / 3D Effects / Drop Shadow (4/4/48/3 Cor #000000)
43. Selections / Modify / Contract / 45 Pixels
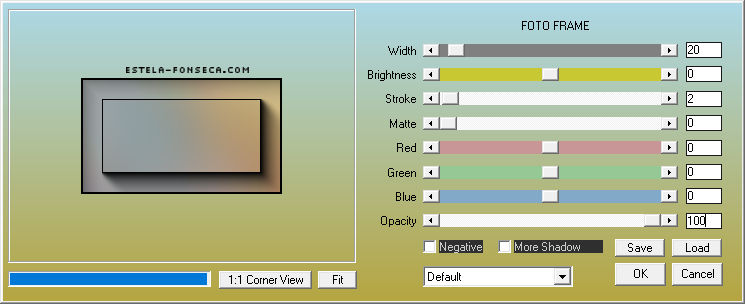
44. Effects / Plugins / AAA Frame / Foto Frame
Effects / 3D Effects / Drop Shadow (4/4/48/3 Cor #000000)
Selections / Select None
45. Blend Mode / Overlay
46. Abra o tube <<Renee-TUBES-RYTAS 20>>
47. Image / Resize / 45 %... Resize All Layers ... Desmarcado
48. Copie e Cole como nova layer
49. Ferramenta <<Pick Tool (K)>> Posição X= 562 / Posição Y=17 / Tecla <<M>> para desativar a Pick Tool
50. Layers / Arrange / Move Down
Ative a Layer do TOPOPrimeiro Plano cor (4) #FFFFFF / Segundo Plano cor 2
51. Layers / New Raster Layer
52. Selections / Load/Save selection / Load selection From Disk: Aurika-3
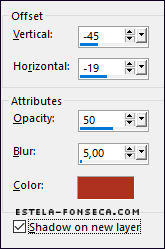
53. Ferramenta <<Flood Fill Tool >> Opacidade 25% / Preencha a seleção com a cor nº454. Effects / 3D Effects / Drop Shadow : -45 / -19 / 50 / 5 / Cor=2 (shadow on a new layer marcado)
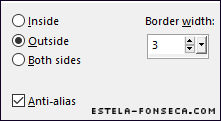
Ative a Layer RASTER 555. Selections / Modify / Select Selection Borders (outside / 3 / Anti Alias ... Marcado)
56. Ferramenta <<Flood Fill Tool >> Opacity 100% / Preencha a seleção com a cor nº 4Selections / Select None
57.Effects / 3D Effects / Drop Shadow :-2/2/50/5 / Cor #000000... desmarque <<shadow on new layer>>
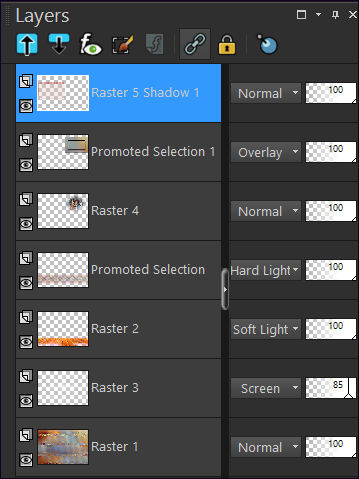
Ative a layer da Sombra (Raster 5 Shadow 1)
58. Effects / Texture Effects / Blinds (Cor Branca)
Ative a Layer do TOPO
59. Layers / Merge / Merge Down
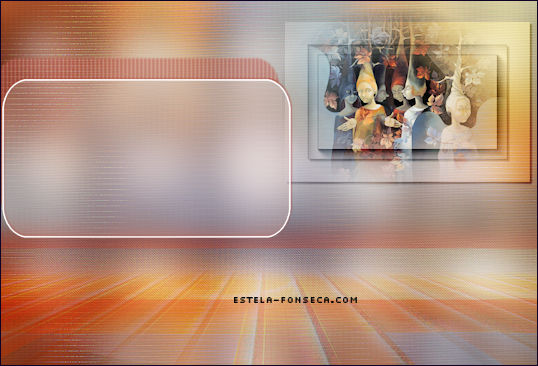
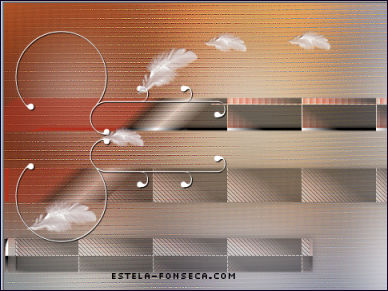
Resultado até agora...
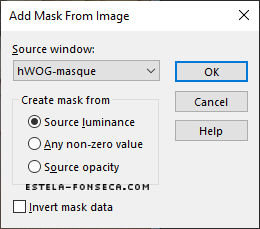
Abra a Mask <<hWOG-masque.jpg>> no PSP
60. Layers / New Mask Layer / From Image:Mask: hWOG-masque.jpg’
Layers / Merge / Merge Group
61. Selections / Load/Save selection / Load selection From Disk: Aurika-4
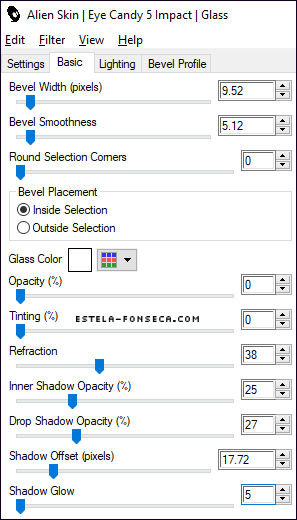
62. Effects / Plugins / Alien Skin EyeCandy 5 / Impact / Glass / Cor 4
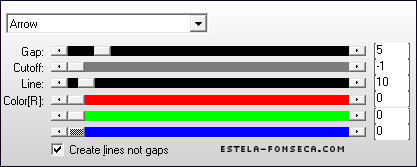
63. Effects / Plugins / AP [Lines] / Lines – Silverlining
Selections / Select None
64. Effects / Plugins / Unlimited 2.0 / °v° Kiwi`s Oelfilter / Setzboard (22 )
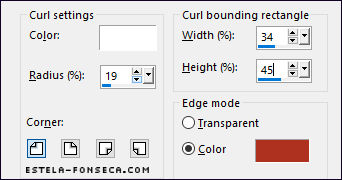
65. Effects / Image Effects / Page Curl Cor (2) #ae3220
66. Abra o tube <<Deco>> Copie e Cole como nova layer
Posicione à esquerda e no topo como segue:
67. Abra o tube <<Renee-TUBES-RYTAS 10>>
68. Image / Resize / 89%... Resize All Layers ... Desmarcado
69. Copie e Cole como nova layerFerramenta <<Pick Tool (K)>> Posição X= -3 / Posição Y=203 / Tecla <<M>> para desativar a Pick Tool
70. Layers / New Raster Layer
71. Selections / Load/Save selection / Load selection From Disk: Aurika-5
72. Ferramenta <<Flood Fill Tool >> Preencha com a cor do segundo plano ( cor 2)2 Cliques
73. Effects / Plugins / Alien Skin EyeCandy 5 / Impact / Glass / Preset : Aurika-Glass
Selections / Select None
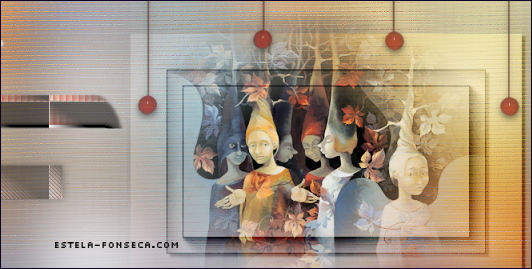
74. Blend Mode / Overlay75. Abra o Tube <<Aurika-Image 2>> Copie e Cole Como nova layer
Ferramenta <<Pick Tool (K)>> Posição X= 437 / Posição Y=282 / Tecla <<M>> para desativar a Pick Tool
76. Abra o Tube <<deco-2>> Copie e Cole como nova layer
Posicione no topo à direita , como segue:
Opacidade / 61%
77. Escolha um tube para decorar ( você tem uma pasta com tubes para escolher ) Renée usou <<Renee-TUBES-RYTAS 15>>Image / Resize/ 65%... Resize All Layers ... Desmarcado
Copie e Cole como nova layerPosicione no canto inferior à direita
78. Aplique uma sombra de sua escolha
79. Decore com Pássaros (opcional)
Está tudo no Lugar certo?80. Image / Add Borders / Symmetric Marcado / 1 Pixel Cor (2) #ae3220
Image / Add Borders / Symmetric Marcado / 20 Pixels Cor(4) #ffffff
Image / Add Borders / Symmetric Marcado / 2 Pixels Cor (3) #b3af6b
Image / Add Borders / Symmetric Marcado / 40 Pixels Cor (4) #ffffff
81. Copie e Cole como nova layer a Marca D'água de Renée
82. Layers / Merge / Merge All (Flatten)
83. Image / Resize / 90%... ResizeAll Layers ... Marcado
Se você quiser escrever o título, a fonte usada está anexada no arquivo
Salve como arquivo JPG.FIM
Versão 2:
©Tutorial traduzido por Estela Fonseca em 15/05/2022.
Não alterar nem repassar sem autorização.
