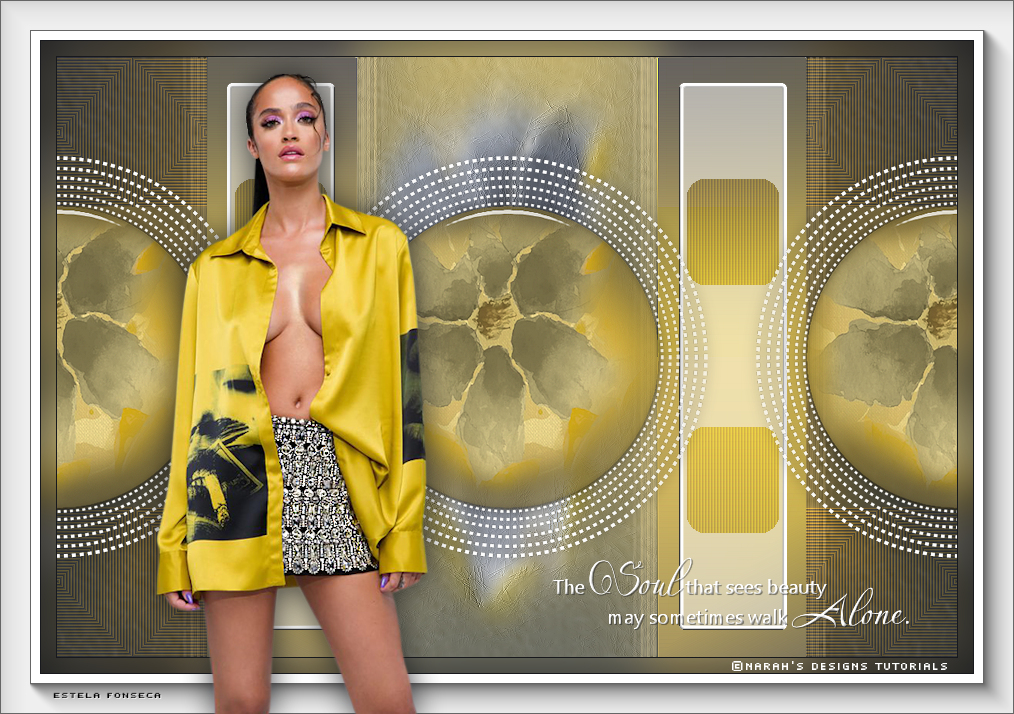
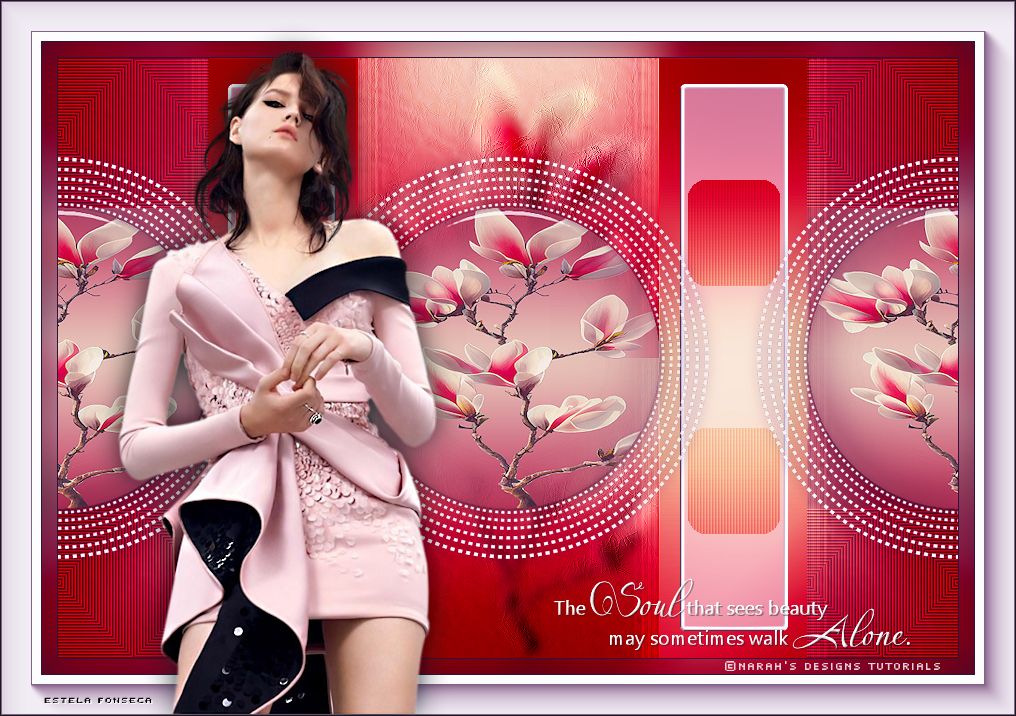
ALONE
Tutorial de ©Narah - Original Aqui
Tutorial realizado na versão PSP 2019.
Materiais Necessários:
Tube 3934 - woman - LB TUBESAlone_AlphaChannel_Narah.pspimage
Narah_Misted_Alone.pspimage
Narah_Deco1_Alone.pspimage
Narah_Deco2_Alone.pspimage
Narah_WordArt_Alone.pspimage
Alone_ColorPalette.jpg
Watermark Narah's Designs Tutorials.pspimage
PLUGINS:Medhi / Sorting Tiles
Simple / Blintz
Alien Skin / Eye Candy 5: Nature / Ripples
Alien Skin / Eye Candy 5: Impact / Glass
AAA Frames / Foto Frame
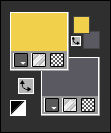
Estas são as cores utilizadas neste tutorial:
1. Abra <<Alone_AlphaChannel_Narah.pspimage>> Duplique e feche a originalTrabalharemos na cópia!
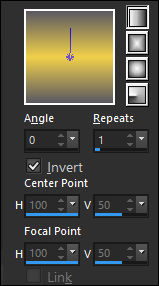
2. Primeiro Plano cor (1) #f1d04b / Segundo Plano cor (2) #5a5961
Forme um gradiente Linear ( Angle 0 / Repeats 1) Invert Marcado
Preencha com o Gradiente.
3. Adjust / Blur / Gaussian Blur / Radius: 50
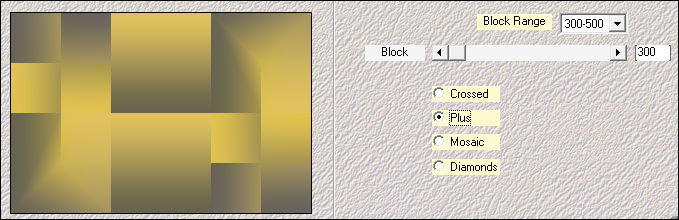
4. Effects / Plugins /Medhi / Sorting Tiles: Block Range: 300-500 / Block 300 / Plus
Adjust / Sharpness / Sharpen
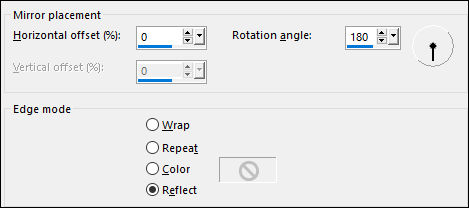
Effects / Reflection Effects / Rotating Mirror: 0 / 180 / Reflect
5. Layers / Duplicate
Adjust / Blur / Gaussian Blur/ Radius: 50
Blend Mode / Multiply.
6.Ative a layer << Raster 1 >> (Layer do Fundo).
Selections / Load/Save Selection / Load Selection From Alpha Channel: Alone_Sel 1_Narah
Selections / Promote Selection to Layer
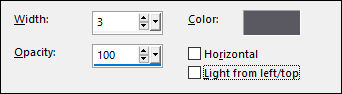
7. Effects / Texture Effects / Blinds:( 3 / 100 / Cor 2)
8. Effects / Plugins / Simple / Blintz.
Selections / Select None.Objects / Align / Top
(Se não tens esta opção mova a layer para a borda superior esquerda)
Adjust / Sharpness / Sharpen
9. Layers / Duplicate.Image / Mirror / Mirror Vertical.
Layers / Merge / Merge Down.
Layers / Duplicate.
Layers / Mirror / Mirror Horizontal.
Layers / Merge / Merge Down.
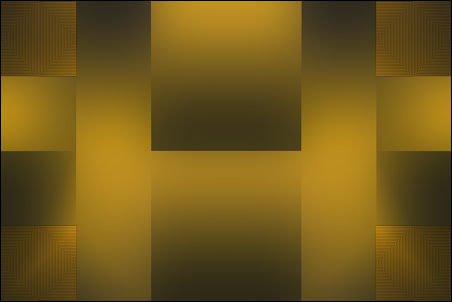
Layers / Arrange / Move up.
Blend Mode / Overlay.
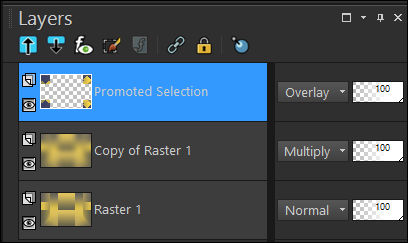
Agora as layers estão assim:
Resultado:
10. Ative a Layer << Raster 1>> (Fundo)Selections / Load/Save Selection / Load Selection From Alpha Channel: Alone_Sel 2_Narah.
Selections / Promote Selection to Layer
Layers / Arrange / Bring to Top
11. Effects / Plugins / Alien Skin Eye Candy 5 / Nature / Ripples:
Em Settings, selecione a opção: Expanding From Selection, Small.Adjust / Sharpness / Sharpen
Selections / Select None
*Nota: Se a layer ficar muito clara, você pode mudar o Blend Mode. na versão livre Narah mudou oBlend Mode para Overlay.
12. Ative a Layer << Copy of Raster 1>>
Selections / Load/Save Selection / Load Selection From Alpha Channel: Alone_Sel 3_Narah.
Selections / Promote Selection to Layer
**Nota: Recordem se a layer ficar muito clara, mudem o Blend Mode.
Ative e Copie o tube <<Narah_Misted_Alone.pspimage>>Cole na seleção
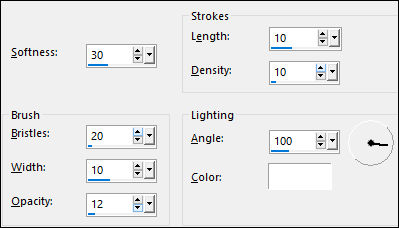
13. Effects / Art Media Effects / Brush Strokes:30 / 20 / 10 / 12 / 10 / 10 / 100 / cor 4 (branco)
Selections / Select None.
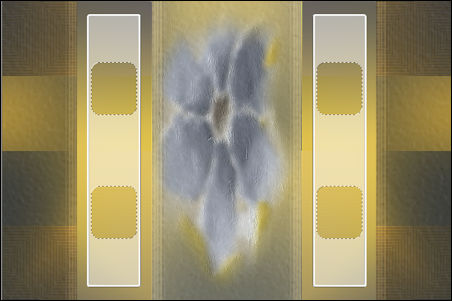
Resultado:
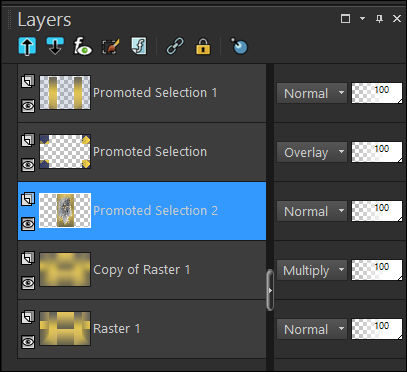
14. Ative a Layer do Topo << Promoted Selection 1>>.
Ative e copie <<Narah_Deco1_Alone.pspimage>> Cole como nova layerAtive a Varinha Mágica (Magic Wand), selecione as 4 partes doloridas do Deco 1.
15. Ative a Layer << Promoted Selection 1>>Selections / Promote Selection to Layer.
Effects / Texture Effects / Blinds: Mesmos valores usados no ponto 7.Blend Mode /Overlay ... Opacidade / 70.
Selections / Select None
16. Ative a Layer << Raster 2 >>
Ative e Copie <<Narah_Deco2_Alone.pspimage>> Cole como nova layer.
Selections / Load/Save Selection / Load Selection From Alpha Channel: Alone_Sel4_Narah.
Layer / New Raster Layer
Preencha com o Gradiente ( o mesmo do ponto 2)Adjust / Blur / Gaussian Blur / Radius: 30
Ative e Copie <<Narah_Misted_Alone.pspimage>> Cole na seleção.
**Mantenha a seleção Ativada**
Layers / Arrange / Move Down
Ative a Layer <<Raster 3 >>
Layers / Merge / Merge Down
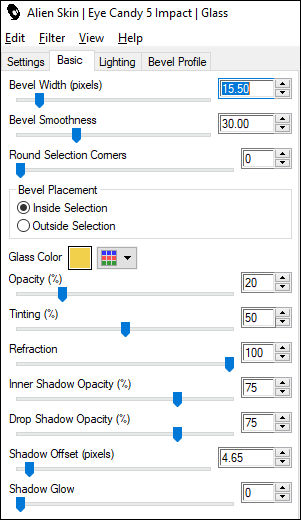
17. Effects / Plugins / Alien Skin Eye Candy 5 / Impact / Glass:
Em Settings, selecione Factory Default e em Basic mudem a cor de Glass Color para a cor 1 de seu trabalho:
Selections / Select None
Image / Resize / 80% ... Resize All Layers ... DesmarcadoAdjust / Sharpness / Sharpen
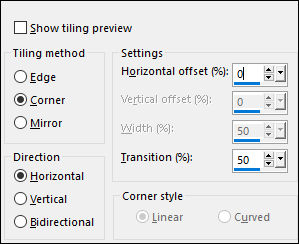
18. Effects / Image Effects / Seamless Tiling:Corner / Horizontal / Horizontal Offset 0 / Transition 50
Effects / 3D Effects / Drop Shadow: 0 / 0 / 80 / 20 / Cor 3
19. Image / Add Borders / Symmetric Marcado / 1 Pixel cor 3
Selections / Select All
CopieImage / Add Borders / Symmetric Marcado / 15 Pixels cor 1
Selections / InvertCole na seleção!!!
Adjust / Blur / Gaussian Blur / Radius 20
Selections / Select None
Image / Add Borders / Symmetric Marcado / 1 Pixel cor 3
Selections / Select All
Image / Add Borders / Symmetric Marcado / 40 Pixels cor 4 (branco)
Selections / Invert
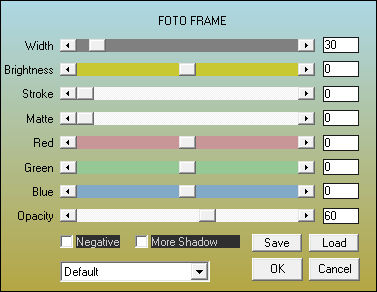
20. Effects / Plugins / AAA Frames / Foto Frame: 30 / 0 / 0 / 0 / 0 / 0 / 0 / 60
Selections / Select None
21. Ative e Copie o tube <<3934 - woman - LB TUBES.pspimage>> Cole como nova layer.
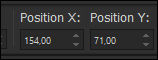
Pick Tool (K) Position X 154.00 / Position Y 71.00Para sair da Pick Tool: Tecla M.
22. Effects / 3D Effects / Drop Shadow: 0 / 0 / 80 / 45 / Cor 3
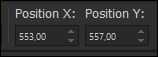
23. Ative e Copie <<WordArt Narah_WordArt_Alone.pspimage>> Cole como nova layerPick Tool (K): Position X 553.00 / Position Y 577.00
Effects / 3D Effects / Drop Shadow: 1 / 1 / 50 / 1 / Cor 3 ou Cor Preta
24. Image / Add Borders / Symmetric Marcado / 1 Pixel cor 3
*Se desejar redimensione para 1000 Pixels de Largura (width).
25. Assine, Coloque a Marca d'água de Narah's Designs Tutorials e exporte como jpg.
Versão 2: Tube de LB Tubes - Floral (Próprio):
©Tutorial criado por Narah e Traduzido por Estela Fonseca em 01/08/2023.
Não alterar nem repassar sem autorização.