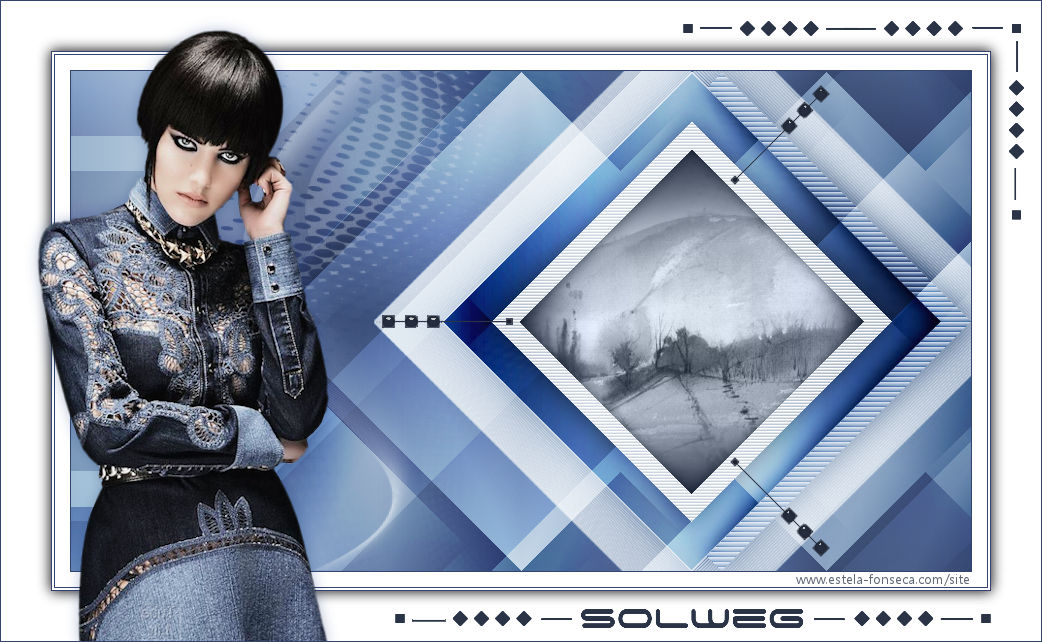
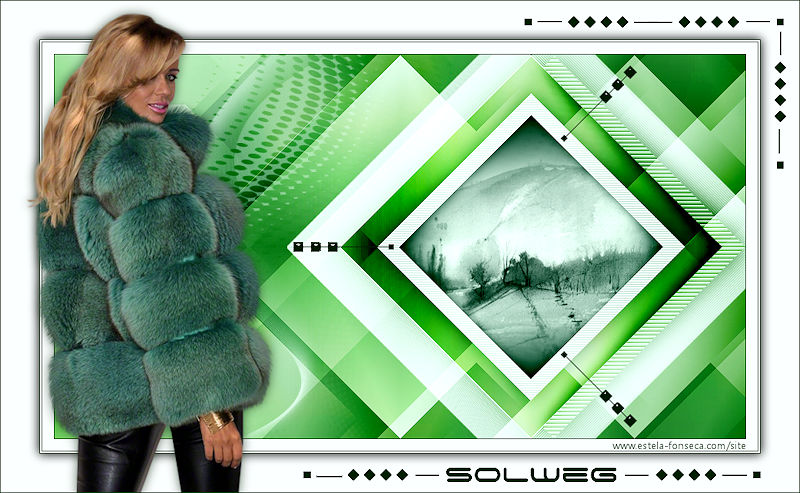
SOLWEG
Tutorial de ©Monaliza, original, AQUI.
Tutorial traduzido no PSP X9, mas pode ser feito com outras versões.
Material Necessário:
Tube de Lyly
Mask de Narah
Plugins Utilizados:
<I.C.NET Software> / Filters Unlimited 2.0 / Tile & Mirror
Mehdi / Sorting Tiles
Simple / Blintz*
<I.C.NET Software> / Filters Unlimited 2.0 / &Bkg Kaleidoscope> / 4QFlip UpperLAlien Skin Eye Candy 5 Impact / Perspective Shadow , Backlight & Glass
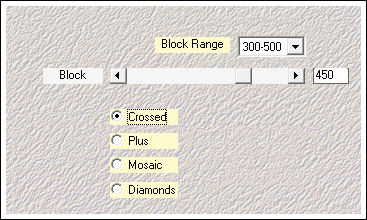
Filter Factory Q / Mosaïc
* Importados para o Unlimited 2.0
Preparação:Abra os tubes no PSP, duplique e feche os originais.
Copie as seleções para a pasta de seleções do PSP
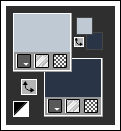
Primeiro Plano Cor #d5e0ea
Segundo Plano Cor #2b3447
Gradiente estilo <<Rectangular>> Configurado como segue:
01- Abra uma nova imagem transparente de 900/500 pixels
Preencha com o Gradiente
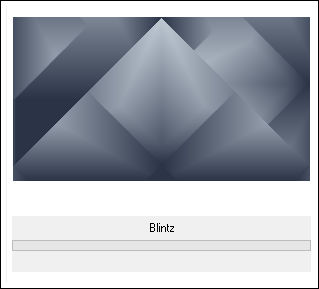
02- Effects / Plugins / Mehdi / Sorting Tiles
Effects / Plugins / Simple / Blintz
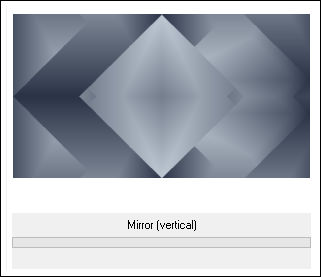
03- Effects / Plugins / <I.C.NET Software> / Filters Unlimited 2.0 / Tile & Mirror / Mirror Vertical
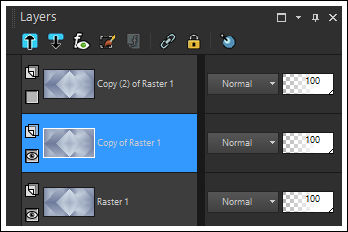
Layers / Duplicate ( 2 vezes)
Oculte a Layer do Topo e ative a Layer do Meio <<Copy of Raster 1>>
04- Effects / Image Effects / Seamless Tilling
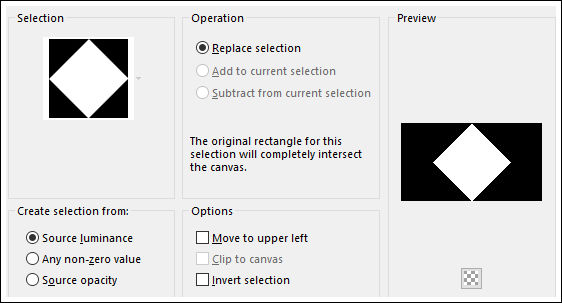
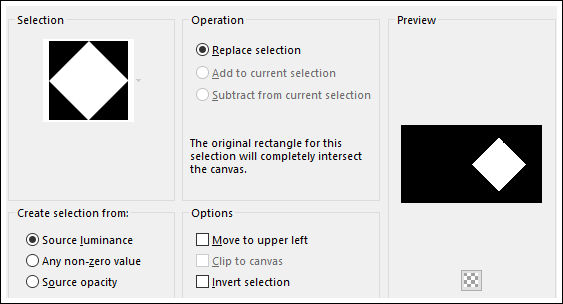
05- Selections / Load/Save Selection /Load Selection From Disk: mz_sel_solweg
Selections / Promote Selection to Layer
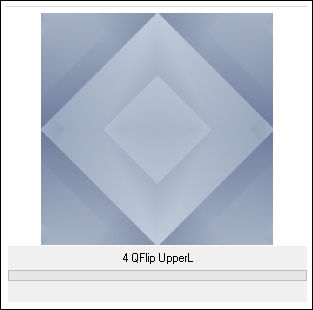
06- Effects / Plugins / <I.C.NET Software> Filters Unlimited 2.0 / &Bkg Kaleidoscope> / 4QFlip UpperL
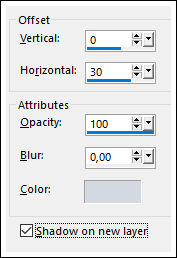
07- Effects / 3D Effects / Drop Shadow: Cor do Primeiro Plano
Selections / Select None
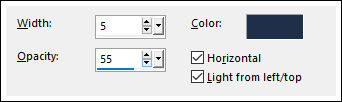
Effects / Texture Effects / Blinds / Cor do Segundo Plano
08- Effects / Plugins / Alien Skin Eye Candy 5 / Impact / Perspective Shadow /Preset 02_shadow
Ative a Layer << Promotes Selection>>09- Effects / Plugins / Alien Skin Eye Candy 5 / Impact / Perspective Shadow / Preset 02_shadow
Blend Mode / BurnOpacidade / 85%
10- Ative a Layer <<Raster 1>>
Layers / Arrange / Bring to Top
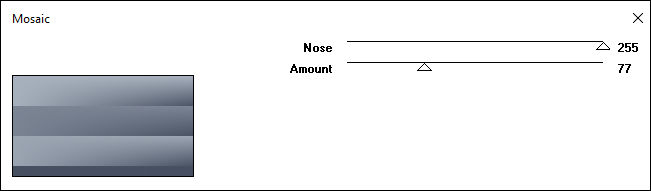
11- Effects / Plugins / Filter Factory Q / Mosaïc
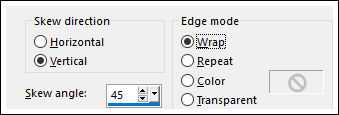
Effects / Geometric Effects / Skew
Blend Mode / Overlay ( ou outro)
12- Ative a Layer do Fundo <<Copy of Raster 1>>
Layers / New Raster Layer
13- Selections / Load/Save Selection / Load Selection From Disk: mz_sel_solweg
Effects / Plugins / Alien Skin Eye Candy 5 Impact / Backlight / Preset <<mz_solweg>>
Blend Mode / ScreenMantenha a Seleção
14- Desfaça o Gradiente e coloque no Primeiro Plano a cor branca #ffffff
Ative a Layer do TopoSelections / Modify / Contract / 35 px
15- Layers / New Raster Layer
Preencha com a cor do Primeiro Plano #ffffffSelections / Modify / Contract / 20 px
Mantenha a Seleção!!Primeiro Plano cor #d5e0ea
16- Gradiente estilo <<Rectangular>> configurado como antes:
Preencha a Seleção com o GradienteLayers / New Raster Layer
17- Ative o tube <<nicole-mist-abstrait2-2014>> Copie e Cole na seleçãoBlend Mode / Luminance (Legacy)
Selections / Invert
Effects / 3D Effects / Drop Shadow :
Selections / Select None
Layers / Merge / Merge Down
18- Effects / Plugins / Alien Skin Eye Candy 5 / Impact / Perspective Shadow /Preset 02_shadow
19- Ative a Varinha Mágica (Tolerance e Feather =0)Selecione a Borda branca
Effects / Texture Effects / Blinds / Cor do Segundo Plano
Selections / Select None
20- Ative a Layer do Fundo <<Copy of Raster 1 >>
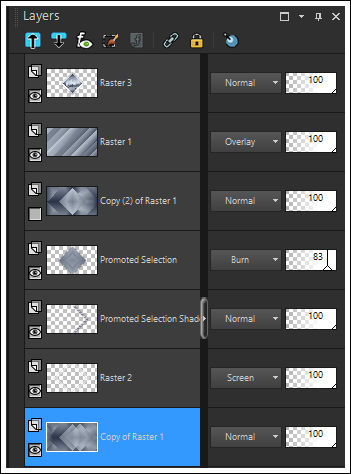
Neste ponto sua paleta das layers está assim:
Layers / Merge / Merge Visible
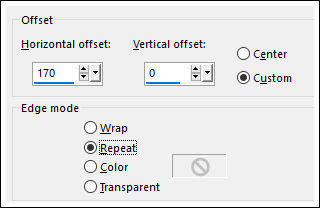
Effects / Image Effects / Offset
Ative a Layer do Topo e a torne visivel
21- Blend Mode / Overlay
Selections / Load/Save Selection / Load Selection From Disk: mz_sel_solweg1
Delete no teclado
Selections / Select None
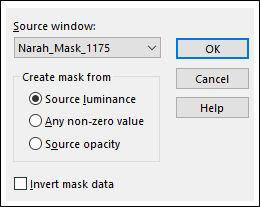
22- Ative a Mask <<Narah_mask_1175>>
Image / Rotate Right
MinimizeLayers / New Raster Layer
Preencha com a cor do Primeiro PlanoLayers / New Mask Layer / From Image: Narah_mask_11754
Layers / DuplicateLayers / Merge / Merge Group
Blend Mode / Screen23- Image / Add Borders / Symmetric Marcado / 1 pixel cor do Segundo Plano
Image / Add Borders / Symmetric Marcado / 15 pixels cor #ffffff
Image / Add Borders / Symmetric Marcado / 1 pixel cor do Segundo PlanoImage / Add Borders / Symmetric Marcado / 2 pixels cor #ffffff
Image / Add Borders / Symmetric Marcado / 1 pixel cor do Segundo PlanoSelections / Select All
24- Image / Add Borders / Symmetric Marcado / 50 pixels cor #ffffff
Effects / 3D Effects / Drop Shadow:
Edit / Repeat Drop Shadow
Selections / Select None25- Layers / New Raster Layer
Selections / Load/Save Selection / Load Selection From Disk : mz_sel_solweg2
Preencha a seleção com a cor do Segundo Plano
Selections / Select None
26- Layers / New Raster Layer
Selections / Load/Save Selection / Load Selection From Disk: mz_sel_solweg3
Preencha a seleção com a cor do Segundo Plano
27- Effects / Plugins / Alien Skin Eye Candy 5 Impact / Glass / Clear, No Drop Shadow
Selections / Select None
28- Ative o tube <<Femme 79 by Lily >> Copie e Cole como nova layerImage / Mirror / Mirror Horizontal
Posicione como preferirAplique uma sombra de sua escolha.
Image / Add Borders / Symmetric Marcado / 1 pixel cor do Segundo Plano
29- Assine seu trabalho
Salve como JPG
Versão com tubes de Nicole (paisagem) e de Svb(personagem):
©Tutorial Traduzido por Estela Fonseca 29/10/2017.
Obrigada Monaliza por me permitir traduzir seu trabalho.