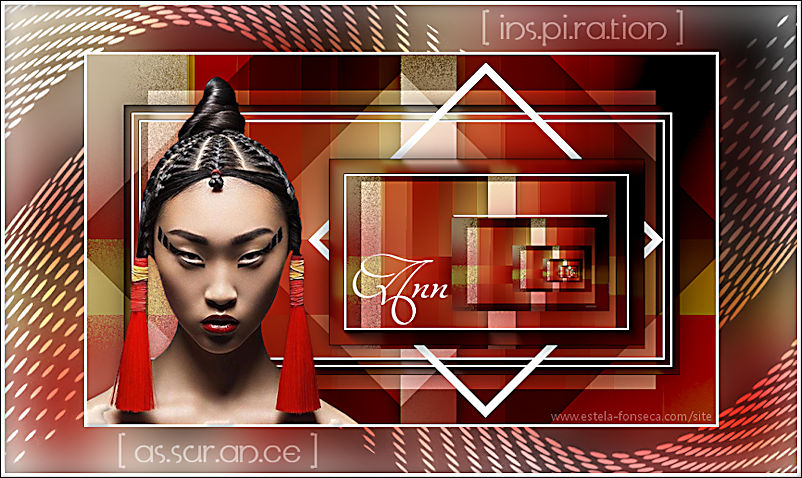
ANN
Tutorial de ©Monaliza, original, AQUI.
Tutorial traduzido no PSP X7, mas pode ser feito com outras versões.
Material Necessário:
O tube usado na tradução é de Karine Dre@ms. Mask de Narah.
(O tube principal não foi fornecido no material)
Plugins Utilizados:
Mehdi / Wavy Lab 1.1VanDerLee / UnPlugged-X / Rotocube
Visual Manipulation / X-Mirror
Toadies / What are you ?
Unlimited 2
BKG Designers sf10 I / Corner Half Wrap
Visual manipulation / Y-Mirror
VM Natural / Speed
Eye Candy 5: Impact / Perspective Shadow
Mock / Windo
AAA Frame / Foto Frame
Eye Candy 5: Impact / Glass
VanDerLee / UnPlugged-X / 45° rectangle
Preparação:
Abra o tube no PSP, duplique e feche o original.
Abra a Mask no PSP e Minimize.
Clique duas vezes no preset do Alien Skin
Copie as seleções para a pasta de seleções do PSP.
Cores usadas:
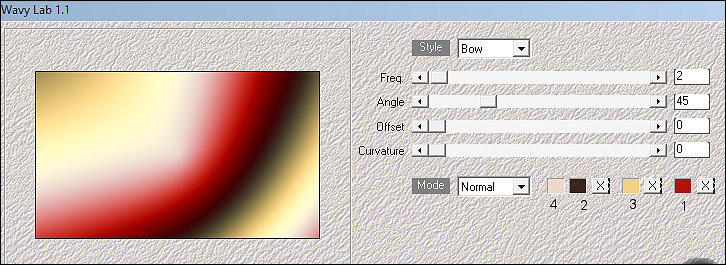
01. Primeiro Plano cor escura ( Cor 2) e Segundo Plano cor Clara (Cor 4)Abra uma nova imagem transparente de 850 /500 Pixels
Effects / Plugins / Mehdi / Wavy Lab 1.1
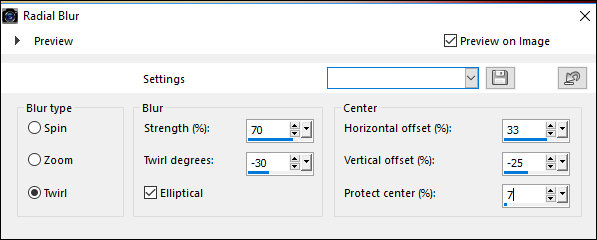
Adjust / Blur / Radial Blur
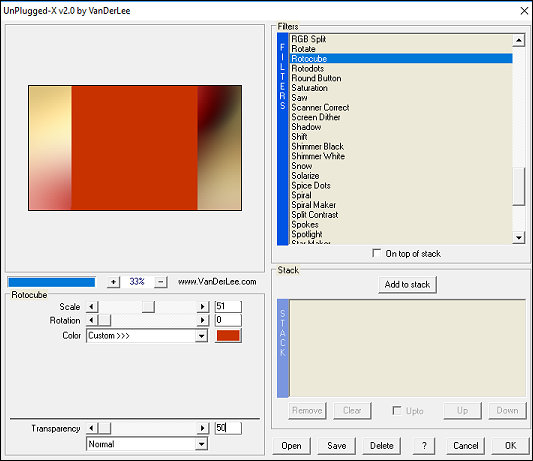
02. Effects / Plugins / VanDerLee / UnPlugged-X / Rotocube
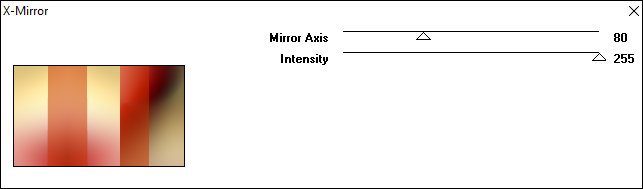
Effects / Plugins / Visual Manipulation / X-Mirror
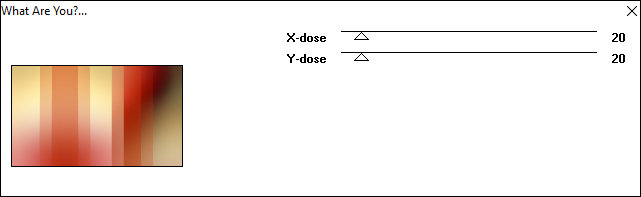
Effects / Plugins / Toadies / What are you?
Adjust / Sharpness / Sharpen More
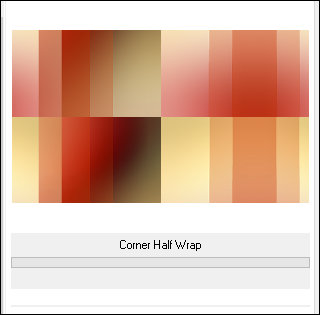
03. Layers / DuplicateEffects / Plugins / Unlimited 2 / BKG Designers sf10 I / Corner Half Wrap
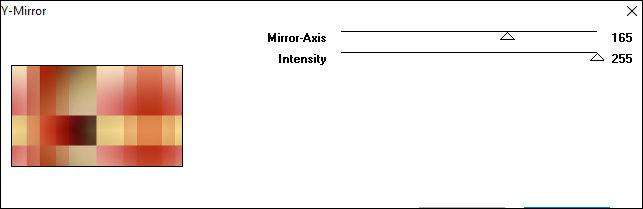
Effects / Plugins / Visual Manipulation / Y-Mirror
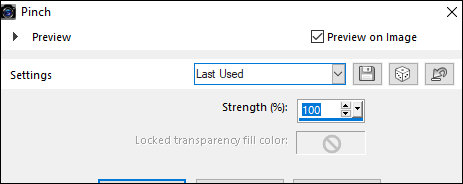
Blend Mode / MultiplyEffects / Distortion Effects / Pinch
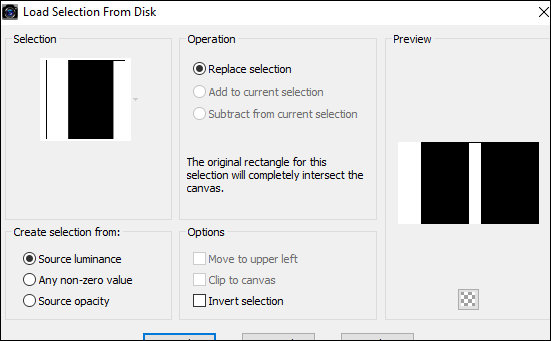
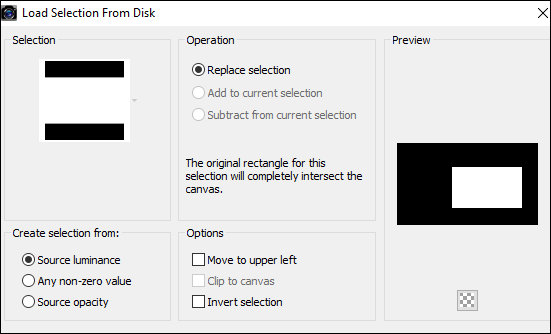
04. Selections / Load save selection / Load selection from disk: Selection <<mz-sel-ann>>
Selections / Promote selection to layer
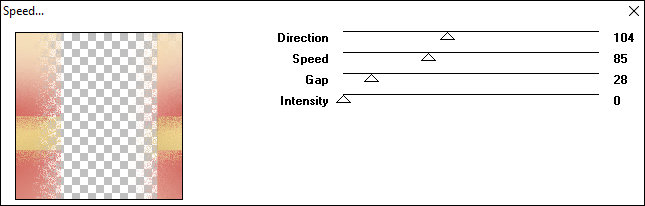
Effects / Plugins / VM Natural / Speed / Default
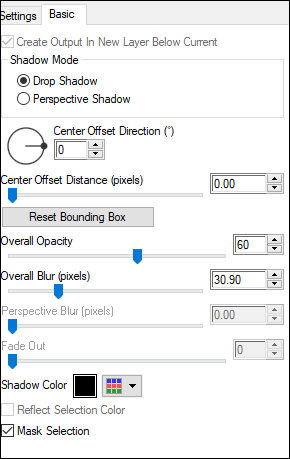
Selections / Select NoneEffects / Plugins / Alien Skin Eye Candy 5 / Impact / Perspective Shadow/ Preset: 02-Shadow
Em Basic: confirme a configuração
05. Layers / Merge / Merge All (flatten)
Effects / Plugins / Mock / Windo
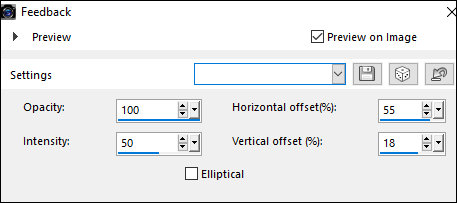
Effects / Reflections Effects / Feedback
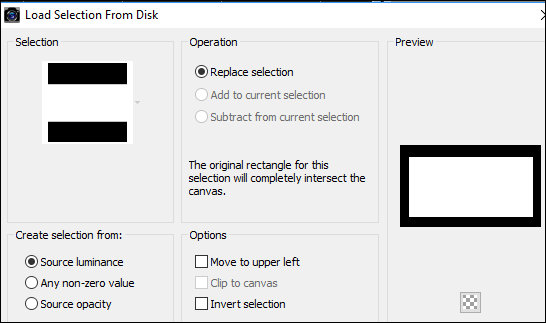
06. Selections / Load save selection / Load selection from disk: <<mz-sel-ann1>>
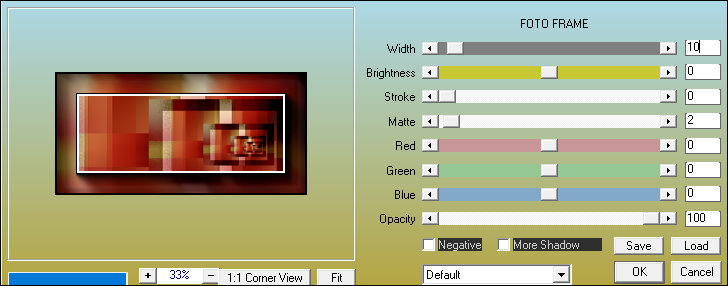
Selections / Promote selection to layerEffects / Plugins / AAA Frame / Foto Frame
Selections / Select NoneEffects / Plugins / Alien Skin Eye Candy 5 / Impact / Perspective Shadow (mesma configuração anterior)
07. Ative a layer BackgroundSelections / Load save selection / Load selection from disk: <<mz-sel-ann2>>
Effects / Plugins / AAA Frames / Foto Frame ( mesma configuração anterior (etapa 6)Effects / Plugins / Alien Skin Eye Candy 5 / Impact / Perspective Shadow / Preset: 02-shadow
(igual a etapa 4)
Effects / Plugins / AAA Frame / Foto Frame
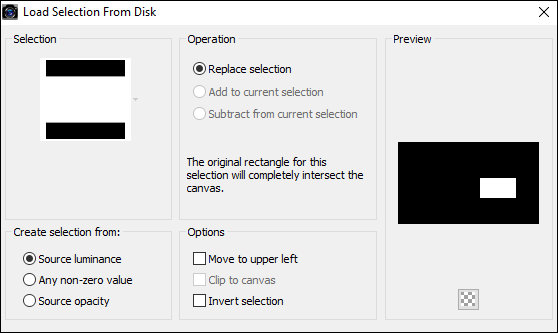
Selections / Select None08. Selections / Load save selection / Load selection from disk: <<mz-sel-ann3>>
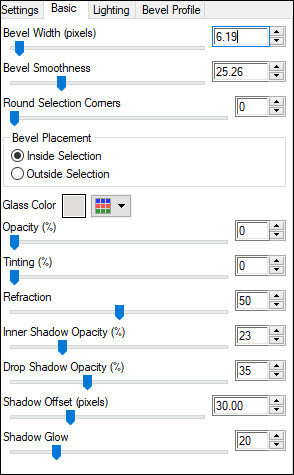
Ative a layer superior (promoted selection)Effects / Plugins / Alien Skin Eye Candy 5 / Impact / Glass / Preset: <<mz-glass-ann>>
Em Basic: confirme a configuração
Selections /Select None
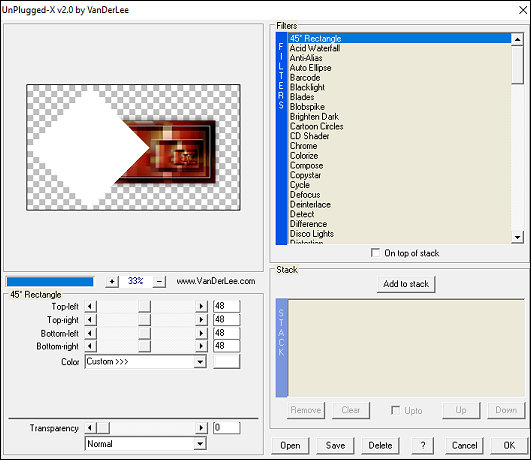
09. Layers / New Raster LayerEffects / Plugins / VanDerLee / UnPlugged-X / 45° Rectangle
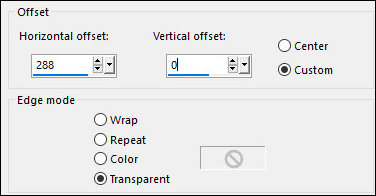
Effects / image Effects / Offset (288/0)
10. Selecione o losango branco com a Magic Wand(Tolerance e Feather:0)
Selections / Modify / Contract: 10
Edit/Cut (a imagem ficará na memória)Selections / Select None
Layers / Arrange / Move Down
Cole como nova layer (a imagem está na memória)
Blend Mode / Soft Light
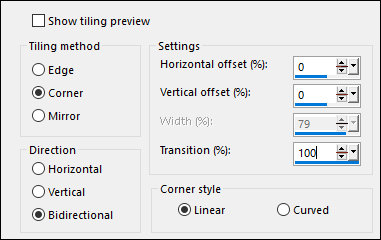
Effects Image Effects / Seamless tiling
Effects / Plugins / Alien Skin Eye Candy 5 / Impact / Perspective shadow / Preset 02-shadow (igual etapa 4)
11. Copie o tube personagemAtive a layer superior
Cole como nova layer
Posicione à esquerda
Aplique um Drop shadow de sua preferência
Image / Add Borders / Symmetric marcado / 3px / branco
Selecione esta borda com a Magic Wand
Effects / 3D Effects / Inner Bevel
Selections /Select None
12. Layers / DuplicateImage / Resize / 80% ... Resize All layers ... Desmarcado
Effects / Plugins / Alien Skin Eye Candy 5 / Impact / Perspective shadow / Preset 02-shadow (igual etapa 4)
Ative a layer background
Adjust / Blur / Gaussian Blur / Radius:30
Abra a mask <<Narah-mask-0183>> na área de trabalho do PSPImage / Mirror / Mirror Vertical (Minimize)
Volte à sua imagem de trabalho
Layers / New Raster Layer
Preencha com a cor #ffffff
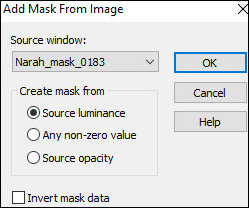
Layers / New mask layer / Fom Image / Mask<<Narah-mask-0183>>
Layers / Merge / Merge Group
13. Effects / Distortion Effects / Wave
Effects / Plugins / Alien Skin Eye Candy 5 / Impact / Perspective shadow / Preset 02-shadow (igual etapa 4)Blend Mode / Overlay
Layers / Duplicate
Image / Mirror / Mirror Horizontal
Image / Mirror / Mirror Vertical
Selections / Select All
Image / Add borders / Symmetric Marcado / 4px / cor #ffffff
Selections / Invert
Effects / 3D Effects / Inner Bevel - configuração igual etapa 11
Effects / 3D Effects / Drop Shadow: 0/0/60/20 / #000000
Selections /Select None
14. Copie o elemento <<ann-titre>> / Cole como nova layer
Posicione como preferir
Copie o elemento <<ann-texte>> / Cole como nova layer
Blend Mode / Soft Light
Assine seu trabalho
Layers / Merge / Merge All (flatten)
Redimensione (opcional)
Salve como JPG
Versão com tube de Ann:
©Tutorial Traduzido por Vera Mendes em: 26/01/2019.
Obrigada Monaliza por me permitir traduzir seu trabalho.