HARLOW
Tutorial de Marja , original, Aqui.

Marja criou este trabalho no PSP X2 e traduzi no PSP 2022 ULTIMATE.
Se você estiver usando uma versão diferente do PSP, as configurações e os efeitos dos plugins podem
produzir um resultado diferente. Nesse caso, experimente as configurações até obter o resultado desejado.
Materiais Necessários:
Tube de ReneeGraphisme
Masks de Narah
Outros materiais criados por Marja (mpd© é adicionado por Marja)
Plugins:
Filters Unlimited 2.0
Filter Factory Gallery M / Center Square Tiler*
&Bkg Designers sf10 I / Cruncher
Graphic Plus / Cross Shadow
Tramages / Tow The Line*
*Importado para o Unlimited 2.0
Preparação:
Coloque as seleções na pasta de seleções do Psp.
Abra os tubes duplique e feche os originais. Trabalhe com as cópias.
Remova a marca d'água das cópias antes de usá-las.
Abra as máscaras no psp e minimize-as.
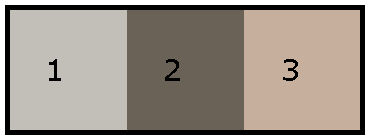
Primeiro Plano cor 1 / Plano de Fundo cor 2
1. Abra uma nova imagem transparente de 800x500 pixelsPreencha com a cor do plano de fundo (cor 2)
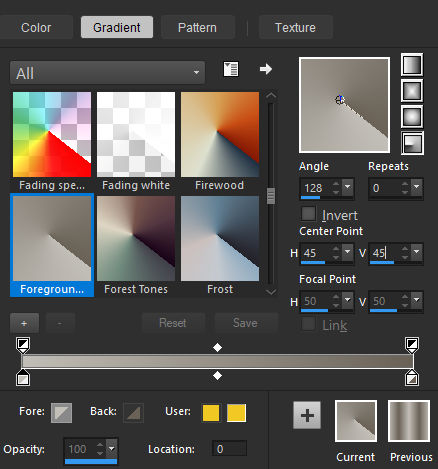
2. Forme no primeiro plano um gradiente Radial configure como segue:
3. Layers / new raster layer
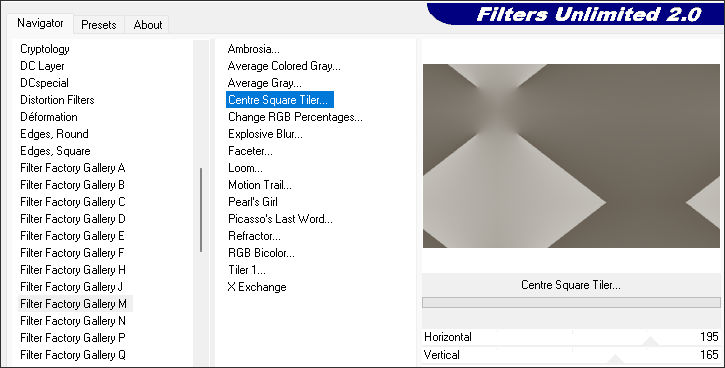
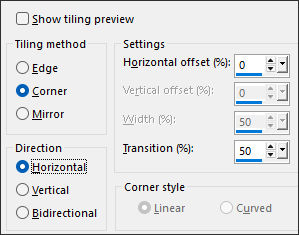
Preencha com o Gradiente.4. Effects / Plugins / <I.C.NET Software> Filters Unlimited 2.0 / Filter Factory Gallery M / Centre Square Tiler
195 / 165
5. Effects / Image Effects / Seamless Tiling
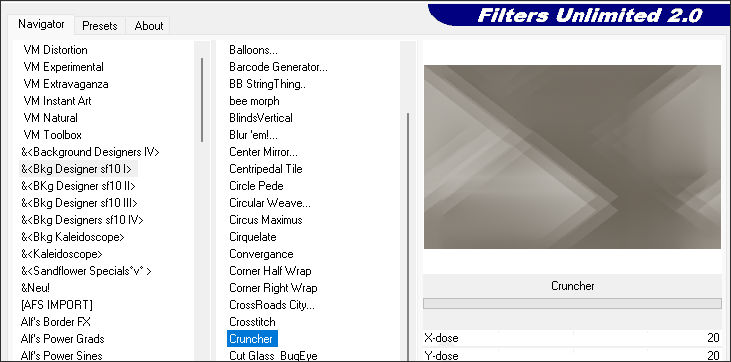
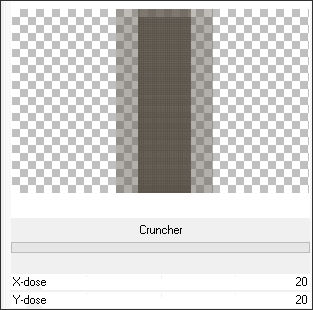
6. Effects / <I.C.NET Software> Filters Unlimited 2.0 / Bkg Designers sf10I / Cruncher / Default (20/20)
Layers / Merge / Merge Visible
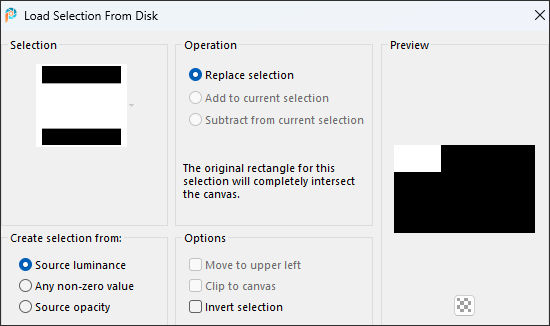
7. Selections / Load-Save Selection / Load Selection from Disk: L679 Sel 1 mpd©designs
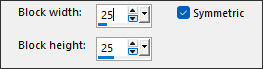
8. Selections / Promote selection to layerEffects / Distortion Effects / Pixelation: 25/25/Symmetric Marcado
9. Effects / Edge Effects / Enhance MoreSelections / Select none
10. Selections / Load-Save Selection / Load Selection from Disk: L679 Sel 2 mpd©designs
11. Ative a Layer do FundoSelections / Promote selection to Layer
12. Effects / Distortion Effects / Pixelate ...mesmos valores de antes
13. Effects / Edge Effects / Enhance MoreSelections / Select none
Ative a layer do Topo
Layers / Merge / Merge Down
14. Coloque no Primeiro Plano a cor BrancaLayers / New Raster Layer
15. Selections / Load-Save Selection / Load Selection from Disk: L679 Sel 3 mpd©designs
16. Preencha a seleção com a cor brancaSelections / Select None
Layers / Duplicate
Image / Mirror / Mirror Horizontal
Image / Mirror / Mirror Vertical
17. Layers / Merge / Merge DownBlend mode / Dodge
Opacidade 50.
18. Selections / Load-Save Selection / Load Selection from Disk: L679 Sel 4 mpd©designs
19. Layers / New Raster LayerPreencha com a cor do Plano de Fundo (cor 2)
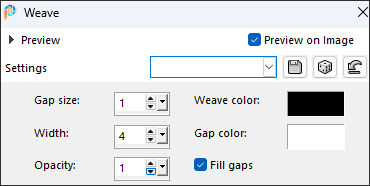
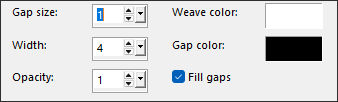
20. Effects / Texture Effects / Weave: Cor #000000 / Cor #ffffff
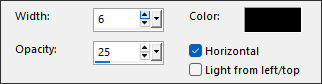
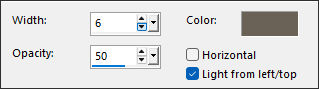
21. Effects / Texture Effects / Blinds: Cor #000000
22. Selections / Select NoneEffects / Plugins / <I.C.NET Software> Filters Unlimited 2.0 / Bkg Designers sf10I / Cruncher /Default
23. Adjust / Sharpness / Sharpen
Effects / Image Effects / Seamless Tiling:
24. Effects / 3D Effects / Drop Shadow: 0 / 0 / 20 / 50,00 / Cor #000000
25. Selections / Load-Save Selection / Load Selection from Disk:L679 Sel 5 mpd©designs
26. Layers / New Raster LayerRemova o Gradiente do Primeiro Plano ... primeiro plano cor 1
Preencha a seleção com a cor 1
27. Effects / Texture Effects / Weave: Weave color=>#ffffff / Space color =>#000000
28. Effects / Texture Effects / Blinds: Gap Color =>cor 2
Selections / Select none
29. Effects / Plugins / <I.C.NET Software> Filters Unlimited 2.0 / Bkg Designers sf10I / Cruncher /Default
30. Adjust / Sharpness / SharpenEffects / 3D Effects / Drop Shadow
V&H at 0
Opacity 20
Blur 50.00 black
31.
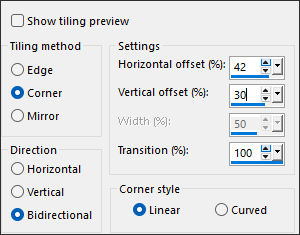
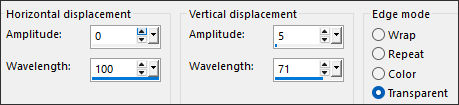
Effects / Distortion Effects / Wave
32.
Selections / Load-Save Selection / Load Selection from Disk:L679 Sel 6 mpd©designs
33. Delete no teclado uma vez.Selections / Select None
34.
Again
Effects / 3D Effects / Drop Shadow
V&H to 0
Opacity 20
Blur 50.00 Black
35.
Selections / Load-Save Selection / Load Selection from Disk and look for
L679 Sel 7 mpd©designs in the dropdown menu
Settings are still correct
36.
Set your foreground to color no. 3
Layers / New Raster Layer
and fill the selection with your foreground
37.
Effects / Plugin / Graphic Plus Cross Shadow, Default
Selections / Modify / Contract by 3
and press the Delete key once
38.
Layers / New Raster Layer
and fill the selection with your background
Set your foreground to color no. 1
39.
Selections / Modify / Contract by 10
and fill the selection with your foreground
40.
Selections / Modify / Contract by 5
and press the Delete key once Press the delete key.
41.
Layers / New Raster Layer
and fill the selection with your background.
42.
Layers / New Raster Layer
and fill the selection with your foreground.
43.
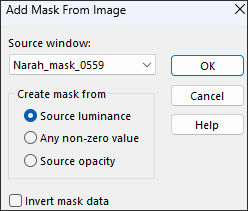
Layers / New Mask Layer / From Image: Narah_mask_0559
44.
Layers / Duplicate
Layers / Merge / Merge Group
Set the blend mode of this layer to Dodge.
45.
Adjust / Sharpness / Sharpen
Select None
Layers / Merge / Merge Down
46.
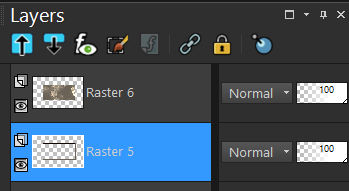
Activate the second layer from the top in your layers palette.
Effects / Edge Effects / Enhance
47. Activate the top layer in your layers palette.
Layers / Merge / Merge Down
Repeat this once more.
48.
Edit / Copy
Edit / Paste as a new image.
49.
Return to your 800 image.
Effects / 3D Effects / Drop Shadow
V&H at 0
Opacity 65
Blur 35.00 Black
49.
Go back to your copy from step 48
Layers / Duplicate
50.
Effects / Plugin / Unlimited 2.0 / Tramages Tow The Line, default
Effects / Geometric Effects / Vertical Perspective
Distortion at 60
Check the box for transparency
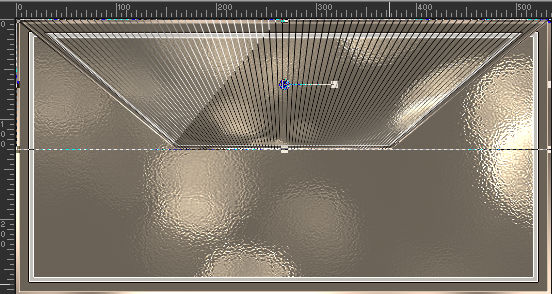
51.
Image / Ruler
Choose the Distortion tool, letter D on your keyboard (in PSP12)
and drag it up from the bottom
52.
Image / Ruler
Layers / Duplicate
Image / Flip
Layers / Merge / Merge Down
53.
Layers / Duplicate
Effects / Distortion Effects / Polar Coordinates
Check Rectangular to Polar
and check Transparent
54.
Set the blend mode to Dodge
and reduce the layer opacity to 50
55. Ative a layer do meioEffects / 3D Effects / Drop Shadow
V&H to 0
Opacity 65
Blur 35.00 Black
56.
Layers / Merge / Merge All Layers
Add image/borders
2 pixels background (color no. 2)
10 pixels white
3 pixels background
57.
Selections / Select All
Add image/borders
15 pixels foreground (color no. 1)
Selections / Invert
58.
Effects / Texture Effects / Blinds
Just click OK, the settings are still correct.
Repeat this again
BUT now just check horizontal
59.
Effects / Edge Effects / Accentuate
Effects / 3D effects / drop shadow
v&h at 0
coverage 65
fading 35.00 black
Select nothing
60.
Image / Resize and enter 150 pixels in width
checkbox for size of all layers.
Edit/Copy and return to your 800 image
Edit/Paste as New Layer
61.
Effects / Image Effects /Offset: horizontal => -150 / vertical => 150 / Custom / Transparent ...Marcados.
62. Adjust / Sharpness / Sharpen
Effects / 3D effects / drop shadow
v&h at 0
coverage 65
fading 35.00 black
63.
Layers / Duplicate
Effects / Image Effects / Shift
horizontal at 0
vertical at minus 125
checkboxes for custom and transparent
64.
Once more
Layers / Duplicate
Effects / Image Effects / Shift
horizontal at 0
vertical at minus 125
checkboxes for custom and transparent
65.
Layers / Merge / Merge Down
Repeat this 1 more time.
66.
Activate L679 deco by mpd©
Edit/Copy and return to your 800 image
Edit/Paste as New Layer
67.
Effects / Image Effects / Shift
horizontal at minus 150
vertical at 20
checkboxes for custom and transparent
68.
Activate L679 deco 1 by mpd©
Edit/Copy and return to your 800 image
Edit/Paste as New Layer
69.
Effects / Image Effects / Shift
horizontal at 0
vertical at 10
checkboxes for custom and transparent
70.
Activate L679 Deco 2 by mpd©
Edit/Copy and return to your 800 image
Edit/Paste as New Layer
71.
Effects / Image Effects / Shift
horizontal at minus 278
vertical at 0
checkboxes for custom and transparent
Set the blend mode of this layer to overlay
72.
Activate Renee-TUBES-September-2025-53
In your layers palette, activate the middle layer
Edit/Copy and return to your 800 image
Edit/Paste as New Layer
73.
Image/Resize by 50%, no checkbox for resize all layers
Once more
Image/Resize but now at 85%, no checkbox for resize all layers
74.
Image/mirror
Effects / Image Effects / Shift
horizontal at 200
vertical at minus 40
checkboxes for custom and transparent
75.
Adjust / Sharpness / Sharpen
Effects / 3D effects / drop shadow
v&h at 0
coverage 65
fading 35.00 black
76.
Layers / Merge / Merge All Layers
Foreground is set to color no. 1
background is set to color no. 2
77.
Image/Add borders;
2 pixel background
10 pixels foreground
2 pixels background
20 pixels foreground
15 pixels background
78.
Selections / select all
Selections / Modify / Shrink by 35
Effects / 3D effects / drop shadow
v&h at 0
coverage 85
fading 25.00 black
Select nothing
79.
Image / Resize and enter 800 pixels in width
checkbox for size of all layers
80.
Activate L679 text by mpd©
Edit/Copy and return to your 800 image
Edit/Paste as New Layer
Place the text where you like it / find it beautiful
Layers / new raster layer
and place your name/watermark here
!! don't forget my tutorial watermark!!
Layers / Merge / Merge All Layers
Save your work as a jpeg fileThis brings you to the end of this lesson.
43. Coloque seu nome ou a sua marca d'água.Não esqueça de colocar a marca d'água de Marja
Layers / Merge / Merge All
Salve como jpg.
©Tutorial traduzido por Estela Fonseca em 07/10/2025.
Não alterar nem repassar sem autorização.