 |
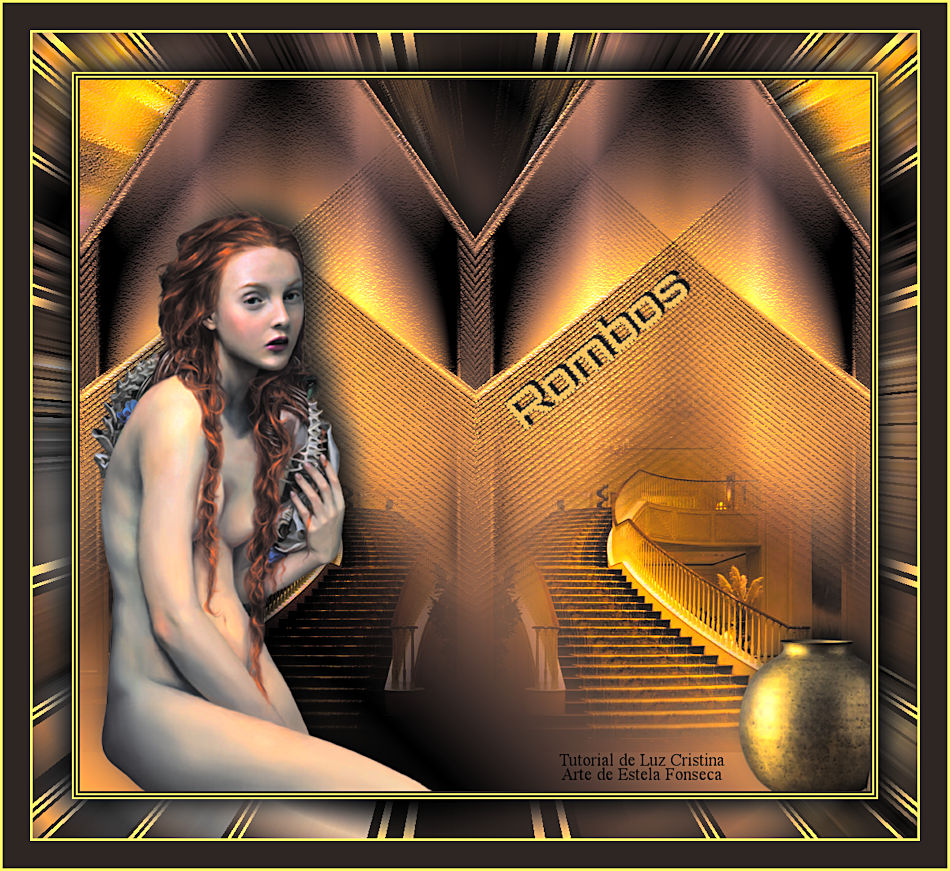
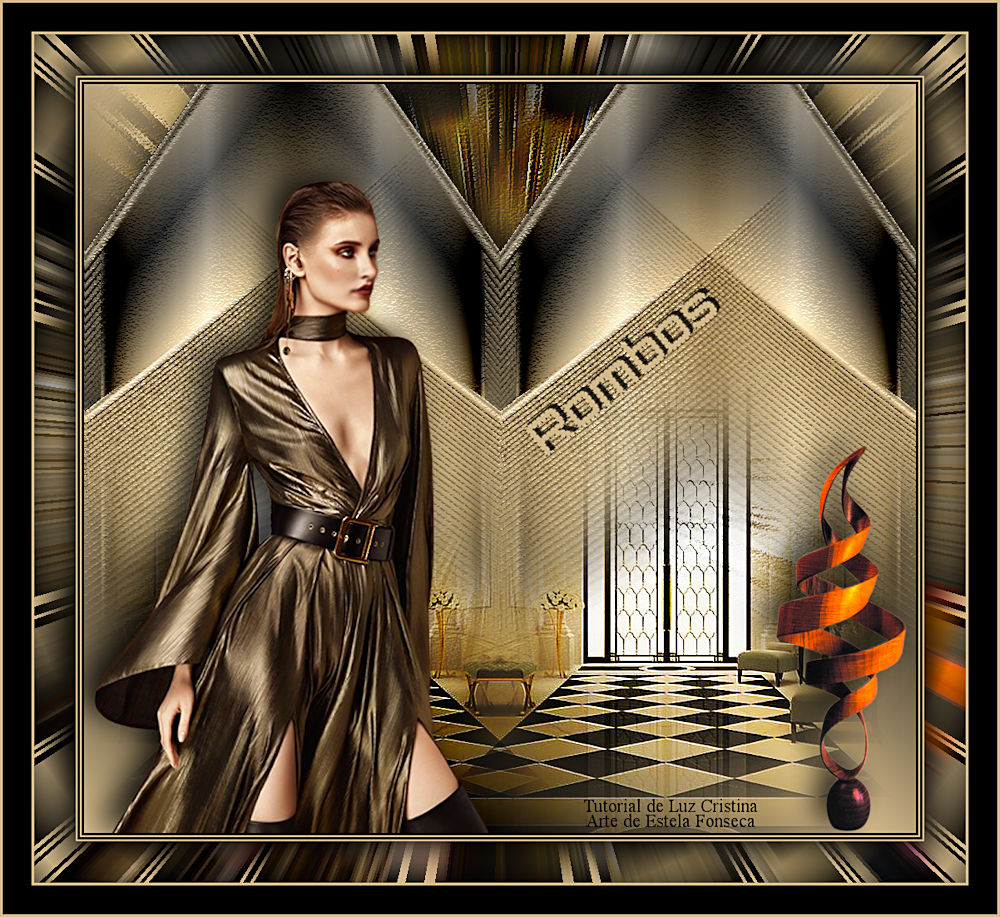
ROMBOSTutorial de ©Luz Cristina - Original AQUI
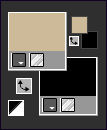
Unlimited 2.0 Muras Copies Artistic Factory gallery "H" FMTT Xero Abra os tubes no PSP, duplique e feche
os originais. 2- Primeiro Plano cor #ccba99 / Segundo Plano cor # 000000
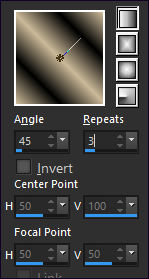
Gradiente <<Linear>> Angle 45 / Repeats 3
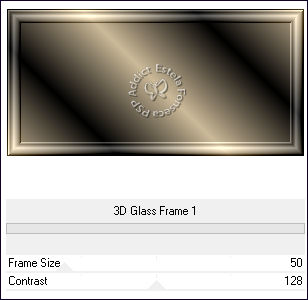
Preencha a layer transparente com o Gradiente 3- Effects / Plugins / <I.C.NET Software> Filters Unlimited 2.0 / Bottom and Frames / 3D Glass Frame 1/ Default
Edit / Cut ou Delete no Teclado Selections / Select None
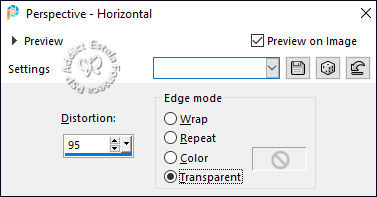
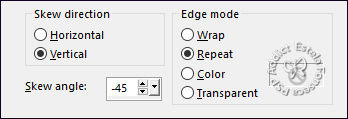
8- Effects / Distortion Effects / Pinch
(100)
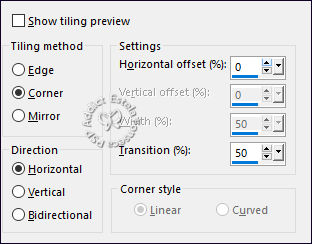
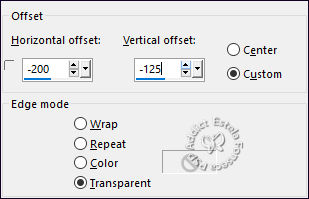
13- Effects / 3D Effects / Drop Shadow: (-) 10 / 15 / 80 / 50 / Cor #000000 14- Layers / New Raster Layer Layers / Arrange / Send to Bottom Preencha com o Gradiente 15- Ative e Copie o tube << misted >> Cole como nova layer 16- Effects / image Effects / Offset
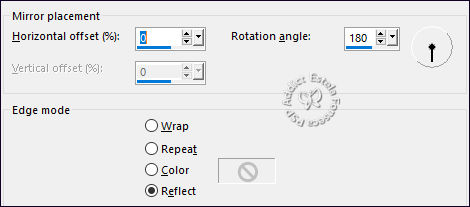
17- Layers / Duplicate Image / Mirror / Mirror Horizontal 18- Layers / Merge / Merge Down Image / Mirror / Mirror Vertical 21- Effects / Plugins / Filter Factory Gallery "H" / Zoom Blur: ( 22 9) 22- Layers / Arrange / Move Down 25- Ative e copie o tube da personagem / Copie e Cole como nova layer Layers / Arrange / Bring to top Posicione à esquerda Effects / 3D Effects / Drop Shadow: (-) 10
/ (-)15 / 80 / 50 / Cor #000000 Posicione à Direita Effects / 3D Effects / Drop Shadow: (-) 10
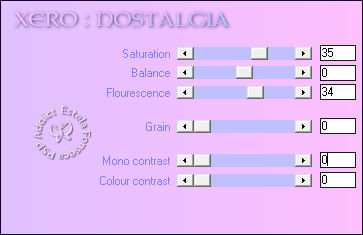
/ (-)15 / 80 / 50 / Cor #000000 Effects / Plugins / Xero / Nostalgia
26- Ative e Copie o <<texto>> Cole Como Nova Layer Posicione O Texto já tem sombra 27- Image / Add Borders / Symmetric Marcado / 3 Pixels cor #000000 Image / Add Borders / Symmetric Marcado / 2 Pixels cor Clara Image / Add Borders / Symmetric Marcado / 3 Pixels cor #000000 Image / Add Borders / Symmetric Marcado / 2 Pixels cor clara Image / Add Borders / Symmetric Marcado / 50 Pixels cor #000000 28- Ative a "Varinha Mágica" Feather e Tolerance = 0 / Selecione a borda externa 29- Effects / Plugins / Filter Factory Gallery "H"
/ Zoom Blur ( 22 9) Effects / 3D Effects / Drop Shadow: 10 / 15 / 100 / 50 Selections / Select None Image / Add Borders / Symmetric Marcado / 3 Pixels cor Clara Image / Add Borders / Symmetric Marcado / 35 Pixels cor #000000 Image / Add Borders / Symmetric Marcado / 3 Pixels cor clara Image / Resize / 79% ... Resize All Layers ... Marcado! Salve como JPG.
FIM
Versão com tubes de Renée (Personagem) e Vaso de Luz Cristina (Misted-EF)
©Tutorial traduzido por Estela Fonseca
em: 04/08/2022. |