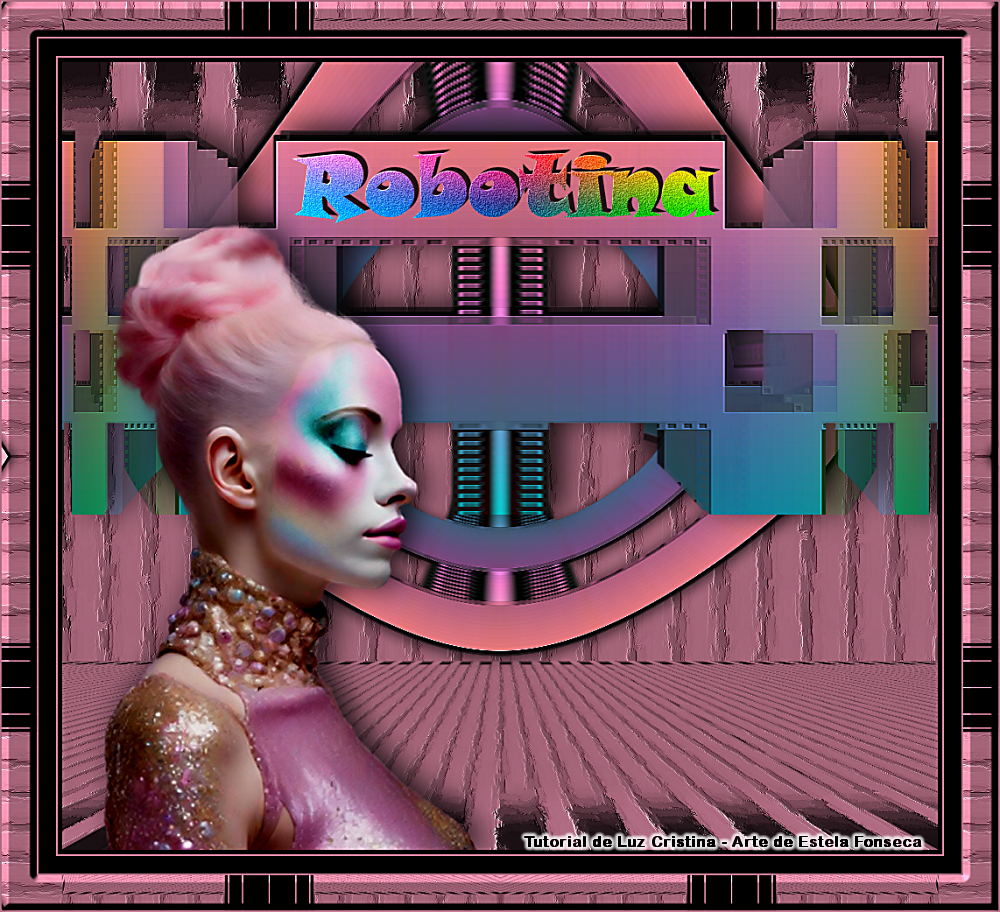
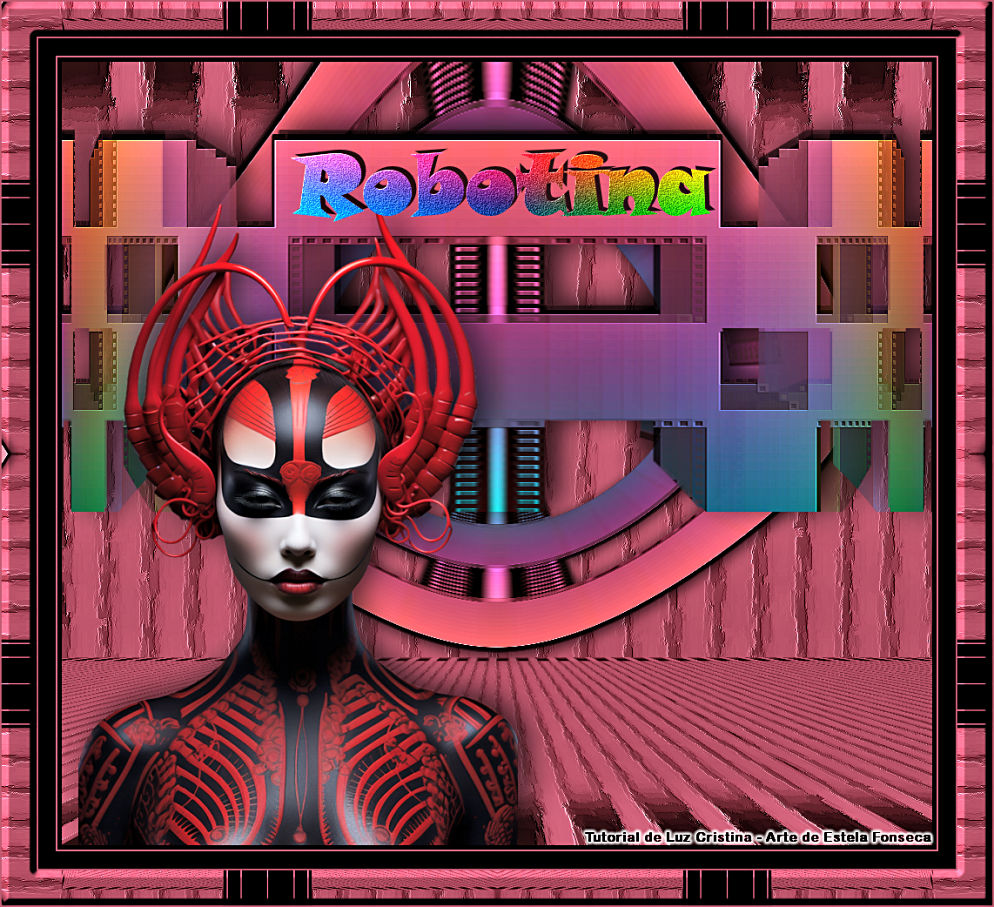
ROBOTINA
Tutorial de ©Luz Cristina - Original
AQUI
MATERIAIS:

2 Tubes + 1 Forma
PLUGINS
Factory gallery "M"
Eye candy 5 Impact
Neology
FM Tile Tools
Simple
MuRas perspective tiling
Abra os tubes no PSP. Duplique e feche os originais.
1- Abra o tube da Forma (ele será a base deste trabalho)
2- Selections / Select all
Selections / Float
Effects / Plugins / Filter factory gallery "M" / Ambrosia / Default

Você pode alterar as configurações de acordo com suas cores
Selections / Select None
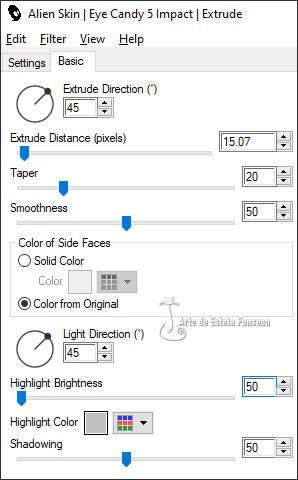
3- Effects / Plugins / Alien Skin Eye candy5 / Impact / extrude
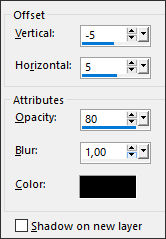
4. Effects / 3D effects / Drop shadow: -5 / 5 / 80 / 1 /#000000
5- Effects / Plugins / Neology / Vasarely mosaics: 10

6- Effects / Plugins / FM Tile Tools /Blend emboss / Default
7- Effects / Image effects / seamless tiling
8- Effects / Geometric effects / cylinder vertical : 100
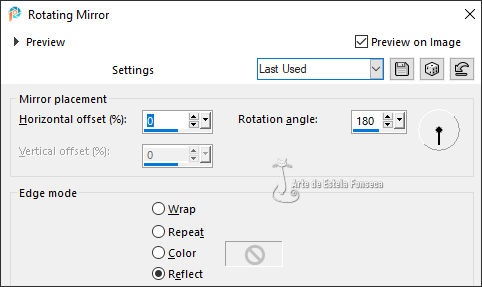
9- Effects / Reflection effects / rotating mirror
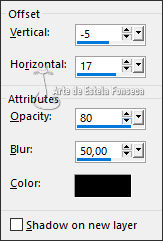
10- Effects / 3D effects / Drop shadow: -5 / 17 / 80 / 50 / #000000
11- Layers / Duplicate
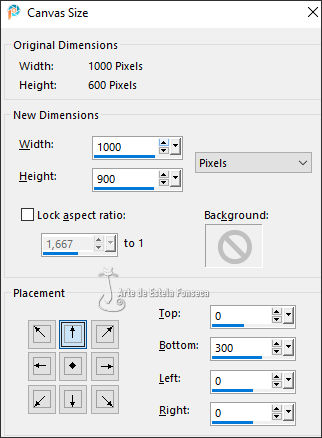
12.- Image / canvas size: ( 1000 X 900 px
13- Image / Mirror / Mirror Vertical
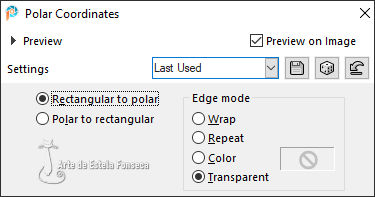
14- Effects / Distortion effects / polar coordinate / rectangular to polar
/ transparente
15- Layers / Arrange / Move Down
16- Image / Mirror / Mirror Vertical
17- Effects / Plugins / Simple / top left mirror
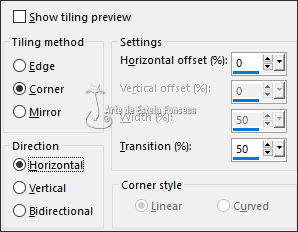
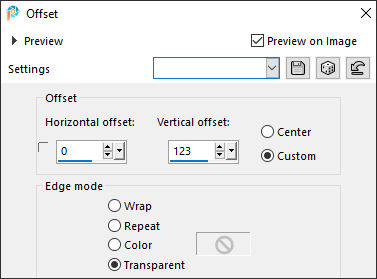
18- Effects / Image effects / offset
19- Effects / Distortion effects / pinch : 70
20- Layers / New rastes layers
Layers / arrange / send to bottom
21- Preencha com a cor #b16d83
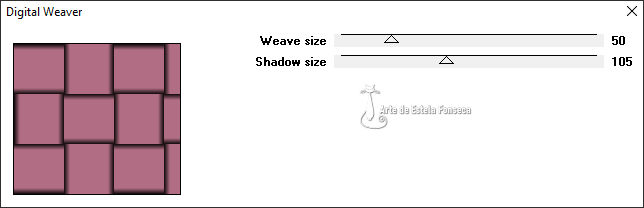
22- Effects / Plugins / Neology / digital weaver: 50 / 105
23- Adjust / blur / motion blur : aplicar 2 vezes

24- Effects / art media effects / brush strokes

25-Layers / Duplicate
26- Image / Mirror / Mirror Vertical
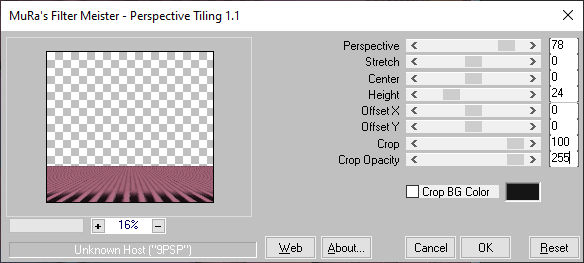
27- Effects / Plugins / Muras Meister / perspective tiling
28- Ative o tube <<8374-LuzCristina >> Copie e cole como nova layer
Layers / Arrange / Bring to top
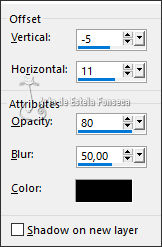
Effects / 3D Effects / Drop Shadow: -5 /11 / 80 / 50 / Cor #000000
Abra o texto, copie e cole como nova layer - Posicione como no modelo final.
29- Image / Add borders / Symmetric Marcado / 5 Pixels cor #000000
Image / Add borders / Symmetric Marcado / 2 Pixels Cor #b16d83
Image / Add borders / Symmetric Marcado / 20 Pixels Cor #000000
Image / Add borders / Symmetric Marcado / 2 Pixels Cor #b16d83
Image / Add borders / Symmetric Marcado / 40 Pixels Cor #000000
Image / Add borders / Symmetric Marcado / 2 Pixels Cor #b16d83
30- Ative a Varinha Mágica e Selecione a borda de 40 Pixels
Effects / Reflection effects / kaleidoscope

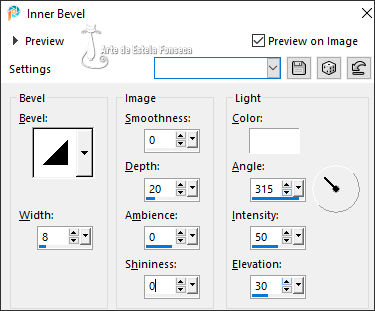
Effects / 3D Effects / Inner Bevel
Selections / Select None
Image / Resize / 83% ... Resize All Layers - Marcado
Versão com tube de Renée Designs:
VOLTAR
©Tutorial traduzido por Estela Fonseca
em: 09/05/2024.
Não alterar nem repassar sem autorização.
|