 TOP ESOTÉRICA
Tutorial de ©Luz CristinaGarcia Ruiz - Original AQUI Tutorial escrito com no PSP 9 e Traduzido no PSP X8
Materiais Necessários:
MMDesignz e Luz Cristina 2 Tubes, masck marge-topfade.
Muras Meister / Pole transform eTone Flaming Pear / Flexify 2 e Flood.
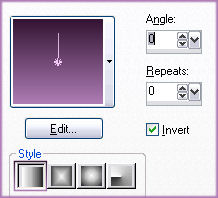
2- Paleta de cores: Foreground #331433 Background #ad7cb4 Forme um gradiente estilo linear ( 0 / 0 ) Invert Marcado
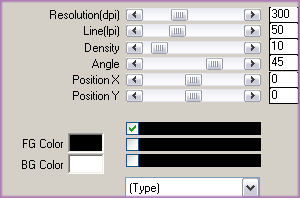
3- Selections, Select all Abra o tube misted (paisagem) , copie e cole na seleção Selections, select none 4- Adjust / Blur / Radial blur:
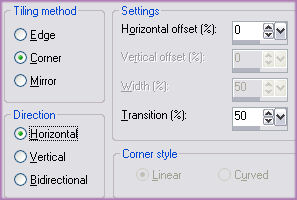
6- Effects / Image Effects / Seamless tiling :
7- Layers /duplicate Clique nos olhos da layer de baixo. Para ocultá-la. 8- Effects / Geometrics effects / perspective vertical / 65 transparente. 9- Image / flip. 10- Effects / Geometrics effects / perspective vertical / 65 transparente. 11- Effects / Plugin / Muras Meister/ Pole Transform:
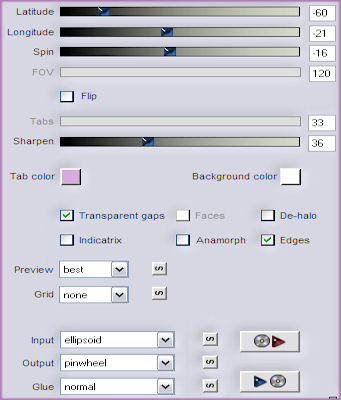
13- Effects / Plugin / Flexify 2 :
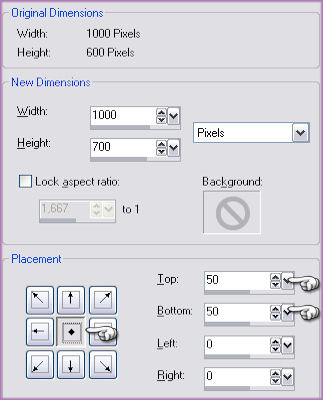
14- Image / Canvas size / 1000 x 700 px. ( 50 50 0 0 )
15- Effects /User defined filter emboss 3. 16- Layers/ duplicate Image mirror. 17- Layer / Merge / merge down. 18- Selecione com a varinha mágica o centro da imagem , configure - tolerance 10 / feather 2. 19- Selections / modify / expand 2. 20- Layers /New raster layer Preencha com o mesmo gradiente , no mesmo gradiente . Opacidade do baldinho: 50. 21- Effects / Plugin / Muras Meister / Tone :
22- Effects /User defined filter emboss 3. blend mode / hard ligth. 23- Layers / New raster layer Copie o tube da paisagem e cole na seleção Selections / Selection none. 24- Layer / Merge / merge down , repita novamente esse passo. 25- Effects / 3D Effects / Drop shadow: 20 20 80 45. 26- Clique novamente no olho da layer raster 1 para torna-la visivel Deixe-a ativa. Effects /Image effects/ offset / horiz. 0 / vertical 50 / Custom / transparente. 27- Image /Canvas size / 1000 x 800 px. ( 0 100 0 0 )
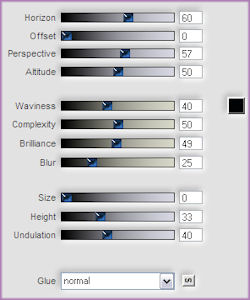
28- Effects / Plugin / Flaming Pear / Flood :
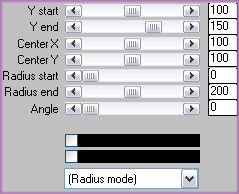
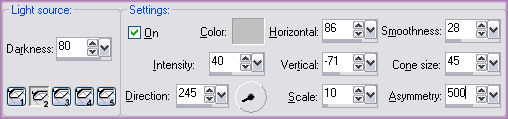
29- Effects / Ilumination effects / lights :
31- New raster layer / arrange send to bottom Preencha com o gradiente no estilo linear , mas mude a configuração para: angle 0 / repeats 1. 32- Copie o tube da mulher e cole como nova layer. Posicione. 33- Layers /Merge All /Exportar como JPG.
©Tutorial traduzido por Estela Fonseca em 05 de
Janeiro de 2011. |