SENT WITH LOVE
Tutorial de ©Elizabeth Creations
Este tutorial foi traduzido usando o Paint Shop Pro 2019 Ultimate.
Material Necessário:
Plugins Utilizados:Filters Unlimited / Paper Textures
AAA Frames / Foto Frame
Simple / 4 Way Average
Filter Factory Gallery Q / Gravity Blossom
(Importados para o Unlimited 2.0)
Lembre-se de salvar seu trabalho constantemente.
1. Na paleta de Materiais... Primeiro Plano cor preta (#000000)2. Abra uma nova imagem transparente de 980 X 730 Pixels.
3. Preencha com a cor do Primeiro Plano.
4. Layers / Duplicate.
5. Selections / Select AllSelections / Modify / Contract / 20 Pixels
6. Delete no Teclado
Selections / Select None.
Ative a Layer <<Raster 1>>
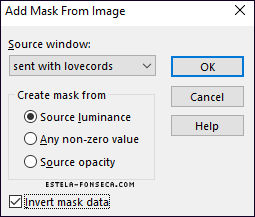
7. Abra << sent with lovecords.png>> na sua área de trabalho... diminua o zoom ou minimize para torná-la menor.
e com seu trabalho em andamento ativado
Layers / New Mask Layer / From Image: sent with lovecords.png
8. Layers / Merge / Merge Group.
9. Na paleta de Materiais ... Primeiro Plano cor #700002 / Segundo Plano cor #FFFFFF.
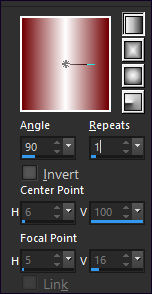
10. Clique com o botão esquerdo no fundo branco e forme um Gradiente <<Foreground-Background gradient (Corel_06_029)>>estilo <<LINEAR >> e configure como segue:
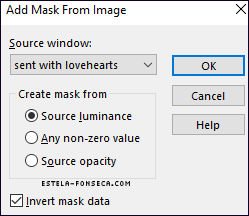
11. Abra <<sent with lovehearts.png>> Minimize
12. Layers / New Raster Layer
Preencha com a cor do Primeiro Plano
13. Layers / New Mask Layer / From Image: sent with lovehearts.png
14. Layers / Merge / Merge Group.
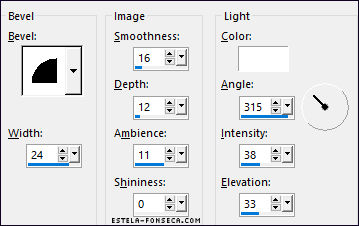
15. Effects / 3D Effects / Inner Bevel:
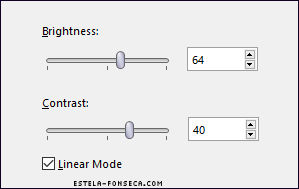
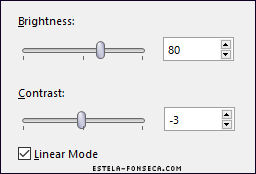
16. Adjust / Brightness and Contrast / Brightness/Contrast:
17. Layers / New Raster Layer.
Preencha com o Gradiente
18. Abra << sent with lovebeads.png>> Minimize
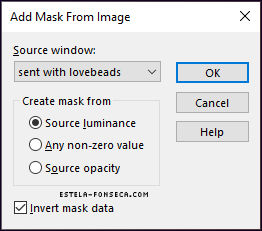
19. Layers / New Mask Layer / From Image:sent with lovebeads.png
20. Layers / Merge / Merge Group.
21. Effects / 3D Effects / Inner Bevel: (Mesmos valores do ponto 15)
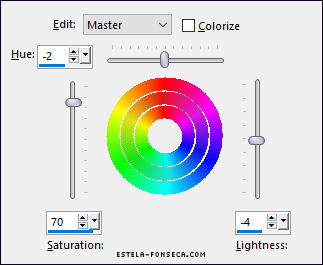
22. Adjust / Hue and Saturation / Hue/Saturation/Lightness:
23. Layers / Merge / Merge Down ( 2 vezes)
24. Effects / 3D Effects / Drop Shadow: 0 / 0 / 40 / 27 / Cor #000000
25. Layers / New Raster Layer
Layers / Arrange / Send to Bottom
Preencha com o Gradiente do Segundo Plano
Adjust / Blur / Gaussian Blur / Radius 75.
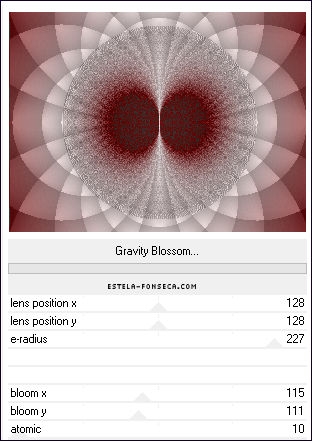
26. Layers / Duplicate.Effects / Plugins / Filters Unlimited 2.0 / Filter Factory Gallery Q / Gravity Blossom:
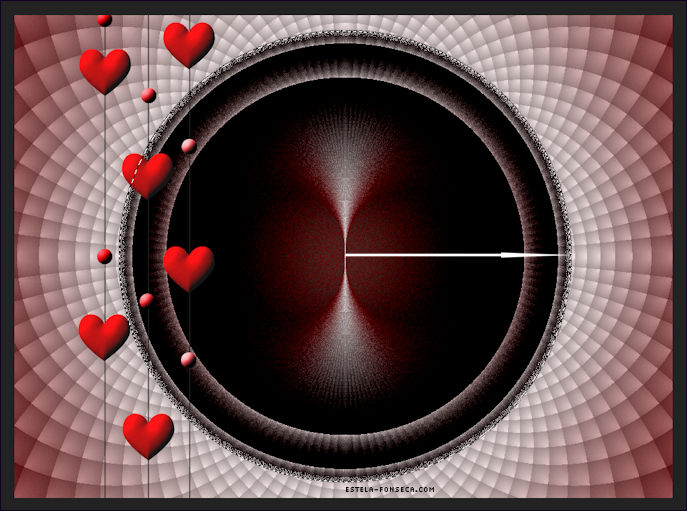
27. Selection Tool / CIRCLE / Feather = 0
Posicione-se no ponto central e arraste-o para a direita até a borda:
28. Selections / Invert.
Delete no Teclado
Selections / Select None.
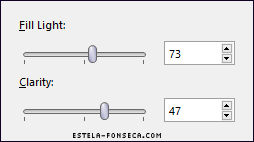
29. Adjust / Brightness and Contrast / Fill Light / Clarity:
30. Adjust / Bright and Contrast / Highlight/Midtone/Shadow:
31. Effects / 3D Effects / Drop Shadow: 0 / 0 / 40 / 27 / Cor #000000
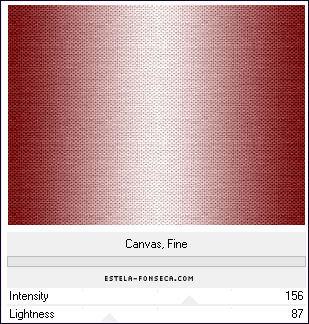
32. Ative a Layer <<Raster 1>>Effects / Plugins / Filters Unlimited 2.0/ Paper Textures / Canvas,Fine / Default
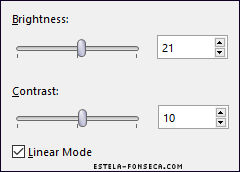
33. Adjust / Bright and Contrast / Brightness/Contrast:
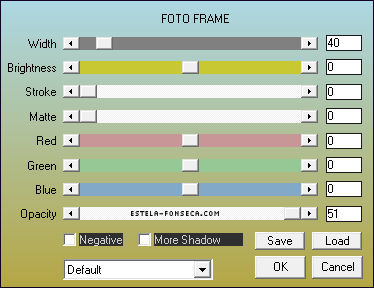
34. Effects / Plugins / AAA Frames / Foto Frames:
35. Effects / Plugins / Simple / 4 Way Average.
36. Ative a Layer do topoAbra <<corners.png>> Copie e Cole como nova layer
37. Ative a terceira layer a partir da layer do Fundo
Abra <<small_flowers.png>> Copie e cole como nova layer
Posicione no canto superior à direita como segue:
38. Adjust / Hue and Saturation / Vibrancy 70.
39. Abra o tube << JHanna-330 tube>> Copie e Cole como nova layerArraste até a borda inferior, como no modelo.
40. Adjust / Brightness and Contrast / Brightness/Contrast:
41. Effects / 3D Effects / Drop Shadow: 0 / 0 / 40 / 27 / Cor #000000
42. Abra o tube <<poppies.png>> Copie e Cole como nova layerPosione à direita como no modelo.
43. Escreva seu nome com uma fonte de sua escolha.
44. Se você está feliz com o resultado de seu trabalho...Image / Add Borders / Symmetric Marcado / 5 Pixels cor #ffcecf
Image / Add Borders / Symmetric Marcado / 4 Pixels cor #000000
Image / Add Borders / Symmetric Marcado / 23 Pixels cor #ffcecf
Image / Add Borders / Symmetric Marcado / 2 Pixels cor #3c3c3c
45. Ative a Varinha Mágica (Feather e Tolerance = 0) e selecione a borda de 23 PixelsEffects / Plugins / Filters Unlimited 2.0 / Paper Textures / Canvas,Fine / Default
Selections / Select None.
46. Image / Add Borders / Symmetric Marcado / 23 Pixels cor #c5717747. Ative a Varinha Mágica (Feather e Tolerance = 0) e selecione essa borda
48. Effects / Plugins / Filters Unlimited 2.0 / Paper Textures / Canvas,Fine / Default
Selections / Invert.
49. Effects / 3D Effects / Drop Shadow: 0 / 0 / 40 / 27 / Cor #000000Selections / Select None.
50. Image / Add Borders / Symmetric Marcado / 1 Pixel cor #6b3134
Salve como arquivo JPG.

©Tutorial Traduzido por Estela Fonseca 13/04/2022.
Obrigada Elizabeth por me permitir traduzir seu trabalho.