SENSIA
Tutorial de ©CameronTags , original Aqui.
Material Necessário:
Andrew's Filter 10 - 21 official site
1- Abra uma nova imagem transparente de 800 / 550 pixels.Preencha com a cor #80ffff
2- Layers / New Raster layerPreencha com a cor #000000
3- Abra a mask <<masktutorialsensia_camerontags.png>> MinimizeLayers / New mask layer from image:
Layers / Merge / Merge Group
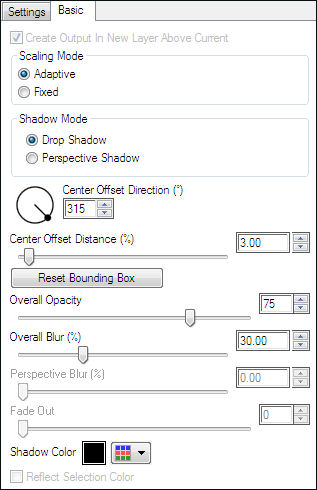
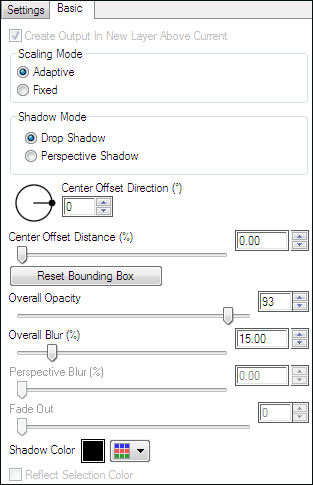
4- Effects / Plugin / Eye Candy 6 Text_Selection / Perspective Shadow / Drop Blurry / Basic, valores:
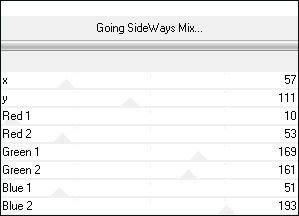
5- Layers / Merge / Merge All.6- Effects / Plugin / Andrew's Filter 21 / Going SideWays Mix:
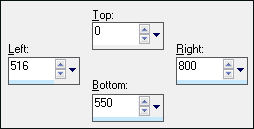
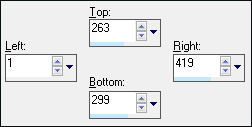
7- Ative a Ferramenta Selection Tool (S) / Rectangular / Custom Selections:
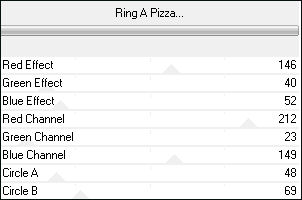
8- Effects / Plugin / Andrew's Filter 10 / Ring A Pizza:
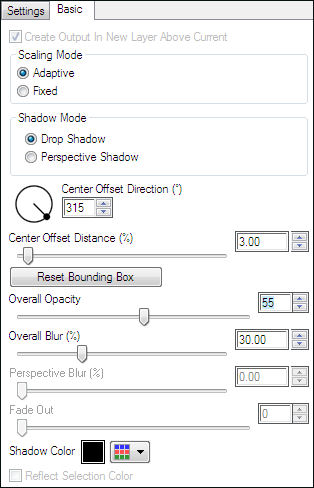
9- Effects / Plugin / Eye Candy 6 Text_Selection / Perspective Shadow / Drop Height 0 /Basic, valores:
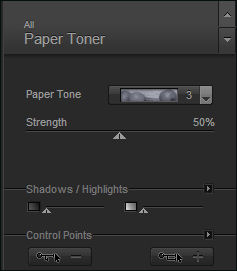
10- Effects / Plugin / Nik Color Efex Pro 3 / Paper Toner:
Selections / Select None11- Adjust / Sharpness / Sharpen
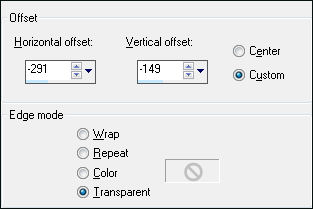
12- Ative o tube <<barstutorialsensia_camerontags.pspimage>>
Copie e cole como nova layer
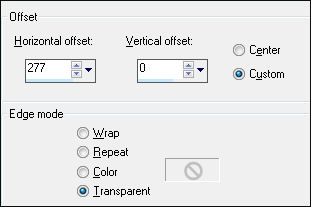
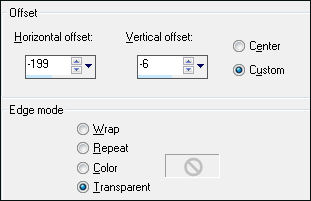
Effects / Image Effects / Offset:
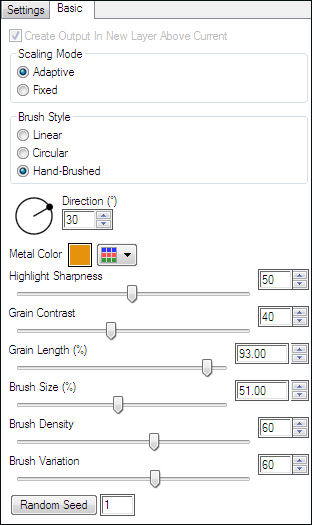
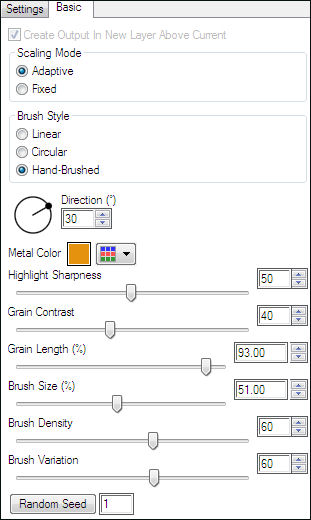
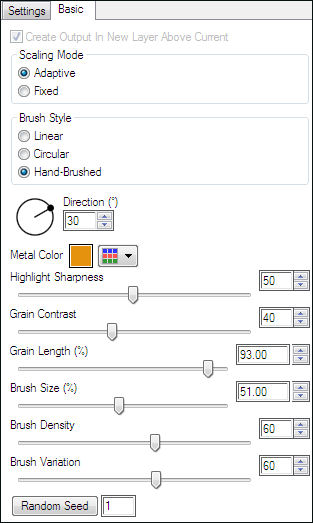
13- Sobre a mesma layer: Effects / Plugin / Eye Candy 6 / Textures /
Brushed Metal - Unusual Colors - Handbrushed, Muddy Green
Basic, valores:
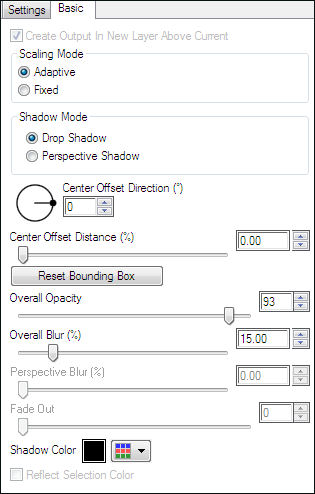
14- Effects Plugin Eye Candy 6 / Text_Selection / Perspective Shadow / Drop - Blurry
Basic, valores:
15- Layers / New Raster Layer
Ative a Ferramenta Selection Tool (S) / Rectangle / Custom Selection e configure:
16- Preencha a seleção com a cor #ffffff
Selections / Select None.17- Na mesma layer: Effects / Plugin / Eye Candy 6 / Textures / Brushed Metal
Unusual Colors - Handbrushed, Muddy Green
Basic, valores:
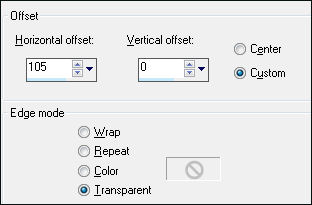
18- Ative <<cuadrostutorialsensia_camerontags.pspimage>>
Copie e cole como nova layer
Effects / Effects Image / Offset:
19- Sobre a mesma layer: Ative a Ferramenta Selection Tool (S) / Mode Replace
Selections / Select All
Clique na borda do tube <<cuadrostutorialsensia>>
Ative a <<texturetutorialsensia_camerontags.png>> Minimize.
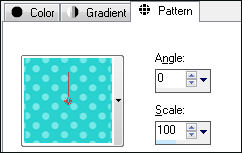
Configure a Pattern como segue:
20- Preencha a seleção com a pattern
Selections / Select None.
21- Sobre a mesma layer:
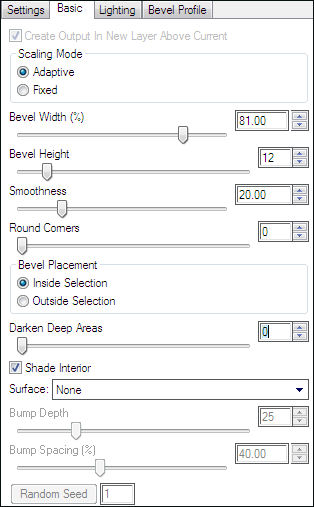
Effects / Plugin / Text_Selection / Bevel / Buttons (Fat Shapes) - Button
em Basic, valores:
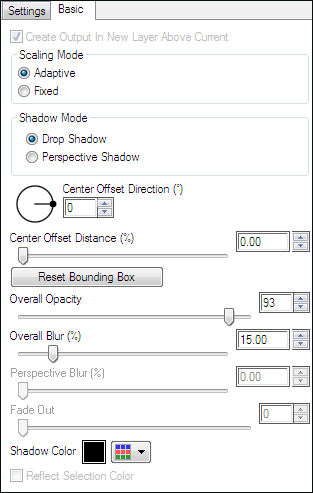
22- Sobre a mesma layer:
Effects / Plugin / Eye Candy 6 Text_Selection / Perspective Shadow / Drop Height 0 - em Basic, valores:
23- Ative o tube <<estrellastutorialsensia_camerontags.pspimage>> Copie / Cole como nova layer
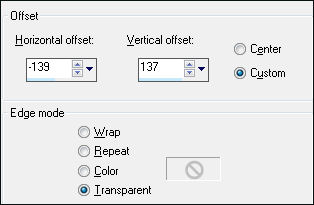
Effects / Image Effects / Offset:
24- Sobre a mesma layer:
Effects / Plugin / Eye Candy 6 / Textures / Brushed Metal / Unusual Colors - Handbrushed, Muddy Green
Em Basic, valores:
25- Sobre a mesma layer:
Effects / Plugin / Eye Candy 6 / Text_Selection / Perspective Shadow / Drop Height 0
Basic, valores:
26- Ative o tube <<florestutorialsensia_camerontags.pspimage>>
Copie / Cole como nova layer
Effects / Image Effects / Offset:
27- Sobre a mesma layer:Effects / Plugin / Eye Candy 6 / Text_Selection / Perspective Shadow / Drop Height 0
em Basic, valores:
28- Ative o tube <<rostrotutorialsensia_camerontags.pspimage>>Copie e cole como nova layer
Effects / Image Effects / Offset:
Blend Mode / Luminance29- Layers / Merge / Merge All
Image / Add Borders / Symmetric marcado / 50 pixels cor branca
Image / Add Borders / Symmetric Marcado / 1 pixel cor #c0c0c0
Assine seu trabalhoLayers / Merge / Merge All
Salve como jpg
© Tutorial Traduzido por Estela Fonseca em 07/08/2011.
Obrigada, Caroline por me permitir traduzir este trabalho.