RUSHING
Tutorial de ©CameronTags , original Aqui.
Material Necessário:
Ulead Effects / FantasyWarpVM Distortion / Radiator
Xero / Tekstya
Alien Skin Eye Candy 5 / Impact
1- Abra uma Nova Imagem transparente de 800/550 pixels
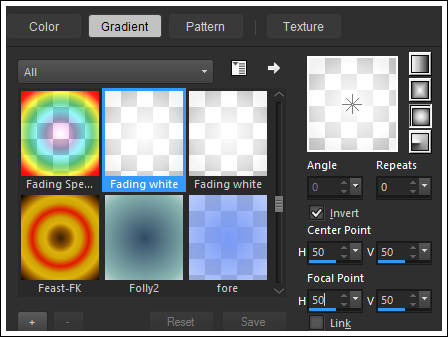
Primeiro Plano cor #d74943 e Segundo Plano cor #146461
Forme um Gradiente estilo <<Linear>> Angle e Repeats 0
Preencha a layer com o Gradiente
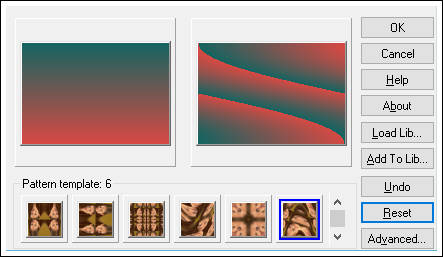
2- Effects / Plugin / Ulead Effects / FantasyWarp / Escolha <<Pattern template 6>>
como mostra a imagem:
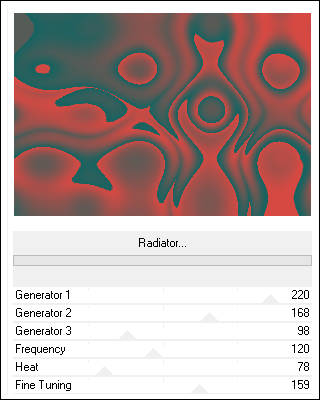
3- Effects / Plugin / VM Distortion / Radiator:
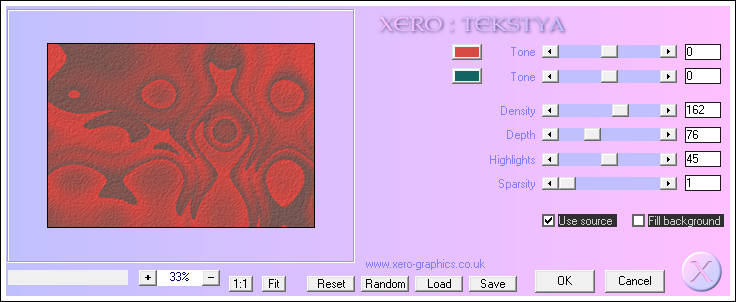
4- Effects / Plugin / Xero / Tekstya:
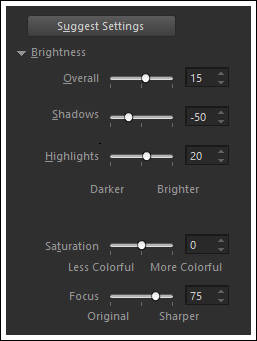
5- Adjust / Smart / Photo Fix
6- Layers / New Raster LayerPrimeiro Plano cor #ffffff
Forme um Gradiente Fading White estilo <<Sunburst>> Repeats 0 / Invert Marcado
Preencha a layer com o Gradiente
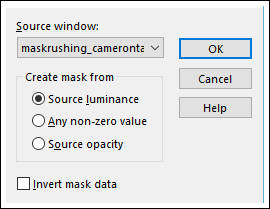
7- Ative a mask <<maskrushing_camerontags.jpg >> MinimizeLayers / New mask layer / From Image:
Layers / Merge / Merge Group.
8- Effects / Edge Effects / Enhance
9- Layers / New Raster Layer
Preencha com a cor #c91b17
Effects / Geometric Effects / Circle / Transparente
10- Effects / Plugin / VM Distortion/ Radiator:
Blend Mode / Color (legacy)11- Ative << gotasrushing_camerontags.pspimage>>
Copie e Cole como nova layer
Effects / Image effects / Seamless Tiling:
12- Ative <<- facesrushing_camerontags .pspimage>>
Copie e Cole como nova layer
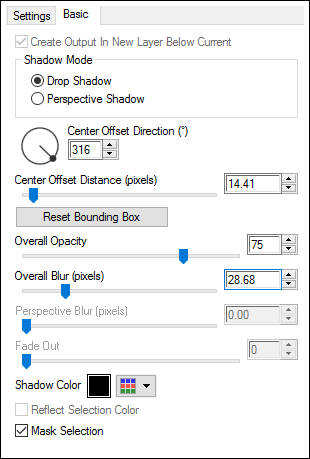
13- Effects / Plugin/ Alien Skin Eye Candy 5 / Impact / Perspective Shadow / Drop Shadow BlurryBasic, valores:
14- Layers / Merge / Merge All
Image / Add Borders / Symmetric Marcado / 1 pixel cor #d50e0e
Image / Add Borders / Symemtric Marcado / 60 píxels cor #ffffff
Image / Add Borders / Symmetric Marcado / 1 pixel cor #d50e0e
© Tutorial Traduzido por Estela Fonseca em 03/01/2010.
Obrigada, Cameron por me permitir traduzir este trabalho.