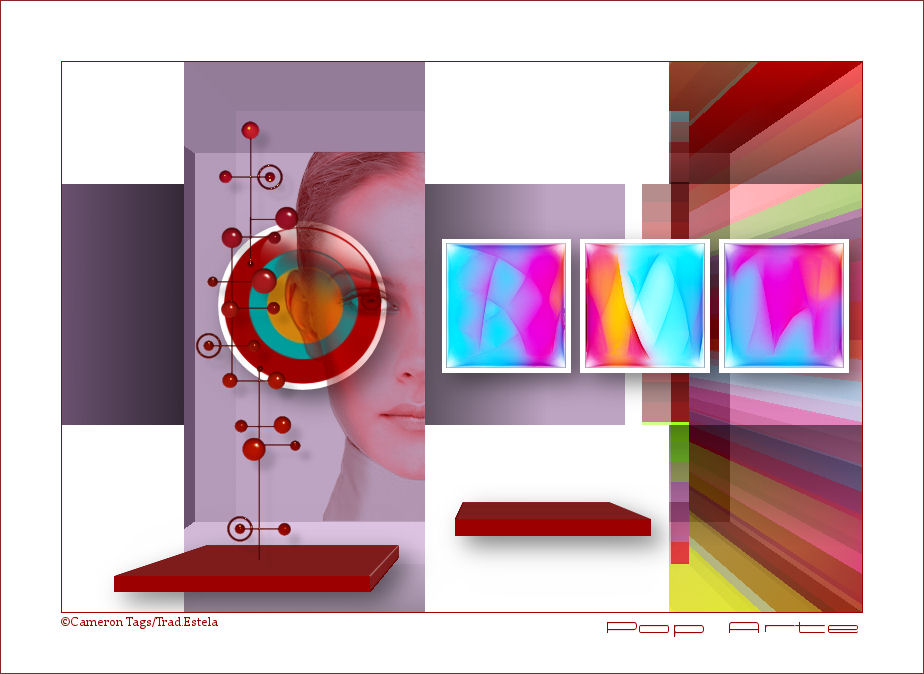
POP ARTE
Tutorial de ©Cameron Tags , original, Aqui.

Material Necessário:
Dynasty PluginsNirvana
Redfield Fractalius
Factory Gallerys A, B, G e H
Alien Skin Eye Candy 5 Impact
1- Abra uma nova imagem transparente de 800 / 550 pixelsPreencha com a cor #bda4c2
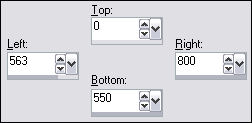
2- Ferramenta Selection Tool(S) / Custom Selection:
Preencha com a cor branca #ffffff3- Effects / Plugin / Dynasty Plugins / Tomorrow:
Selections / Select None
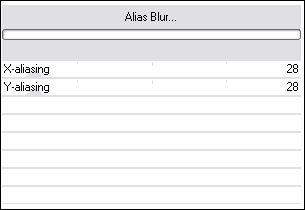
4- Effects / Plugin / Filter Factory Gallery H / Alias Blur:
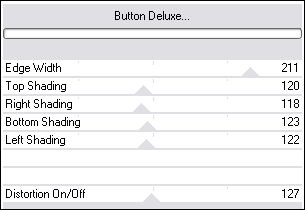
5- Effects / Plugins / Filter Factory Gallery H / Alias Blur acima6- Effects / Plugin / Filter Factory Gallery B / Button Deluxe:
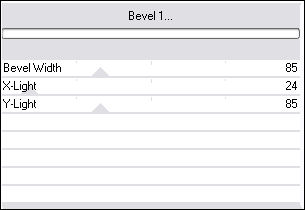
7- Effects / Plugin / Filter Factory Gallery G / Bevel 1:
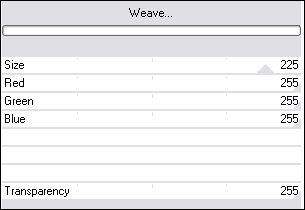
8- Effects / Plugin / Filter Factory Gallery A / Weave 1:
9- Layers / New Raster layer
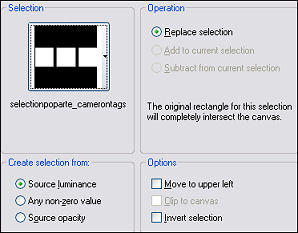
Selections / Load save selection / Load selection from disk: selectionpoparte_camerontags
10- Preencha a seleção com a cor #ffffffMantenha a seleção!
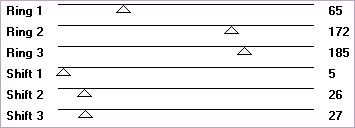
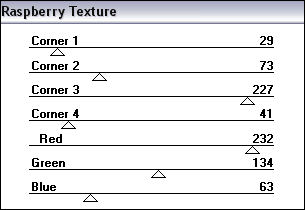
Effects / Plugin / Nirvana / Raspberry texture:
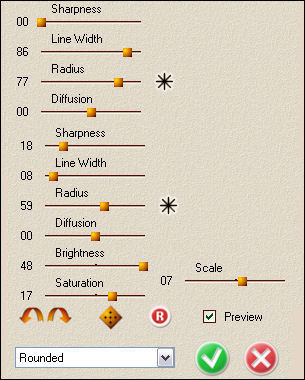
11- Effects / Plugin / Redfield / Fractalius: Rounded
Selections / Select None
12- Layers / New Raster Layer
Selections / Load save selection / Load selection from disk : selectionpoparte2_camerontags /Load
Preencha a seleção com a cor #ffffff
Selections / Select None
13- Na Paleta das Layers, feche todas as layers exeto as das seleções selectionpoparte
Layers / Merge / Merge visible
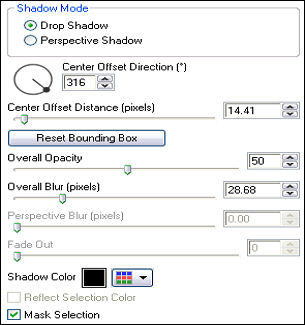
14- Effects / Plugin / Alien Skin Eye Candy 5 / Impact / Perspective Shadow / Drop Shadow Blurry
Basic, estes valores:
Na paleta das Layers:Abra todas as layers ocultas
15- Ative o tube <<esferapoparte_camerontags.pspimage>>
Copie e cole como nova layer
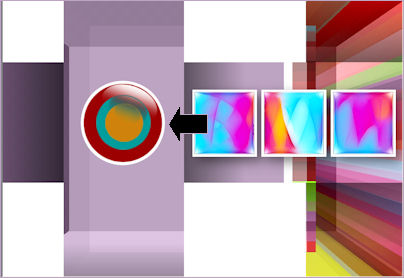
Mova para a esquerda da tag (veja imagem)
16- Sobre a layer da esferapoparte:
Effects / Plugin / Alien Skin Eye Candy 5 / Impact / Perspective Shadow / Drop Shadow Blurry
Em Basic, estes valores:
17- Layers / New Raster layer
Selections / Load save selection / Load selection from disk :selectionpoparte3_camerontags
Preencha a seleção com a cor #9d0000
Selections / Select None
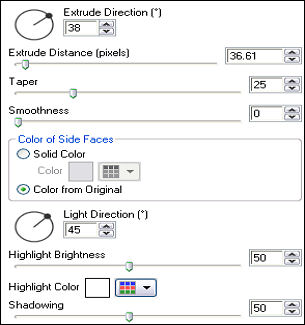
18- Effects / Plugin / Alien Skin Eye Candy 5 Impact / Extrude: Large Offset, Medium Tapper No SmoothingBasic, estes valores:
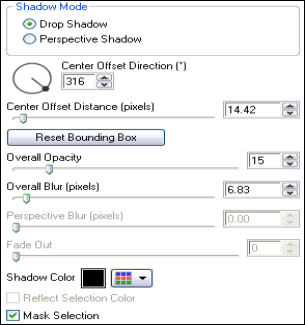
19- Effects / Plugins / Alien Skin Eye Candy 5 Impact / Perspective Shadow / Drop Shadow Blurry
Basic, estes valores:
20- Ative o tube <<estructpoparte_camerontags.pspimage>>
Copie e cole como nova layer
Mova para a esquerda (veja a imagem):
21- Effects / Plugin / Alien Skin Eye Candy 5 Impact / Perspective Shadow / Drop Shadow High
Basic, estes valores:
22- Ative o tube <<facepoparte_camerontags.pspimage >>
Copie e Cole como nova layer
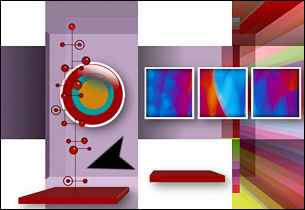
Mova para a esquerda , veja imagem final
23- Layers / Merge / merge All
Image / Add Borders / Symmetric marcado / 1 pixel cor #9d0000
Image / Add Borders / Symmetric marcado / 60 pixels cor #ffffff
Image / Add Borders / Symmetric marcado / 1 pixel cor #9d0000
Escreva o texto
Salve como arquivo jpg
©Tutorial traduzido por Estela Fonseca em 03/02/2010.
Não alterar nem repassar sem autorização.