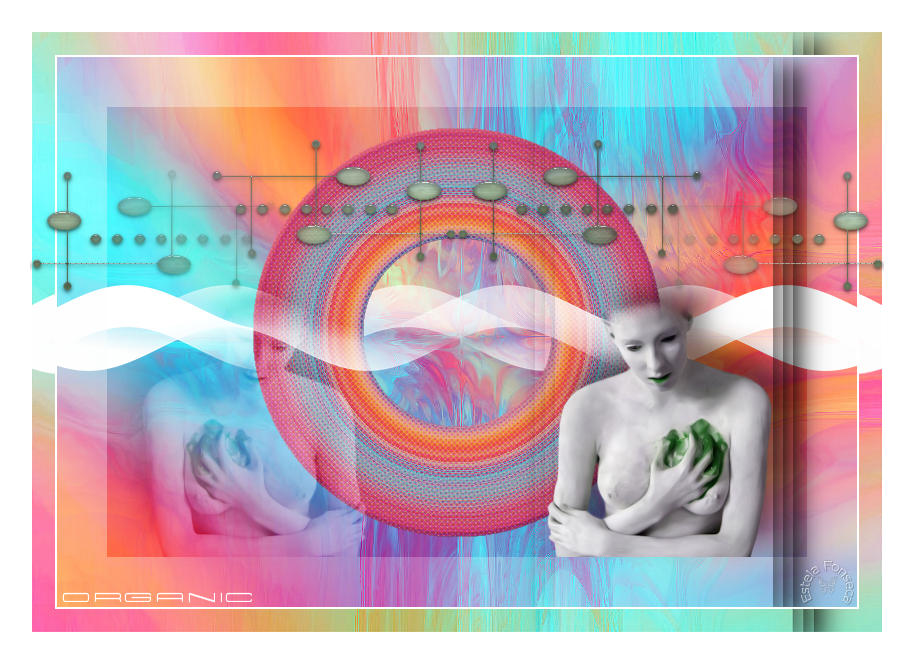
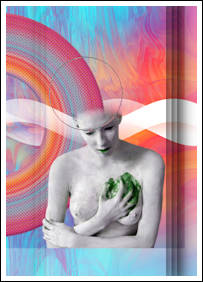
ORGANIC
Tutorial de Cameron Tags.
Tutorial realizado no PSP XII mais pode ser feito em outras versões.
Material Necessário:
tube ©Creatubes
Plugins Utilizados:Factory Gallery A
Alien Skin Eye Candy 5 Impact
Flaming Pear / Swap /red/green
Redfield / Perfectum
Slosh.net sloshifiers / Humanoid
1- Abra uma nova imagem transparente de 800 / 550 pixelsSelections / Select All.
Abra a <<textureorganic_camerontags.jpg>>Copie e cole na seleção
Selections / Select None.
2- Layers / Duplicate.
Effects / Geometric Effects / Circle / Transparente.
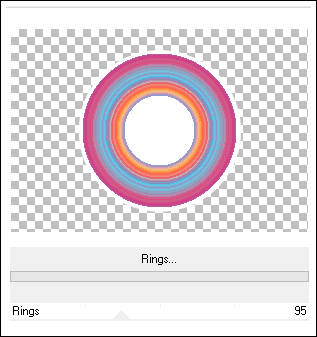
Image / Resize / 80% ( all layers, desmarcado )3- Effects / Plugin / Filters Factory Gallery A/ Rings / 95
( Este filtro tem de ser importado para o Unlimited)
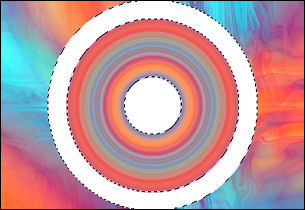
4- Ative a Varinha Mágica e faça um clique dentro dos anéis brancos (ver imagem)
Edit / Cut
Selections / Select none.5- Effects / Artistic Effects / Halftone:
Adjust / One Step Photo Fix
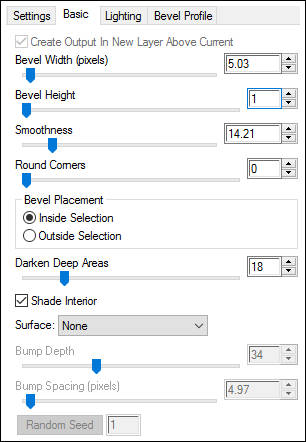
6- Effects /Plugin / Alien Skin Eye Candy 5 Impact / Bevel / Red Lighting,
Em Basic: valores:
7- Layers / New Raster Layer
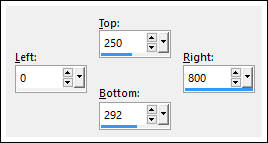
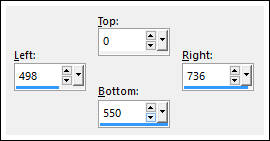
Ferramenta Selection Tool (S) / Custom Selection:
Primeiro Plano cor #ffffffForme um Gradiente no Fading Foreground estilo << sunburst>> Repeats 0 / Invert marcado
Preencha a seleção com o gradiente
Selections / Select None
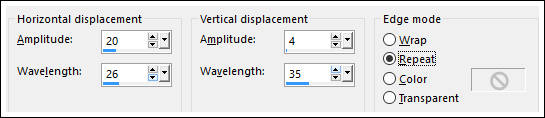
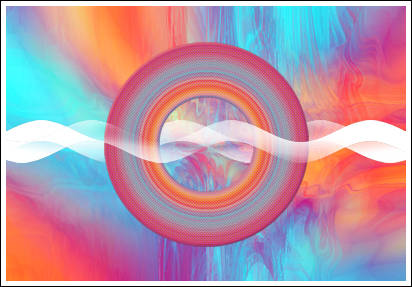
Effects / Distortion effects / Wave:
Layers / DuplicateImage / Mirror
8- Ative a Layer do Círculo (Copy of Raster 1)
Layers / Arrange / Move Up
9- Ative a layer do topo
Layers / New Raster layer
Primeiro Plano cor #ffffff
Forme um Gradiente no Fading Foreground estilo << sunburst>> Repeats 0 / Invert marcado
Preencha a layer com o Gradiente
Selections / Select All.
Selections / Modify / Contract / 50 pixels
Delete no teclado
Selections / Select None
Blend mode / soft light.
10- Layers / New Raster Layer
Ferramenta Selection Tool (S) / Custom Selection
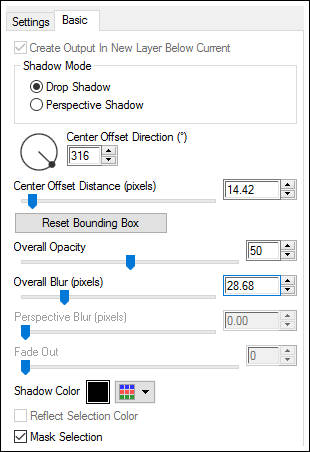
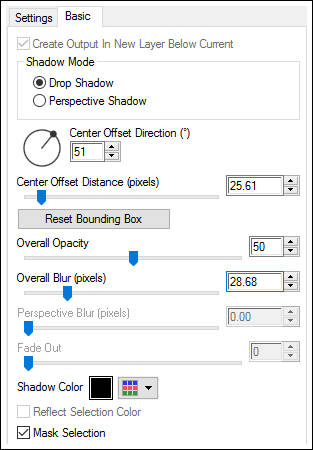
Effects / Plugin / Alien Skin Eye Candy 5 Impact / Perspective Shadow / Drop Shadow Blurry
Basic com estes valores:
Selections / Select None11- Layers / Duplicate (2 vezes)
Ative a layer <<Copy of Raster 4>>
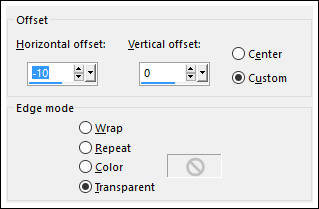
Effects / Image Effects / Offset:
Ative a layer <<Copy (2) of Raster 4>>
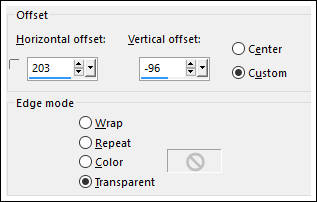
Effects / Image Effects / Offset:
Repita isso mais uma vez.
12- Ative o tube << DIV-PERSO-S2007-01.pspimage >>
Copie e cole como nova layer
Image / Resize / 55% (all layers, desmarcado)
Effects / Image Effects / Offset:
Effects / Plugin / Flaming Pear / Swap red/greenCom a borracha vamos apagar suavemente a parte angular da cabeça (ver imagem)
13- Effects / Plugin / Alien Skin Eye Candy 5 Impact / Perspective Shadow / Drop Shadow Blurry
Basic :
Effects / Plugin / Redfield / Perfectum / Smoothing 39
14- Layers / DuplicateImage / Mirror
Blend mode / soft light.
15- Layers / Merge / Merge allImage / Add Borders / Symmetric marcado /2 pixels cor #ffffff
Copie
16- Abra uma nova imagem transparente de 854 / 604 pixels
Selections / Select all
Cole na seleção
Selections / Select None
Adjust / Sharpness / Sharpen.
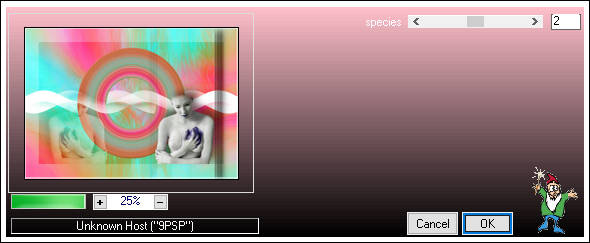
17- Effects / Plugin / Slosh.net sloshifiers / Humanoid / species 2
18- Ative o trabalho Nº1
Copie e cole como nova layer sobre o trabalho nº 2
Ative <<accentorganic_camerontags.pspimage >>
Copie e cole como nova layer
Effects / Image Effects / Offset: 0 / 130 / Custom / Transparente Marcados
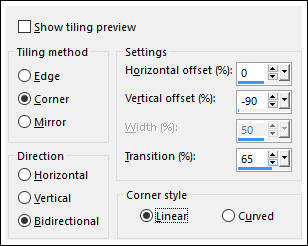
19- Effects /Image Effects / Seamless Tiling :
20- Layers / Merge / Merge All
Image / Add Borders / Symmetric marcado / 30 pixels cor #fffffff
Escreva o texto
Salve como jpg otimizado.
©Tutorial de Cameron Tags - traduzido por Estela Fonseca em 01/10/2009.
Não alterar nem repassar sem autorização.