KANJI
Tutorial de ©CameronTags , original Aqui.
Material Necessário:
Tubes de Cameron.
Plugins Utilizados:Simple
Factory Gallery G
Eye Candy 5 Impact
1- Abra uma nova imagem transparente de 850 X 550 pixels.Preencha com a cor #ffffff
2- Layers / New Raster LayerPreencha com o gradiente estilo Linear Angle e Repeats 0
Formado das cores: #922464 e #1669a5
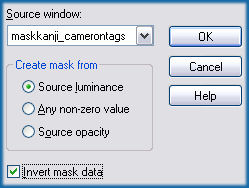
3- Ative a maskkanji_camerontags.pspimage ... Minimize
Layers / New Mask Layer / From Image :
Layers / Merge / Merge Group
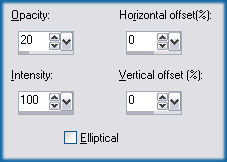
4- Sobre essa mesma layer:
Effects / Reflections Effects / Feedback:
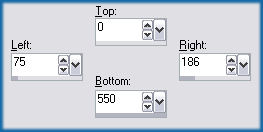
5- Layers / New Raster LayerAtive a Ferramenta «Selection Tool» / Custom Selection:
Preencha a seleção com a cor #c0c0c0
Selections / Select None
6- Sobre a mesma layer:
Effects / Plugins / Simple / Pizza Slice Mirror
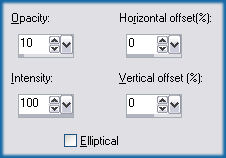
7- Effects / Reflection Effects / Feedback:
8- Sobre a mesma layer:
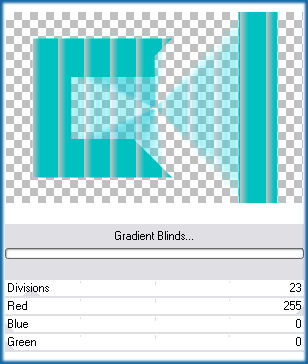
Effects / Plugins / Factory Gallery G / Gradient Blinds, com estes valores:
* Os plugins Filters Factory , podem ser importados para o Unlimited 2
9- Sobre a mesma layer:
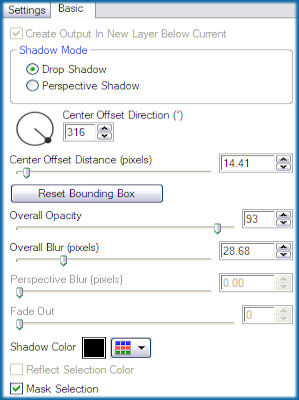
Effects / Plugins / Alien Skin Eye Candy 5 Impact / Perspective Shadow / Drop Shadow Low
Basic, nestes valores:
Blend Mode / Darken
10- Ative «yinyangkanji_camerontags.pspimage»
Copie e Cole Como Nova Layer
11- Sobre a mesma layer:
Effects / Plugin / Eye Candy 5 Impact / Perspective Shadow / Drop Shadow Blurry
Basic, nestes valores:
12- Ative «letraskanji_camerontags.pspimage»
Copie / Cole como nova layer
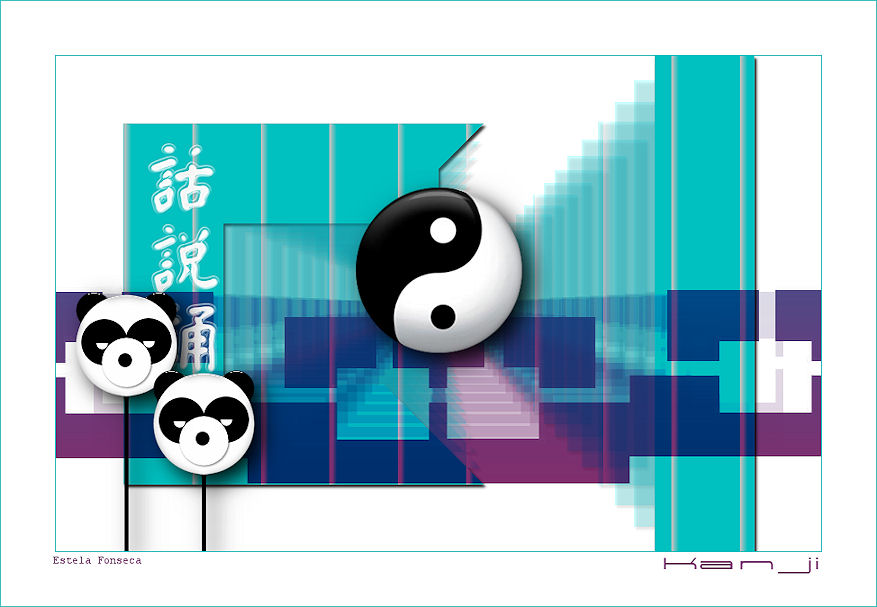
Mova para a esquerda da tag (veja a imagem):
13- Ative o tube «pandaskanji_camerontags.pspimage»
Copie / Cole como nova layer
Mova para a esquerda da tag e abaixo (ver imagem):
14- Sobre o tube pandaskanji:
Effects / Plugins / Alien Skin Eye Candy 5 Impact / Perspective Shadow / Drop Shadow Blurry
Basic, nestes valores:
15- Layers / Merge / Merge All
Image / Add Borders /Symmetric marcado / 1 pixel cor #00c0c0
Image / Add Borders / Symmetric Marcado / 60 pixels cor #ffffff
Image / Add Borders / Symmetric marcado / 1 píxel cor #00c0c0Escreva o texto
Layers / Merge / merge all
Salve como jpg.
© Tutorial Traduzido por Estela Fonseca em 08/08/2009.
Obrigada, Cameron por me permitir traduzir este trabalho.