INGWAZ
Tutorial de ©CameronTags , original Aqui.
Material Necessário:
Plugins Utilizados:» Tronds Patterns - Aqui
» Redfield Craquelure 3D - Aqui
» Presets Craquelure 3D - Aqui
» Eye Candy 6 - Aqui
» Andrew's Filter Collection 56 - Aqui
» Simple - Aqui
» AAA Frames - Foto Frame - Aqui
» Programa Corel PaintShop Photo Pro - Aqui
1- Abra uma nova imagem transparente de 800 x 550 pixelsForeground cor #dbd3cb e Background cor #e63d0a
Forme um gradiente estilo Linear angle 0 repeats 310
Preencha a imagem com o gradiente
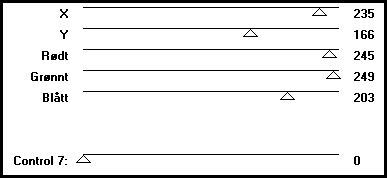
2- Effects - Plugin - Tronds Patterns - LyserginSyreDietylamid - valores: (ver imagem)
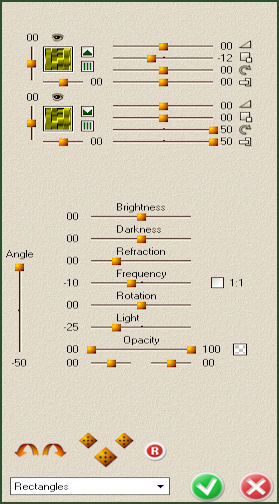
3- Effects - Plugin - Redfield - Craquelure 3D - preset Rectangles - valores: (ver a imagem)
4- Layers - Merge - Merge All
Image - Add Borders - 60 pixels cor #f0f0f0
5- Abra a esfera.pspimage / Copie e cole como nova layer
Effects - Image Effects - Offset: 515 / -105/ Custom / Transparente
6- Sobre a mesma layer:Effects - distortion Effects - Twirl : -720°
Aplicar mais uma vez o efeito Twirl: -720°
7- Sobre a mesma layer:Image , resize, 87%, all layers desmarcadas.
8- Layers, new raster layer
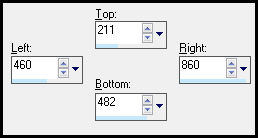
Ferramenta Selection tool - Custom Selection:
9- Foreground cor #484c23 / Gradiente Fading Foreground estilo Linear angle e repeats 0Preencha a seleção
10- Na seleção:
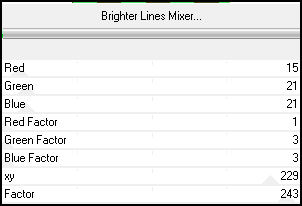
Effects - Plugin - Andrew's Filter Collection 56 - Brighter Lines Mixer - valores:
Selections, select none
11- Sobre a mesma layer : Effects / Plugin / Simple / Diamonds12- Sobre a mesma layer:
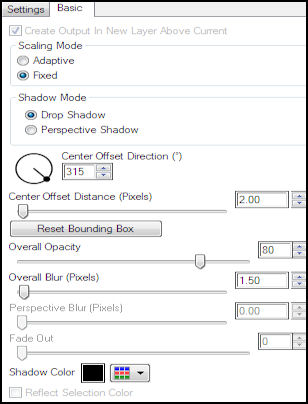
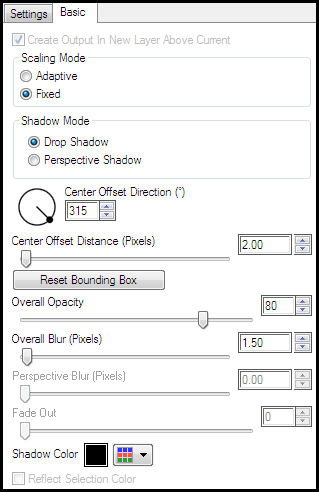
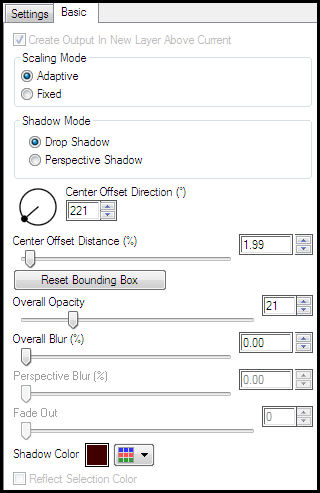
Effects - Plugin - Eye Candy 6 Text_Selection - Perspective Shadow
Drop (Fixed Scaling) - Angled 2 Pixels - em Basic,
valores: (ver a imagem)
Blend Mode / Hard Light
13- Layers, New Raster layyerAtive a Ferramenta Selection Tool - Custom selection:
Preencha a seleção com a cor #f0f0f0Selections, select none
14- Sobre a mesma layer:
Effects - Plugin - Simple - Diamonds
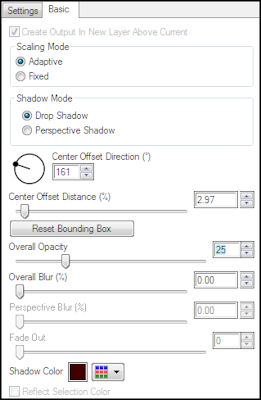
15- Sobre a mesma layer:Effects - Plugin - Eye Candy 6 Text_Selection - Perspective Shadow
Drop (Fixed Scaling) - Angled 2 Pixels - em Basic, valores:
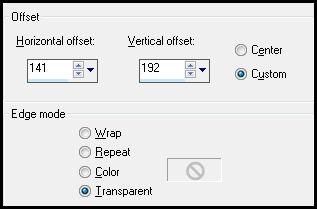
16- Abra florestutorialingwaz_camerontags.pspimage / Copie e cole como nova layer
Effects - Image Effects - Offset - valores:
17- Sobre a mesma layer:
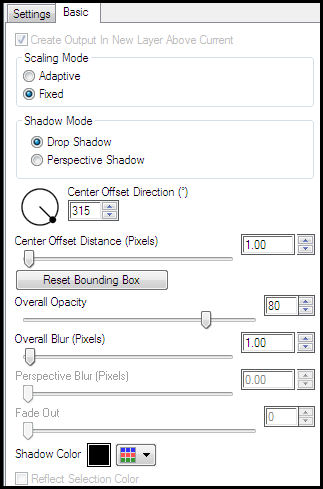
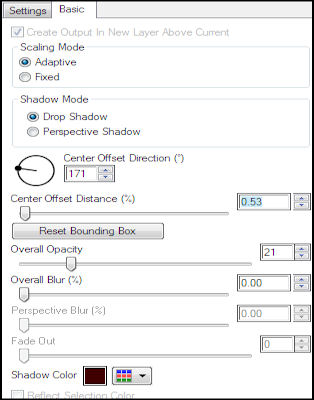
Effects - Plugin - Eye Candy 6 Text_Selection - Perspective Shadow
Drop (Fixed Scaling) - Angled 1 Pixel - em Basic, valores:
18- Sobre a mesma layer:Effects - Plugin - Eye Candy 6 Text_Selection - Perspective Shadow
Drop - Low Opacity, Black - em Basic, valores:
19- Ative womantutorialingwaz_camerontags.pspimage / Copie e cole como nova layer
Effects - Image Effects - Offset : -231/-123/ custom / Transparente
20- Sobre a mesma layer :
Effects - Plugin - Eye Candy 6 Text Selection - Perspective Shadow
Drop - Low Opacity, Black - em Basic, valores:
21- Ative pastotutorialingwaz_camerontags.pspimage / Copie e cole como nova layerEffects - Image Effects - Offset: -241/-195/Custom /Transparente
22- Ative gatotutorialingwaz_camerontags.pspimage / Copie e cole como nova layerEffects - Image Effects - Offset: -298/224/Custom /Transparente
23- Sobre a mesma layer:
Effects - Plugin - Eye Candy 6 Text_Selection - Perspective Shadow
Drop - Low Opacity, Black - em Basic, valores:
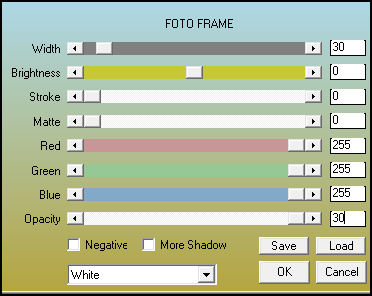
24- Layers - Merge - Merge AllEffects - Plugin - AAA Frames - Foto Frame - valores:
25- Selections - Select All
Select - Modify - Contract 2 pixels
Select - Invert
Foreground cor branca #ffffff
Preencha a seleção
Selections - Select None
26- Image - Add Border - 30 pixels cor #ffffff
Image add border 1 píxel cor #000000
Assine e salve como jpg© Tutorial Traduzido por Estela Fonseca em 17/03/2011.
Obrigada, Caroline por me permitir traduzir este trabalho.