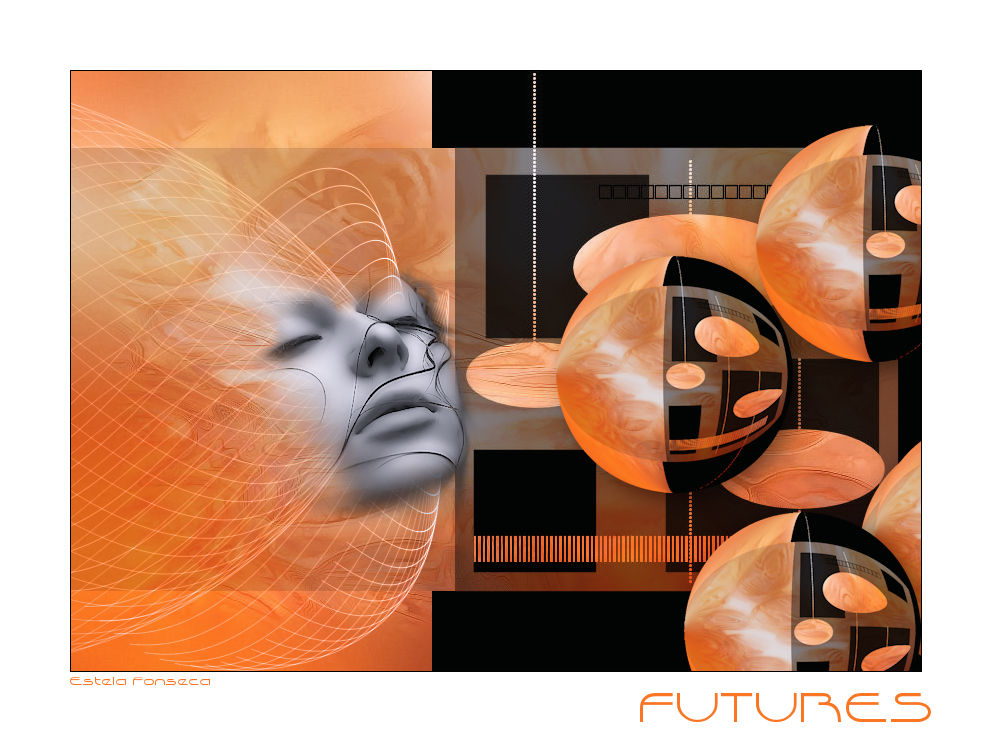
FUTURES
Tutorial de ©CameronTags , original Aqui. / Obrigada Cameron , por sua autorização.
Material Necessário:
Tube de rosto © Denise Worisch.
Plugins Utilizados:
Sinedots / Dragonfly IIXero / Porcelain
Mura's Meister / Copies
Nik Color Efex Pro 3.0
Eye Candy 5 Impact
Corel Paint Shop Pro Programa
1 - Abra uma nova imagem transparente de 850 / 600 pixelsSelections / Select All
Ative a << texturacameron_futures.jpg>> Copie e cole na seleção.
Selections / Select None.
2 - Layers / New raster layerPreencha com a cor # 000000 .
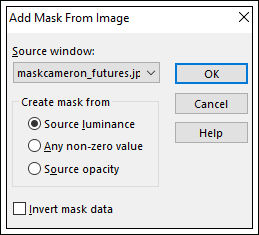
Ative a <<maskcameron_futures.jpg>> Minimize.
Layers / New Mask layer / From Image:Mask: maskcameron_futures
Layers / Merge / Merge Group
Layers / Merge / Merge Visible.
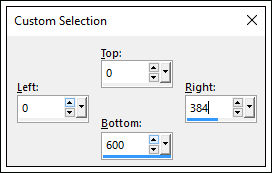
3 - Layers /New Raster LayerFerramenta Seleção ativada / Custom Selection:
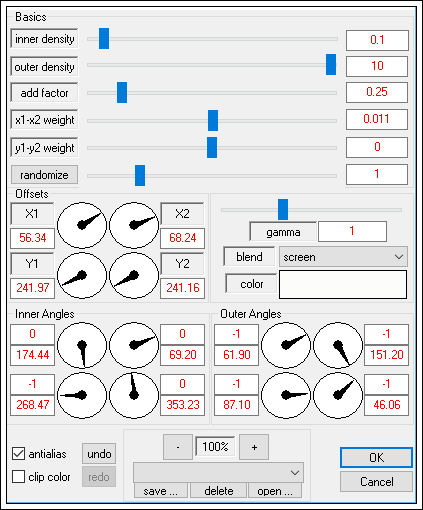
4 - Effects / Plugin / Dragonfly / Sinedots II:
5 - Selections / Select None
Image /Mirror / Mirror Horizontal (Image-Mirror)
Ferramenta Move Tool (M) coloque o Sinedot a esquerda
Blend Mode / Luminance Legacy.
6 - Ative o tube <<4812DWTUBES.pspimage>>Copie e cole como nova layer
Image / Resize / 70% (resize all layers desmarcado)
Coloque do lado esquerdo conforme o modelo.
Effects / Plugin / Xero / Porcelain: 50 / 128 / 128 / 0 / 0 / 0
7 - Ative a Layer ( Merged)
Layers / Duplicate
Effects / Geometric Effects / Circle / Transparnte.
Image / Resize / 40% (resize all layers desmarcado)Selections / Select all
Selections / Select float
Selections / Modify / Contract 1 pixel
Selections / InvertDelete no teclado
Selections / Select None.
Coloque a direita e ao centro:
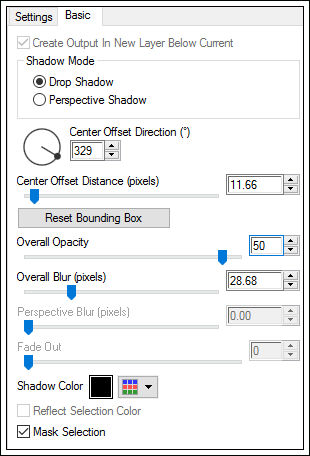
8 - Effects / Plugin / Alien Skin Eye Candy 5 / Impact / Perspective Shadow / Drop Shadow Blurry.
Em basic:
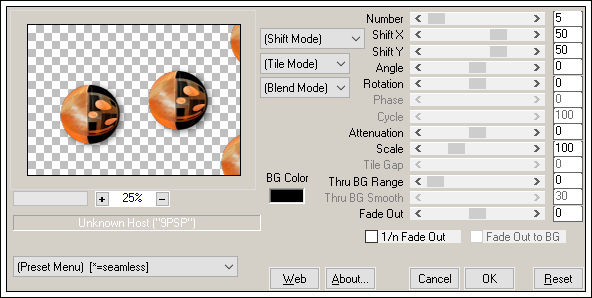
9 - Effects / Plugin / Mura's Meister / Copies
* Nota: o resultado da aplicação deste plugin pode
variar - clique na tela do menu Preset , no resset
para variar e atingir o resultado desejado.10 - Layers / Merge / Merge All
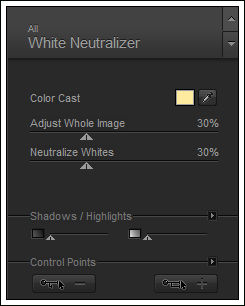
Effects / Plugin / Nik Software / Color Efex Pro 3.0 : Whaite Neutralizer:
11 - Image / Add Borders / Symmetric / 1 pixel cor # 000000
Image / Add Borders / Symmetric / 70 pixels cor # ffffff .
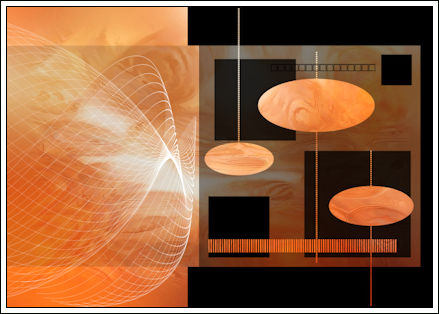
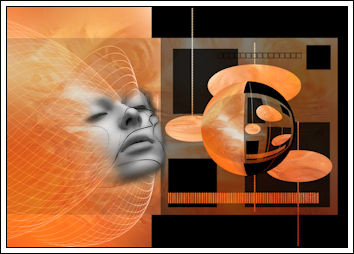
Escreva o texto / Salve em JPG.
© Tutorial Traduzido por Estela Fonseca em 03/07/2009.
Obrigada, Cameron por me permitir traduzir este trabalho.