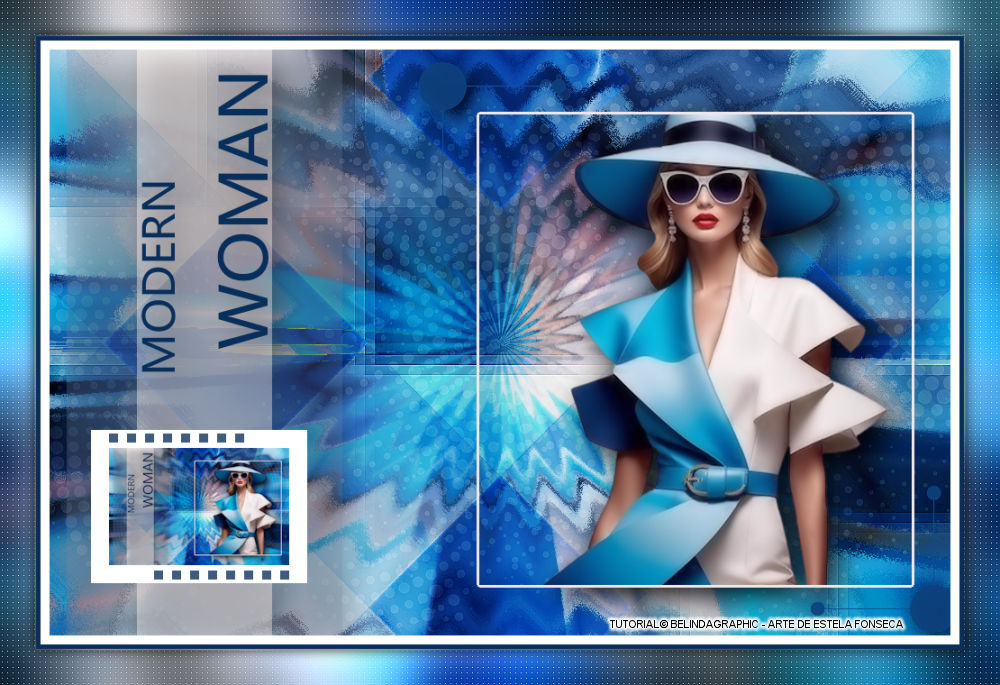
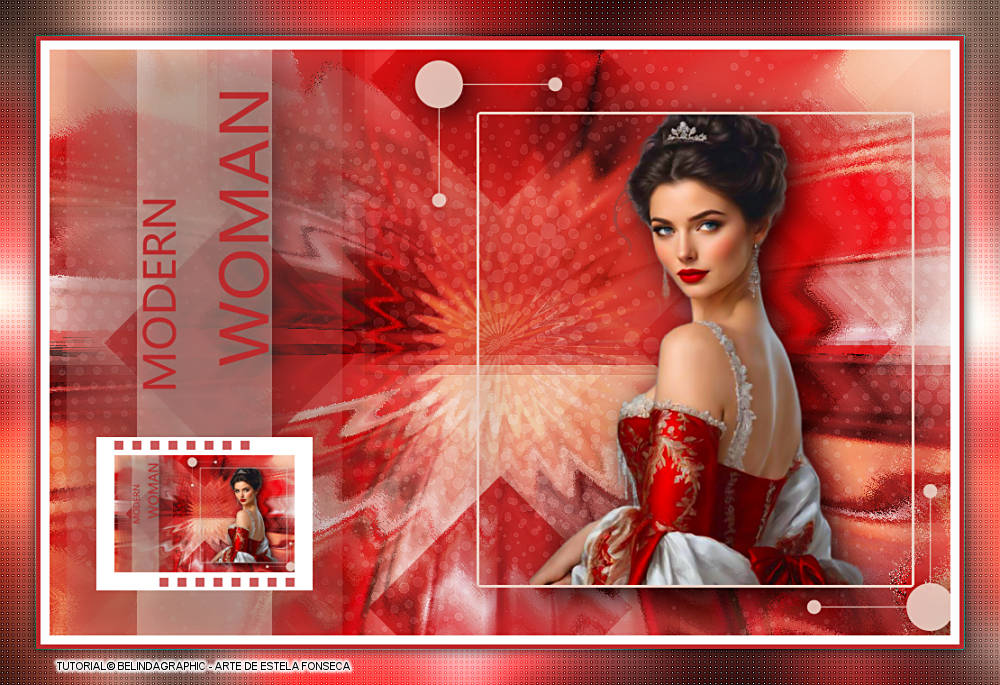
MODERN WOMAN
Tutorial de ©Belinda_Graphic _Tutoriels PSP - Original Aqui
Traduzido no PSP 2022 ULTIMATE, mas pode ser realizado nas versões anteriores!
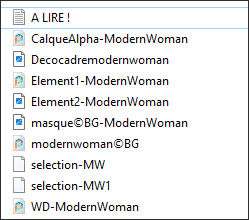
Materiais Necessários:
Plugins:Medhi / Weaver /Sorting Tiles
Italian Editors Effects / Disturbo Zoom
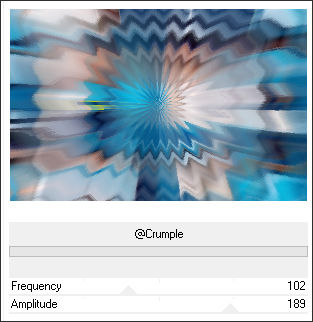
BKG Designers sf10 IV / Crumple
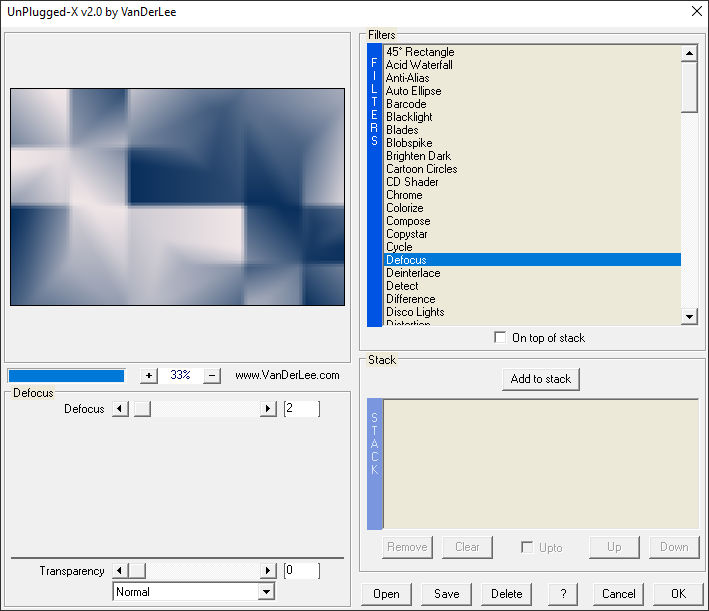
Vanderlee / Defocus
Toadies / What are you?
Alien Skin Eyes Candy 5 / Impact / Perspective Shadow.
Graphic plus / Cross Shadow
Carolaine & Sensibility / CS LDots
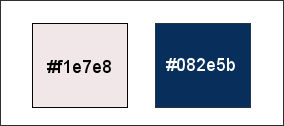
CORES:
Primeiro Plano cor #f1e7e8 / Plano de Fundo cor #082e5b
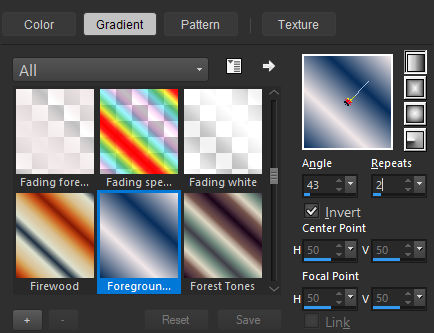
1. Abra a layer <<Alpha Modern-Woman>> Duplique e feche a original. Continue na cópia.Em "Estilos e Texturas", crie um gradiente LINEAR com as seguintes configurações:
Preencha com o Gradiente
2. Selections / Select All - Layers / New Raster LayerAtive o tube <<modernwoman©BG>> Copie e cole na seleção.
Selections / Select None.
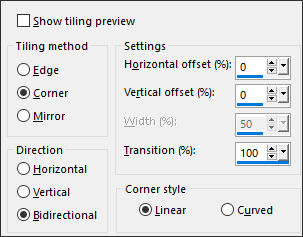
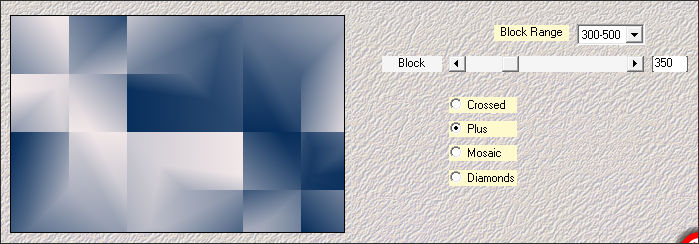
3. Effects / Image Effects / Seamless Tiling: Transition 100
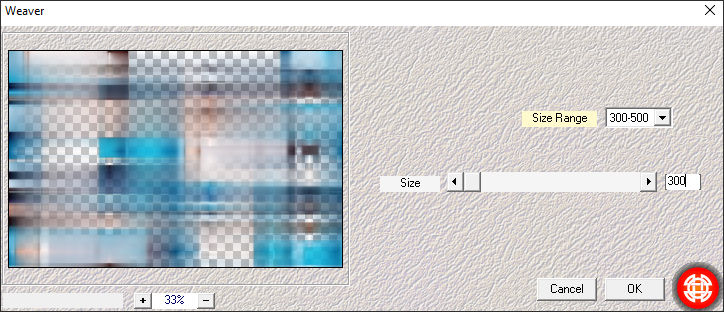
4. Effects / Plugins / Medhi / Weaver.
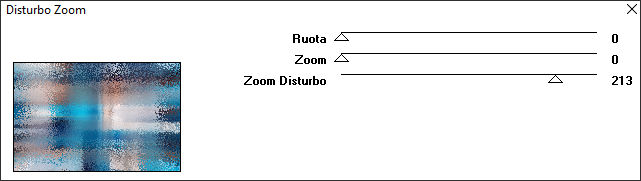
5. Effects / Plugins / Italian Editors Effects / Disturbo Zoom.
6. Effects / Plugins / BKG Designers sf10 IV / Crumple.
Blend Mode / Hard Light.
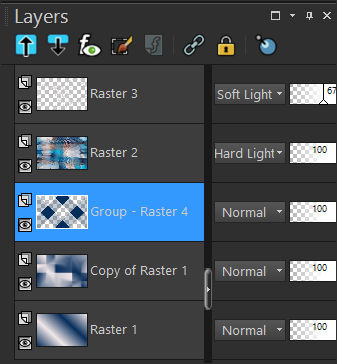
7. Ative a Layer <<Raster 1>>Layers / Duplicate
Effects / Plugins / Medhi / Sorting Tiles.
8. Effects / Plugins / Vanderlee / Unplugged X / Defocus.
Adjust / Sharpness / Sharpen.
9. Ative a Layer << Raster 2 >>.
Ative o arquivo <<Element1-ModernWoman >>Copie e cole como nova layer.
Blend Mode / Soft Light
Opacidade / 67%.
Adjust / Sharpness / Sharpen.
10. Layers / New Raster LayerPreencha com a cor do Segundo Plano
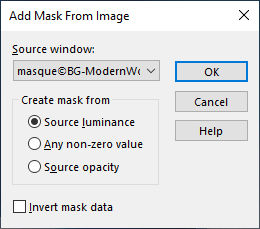
Ative <<masque©BG-ModernWoman>> Minimize.
Layers / New Mask Layer / From Image:
Layers / Duplicate
Layers / Merge / Merge Group
Layers / Arrange / Move Down ... 2 Vezes
11. Resultado:
12. Ative a Layer do Topo
Layers / New Raster LayerSelections / Load /Save save selection / Load selection from alpha channel: Selection #1
13. Ative o tube <<modernwoman©BG>> Copie e cole como nova layerImage / Resize / 90%... Resize All Layers ... Desmarcado
Posicione no centro da seleção.
14. Selections / Invert
Edit / Cut ou Delete no TecladoSelections / Invert
Ative a Layer abaixo desta
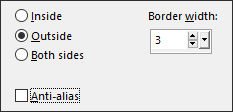
Selections / Modify / Select selection Borders
Preencha com a cor do Primeiro Plano
Selections / Select None
15. Layers / New Raster LayerSelections / Load /Save save selection / Load selection from alpha channel: Selection #2
Baldinho de Pintura com opacidade 50%.
Preencha a seleção com a cor do Primeiro PlanoSelections / Select None
16. Effects / Plugins / Toadies / What are you? Default
Ative o tube << WD-ModernWoman>> Copie e cole como nova layerPosicione à esquerda como no modelo.
17. Ative o <<Element2-ModernWoman>> Copie e cole como nova layerPosicione ao redor da moltura do tube feminino como no modelo
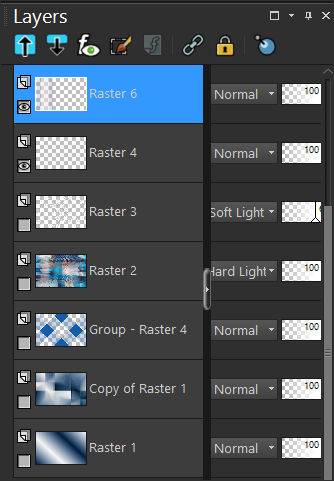
18. Feche as Layers de raster 1 até raster 3.
Layers / Merge / Merge Visible
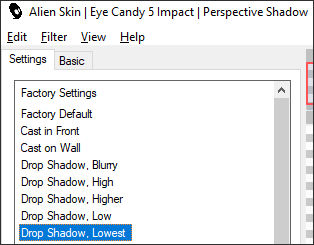
19. Fique na layer mergedEffects / Plugins / Alien Skin Eyes Candy 5 / Impact / Perspective Shadow / Drop Shadow Lowest.
Abra as Layer fechadas
20. Edit / Copy Special / Copy Merged.Cole como nova imagem
Image / Resize / 20%... Resize All Layers ... Marcado
Image / Add Borders / Symmetric Marcado / 20 pixels cor #ffffff.
21. Ative <<Decocadremodernwoman>> Copie e cole como nova layerLayers / Merge / Merge All (Flatten)
22. Copie / Retorne ao seu primeiro trabalhoCole como nova layer
Posicione à esquerda como no modelo
Layers / Merge / Merge All (Flatten)
Copie!!!!
23- Image / Add Borders / Symmetric Marcado / 10 pixels cor #ffffff.
Image / Add Borders / Symmetric Marcado / 5 pixels cor #082e5b
Image / Add Borders / Symmetric Marcado / 40 pixels cor #f1e7e8.Ative a Varinha Mágica (Feather e Tolerance em )
Selecione a borda externa
24. Cole na seleção ( a imagem copiada está na memória)Adjust / Blur / Gaussian Blur / Radius 23
Effects / Plugins / Graphics Plus / Cross Shadow / Deault
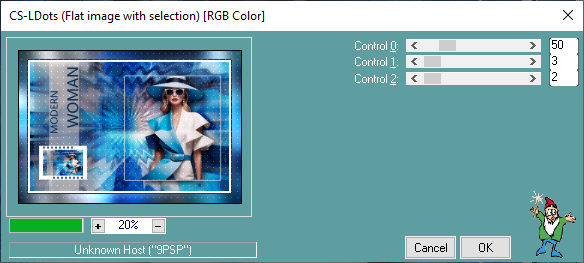
25. Effects / Plugins / Carolaine & Sensibility / CS LDots.
Adjus / Sharpness / Sharpen MoreSelections / Invert
Effects / 3D Effects / Drop Shadow: 2 2 50 20 de cor #000000.
Effects / 3D Effects / Drop Shadow: -2 -2 50 20 de cor #000000.
26. Assine seu trabalho
Layers / Merge / Merge All
Image - Resize à 950 pixels de largura (Resize All Layers ...Marcado).
Salve como JPG.
Versão com tube Próprio:

©Tutorial Traduzido por Estela Fonseca 16/05/2024.
Obrigada Belinda por me permitir traduzir seu trabalho.