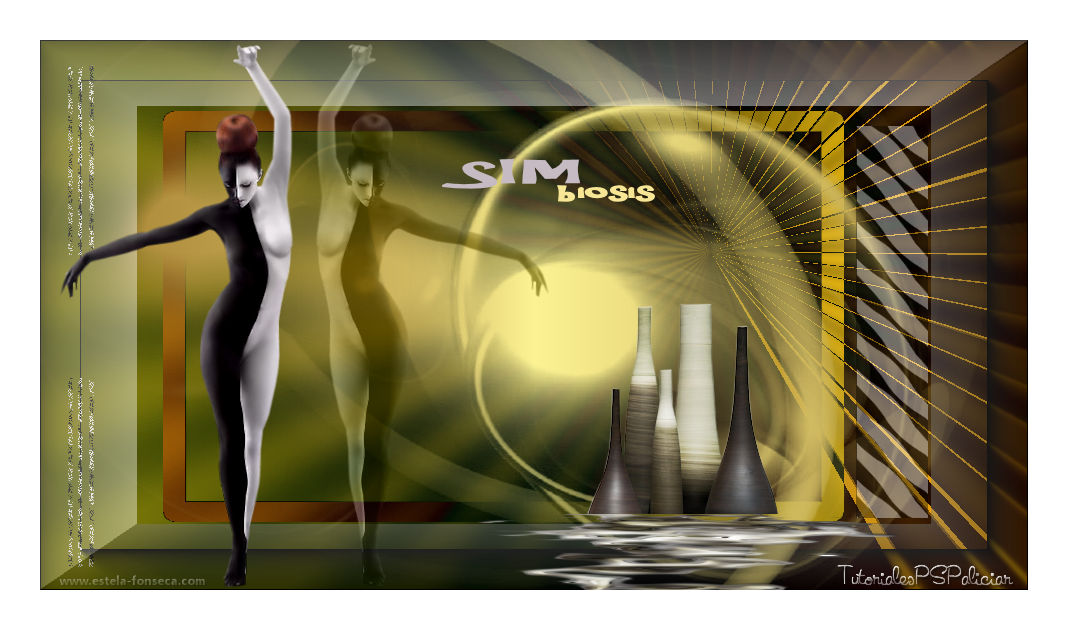
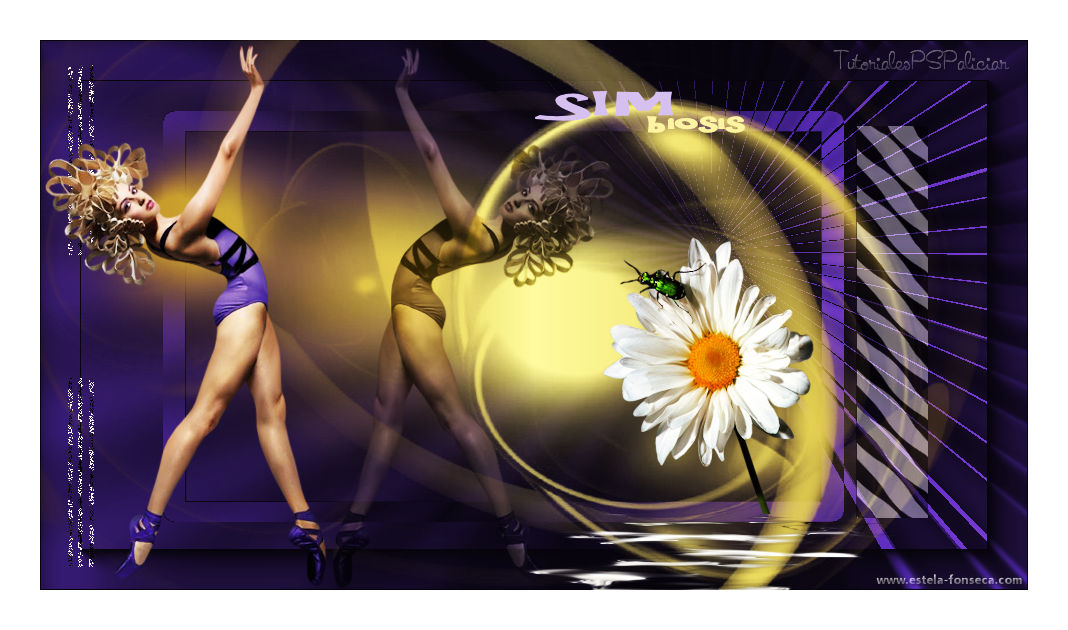
SIMBIOSIS
Tutorial de ©Alicia.Original Aqui.
Materiais Necessários:
Tube calguisdecom17022014
Tube femme_en_noir_et_blanc_tubed_de_thafs
Mask : Narah_mask_ 0799.jpg
Gradiente : Goldgradient
Word Art Simbiosis_aliciar
Seleções: sel3902_aliciar, sel3903_aliciar et sel3904_aliciarMarca d'água tutorialespspaliciar
Plugins Utilizados:Filter Factory Gallery A/Raygun
AAA Frames/Foto Frame
Flaming Pear/Flood
Preparação:Abra os tubes duplique e feche os originais.
Coloque as seleções na Pasta de Seleções do PSP.
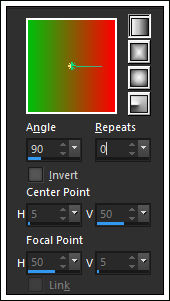
01- Abra uma nova imagem transparente de 988/550 pixels02- Primeiro Plano Cor #00c00b / Segundo Plano cor #ff0000
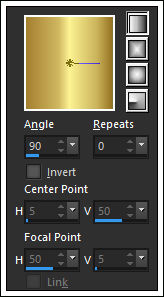
Forme um Gradiente Estilo Linear Angle 90 / Repeats 1
Preencha a layer transparente com o Gradiente
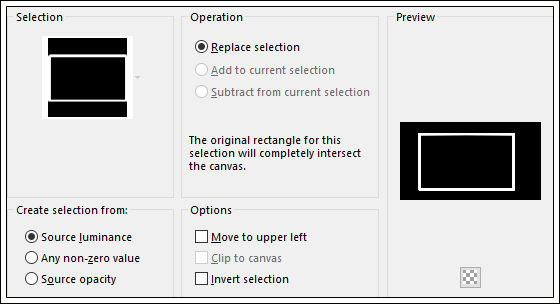
03- Layers / New Raster Layer
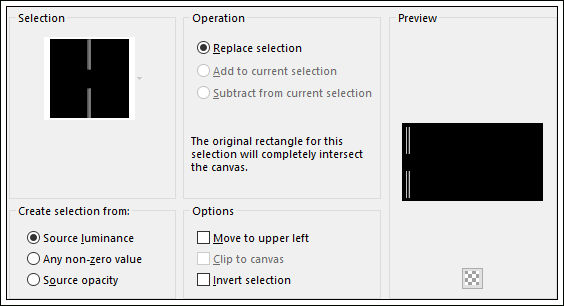
Selections / Load save selection / Load Selection from disk: sel3902_aliciar.PspSelection
Preencha a seleção com o Gradiente:
Selections / Select None
Layers / Merge / Merge Visible
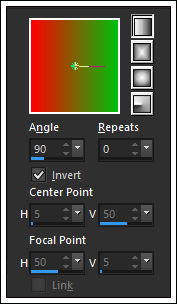
05 - Layers / New Raster Layer
Preencha com o Gradiente <<GoldGradient>>
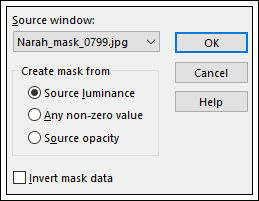
06- Abra a Mask <<Narah_mask_0799.jpg>> Minimize
Layers / New Mask layer / From Imagem: Narah_mask_0799.jpg
Layers / Merge / Merge Group
07- Ative a layer <<Merged>>
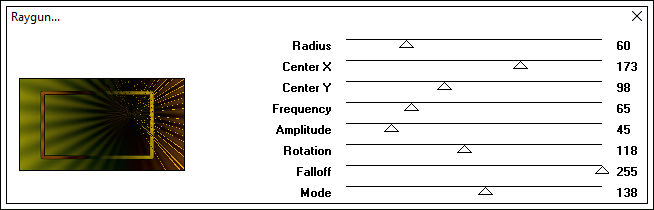
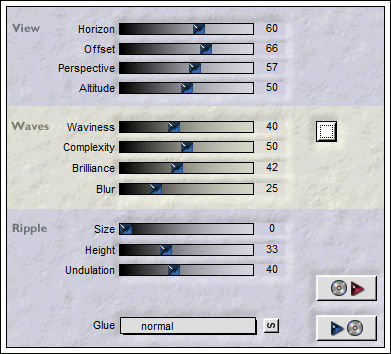
Effets/ Plugin /Filter Factory Gallery A/Raygun
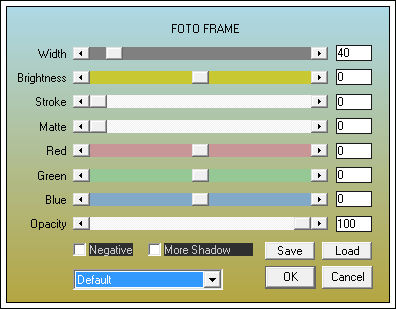
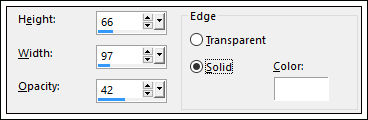
08- Effects / Plugin / AAA Frames/Foto Frame
09- Ative a Layer da Mask
Layers / New Raster Layer
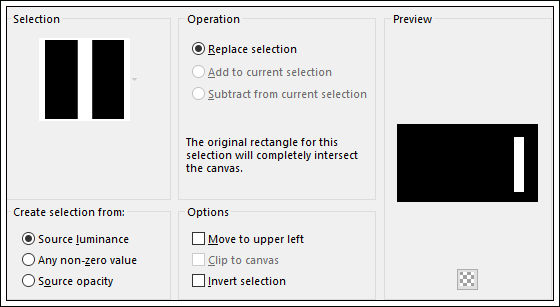
Selections / Load save selection / Load Selection from disk: sel3903_aliciar.PspSelection
Preencha a Seleção com o Gradiente << GoldGradient>>
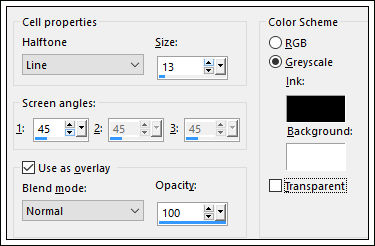
Selections / Select None10 - Effects/ Artistic Effects /Halftone:
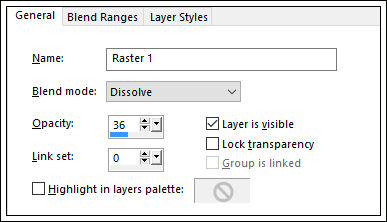
11 - Blend Mode / Dissolve
Opacidade / 36
12 - Layers / New Raster Layer
Selections / Load save selection / Load Selection from disk: sel3904_aliciar.PspSelection
Preencha com o Gradiente <<GoldGradient>>
Selections / Select None
13 - Effects/ Artistic Effects / Halftone
Opacidade 38
14 - Layers / Merge / Merge Visible
15 - Effects/ 3D Effects / Buttonize:
16 - Ative o tube << tube femme_en_noir_et_blanc_tubed_by_thafs.pspimage>>
Copie / Cole como Nova Layer
Image/Resize / 75%/ desmarque " Resize all layers"
Posicione17 - Layers / Duplicate
Image/Mirror / Mirror Horizontal
18 - Opacidade / 46%
Blend Mode / Luminance Legacy19 - Ative o tube <<calguisdecom17022014.pspimage>>
Copie e Cole como Nova LayerImage/Resize / 50% / Desmarque " Resize all Layers"
20 - Posicione como segue:
21 - Effects/ Plugin / Flaming Pear/Flood: Cor #ffffff
22 - Ative o tube << Word Art Simbiosis_aliciar.pspimage >>
Copie e Cole como nova LayerPosicione como segue:
23 - Coloque a sua assinatura ou a sua marca d'água
24 - Coloque a Marca d'água <<tutorialespspaliciar>>
25 - Image/Add Borders / Symmetric Marcado / 30 pixels cor #ffffff
26 - Exporte como jpeg.
©Tutorial de Alicia, traduzido por Estela Fonseca em 25/02/2016.
Não alterar nem repassar sem autorização.