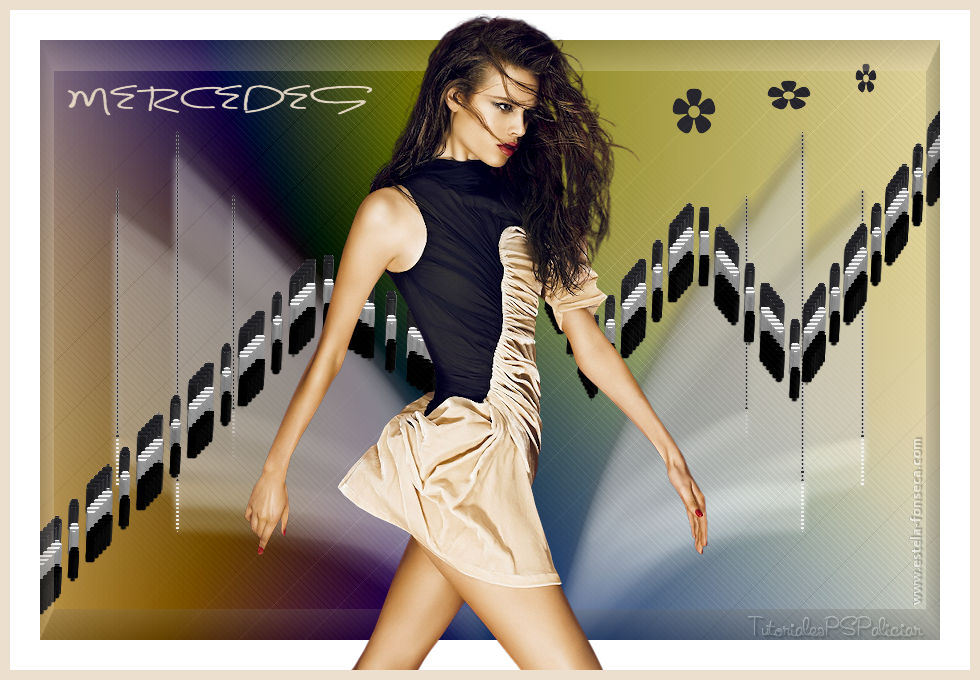
MERCEDES
Tutorial de ©Alicia.Original Aqui.
Materiais Necessários:
Tube MR_Jessy by Maryse
Seleções: sel375_aliciar , sel3908_aliciar, sel3909_aliciar e sel3909_aliciar.(Copie e Cole dentro da pasta de Seleções do PSP)
Preset mercedes_aliciarmotiontrail do plugin Alien Skin Eye Candy 5/Impact/Motion Trail(Duplo clique para importá-lo)
Preset mercedes_aliciarextrude do Plugin Alien Skin Eye Candy 5/Impact/Extrude(Duplo clique para importá-lo)
Marca D'água tutorialespspaliciar
Plugins Utilizados:
Nik Software/ Color Efex Pro 3,0 Complete
Panopticum/PAN Alpha Strip
Alien Skin Eye Candy 5:Impact/Motion Trail
Alien Skin Eye Candy 5:Impact/Extrude
L en K's /Paris
Preparação:Abra os tubes no PSP, Duplique e feche os originais
01- Primeiro Plano cor #2c2b31 e Segundo Plano Cor #eddfcd
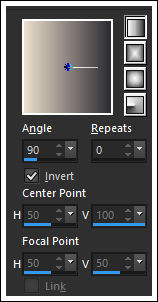
Forme um Gradiente estilo Linear angle 90 Repeats 0
02- Abra uma Nova imagem transparente de 900 / 600 pixels
Preencha com o Gradiente03- Layers / New Raster Layer
Preencha com o Gradiente (invert marcado)
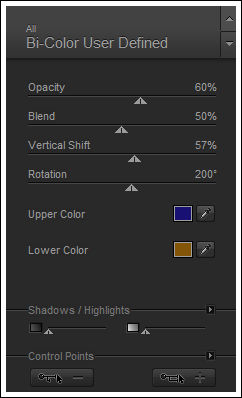
04- Effects / Plugin / Nik Software/ Color Efex Pro 3,0 Complete/ Bicolor-User Defined
Upper Color #181173 Lower Color #825508
Blend Mode / Difference
05- Layers / New Raster Layer
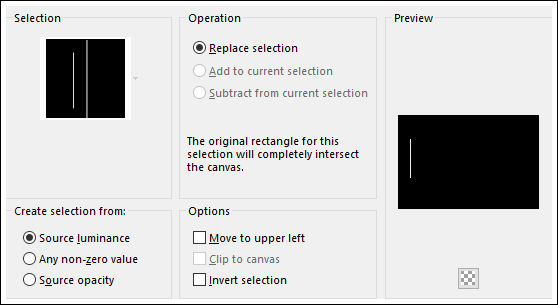
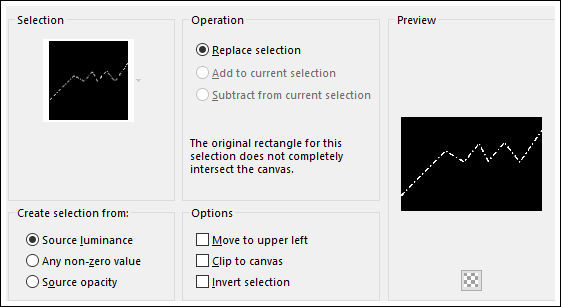
Selections / Load save selection / Load selection from disk: sel375_aliciar .PspSelection
Preencha com a cor do Primeiro Plano Cor #2c2b31
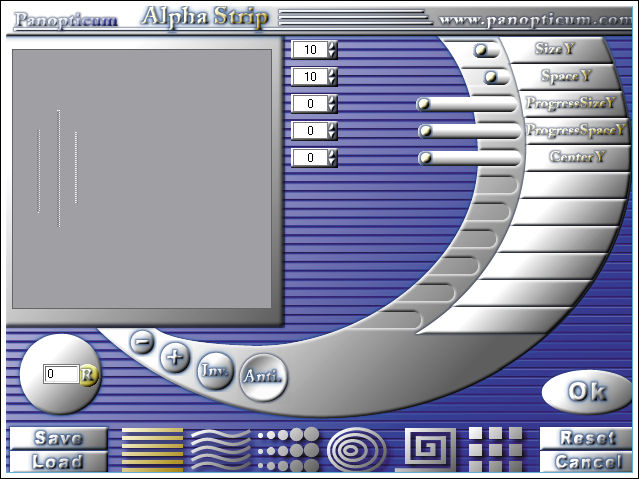
Selections / Select None06- Effects / Plugin / Panopticum/PAN Alpha Strip
Selecione as linhas horizontais, veja que estão destacadas em amarelo.
07- Layers / Duplicate
Image/Mirror / Mirror Horizontal ( Image-Mirror)
Layers / Merge / Merge down
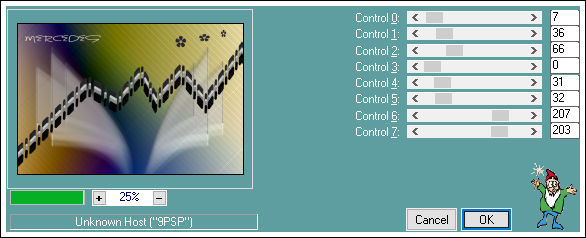
08- Effects/ Plugin /Alien Skin/Eye Candy 5/ Impact/Motion Trail / preset mercedes_aliciarmotiontrail.f1s
09- Repita o ponto 8
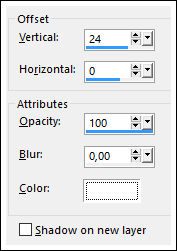
10 - Effects/ 3D Effects / Drop Shadow: 24/0/100/0/cor #FFFFFF
11 - Repita o passo 10.
12- Layers / New Raster Layer
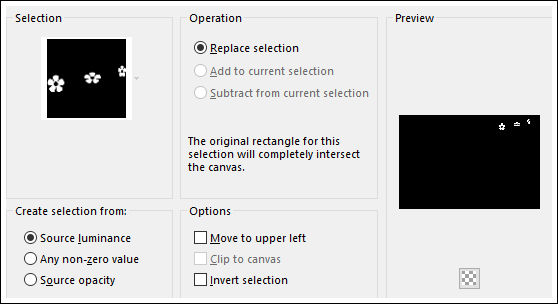
Selections / Load Save Selection / Load selection from disk: sel3908_aliciar .PspSelection
Preencha com a cor #2c2b31
Selections / Select None13 - Effects/Plugin / Panopticum/PAN Alpha Strip
14- Effects/ 3D Effects / Drop Shadow: 24/0/100/0/cor #FFFFFF
15 - Effects/ 3D Effects / Drop Shadow: 24/0/100/0/cor #000000
16- Effects/ Plugin / Alien Skin/Eye Candy 5/ Impact/Extrude/ preset mercedes_aliciarextrude.f1s
17 - Layers / New Raster Layer
Selections / Load Save Selection / Load selection from disk:sel3909_aliciar .PspSelection
Preencha com a cor #2c2b31
Selections / Select None18 - Layers / New Raster Layer
Selections / Load Save Selection / Load selection from disk: sel3910_aliciar .PspSelection
Preencha com a cor #eddfcd
Selections / Select None19 - Layers / Merge / Merge Visible
Effects/ Plugin / L en K's /Paris
20 - Effects/ 3D Effects / Buttonize
21 - Image /Add Borders / Symmetric Marcado / 30 pixels cor #ffffff
22 - Ative o tube << MR_Jessy.pspimage>>
Copie e Cole como nova layer
Image / Resize / 80% (Resize all layers desmarcado)
Image / Mirror / Mirror Horizontal (Image-Mirror)
Posicione
23 - Image /Add Borders / Symmetric Marcado / 10 pixels cor #eddfcd
24 - Coloque a sua assinatura
25 - Coloque a marca d'água tutorialespspaliciar26 - Layers / Merge/ Merge all. Exporte como jpeg.
©Tutorial de Alicia, traduzido por Estela Fonseca em 25/05/2016.
Não alterar nem repassar sem autorização.