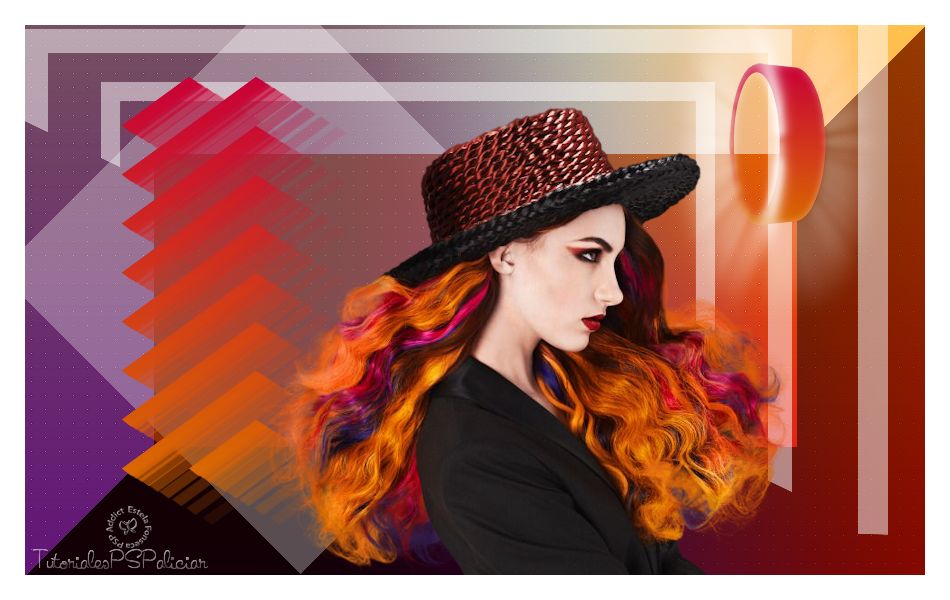
HAIRS
Tutorial de ©Aliciar.
Obrigada Alicia , por sua autorização.
Este tutorial foi feito no PSP XIII, mas pode ser feito em outras versões do PSP.
Materiais Necessários:
Tube de Alies 1VR597i-woman-20072013 .
Seleções: Sel 367_aliciar, Sel 343_aliciar e Sel 365_aliciar( coloque na pasta de seleções de Corel PaintShop Pro )
Preset Hairs_aliciar ( coloque na pasta Blacklight de Eye Candy Impact 5 )
Marca d'água tutorialespspaliciarPlugins Utilizados:
penta.com/Dot and Cross
Alien Skin Eye Candy 5:Impact/Backlight
It@lian Editors Effect/Bordo con luci
Nik Software Color Efex Pro 3.0 Complete
VanDerLee/ UnPlugged -X/45 Rectangle
MuRa's Meister Copies
Abra os tubes, duplique e feche os originais.
1 - Abra uma imagem transparente de 900 / 550 pixels
Preencha com o Gradiente estilo Linear angle: 0°/Repeats: 0
Foreground cor #c80037/ Background cor #da6900
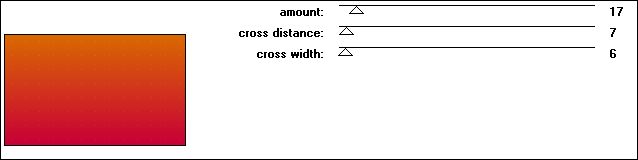
2 - Effects/ Plugin / Pentacom/ Dot and Cross:
3 - Effects/ Edge effects / Enhance
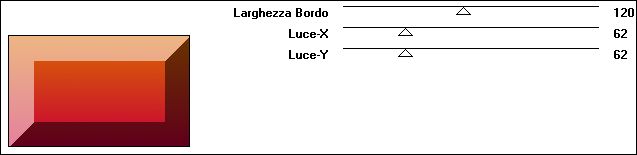
4 - Effects/ Plugin / It@lian Editors Effect/ Bordo con luci:
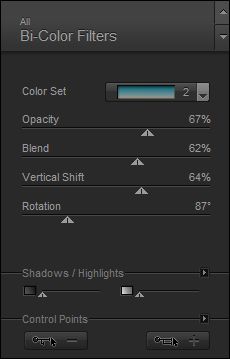
5 - Effects/ Plugin / Nik Software Color Efex Pro 3.0 Complete: Bi-Color Filters/ Cool Warm 2
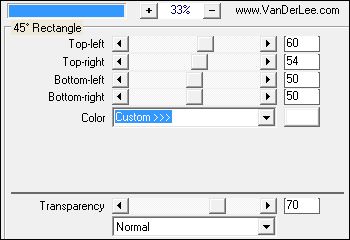
6 - Effects/ Plugin /VanDerLee/ UnPlugged -X/45° Rectangle:
(Cor #ffffff)
7 - Layers / New raster layer.
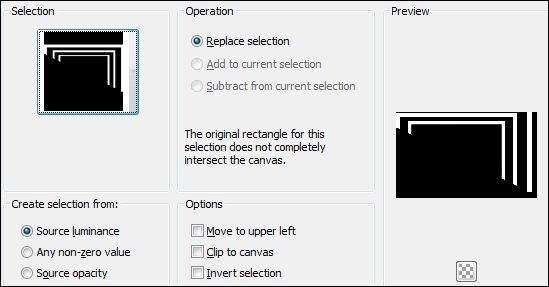
Selections / Load save selection / Load select from disk: sel 367_aliciar.PspSelection
Preencha com a cor #ffffff
Opacidade 50%
Selections / Select None8 - Layers / New raster layer.
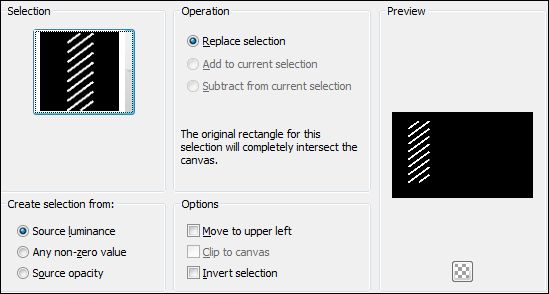
Selections / Load save selection / Load select from disk: sel 343_aliciar.PspSelection
Preencha a seleção com o gradiente Linear angle e repeats 0 / Invert marcadoForeground cor #c80037/ Background cor #da6900
Selections / Select None
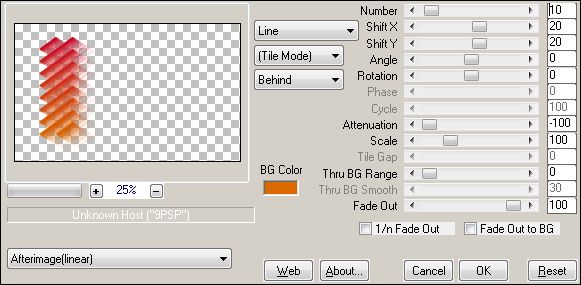
9 - Effects/ Plugin / Mura's Meister/Copies:
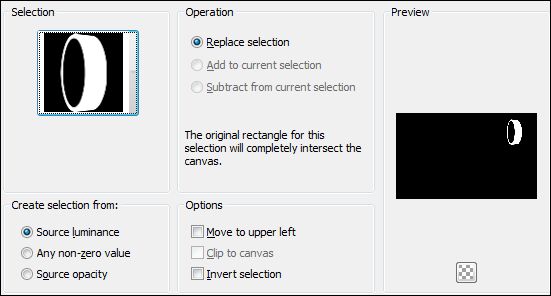
10 - Layers / New raster layer.
Selections / Load save selection / Load select from disk: sel 365_aliciar.PspSelection
Preencha a seleção com o gradiente Linear angle e repeats 0 / Invert marcado
Foreground cor #c80037/ Background cor #da6900
Selections / Select None
11 - Effects/ Plugin / Alien Skin Eye Candy 5 Impact / Blacklight
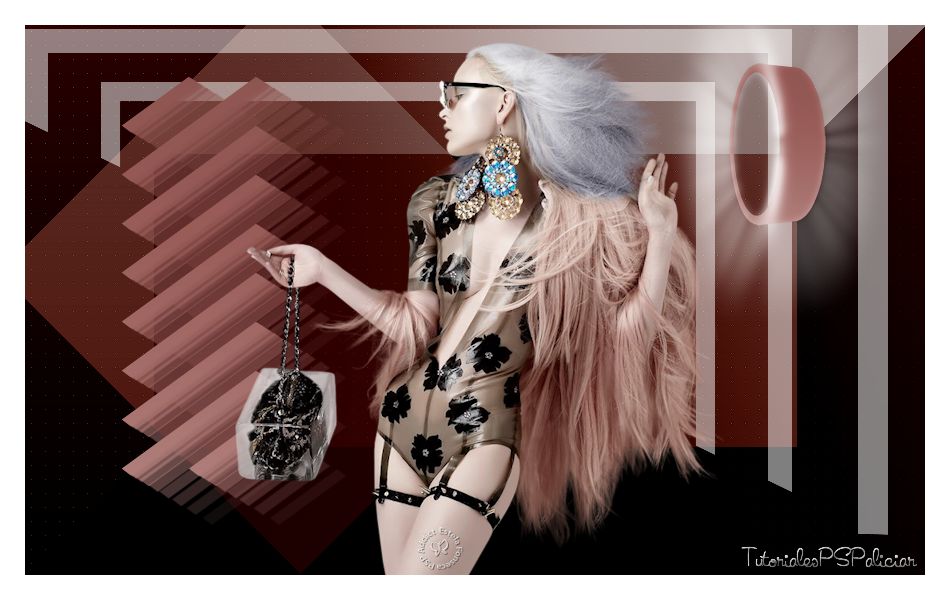
preset Hairs_aliciar.f1s12 - Ative o tube << Alies 1VR597i-woman-20072013.pspimage>>
Copie/Cole como nova layerImage / Resize / 90%/ desmarque: Resize all layers
Posicione como na imagem final.13 - Image/Add Borders: 25 pixels cor #ffffff
14 - Coloque a sua assinatura
15 - Coloque a marca d'água de tutorialespspaliciar
16- Exporte como Jpg otimizado.© Tutorial Traduzido por Estela Fonseca em 29/07/2013.
Obrigada, Alicia por me permitir traduzir este trabalho.