 |
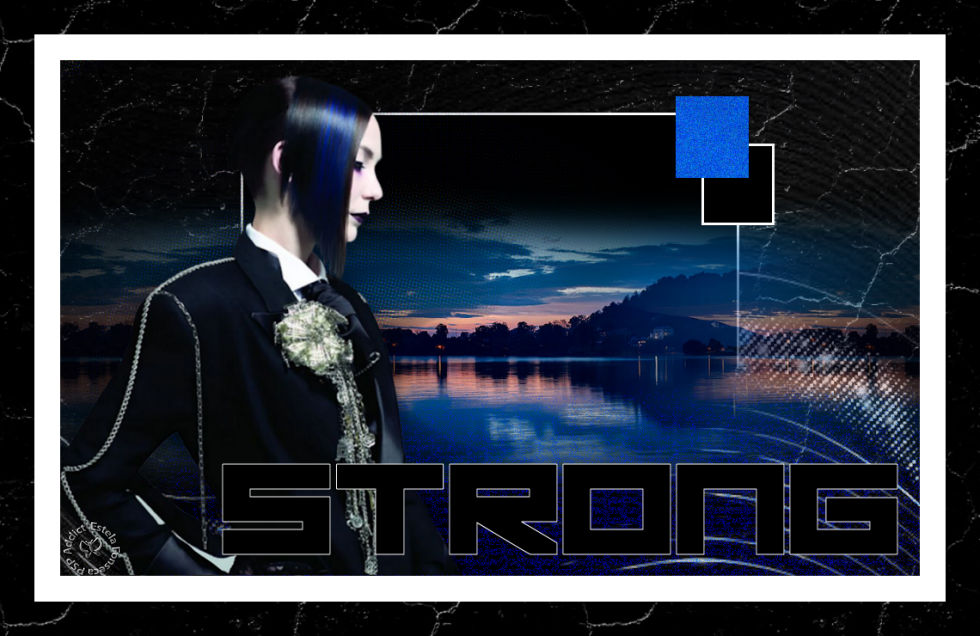
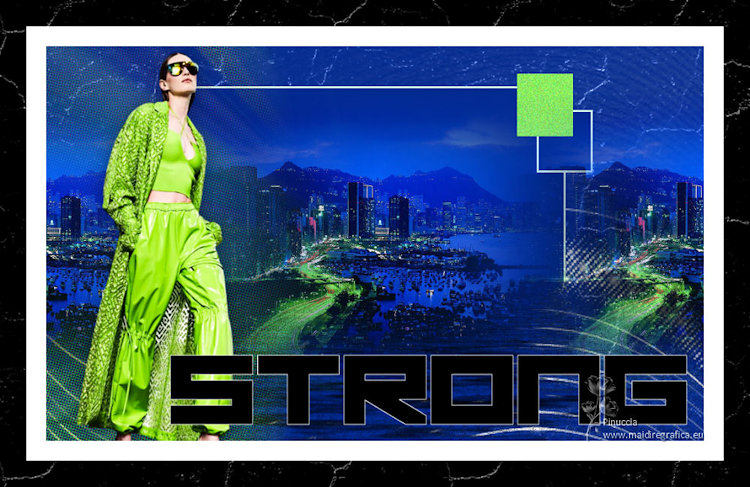
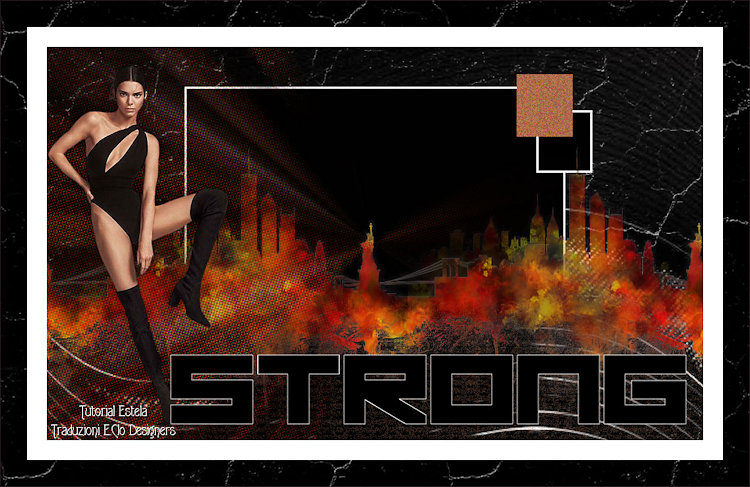
STRONG
Este tutorial foi realizado no Corel PaintShop Pro 2021 Ultimate.
Agradeço as maravilhosas tradutoras...
Material Necessário:
Tube de PqnaAlice (Misted) EF-Strong_Tube EF-Strong_Texto EF-Strong_Deco_1 Selections_Strong_1 / Selections_Strong_2 / Selections_Strong_3 Versão 2: Tubes de Jeanne.
PLUGINS Filters Unlimited 2.0 / Photo Aging Kit Flaming Pear / Flood
Preparação: Abra os tubes no PSP, duplique e feche os originais. Trabalhes com as cópias!!! Copie as Seleções para a pasta de Seleções do PSP.
Você pode alterar os blends das layers e as opacidades de acordo com as suas cores.
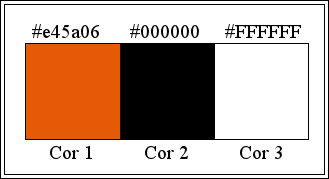
Cores do Tutorial:
01- Abra uma nova imagem transparente de 1000 X 600 Pixels Preencha com a cor 2
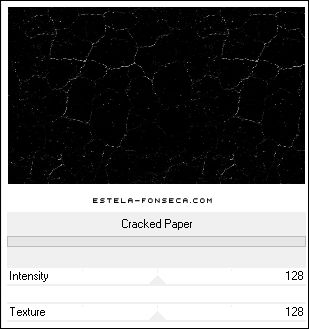
02- Effects / Plugins / Filters Unlimited 2.0 / Photo Aging Kit / Cracked Paper: 128 / 128
Abra o «EF-Strong_Deco_1» Copie e Cole como nova layer
03- Blend Mode / Screen Layers / New Raster Layer
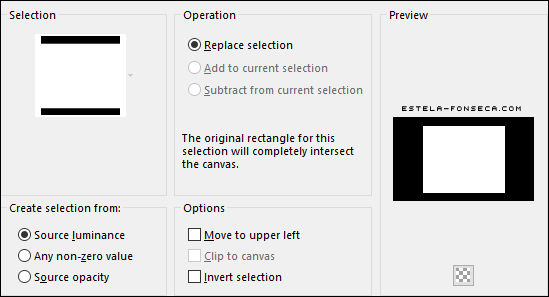
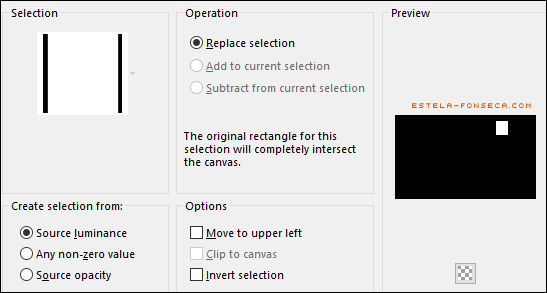
04- Selections / Load /Save selection / Load selection from disk: Strong_1
Preencha a seleção com a cor 3
05- Selections / Modify / Contract 3 Pixels ... Preencha com a cor 2 Selections / Select None
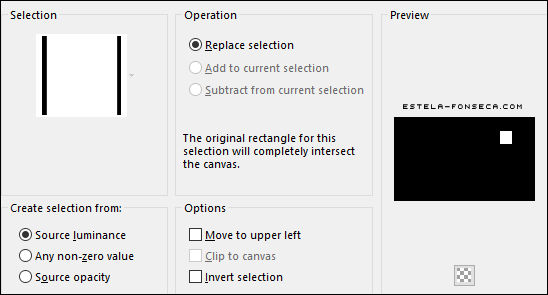
06- Layers / New Raster Layer Selections / Load /Save selection / Load selection from disk: Strong_2
07- Preencha a seleção com a cor 3 Selections / Modify / Contract 3 Pixels ... Preencha com a cor 2
08- Selections / Select None Layers / New Raster Layer
09- Selections / Load /Save selection / Load selection from disk: Strong_3
Preencha com a cor 1
10- Adjust / Add Remove Noise / Add Noise:
Selections / Select None
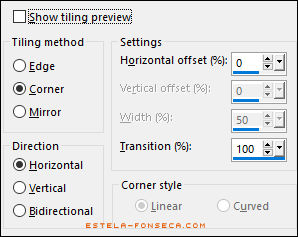
11- Ative o tube «079PaisagemByPqnaAlice» Copie e Cole como nova layer Effects / Image Effects / Seamless Tiling:
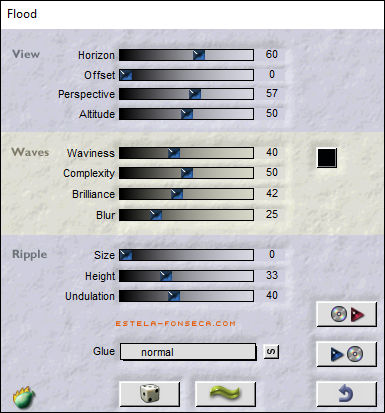
12- Ative a Layer «Raster 3» Effects / Plugins / Flaming Pear / Flood:
13- Ative o tube «EF-Strong_Texto» Copie e Cole como nova Layer Layers / Arrange / Bring to top
14- Pick Tool (K): Posição X: 188 / Posição Y: 469 / Tecla M para desativar a Pick Effects / 3D Effects / Drop Shadow: 10 / 12 / 50 / 20 / Cor 2 (shadow, on new layer-MARCADO)
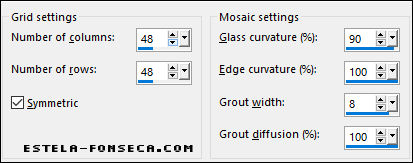
15- Effects / Texture Effects / Mosaic Glass
Opacidade / 73% Abra o tube «EF-Strong_Tube» Copie e Cole como nova layer Pick Tool (K): Posição X: -11 / Posição Y: 28 / Tecla M para desativar a Pick
16- Layers / Duplicate Ative a Layer «Raster 8»
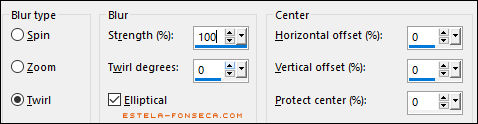
17- Adjust / Blur / Radial Blur:
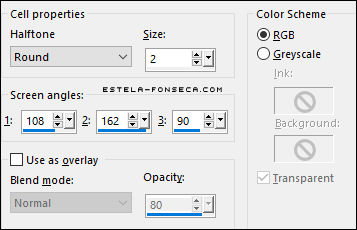
Effects / Artistic Effects / Halftone:
18- Blend Mode / Hard Light ... Opacidade / 67% Layers / Arrange / Move Down (2 Vezes)
19- Ative a Layer do tube (Copy of Raster 8) Effects / 3D Effects / Drop Shadow: 0 / 0 / 40 / 40 / Cor 2 (Desmarque: Shadow on new layer)
20- Image / Add Borders / Symmetric Marcado / 30 Pixels cor 3 Image / Add Borders / Symmetric Marcado / 40 Pixels cor 2
21- Ative a Varinha Mágica e selecione a Borda externa Effects / Plugins / Filters Unlimited 2.0 / Photo Aging Kit / Cracked Paper: 128 / 128
22- Selections / Select None Assine seu trabalho... Layers / Merge / Merge All
24- Image / Resize / 1000 Pixels de Largura ... Resize All Layers ... Marcado. Salve Como JPG.
Versão 2: Tube de Jeanne (Personagem) Jeanne
(Misted)
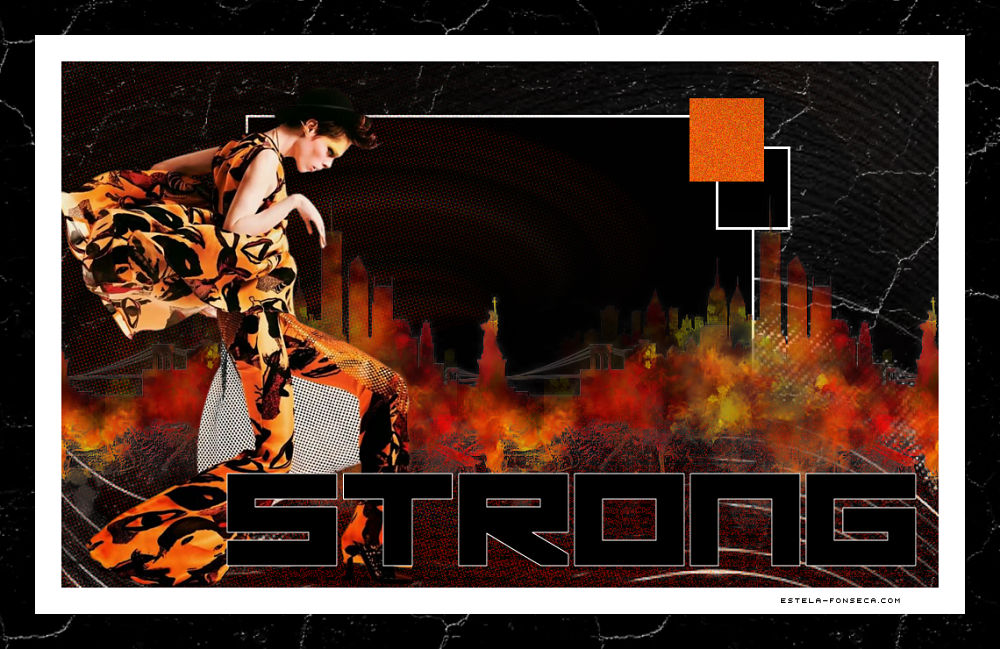
Versão de Pinuccia:
Versão de Clo:
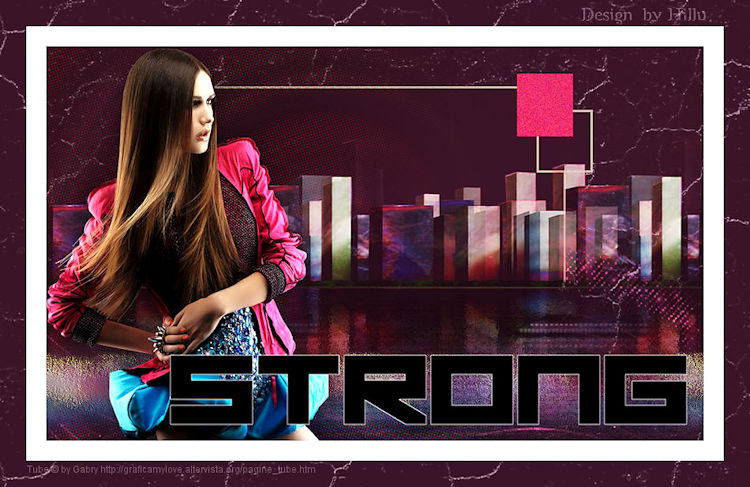
Hillu:
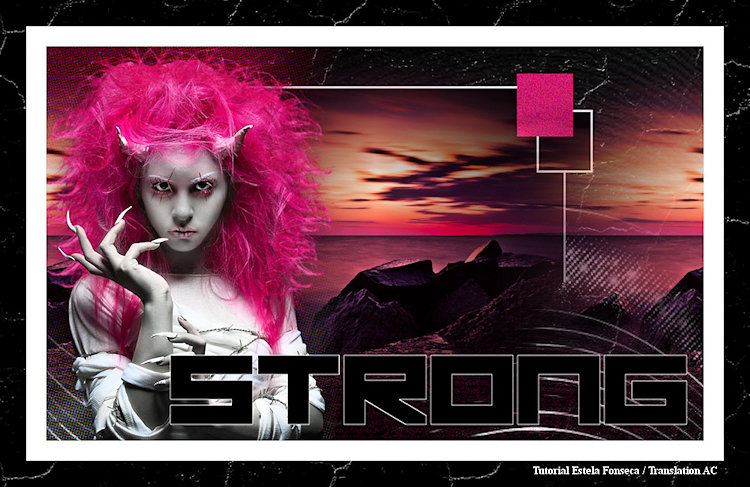
Angela:
©Tutorial criado por Estela Fonseca
em 05/02/2023. |