 |
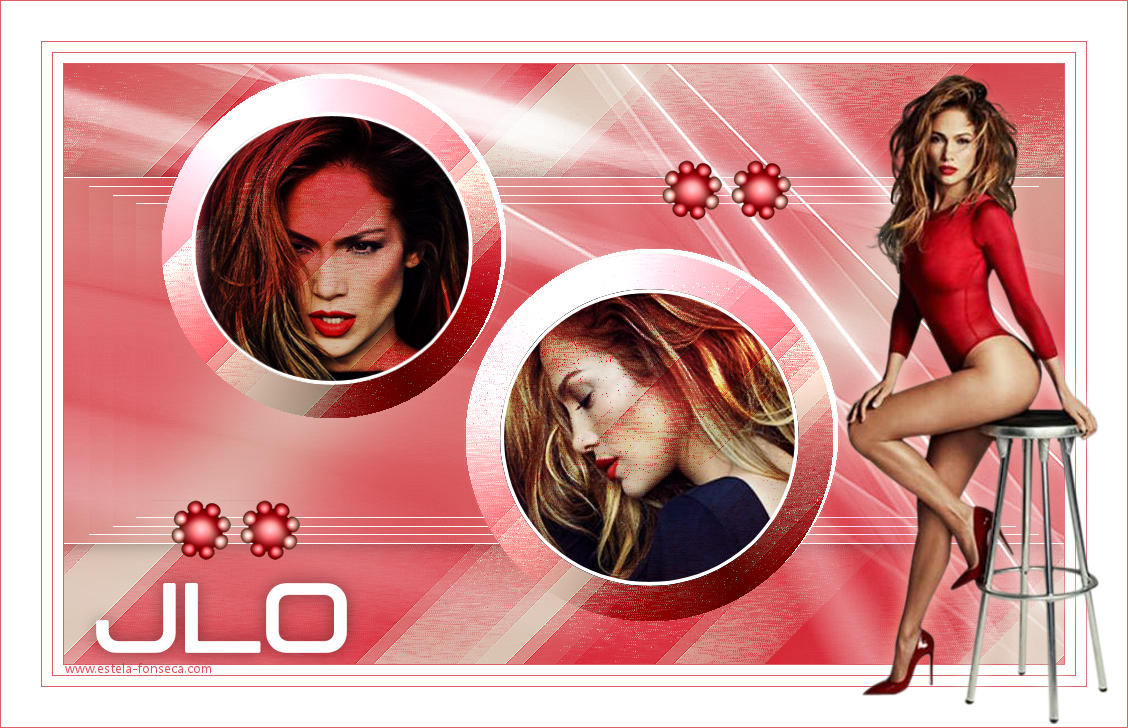
JLO
Meu especial agradecimento as maravilhosas tradutoras: Pinuccia, Clo e Hillu.
Tubes de LB Tubes... AQUI. Demais materiais criados especialmente
♥ Agradeço as artistas pelas lindas criações (Mask e Tubes e afins) Não altere o nome nem remova a marca d'água do original. Não compartilhe em grupos ou ofereça-os em seus sites, blogs etc ... Seu uso nos tutoriais está sujeito a autorização dos autores. ♥
Plugins Utilizados: Medhi / Sorting Tiles <I.C.NET Software> Filters Unlimited 2 / Toadies <I.C.NET Software> Filters Unlimited 2 / Tramages <I.C.NET Software> Filters Unlimited 2 / Buttons & Frames
Preparação: Abra os tubes no PSP, duplique e feche os originais. Copie as seleções para a pasta de seleções do PSP.
Image / Mirror / Mirror Horizontal = Image/Mirror Image / Mirror / Mirror Vertical = Image / Flip
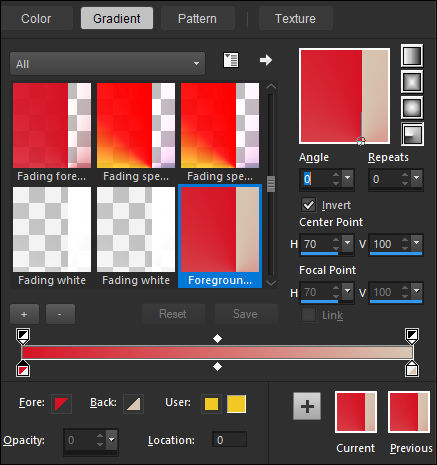
1-Abra uma imagem transparente de 1000/600 Pixels Primeiro Plano #d61325 Segundo Plano #d7c6b2
2- Gradiente <<Radial>> Configurado como abaixo:
Preencha com o Gradiente
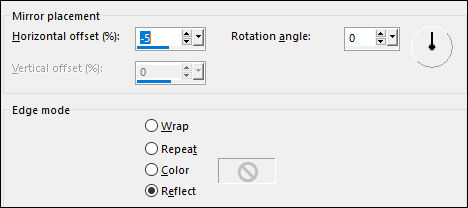
3- Effects / Reflection Effects / Rotating Mirror:
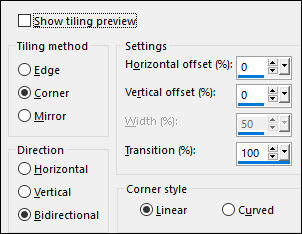
Effects / Image Effects / Seamless Tiling
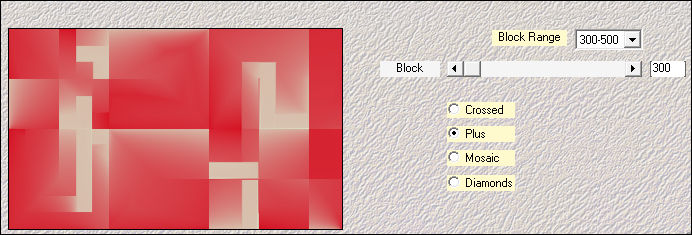
4- Effects / Plugins / Medhi / Sorting Tiles
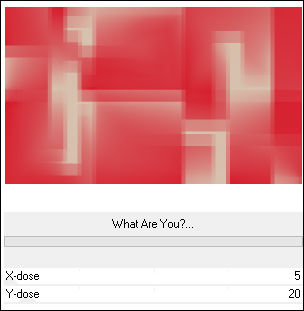
Layers / Duplicate Effects / Plugins / <I.C.NET Software> Filters Unlimited 2 / Toadies / What Are You?
Effects / Edge Effects / Enhance
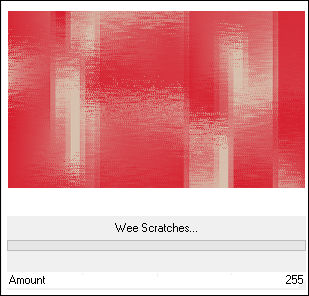
5- Effects / Plugins / <I.C.NET Software> Filters Unlimited 2 / Tramages / Wee Scratches
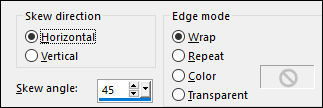
Effects / Geometric Effects / Skew
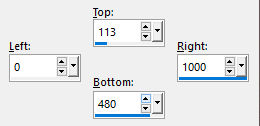
6- Selection Tool (S) / Custom Selection
Selections / Promote selection to Layer Adjust / Blur / Gaussian Blur / Radius 50 Selections / Select None
7- Effects / Edge Effects / Enhance More Layers / Duplicate Image / Resize / 95 ... Resize All Layers ... Desmarcado Repita mais duas vezes Layers / Merge / Merge Down ( 3 vezes)
8- Ative a Layer <<Raster 1>> Layers / Arrange / Bring to top Adjust / Blur / Gaussian Blur / Radius 50
9- Effects / Plugins / VM Natural / Plastic Starfish / Default Image / Resize / 20%... Resize All Layers ... Desmarcado Image / Resize / 50%... Resize All Layers ... Desmarcado Adjust / Sharpness / Sharpen
10- Pick Tool (K) Mode: Scale Posição X (87) Posição Y (436) Layers / Duplicate Pick Tool (K) Mode: Scale Posição X (156) Posição Y (436) Tecla "M" para desativar a Pick Tool Layers / Merge / Merge Down
11- Copie e Cole como nova imagem, minimize, usaremos mais tarde!!! Effects / 3D Effects / Drop Shadow: 0 / 0 / 40 / 25 cor #000000
12- Ative a Layer do Fundo <<Copy of Raster 1>> Selections / Load save selection / Load selection from disk: Jlo_1
Selections / Promote Selection to Layer Layers / Arrange / Bring to top
13- Effects / Plugins / <I.C.NET Software> Filters Unlimited 2 / Buttons & Frames
Selections / Modify / Contract 36 Pixels
14- Tube <<1869 - JLO - LB TUBES >> Copie e Cole como nova layer Image / Resize / 65 ... Resize All Layers ... Desmarcado Posicione sobre a seleção Selections / Invert Delete no Teclado Selections / Invert
15- Selections / Select None Blend Mode / Multiply (ou outro) Layers / Duplicate Blend Mode / Overlay (ou outro)
16- Layers / New Raster Layer Selections / Load save selection / Load selection from disk: Jlo_2
Preencha a seleção com a cor branca Selections / Modify / Contract 4 Pixels Delete no Teclado Selections / Select None Layers / Merge / Merge Down ( 2 Vezes)
17- Ative a Layer <<Copy of Raster 1>> Selections / Load save selection / Load selection from disk: Jlo_3
Selections /Promote selection to layer Layers / Arrange / Bring to top
18- Effects / Plugins / <I.C.NET Software> Filters Unlimited 2 / Buttons and Frames / Round Buttom:
Selections / Modify / Contract 36 Pixels
19- Tube <<1870 - JLO - LB TUBES >> Copie e Cole como nova layer Posicione sobre a seleção Selections / Invert Delete no Teclado Selections / Select None
20- Blend Mode /Dodge (ou Overlay) Layers / Duplicate Blend Mode / Multiply ( Ou Normal) Opacidade à gosto!
21- Layers / New Raster Layer Selections / Load save selection / Load selection from disk: Jlo_4
Preencha a seleção com a cor branca Selections / Modify / Contract 4 Pixels Delete no Teclado Selections / Select None
22- Layers / Merge / Merge Down ( 2 Vezes) Certifique-se de estar na layer do topo Layers / Merge / Merge Down Effects / 3D Effects / Drop Shadow: -5 / 5 / 100 / 0 cor #ffffff Effects / 3D Effects / Drop Shadow: 0 / 0 / 40 / 25 cor #000000
23- Ative o <<Deco 1>> Copie e Cole como nova layer Layers / Arange / Move Down Image / Add Borders / Symmetric Marcado / 1 pixel cor #d96266 Image / Add Borders / Symmetric Marcado /10 Pixels cor clara (OU branca)
24- Image / Add Borders / Symmetric Marcado / 1 pixel cor escura Image / Add Borders / Symmetric Marcado /10 Pixels cor clara (OU branca)
25- Image / Add Borders / Symmetric Marcado / 1 pixel cor escura Image / Add Borders / Symmetric Marcado /40 Pixels cor clara (OU branca)
26- Ative o tube <<1871 - JLO - LBTUBES >> Copie e Cole como nova layer Pick Tool (K) Mode: Scale Posição X (640) Posição Y (94) Tecla "M" para desativar a Pick Tool
27- Aplique uma sombra de sua escolha Ative o <<Texto>> Copie e Cole como nova layer Posicione Effects / 3D Effects / Drop Shadow: 0 / 0 / 40 / 25 cor #000000
28- Ative a Imagem minimizada na etapa 11, copie e cole como nova layer Pick Tool (K) Mode: Scale Posição X (693) Posição Y (154) Tecla "M" para desativar a Pick Tool
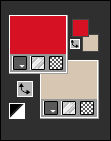
29- Effects / 3D Effects / Drop Shadow: 0 / 0 / 40 / 25 cor #000000 Image / Add Borders / Symmetric Marcado / 1 pixel cor escura Assine seu trabalho Salve como JPG!
Versão 2 : Tubes de EF
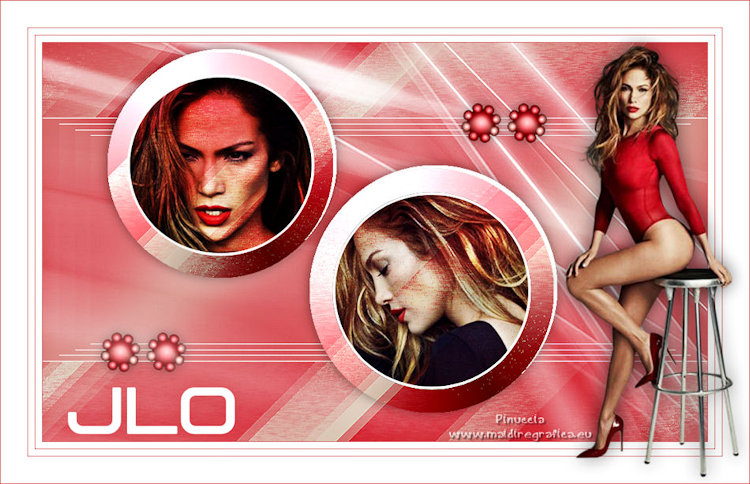
Versão de Pinuccia:
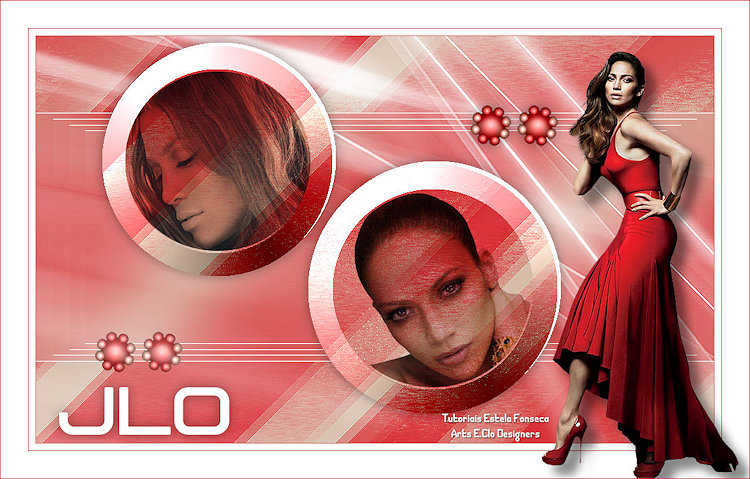
Versão de Clo:
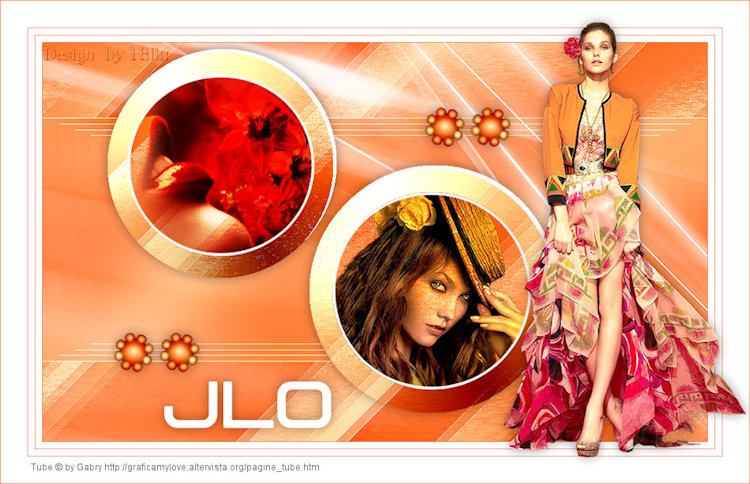
Versão de Hillu:
©Tutorial criado por Estela Fonseca em Novembro de
2019. |