PAGU
Agradeço as maravilhosas tradutoras: Pinuccia e Clo.
Material Necessário:
O tube Utilizado neste tutorial é de Lily, seu site AQUI. Mask de Narah, seu Grupo, AQUI. Outra Mask feita através de uma imagem de Pinterest.
Plugins Utilizados: <I.C.NET Software> Filters Unlimited 2 / @ Night Shadow Pool Simple / Pizza Slice Mirror, Top Left Mirror, Blintz Carolaine and Sensibility / CS Texture <I.C.NET Software> Filters Unlimited 2 / &<Bkg Kaleidoscope> Richard Rosenman / Solid Borders
Preparação: Abra o tube no PSP, duplique e feche o original. Abra as duas masks no PSP e Minimize-as.
1 - Primeiro Plano cor #6e3053 / Segundo Plano cor #e4d4e9
Abra a layer <<Pagu_Alpha>> Duplique e feche a original
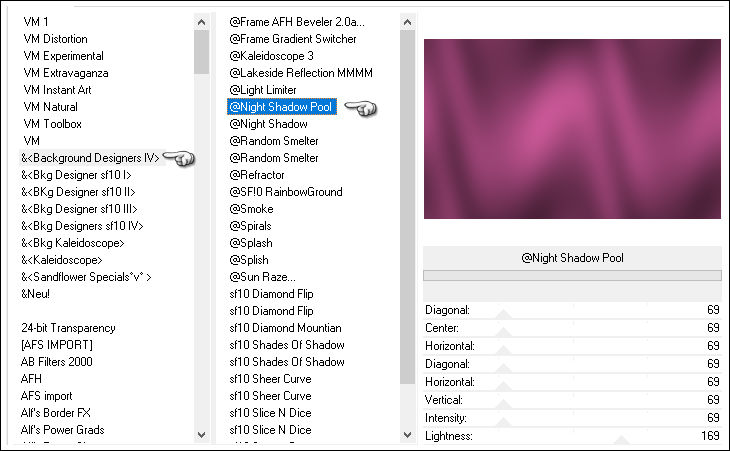
2- Preencha com a cor do Primeiro Plano Effects / Plugins / <I.C.NET Software> Filters Unlimited 2 / @ Night Shadow Pool:
3- Layers / New Raster Layer Preencha com a cor do Segundo Plano
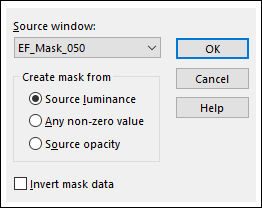
4- Layers / New Mask Layer / From Image: EF_Mask_050
Layers / Merge / Merge Group Layers / Merge / Merge Down
5- Effects / Reflection Effects / Rotating Mirror
Layers / Duplicate
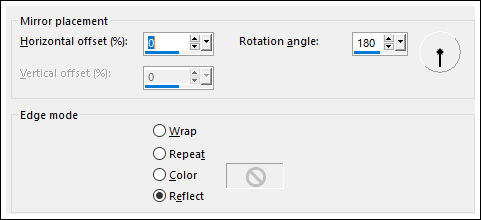
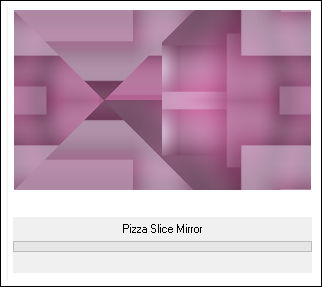
6- Effects / Plugins / Simple / Pizza Slice Mirror ( 2 vezes)
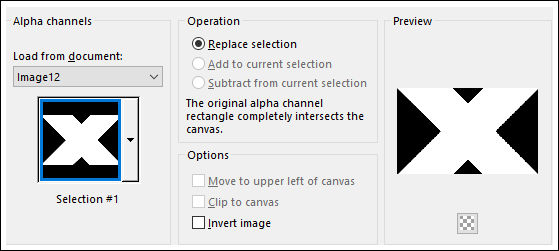
Selections / Load save selection / Load selection from Alpha Channel: Selection #1
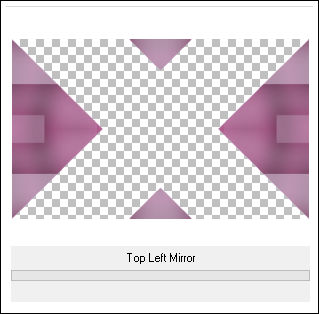
7- Delete no Teclado Selections / Select None Effects / Plugins / Simple / Top Left Mirror
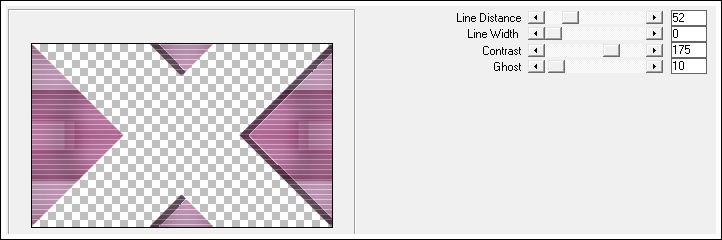
8- Effects / Plugins / Carolaine and Sensibility / CS Texture:
Effects / Reflection Effects / Rotating Mirror / Mesmas configurações de antes.
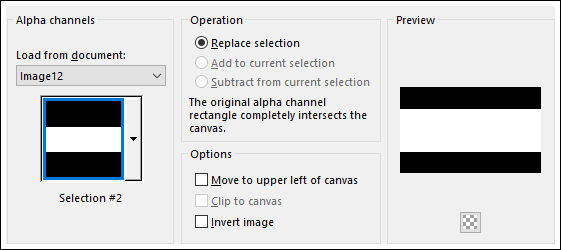
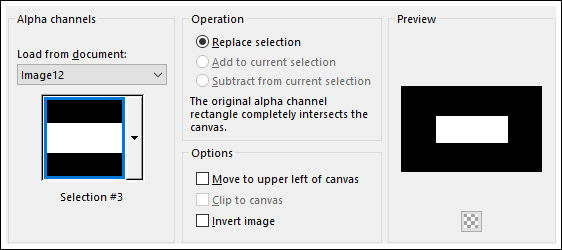
9- Ative a Layer <<Raster 1>> Selections / Load save selection / Load selection from Alpha Channel: Selection #2
Selections / Promote Selection to Layer
10- Layers / Arrange / Bring to top Adjust / Blur / Gaussian Blur / Radius 40 Mantenha a seleção!!!
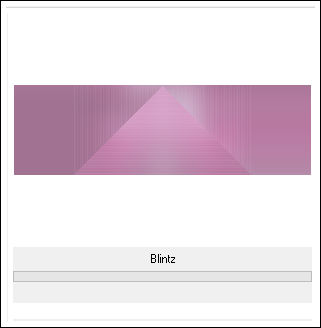
11- Effects / Plugins / <I.C.NET Software> Filters Unlimited 2.0 / Simple / Blintz
Selections / Select None
12- Effects / Image Effects / Seamless Tiling / Side by Side
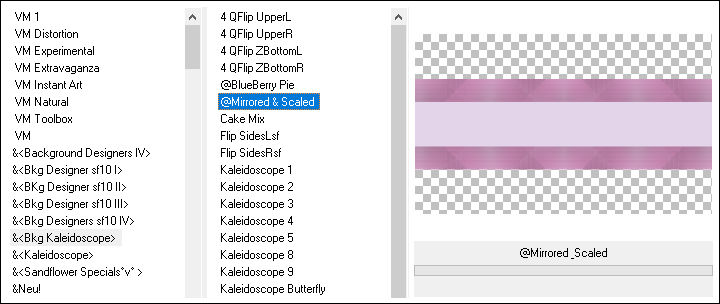
Effects / Plugins / <I.C.NET Software> Filters Unlimited 2 / &<Bkg Kaleidoscope> / Mirrored&Scaled (2 vezes)
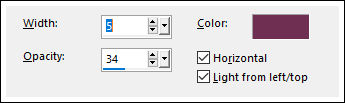
13- Effects / Texture Effects / Blinds / Cor do Primeiro Plano
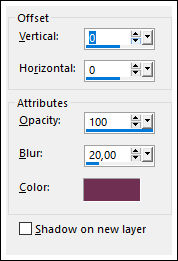
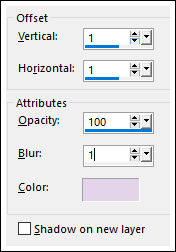
Effects / 3D Effects / Drop Shadow : Cor do Primeiro Plano
14- Ative a Layer <<Raster 1>> Effects / Plugins / Simple / Top Left Mirror
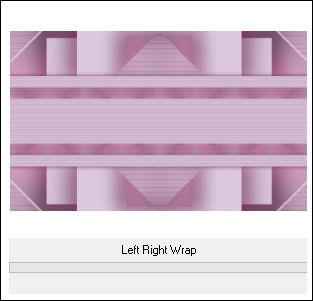
15- Layers / Merge / Merge Visible Effects / Plugins / Simple / Left Right Wrap
16- Layers / New Raster Layer Preencha com a cor do Primeiro Plano
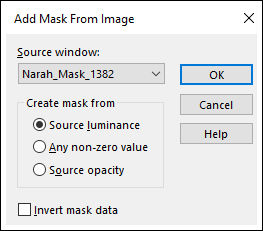
17- Layers / New Mask Layer / From Image: Narah_Mask_1382
Layers / Merge / Merge Group
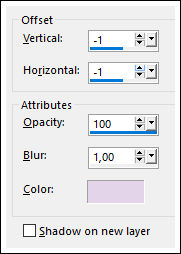
18- Effects / 3D Effects / Drop Shadow: Cor do Segundo Plano
Selections / Load save selection / Load selection from Alpha Channel: Selection #3
19- Layers / New Raster Layer Ative a imagem <<paisagens-papel-de-parede-paisagens (1)>> copie e cole na seleção Mantenha a seleção
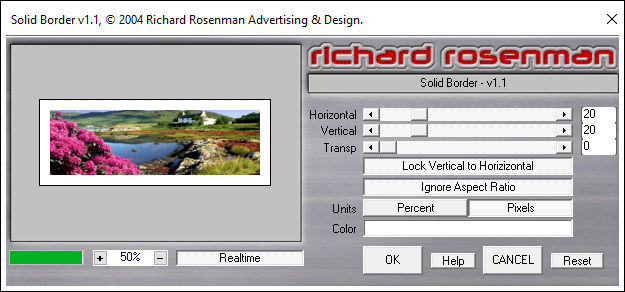
20- Effects / Plugins / Richard Rosenman / Solid Borders (cor branca ou a cor do segundo plano)
Selections / Select None
21- Effects / 3D Effects / Drop Shadow: Cor do Primeiro Plano ou cor Preta
22- Image / Add Borders / Symmetric Marcado 1 Pixel cor do Primeiro Plano Image / Add Borders / Symmetric Marcado 3 Pixel cor do Segundo Plano Image / Add Borders / Symmetric Marcado 1 Pixel cor do Primeiro Plano
Image / Add Borders / Symmetric Marcado 20 Pixel cor do Segundo Plano
Image / Add Borders / Symmetric Marcado 1 Pixel cor do Primeiro Plano Image / Add Borders / Symmetric Marcado 3 Pixel cor do Segundo Plano Image / Add Borders / Symmetric Marcado 1 Pixel cor do Primeiro Plano
Image / Add Borders / Symmetric Marcado 20 Pixel cor do Segundo Plano
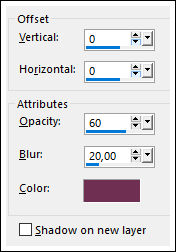
23- Selecione essa borda com a varinha mágica Effects / 3D Effects / Drop Shadow:
Selections / Select None
24- Ative o <<Texto 1>> Copie e cole como nova layer , posicione como no exemplo:
Ative o <<Texto 2>> Copie e cole como nova layer , posicione como no modelo Opacidade 64
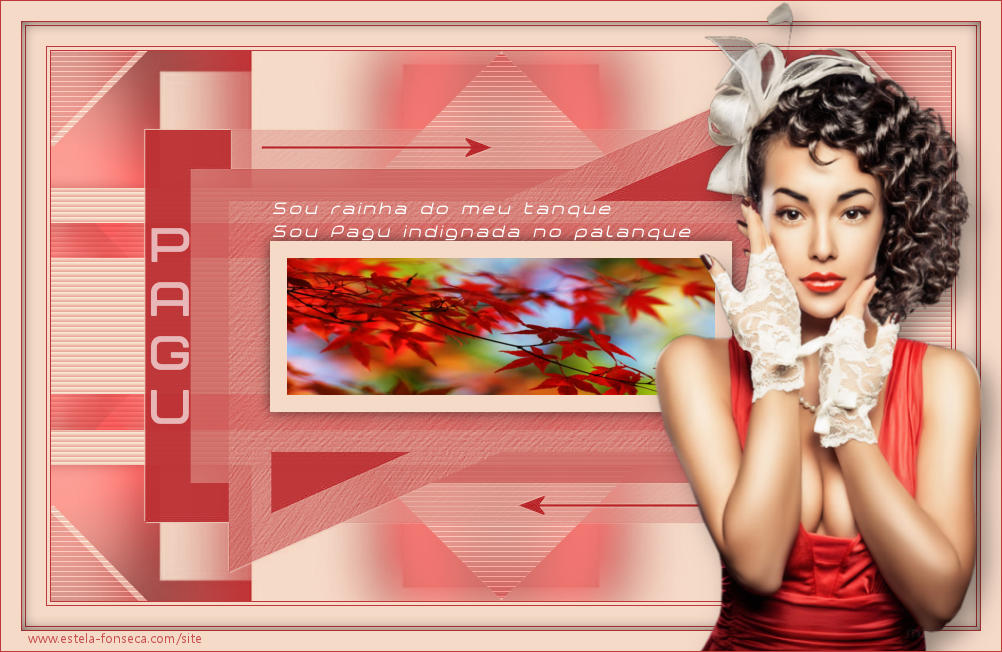
25- Ative o tube de <<Lily>> Copie e cole como nova layer Posicione
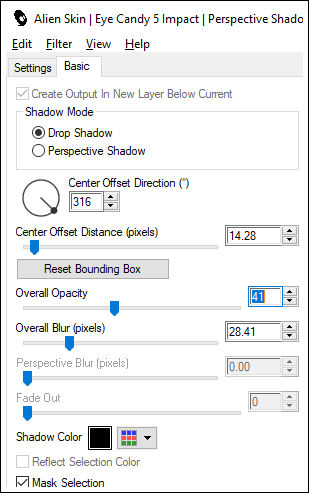
26- Effects / Plugins / Alien Skin Eye Candy 5 / Impact / Perspective Shadow / Drop Shadow Blurry /Em Basic:
Image / Add Borders / Symmetric Marcado 1 /Pixel cor do Primeiro Plano
27- Coloque a sua marca d'água Layers / Merge / Merge All Salve seu trabalho como jpg.
Versão com tube de Athe:
Pinuccia:
Clo:
Hillu:
Adri:
Angel Star:
Frieda:
Mary:
Vera Jarude:
©2013-Tutorial criado por Estela. |