MARCITA Agradeço as tradutoras: Sophie, Clo, Harmi, Keetje e Sternchen06.
Material Necessário:
O tube utilizado é de Thafs. A Mask é de Cameron
** Agradeço por me permitir usar suas lindas criações (Mask e Tubes e afins) Não altere o nome nem remova a marca d'água. **
Plugins Utilizados: Graphics Plus / Cross Shadow AAA Filters / Custom Toadies / What Are You? Penta Com / Jeans AAA Frames / Texture Frames
Preparação: Abra o tube no PSP duplique e feche o original. Coloque a seleção na pasta de Seleções do PSP.
Primeiro Plano cor #3f6c52 Segundo Plano cor #ffffff
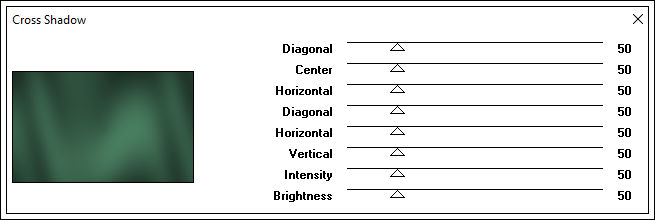
01 - Abra uma nova imagem transparente de 900 / 550 pixels Preencha com a cor #3f6c52 Effects / Plugins / Graphics Plus / Cross Shadow:
Layers / Duplicate
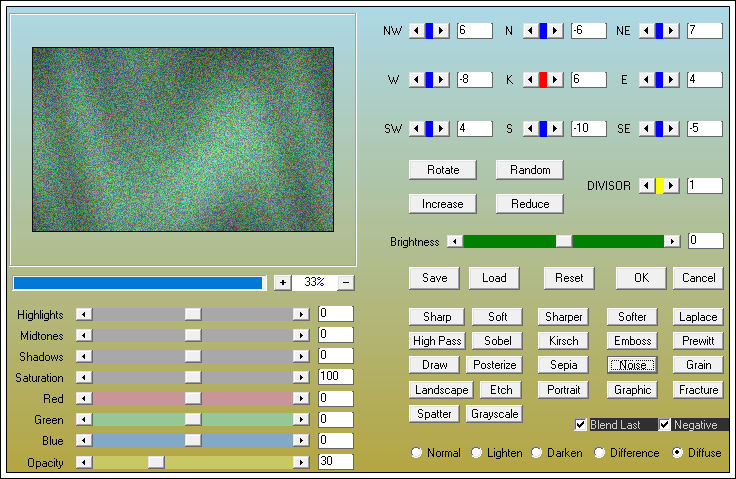
02- Effects / Plugins / AAA Filters / Custom: Noise
Blend Mode / Overlay Layers / Merge / Merge Visible
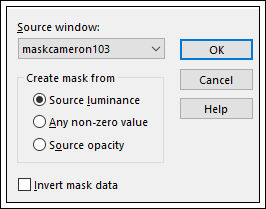
03- Layers / New Raster Layer Preencha com a cor #ffffff Abra a Mask <<maskcameron103>> Minimize Layers / New Mask layer / From Image:
Effects / Edge Effects / Enhance Layers / Merge / Merge Group
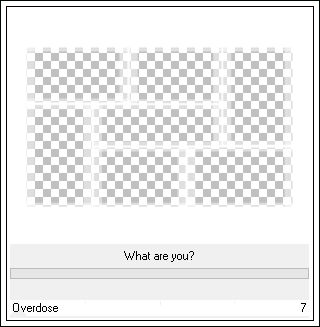
04- Effects / Plugins / Unlimited 2.0 / Toadies / What Are You?
Layers / Merge / Merge Visible
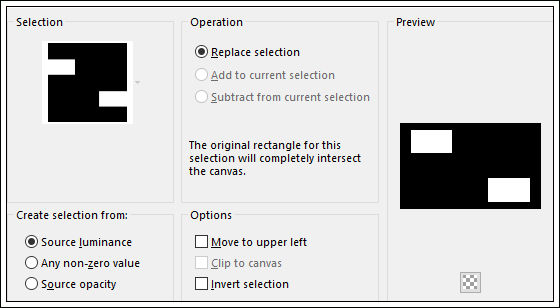
05- Selections / Load save selection / Load selection from disk: EF-Marcita-1
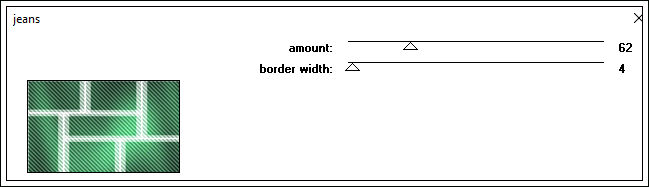
Effects / Plugins / Penta Com / Jeans
Selections / Promote Selection to Layer Blend Mode / Overlay Selections / Select None
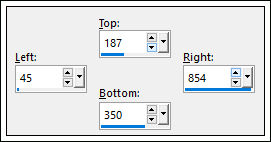
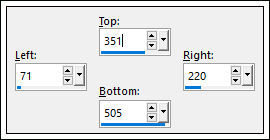
06- Ative a Layer <<Merged>> Ferramenta Selection Tool (S) / Custom Selection
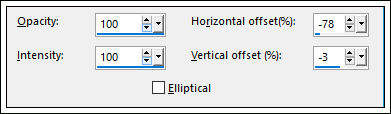
Effects / Reflection Effects / Feedback
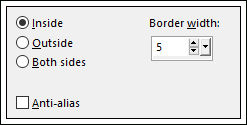
Mantenha a Seleção!!! Layers / New Raster Layer Selections / Modify / Select Selection Borders:
Preencha com a cor branca Selections / Select None Layers / Merge / Merge Down
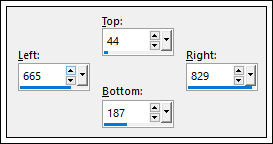
07- Ative a Layer <<Merged>> Ferramenta Selection Tool (S) / Custom Selection
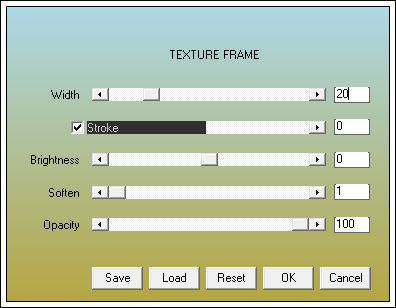
Selections / Promote Selection to Layer Effects / Plugins / AAA Frames / Texture Frames:
Selections / Modify / Contract 21
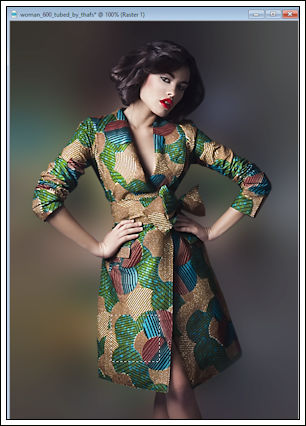
08- Abra o tube <<woman_600_tubed_by_thafs>> ou outro de sua escolha Selecione uma parte , como segue:
Copie e Cole na seleção Effects / Plugins / Alien Skin Eye Candy 5 / Impact / Glass / Clear Selections / Select None Effects / 3D Effects / Drop Shadow: 0 / 0 / 70 / 30 / #000000
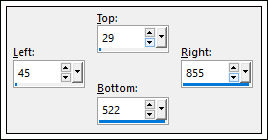
09- Ative a Layer <<Merged>> Ferramenta Selection Tool (S) / Custom Selection
Selections / Promote Selection to Layer Effects / Plugins / AAA Frames / Texture Frames:
Selections / Modify / Contract 21 Pixels Cole na seleção ( o tube ainda está na memória) Effects / Plugins / Alien Skin Eye Candy 5 / Impact / Glass / Clear Selections / Select None Effects / 3D Effects / Drop Shadow: 0 / 0 / 70 / 30 / #000000
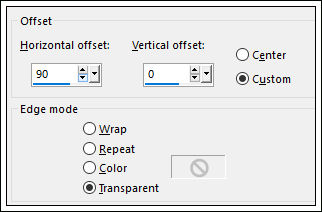
10 - Abra o tube <<Texto-Marcita>> Copie e Cole como nova Layer Effects / Image Effects / Offset:
Blend Mode / Hard Light ( ou outra) Opacidade / 65 Layers / Merge / Merge Visible Ferramenta Selection Tool (S) / Custom Selection
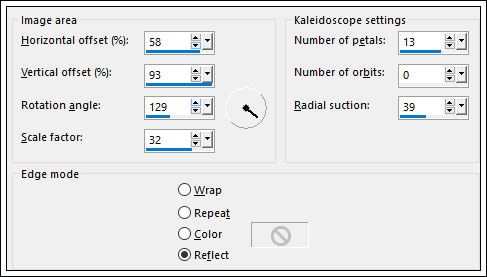
Selections / Invert Effects / Reflection Effects / Kaleidoscope
Adjust / Blur / Gaussian Blur / Radius 30 Selections / Select None
11- Image / Add Borders / Symmetric Marcado / 1 pixel cor #ffffff Selections / Select All Image / Add Borders / Symmetric Marcado / 40 pixels cor #ffffff Selections / Invert
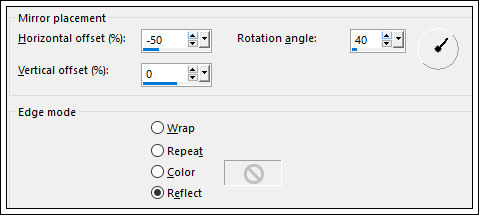
12- Effects / Reflection Effects / Rotating Mirror
Copie Selections / Select None Cole como Nova Layer Image / Mirror / Mirror Horizontal Image / Mirror / Mirror Vertical
13- Ative a Varinha Mágica e selecione a parte branca desta borda Delete no teclado Selections / Select None Layers / Merge / Merge Visible Selections / Select All Selections / Modify / Contract 40 pixels Effects / 3D Effects / Drop Shadow: 0 / 0 / 70 / 30 / #000000 Selections / Select None
14- Effects / Plugins / AAA Frame / Texture Frame:
Abra o tube <<woman_600_tubed_by_thafs>> Copie e Cole como nova layer Image / Resize / 80%... Resize all layers ...Desmarcado Posicione Abra o tube <<Deco1-Marcita>> Copie e cole como nova layer Posicione Image / Add Borders / Symmetric Marcado / 1 pixel cor #ffffff Assine seu trabalho Redimensione se desejar Salve como JPG
Versão com tube de SvB:
Versão de Clo:
Versão de Keetje:
Versão de Sophie:
Versão de Harmi:
Versão de Sternchen06:
Versão de Aurea Manchini:
Versão de Emi:
Versão de Felinec31:
Versão de Gigi Galván:
Versão de Isabella:
Versão de Mara L Didinet:
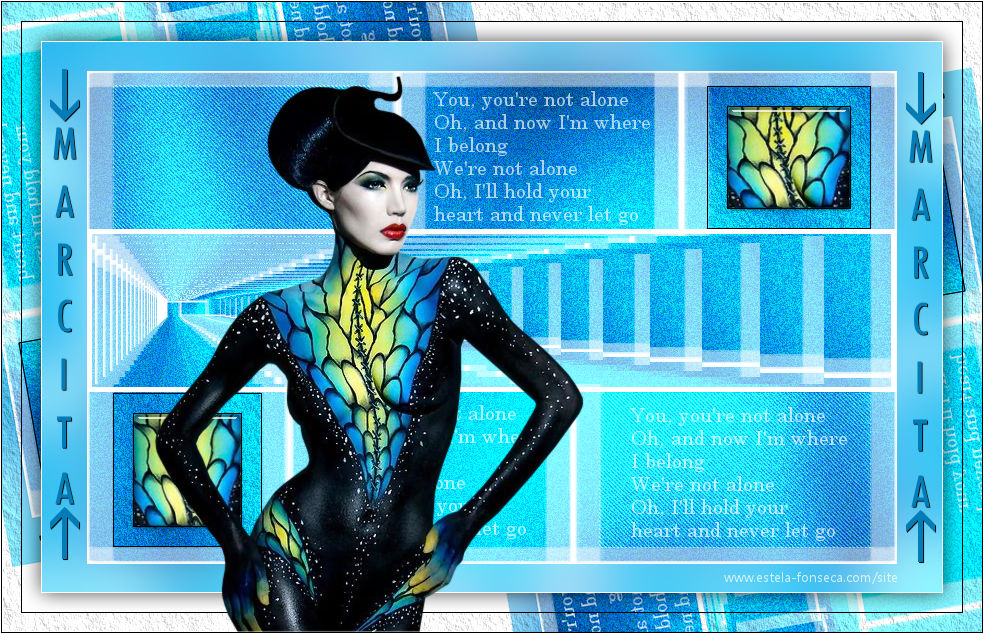
Versão de Marcita:
Versão de Maria José:
Versão de Nadeje:
Versão de Pia-Pini:
Versão de Trudy:
2017. Tutorial criado por Estela Fonseca. |