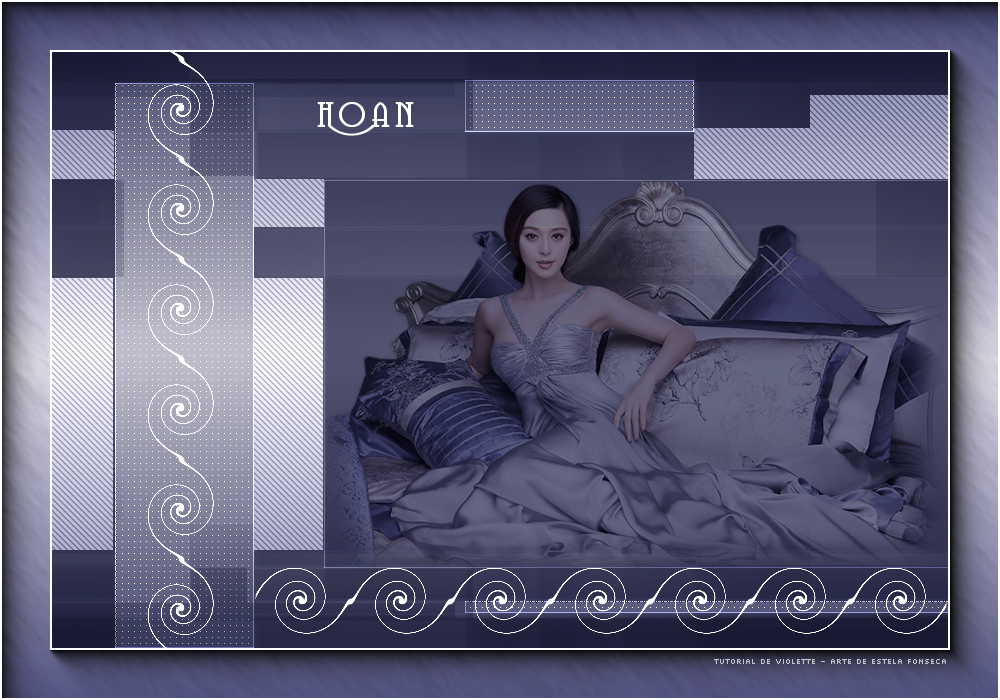
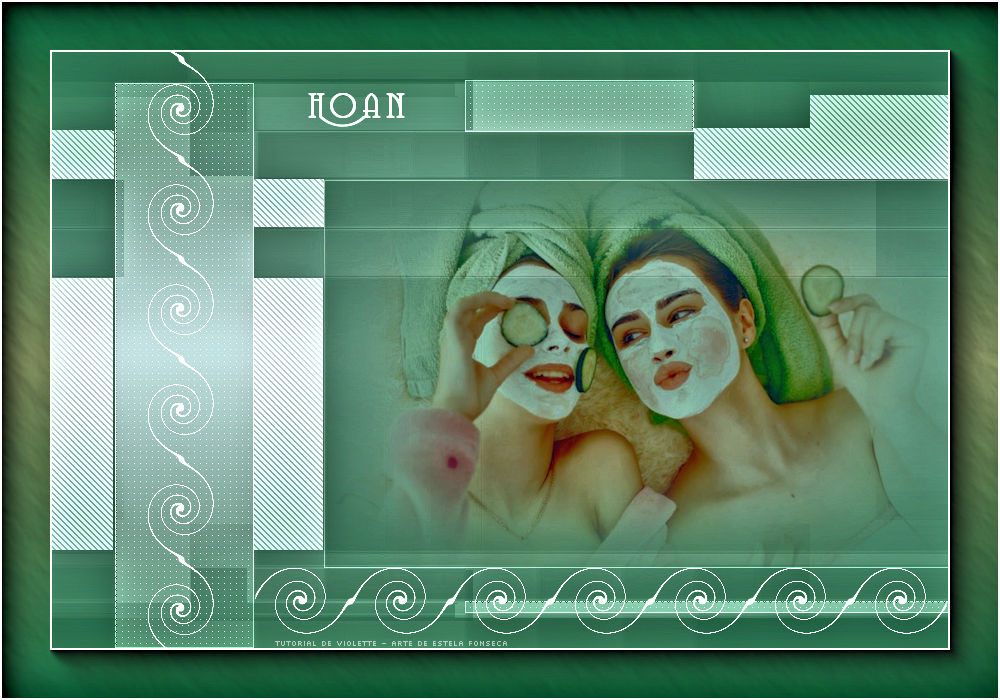
.jpg)
Tutorial realizado no Corel PaintShop Pro 2022 Ultimate, mas pode ser feito em outras versões.
Materiais Necessários:
Tube de LB Tubes.
Demais materiais de Violette;
Plugins:
Pentacom/Color Dot
Richard Rosenman/ Solid Border
AAA Frames/ TEXTURE FRAME e FOTO FRAME
Alien Skin Candy Impact 5
1 - Abra os tubes no PSP, duplique e feche os originais.2 - Primeiro Plano cor #c4c2ce e Segundo Plano cor #4a4c72
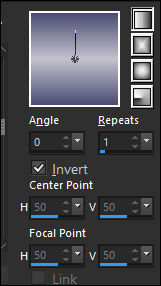
Forme no Primeiro Plano um Gradiente LINEAR angle 0 / Repeats 1 / Invert marcado
3 - Abra uma nova imagem transparente de 900 / 600 pixels
Preencha com o Gradiente
Adjust / Blur / Gaussian Blur / Radius 15
4 - Layers / New Raster Layer
Preencha com a cor do Segundo Plano #4a4c72
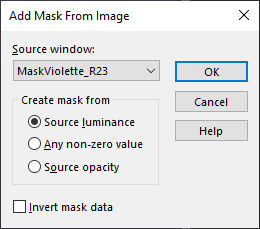
5 - Ative a Mask << MaskViolette_R23 .jpg>> Minimize
Layers / New Mask layer / From Image: MaskViolette_R23 .jpg
Layers / Merge / Merge GroupEffects / Edge Effects / Enhance
Blend Mode / Multiply
6 - Selections / Load save selection / Load selection from disk: Vyp_Hoan01.PspSelection
7 - Ative a Layer <<Raster 1>>Selections / Promote selection to Layer
Layers / Arrange / Move UP
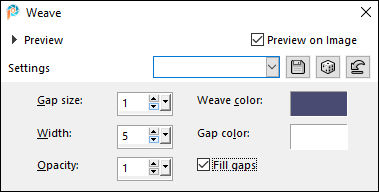
8 - Effects / Texture Effects / Weave ( 1/5 /1/Cores: #4a4c72 e #ffffff) :
Selections / Modify / Select selection borders
Effects / Edge Effects / Enhance
Selections / Select None
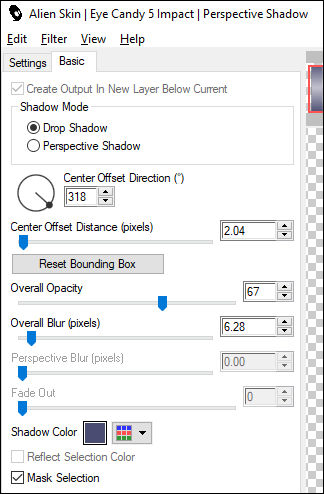
Effects / Plugins / Alien Skin Eye Candy 5 / Impact / Perspective Shadow / preset Vyp_shadow_hoan01.f1s /OK
9 - Selections / Load save selection / Load selection from disk: Vyp_Hoan02.PspSelection
10 - Ative a Layer <<Raster 1>>
Selections / Promote selection to layerLayers / Arrange / Bring to top
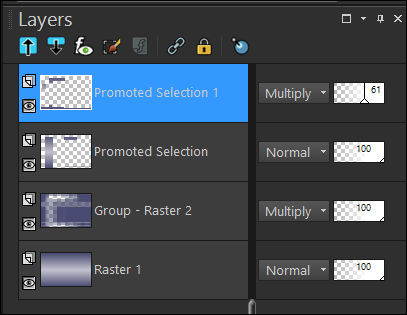
Blend Mode / Multiply ... Opacidade 61%
Selections / Select None
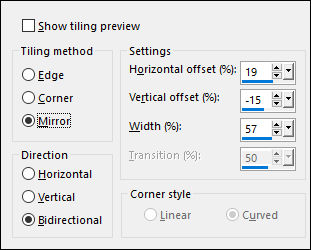
Effects / Image Effects / Seamless Tiling:
11 - Mantenha-se na Layer do TOPOPrimeiro Plano cor #ffffff
Ferramenta Pen Tool (V) configurada como segue: Estilo Solido
Mantenha pressionada a tecla Shift / Desenhe uma linha da esquerda para a direita
Clique em Aplicar
Na paleta das layers , clique com o botão direito do mouse ... Convert to Raster Layer
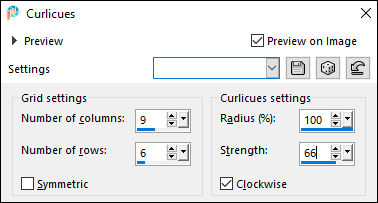
Effects / Distortion Effects / Curlicues:
12 - Layers / Duplicate
Image / Free Rotate
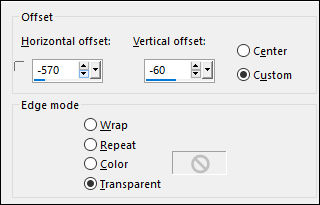
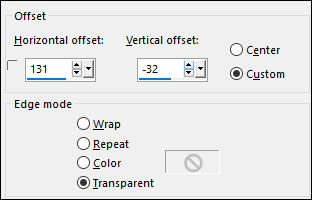
Effects / Image Effects / Offset:
13 - Ative a Layer <<Raster 1>>
Selection Tool (S) / Custom Selection:
Selections / Promote selection to layer
Selections / Modify / Select selection borders
Effects / Edge Effects / Enhance
Selections / Select None
14 - Mantenha-se nesta layer
Ative o tube <<woman408_ByHebe.pspimage>>
Copie e Cole como nova layerImage / Resize / 85% ... Resize All Layers ... Desmarcado
Effects / Image Effects / Offset:
Selection Tool (S) / Custom Selection ... Igual ao ponto 13
Selections / InvertDelete no Teclado
Selections / Select None
Effects / Plugins / Alien Skin Eye Candy 5 / Impact / Perspective Shadow / preset Vyp_shadow_hoan01.f1s /OK
15 - Selections / Load save selection / Load selection from disk: Vyp_Hoan03.PspSelection
16 - Ative a Layer <<Raster 1>>
Selections / Promote selection to LayerLayers / Arrange / Bring to top
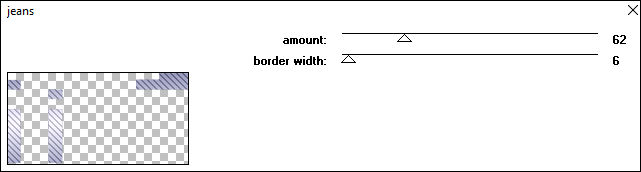
Effects / Plugins / Pentacom / jeans:
Selections / Select None
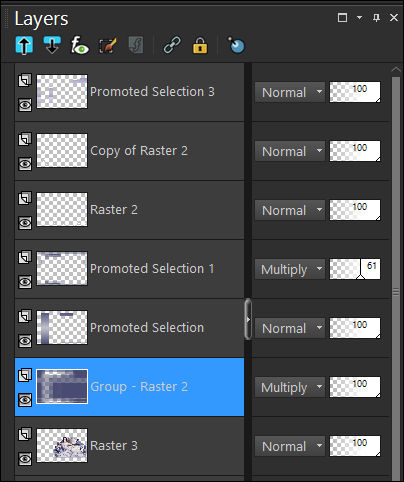
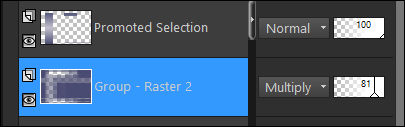
17 - Ative a Layer << Group - Raster 2>>
Blend Mode : Multiply / Opacidade 81%
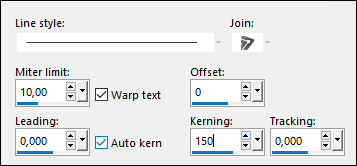
18 - Ferramenta de Texto ...Fonte: CoventryGarden / Tamanho: 36/ Negrito / Vector /Kerning : 150
Segundo Plano cor #ffffffDigite o texto: Hoan
Clique em AplicarConvert to Raster Layer
Layers / Arrange / Bring to top
Posicione como segue:
19 - Layers / Merge / Merge All
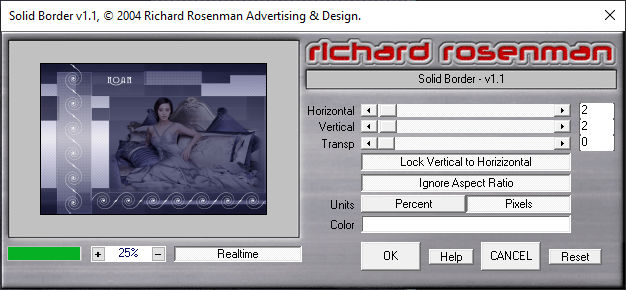
20 - Effects / Plugins / Richard Rosenman / Solid Border:
21 - Image / Add Borders / Symmetric Marcado / 50 pixels cor #4a4c72
Ative a Varinha Mágica (Feather e Tolerance 0) Selecione esta bordaPreencha com o Gradiente do Início
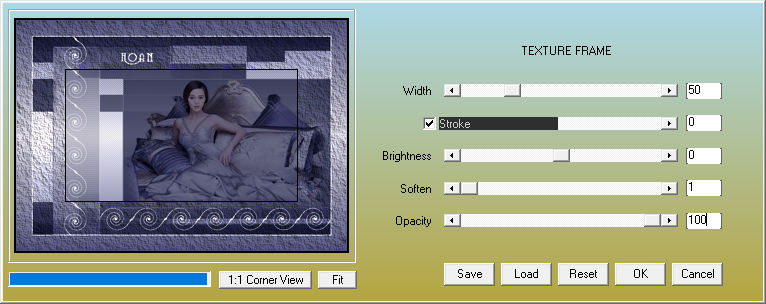
Effects / Plugins / AAA Frames / Texture Frame :
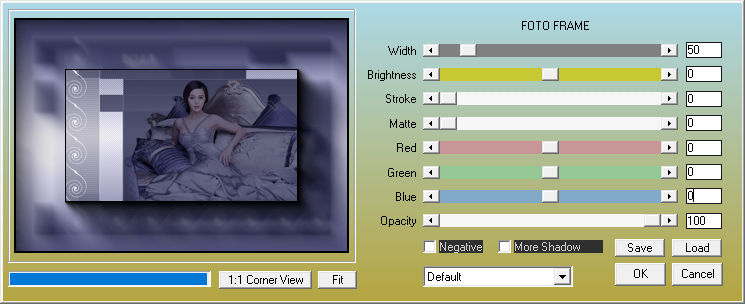
Effects / Plugins /AAA Frames / FOTO FRAME:
Selections / Select None
22 - Effects / Plugins / Richard Rosenman / Solid Border: Igual etapa n°20
23 - Coloque a sua assinatura
24 - Layers / Merge / Merge All
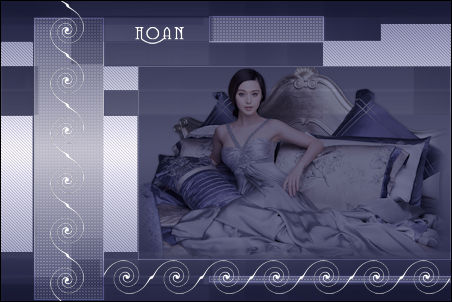
25 - Salve como JPG Otimizado.
FIM
Versão com tube Próprio:
©Tutorial traduzido por Estela Fonseca em 27/08/2023.
Não alterar nem repassar sem autorização.