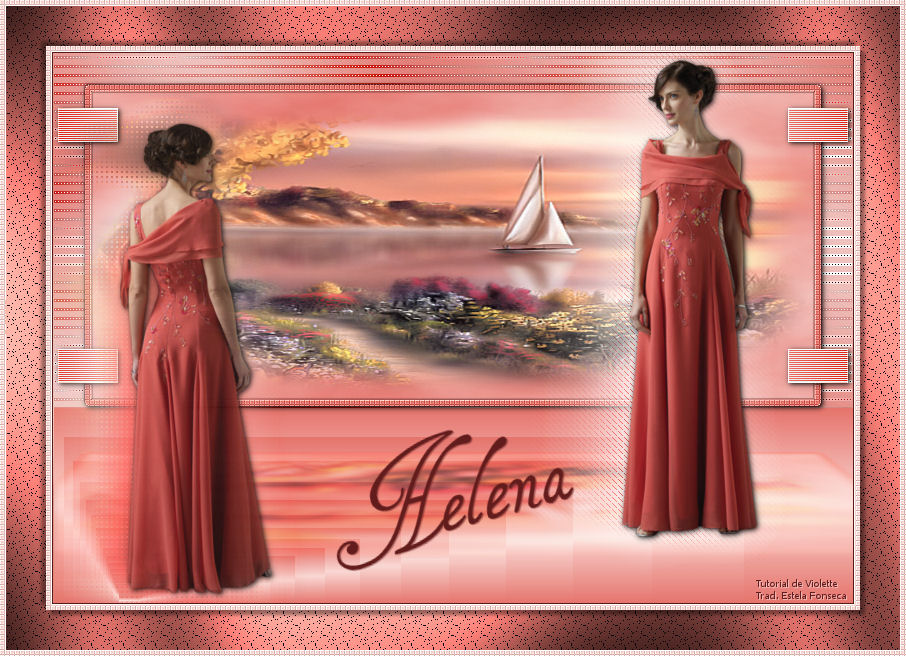
HELENA
Este tutorial é de Viollete , original, aqui.
Este tutorial foi feito no PSP XII, mas pode ser feito em outras versões do PSP.
Materiais Utilizados:
Tubes de Hanne e Suzi .
Os tubes só estão disponíveis para uso pessoal.
Você não tem permissão para colocar esses tubes em outro site sem a permissão do criador.
Criações protegidos por CopyrightFrance.comCréations protegidos por CopyrightFrance.com
Plugins Necessários:
Unlimited.
K & L Filtro
Xero
Alien Skin Eye Candy 5 Impact
Preparação:
Abra os tubes no PSP... Duplique e feche os originais.
Copie as seleções para a pasta de seleções do PSP.
Dê dois cliques nos presets do Alien Skin eles serão instalado automaticamente.
Instale a Fonte
01- Primeiro Plano cor # f9d7d3 / Segundo Plano cor # e5746c
02- Crie um gradiente <<Linear>> /Angle: 45 ° / Repeats : 5 / Invert Marcado
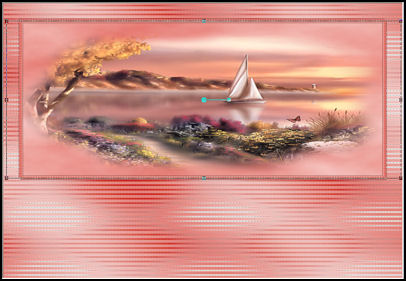
03 - Abra uma nova imagem transparente de 800 / 550 pixels
Preencha com o Gradiente.
04- Adjust / Blur / Gaussian Blur: Radius 40
05- Effects / Plugins / L & K / Zitha:
06- Effects / Edge Effects / Enhance More.
07- Layers / New Raster Layer
Selections / Load / Save Selection / Load selections from disk: "Vyp_Helene01.PspSelection"
08 - Preencha com a cor # e5746c
Effects / Plugins / Unlimited 2.0 / Render / Clouds (fore / background color): 65/128.09 - Layers / New Raster Layer
Ative o tube <<SS-1536 _Misted.pspimage>> Copie e cole na seleçãoMantenha a Seleção!!!
10 - Layers / New Raster Layer
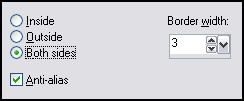
Selections / Modify / Select selection Border:
Preencha com a cor # e5746c
11 - Effects / Plugins / Xero / Fritilary: 5/30/10/0.
Effects / Edge Effects / Enhance More
12 - Effects / 3D Effects / Drop Shadow: 1/1/50/1,00/#2f0f12
Repita com valores negativos: -1 na horizontal e vertical offset.
Selections / Select None.13- Ative a Layer << Raster 3>> layer da paisagem:
Ative a ferramenta deformação e puxe até preencher toda a largura
Clique na ferramenta <<Move>>para tirar a seleção.
14- Ative a Layer do Topo
Layers / Merge / Merge Down (2 Vezes)
15- Effects /Plugins / Alien Skin Eye Candy 5/Impact /Perspective Shadow /preset <<Vyp_Helena01.f1s>>
Basic configurado como segue:
16- Na mesma layer
Selections / Load save selection / Load selection from disk: <<Vyp_Helena02.PspSelection>>
Selections / Promote Selection to layer.
17- Ative a layer <<Raster 2>>
Delete no Teclado
Selections / Select None.
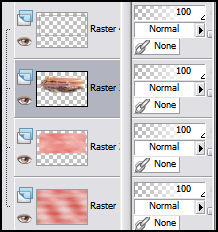
18- Ative a Layer do Topo
Blend Mode: Hard Light / Opacidade 78% .
19 - Ative a Layer <<Raster 2>>
Effects / Plugins / Alien Skin Eye Candy Impact 5 / Perspective Shadow / Drop Shadow Lowest / Default.
20- Ative a Layer do Fundo
Layers / New Raster Layer
Selections / Load save selection / Load selection from disk: <<Vyp_Helena02.PspSelection>>
21- Preencha com o Gradiente <<Linea>> Angle: 0 / Repeats: 1/invert marcado.
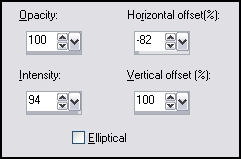
22 - Effects / Reflections Effects / Feedback:
Selections / Select None.
23- Ative a Layer do Topo
Layers / New Raster LayerSelections / Load save selection / Load selection from disk: <<Vyp_Helena03.PspSelection>>
24 - Preencha com o Gradiente Linear Angle: 90 / Repeats: 5/invert marcado.
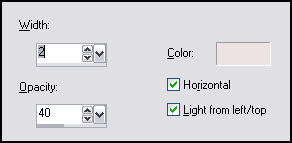
Efeitos / Texture Effects / Blinds:
Selections / Select None
Effects / Edge Effects / Enhance More25- Effects / Plugins / Alien Skin Eye Candy Impact 5/ Perspective Shadow / Drop Shadow Lowest
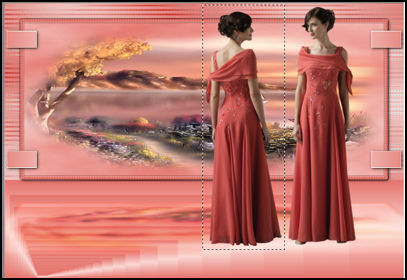
Opacidade 43%26 - Ative o tube << Hanne_Girls.pspimage >> Copie e Cole como nova layer
Image / Resize 80% ... Resize All Layers ... Desmarcado27- Effects / Image Effects / Offset: 154/28/custom/transparente.
28 - Utilizando a ferramenta seleção em retângulo , selecione a mulher do lado esquerdo
29 - Edit / Cut (o tube será cortado e copiado)
Seletions / Select None
Cole como nova layer30- Effects / Image Effects / Offset: -257/-31/custom/transparente.
31- Ative o tube da direita
Layers / DuplicateAdjust / Blur / Gaussian Blur: Radius: 20
Layers / Arrange / Move Down
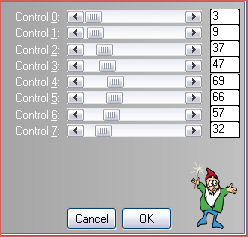
Effects / Distortion Effects / Wind / Right: 10032 - Effects / Plugins / L & K / Frederieck: 173/6
33 - Na Layer da Copia (Layer do topo)
Effects / Plugins / Alien Skin Eye Candy Impact 5 / Perspective Shadow / Drop Shadow Lowest /default.
34 - Layers / Duplicate
Layers / Arrange / Move DownAdjust/ Blur / Gaussian Blur: Radius: 20
Effects / Distortion Effects / Wind / Left: 100
35- Effects / Plugins / L & K / Djinn: 30/18.
36 - Effects / Plugins / Alien Skin Eye Candy Impact 5/ Perspective Shadow / Drop Shadow Lowest /default
Opacidade 43%37 - Image / Add Borders / Symmetric Marcado / 1 pixel cor # 561a16
38 - Selections / Select All.
Image / Add Borders / Symmetric Marcado / 6 pixels cor # f9d7d3
Selections / Invert
Effects / Plugins / Xero / Fritillary :5/30/10/0.
Effects/ Edge Effects / Enhance More39 - Selections / Select All
Image / Add Borders/ Symmetric Marcado / 40 pixels cor # e5746c
Selections / Invert40 - Effects / Plugins / Screenwork / Lace Screen
41 - Effects / Plugins / Graphic Plus/ Cross Shadow / Defaults
Selections / Invert42 - Effects / 3D Effects / Drop Shadow: 5/5/40/5/#000000.
Repita com os valores negativos: -5 na horizontal e vertical offset43 - Selections / Select All
Image / Add Borders / Symmetric Marcado / 6 pixels cor # f9d7d3
Selections / InvertEffects / Plugins / Xero / Fritillary: 5/30/10/0.
Effects / Edge Effects / Enhance
Selections / Select None44 - Ative a ferramenta Texto / Fonte Tagetes / Tamanho: 75 Pixels / Vector
Segundo Plano cor # 631c1c
Digite <<Héléna>>Convert to raster layer
Effects / 3D Efrfects / Drop Shadow: 1/1/50/1/cor # 631c1c45 - Coloque sua assinatura
46 - Layers / Merge All )Flatten)47 - Exporte como JPG otimizado
Versão com tubes de Suiza Bella:
©Tutorial traduzido por Estela Fonseca em 09/08/2009.
Não alterar nem repassar sem autorização.