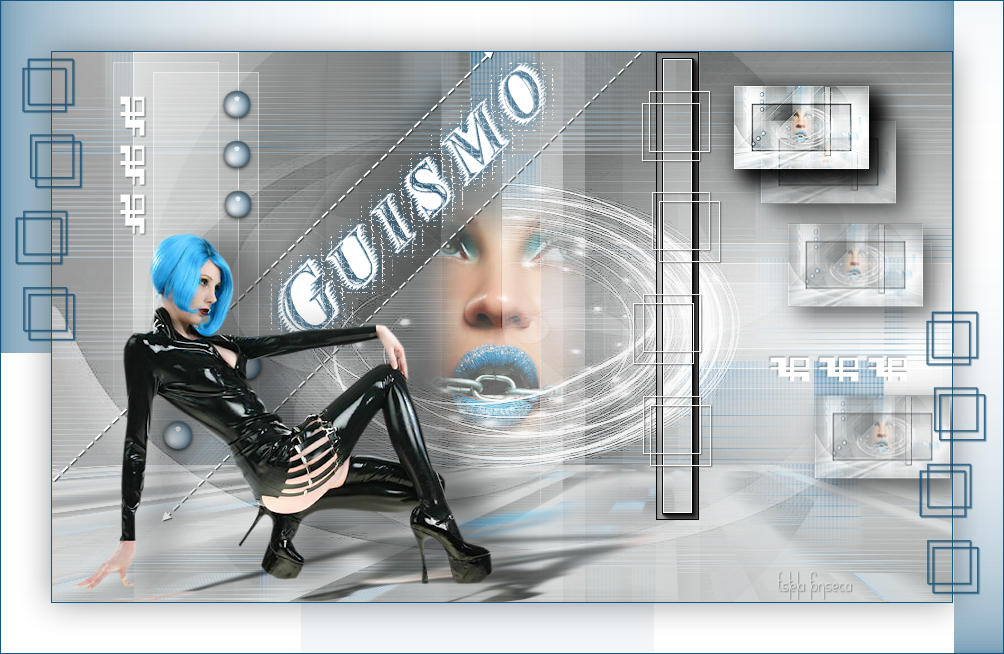
GUISMO
Tutorial de Valerie , original, Aqui.
.jpg)
Tutorial traduzido no PSP X9 mas pode ser feito em versões anteriores do PSP.
Materiais Necessários:
Tubes de Guismo, seu grupo , AQUIMask de Narah, seu grupo, AQUI
Plugins Utilizados:
AAA Frames / Foto FramesAlien Skin Eye Candy 5
Filter Factory Gallery G / Panel Stripes
MuRa's Meister
Penta.com / Jeans
Toadies / What are you
Balder Olrik / Mirror Y*Buttons & Frames / Glass Frame 3*
Déformation / Circulator*
Toadies / Weaver*
*Importados para o Unlimited 2
Preparação:
Abra os tubes no PSP , duplique e feche os originais
Duplo clique no preset do Alien Skin ele será automaticamente importado para a pasta do Plugin.
Abra a Mask no PSP e Minimize.
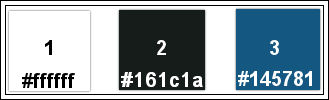
Tabela de Cores:
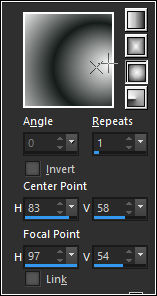
Primeiro Plano cor #ffffff / Segundo Plano cor #161c1aGradiente - Estilo Sunburst / Configurado como segue:
01- Abra a Layer << Alpha-Guismo-VSP>>
Duplique e Feche a original
Preencha com o Gradiente
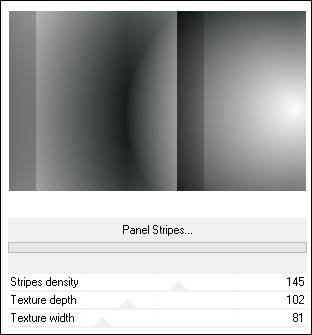
Effects / Plugin /<I.C.NET Software> / Filters Unlimited 2.0/ Filter Factory Gallery G / Panel Stripes
02- Layers / New Raster Layer
Selections / Load Save Selection / Load Selection from Alpha Channel: Selection#1
Preencha com a cor #145781
Selections / Select None
Effects / Plugin / Alien Skin Eye Candy 5 / Impact / Motion Trail / Preset Motion Trail-Guismo-VSP
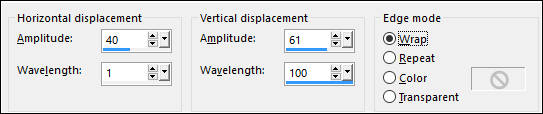
Effects / Distortion Effects / Wave
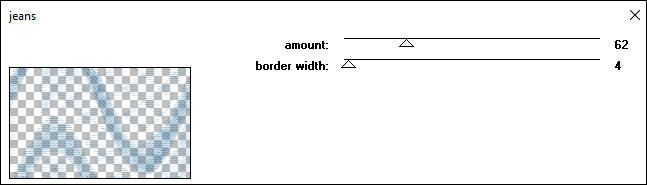
Effects / Plugin / Penta.com / Jeans
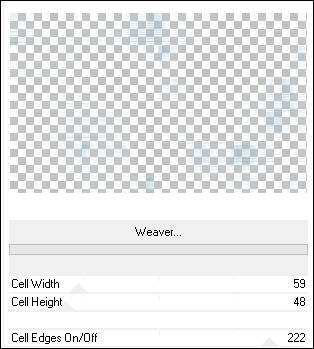
Effects / Plugin / <I.C.NET Software> / Filters Unlimited 2.0 / Toadies / Weaver
Layers / Merge / Merge Down
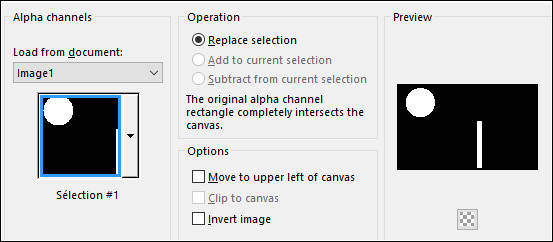
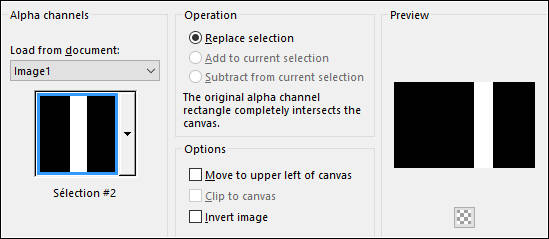
03- Selections / Load Save Selection / Load Selection from Alpha Channel: Selection#2
Selections / Promote Selection to Layer
Selections / Select None
Segundo Plano Cor #ffffff
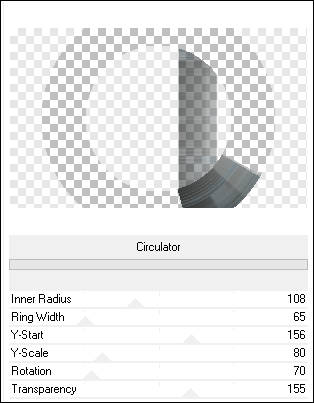
Effects / Plugin / <I.C.NET Software>/ Filters Unlimited 2.0 / Déformation / Circulator
Opacidade / 22
04- Ative a Layer <<Raster 1>>
Selections / Load Save Selection / Load Selection from Alpha Channel: Selection#2 (de novo)
Selections / Promote Selection to Layer
Selections / Select None
Layers / Arrange / Move Up
Layers / Duplicate
Segundo Plano cor #145781
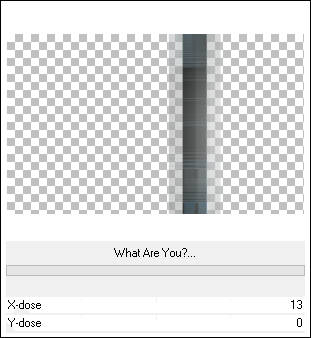
Effects / Plugin / Toadies / What Are You?
Layers / Arrange / Move Down
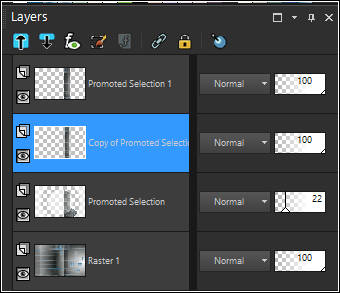
Paleta das Layers:
05- Ative a Layer do Topo
Effects / Plugin / Alien Skin Eye Candy 5 / Impact / Perspective Shadow / Drop Shadow, blurry
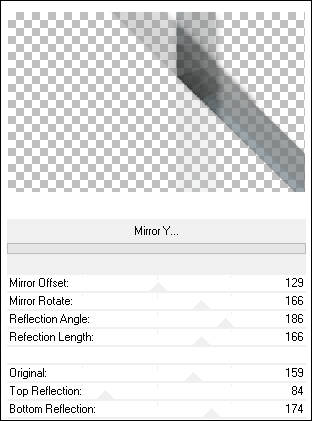
Effects / Plugin/ <I.C.NET Software>/ Filters Unlimited 2.0 / Balder Olrik / Mirror Y
Image / Mirror / Mirror Horizontal
06- Ative a Layer do Fundo
Layers / Duplicate
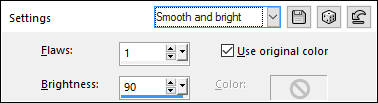
Effects / Artistic Effects / Chrome :
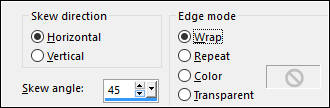
Effects / Geometric Effects / Skew
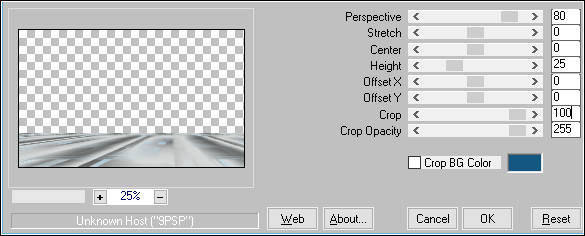
Effects / Plugin / MuRa's Meister / Perspective Tiling
Blend Mode / Lighten
Opacidade / 79
Layers / Arrange / Bring to Top
07- Ative o tube <<Guismo-DecoVSP1>>
Copie e Cole como Nova Layer
Objects / Align / Top
Objects / Align / Right
08- Layers / New Raster Layer
Preencha com a cor #ffffff
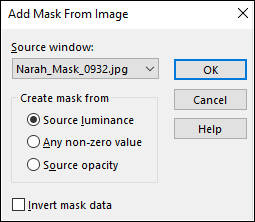
Layers / New Mask Layer / From Image: Narah_Mask_0932
Layers / Merge / Merge group
Effects / Edge Effects / Enhance
Blend Mode / Screen
09- Ative a Segunda layer à partir da Layer do Fundo
Ative o tube <<cal_guis_08_08_2008_mist_face_blu>>
Copie e Cole Como Nova Layer
Image / Resize / 40%... Resize All Layers ... Desmarcado
Layers / Merge / Merge Visible
10- Selections / Load Save Selection / Load Selection from Alpha Channel: Selection#3
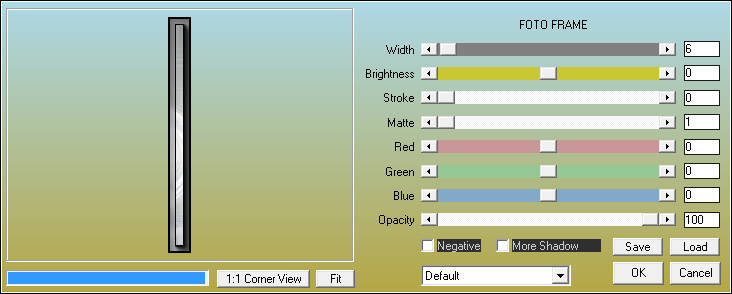
Effects / Plugin / AAA Frames / Foto Frames
Selections / Select None
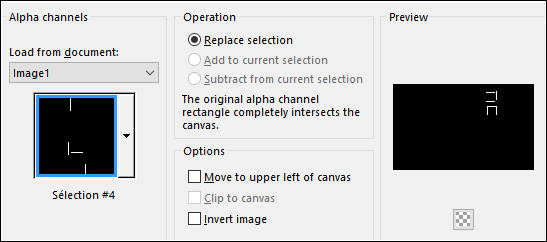
Selections / Load Save Selection / Load Selection from Alpha Channel: Selection#4
Layers / New Raster Layer
Preencha com a cor #ffffff
Selections / Select None
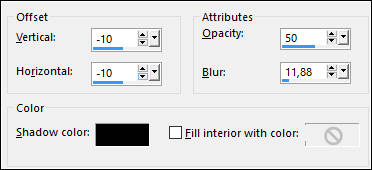
Effects / 3D Effects / Drop Shadow: 1/1/67/2,00 / #000000
11- Ative a Layer do topoAtive o tube <<Guismo-DecoVSP2>>
(Colorize as pérolas com as cores de seu trabalho, em seguida una com a layer das linhas)
Copie e Cole Como Nova Layer
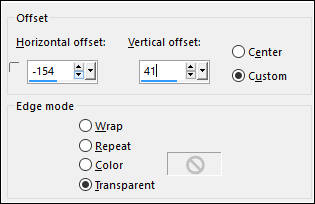
Effects / Image Effects / Offset: -154/41
Layers / Merge / Merge Visible
12- Copie e Cole como Nova Imagem
Effects / Plugin / <I.C.NET Software>/ Filters Unlimited 2.0 / Buttons & Frames / Glass Frame 3
Selections / Select All
Selections / Modify / Contract / 114 pixels
Layers / New Raster Layer
Effects / 3D Effects / Cutout / Cor #000000
Layers / New Raster Layer
Effects / 3D Effects / Cutout
Selections / Select None
Layers / Merge / Merge Visible
13- Image / Resize / 50% ... Resize All Layers ... Marcado ( 2 Vezes)
Copie e Cole Como Nova Layer ( no seu trabalho original)
14- Image /Resize / 60%... Resize all layers ... Desmarcado
Effects / Plugin / Alien Skin Eye Candy 5 / Impact / Perspective Shadow / Drop Shadow, blurry
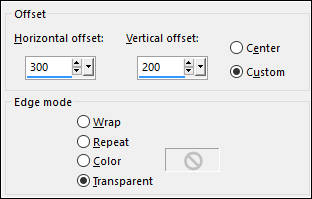
Effects / Image Effects / Offset: 300/200
Layers / Duplicate
Blend Mode / Hard Light
15- Ative a Layer do Meio
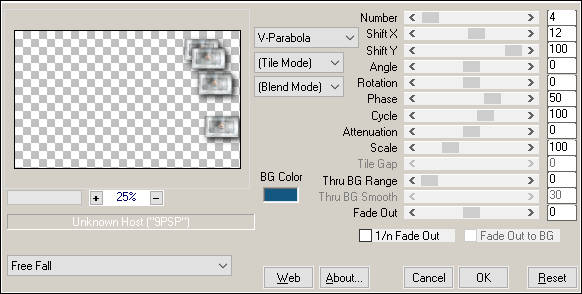
Effects / Plugin / MuRa's Meister / Copies
Opacidade / 65
16- Ative a Layer do topo
Ative o tube <<titre-GuismoVSP>>
Copie / Cole Como Nova Layer
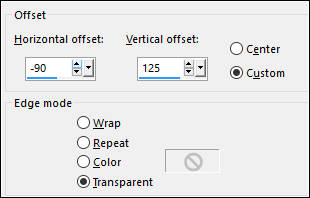
Effects / Image Effects / Offset: -90/125
Layers / Duplicate
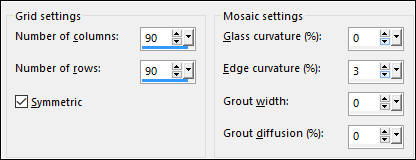
Effects / Texture Effects / Mosaic Glass
Layers / Arrange / Move Down
Ative a Layer do topo
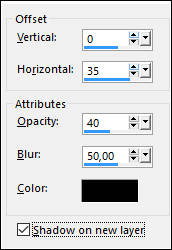
Effects / 3D Effects / Drop Shadow: 0/0/100/15,00 / Cor #145781
17- Ative o tube <<cal_guis_08_07_2008_sexy_cuir_hair_blu>>
Copie e Cole como nova Layer
Image / Resize / 75%... Resize All Layers ... Desmarcado
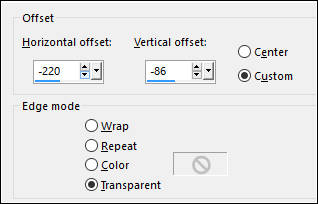
Effects / Image Effects / Offset: -220/-86
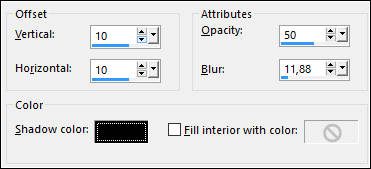
Effects / 3D Effects / Drop Shadow: Cor #000000
18- Ative a Layer do topo
Effects / Plugin / Alien Sin Eye Candy 5 / Impact / Perspective Shadow / Preset Shadow-Guismo1VSP
Layers / Merge / Merge Visible
19- Image / Add Borders / Symmetric Marcado / 1 pixel cor #145781
Selections / Select All
Image / Add Borders / symmetric Marcado / 50 pixels cor #ffffff
Selections / Invert
Effects / Texture Effects / Weave: Weave Color: Cor 3
Selections / Invert
Effects / 3D Effects / Drop Shadow: Cor #000000
Selections / Select None
20- Ative o tube <<Guismo-DecoVSP3>>
Copie e Cole como nova Layer
Image / Add Borders / Symmetric Marcado / 1 pixel cor #145781
Image / Resize / 900 pixels de largura ... Resize all layers marcado
Adjust / Sharpness / Unsharp Mask:
21- Assine seu trabalho
Salve como JPG
Versão com tubes de Guismo:
©Tutorial traduzido por Estela Fonseca em 23/06/2017.
Não alterar nem repassar sem autorização.