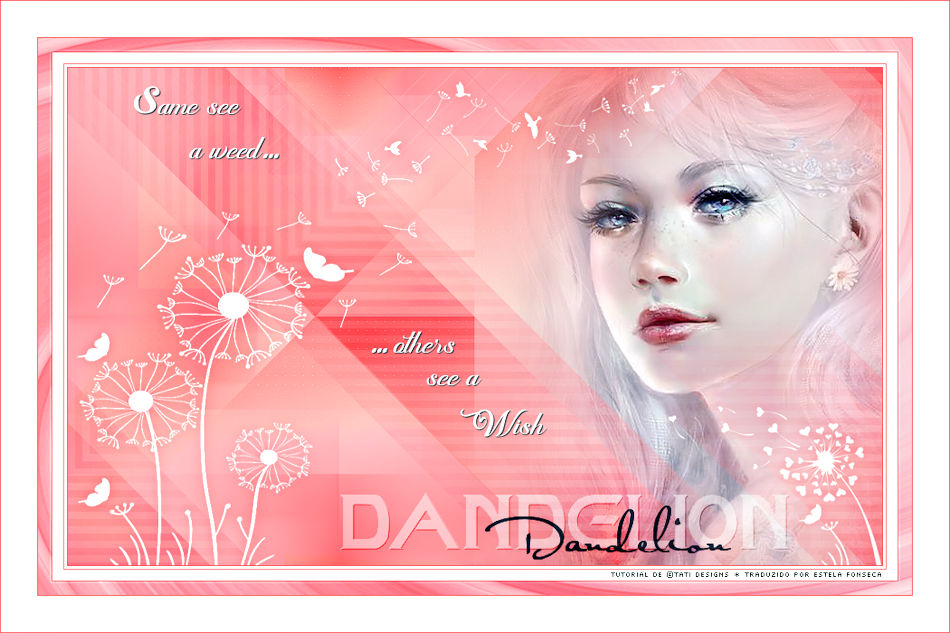
dandelion
Tutorial de Tati Designs , original, Aqui.
Esta lição foi Traduzida com PSP 2019. Mas pode ser feita em qualquer versão.
Materiais Utilizados:
Todos os demais materiais foram criados por Tati.
Atenção... Nota da Autora:
Arquivos com as iniciais "TD" (Tati Designs) são materiais criados por mim exclusivamente para meus tutoriais.
NÃO os use para criar seus próprios tutoriais. Por favor, leia meus Termos de Uso (TOU). Obrigado.
IMPORTANTE
Está proibido modificar ou mudar o nome dos arquivos ou eliminar a marca d'água.Por favor, não use o material criado para este tutorial em outro site.
Plugins Utilizados:
MuRa's Meister / CopiesFlaming Pear / Melancholytron
&<Bkg Kaleidoscope>/ @BlueBerry Pie **
Italian Editors Effect / Effeto Fantasma
L and K landksiteofwonders / L en K's Paris
AP [Lines] / Lines - Silverlining
Carolaine and Sensibility / CS_HLines
** Importar estes plugins para o "Unlimited 2.0".
Preparação:
Duplique os tubes e feche os originais.Instale os plugins na pasta de plugins do PSP
Cores:Escolha cores que harmozem com o tube escolhido.
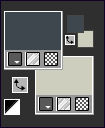
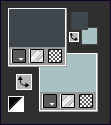
Esta é a Paleta de cores do tutorial.
Se usar outras cores , deves jogar com o modo de mistura (blend mode) e com a opacidade das layers.
01- Primeiro Plano cor (4) #3e464eSegundo Plano cor (1) #cecebe
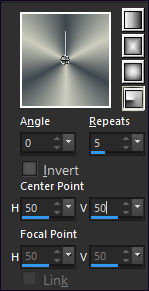
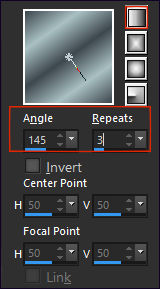
02- Forme um Gradiente no Primeiro Plano . estilo <<RADIAL>> configurado como segue:
03- Abra o arquivo "TD_Canal_Alfa_Dandelion.pspimage". Duplique e Feche o original
(Esta será a base do trabalho e contém seleções em canal alfa)
Renomeie a Layer "TD_Canal_Alfa_Dandelion.pspimage" como "Trama 1", "Raster 1", etc, dependendo do idioma do seu PSP.
04-Preencha a imagem transparente com o Gradiente do Primeiro Plano.
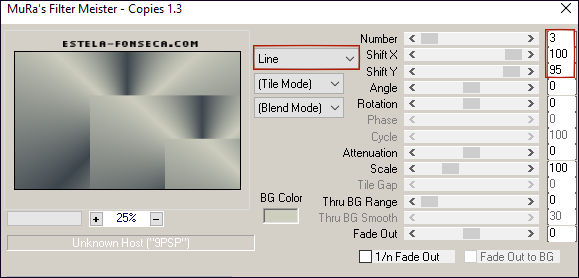
05- Effects / Plugins / MuRa's Meister / Copies:
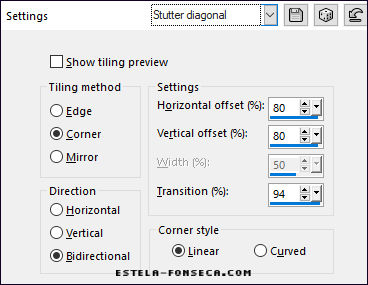
06- Effects / Image Effects / Seamless Tiling / Stutter Diagonal:
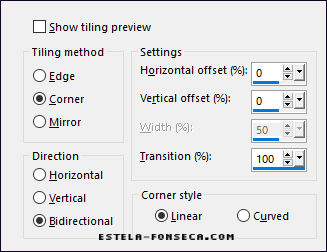
07- Effects / Image Effects / Seamless Tiling:
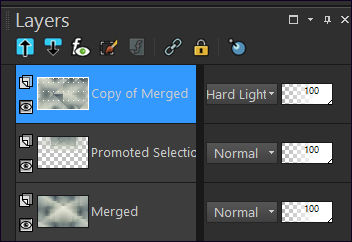
08- Layers / Duplicate
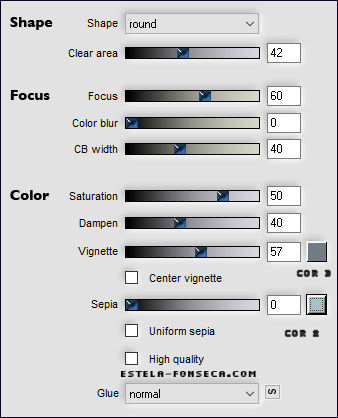
09- Effects / Plugins / Flaming Pear / Melancholytron:
10- Image / Mirror / Mirror Horizontal11- Blend Mode / Hard Light
12- Layers / Merge / Merge Visible
13- Layers / Duplicate
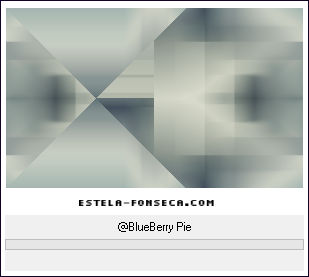
14- Effects / Plugins / <I.C.NET Software> Filters Unlimited 2.0 / &<Bkg Kaleidoscope>/ @BlueBerry Pie:
15- Effects / Image Effects / Seamless Tiling (como antes):
16- Image / Resize / 101%... Resize All Layers ... Desmarcado
Fazemos isto para esconder a linha que ficou no canto superior à direita.
17- Blend Mode / Hard Light
18- Ative a Layer do Fundo (Merged)
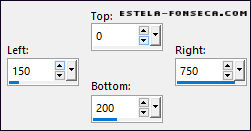
19- Ativa a Ferramenta "Selection Tool (S)" Rectangle / Custom Selection:
20- Selections / Promote selection to layer
21- Selections / Select None
22- Effects / Plugins / Italian Editors Effect / Effeto Fantasma (Default):
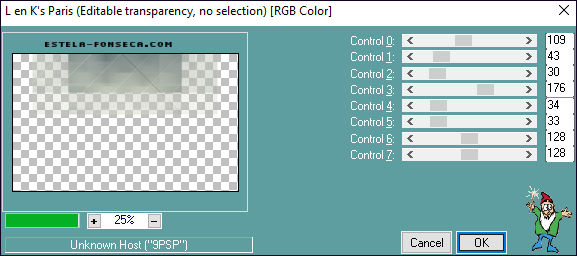
23- Effects / Plugins / L and K landksiteofwonders / L en K's Paris (Default):
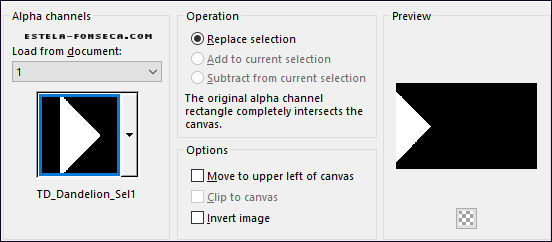
24- Ative a Layer do Topo (Copy of merged)25- Selections / Load save selection / Load selection from alpha channel: "TD_Dandelion_Sel1", clique em "Load":
26- Selections / Modify / Feather / 45 Pixels
27- Adjust / Blur / Gaussian Blur / Radius 35.
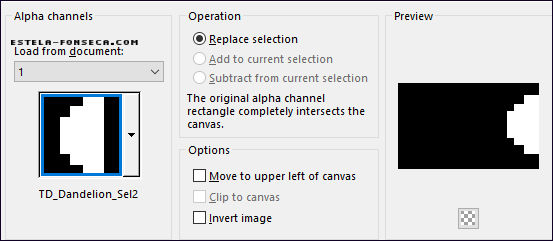
28- Selections / Select None29- Selections / Load save selection / Load selection from alpha channel: "TD_Dandelion_Sel2", clique em "Load":
30- Selections / Modify / Feather / 45 Pixels
31- Adjust / Blur / Gaussian Blur / Radius 55.
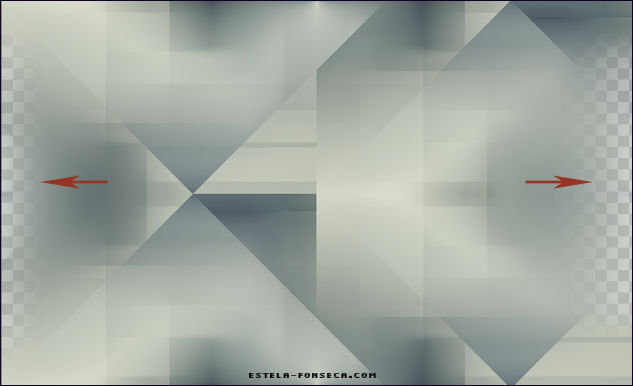
32- Selections / Select None33- Nossa imagem está com as bordas direita e esquerda como na imagem, vamos a solucionar isto:
34- Ative a Layer "Merged"
35- Selections / Select All
36- Ative a Layer "Copy of Merged"
37- Image / Crop to Selection
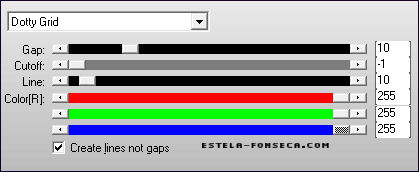
38- Effects / Plugins / AP [Lines] / Lines - Silverlining / Dotty Grid:
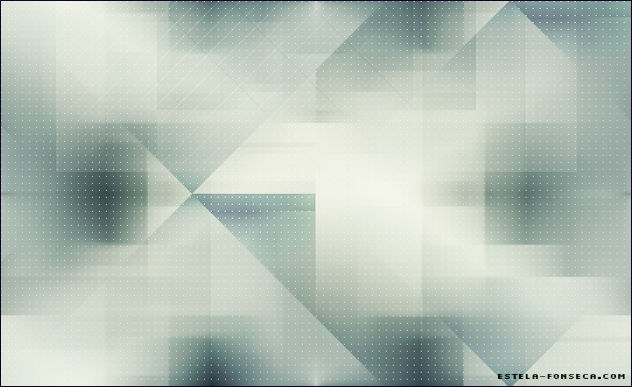
Resultado do Trabalho até agora:
39- Ative o tube "TD_Tube_Mujer_Miho_Hirano" Copie e Cole como nova layer
40- Ferramenta "Pick Tool (K)" Posição de X (346,00) e Posição de Y (35,00) / Tecla "M" para desativar a Pick Tool.
41- Adjust / Sharpness / Sharpen
42- Primeiro Plano cor (4) #3e464e / Segundo Plano cor (2) #aac1c4
43- Prepare no Primeiro Plano um Gradiente estilo "Linear" configurado como segue:
44- Layers / New Raster Layer
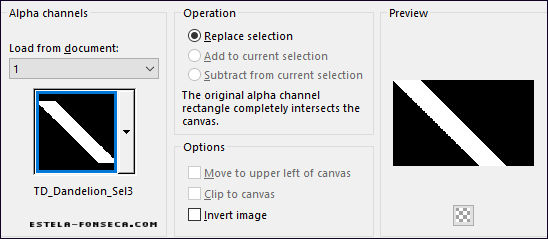
45- Selections / Load save selection / Load selection from alpha channel: "TD_Dandelion_Sel3", clique em "Load":
46- Ative a Ferramenta "Flood Fill" (F) e Baixe a Opacidade à 50.
47- Preencha a seleção com o gradiente do Primeiro Plano
Redefina a Opacidade do Balde de Tinta para 100%
48- Selections / Select None
49- Effects / 3D Effects / Drop Shadow: 0 / 50 / 50 / 0 / Cor: (3) #717b87
Effects / 3D Effects / Drop Shadow: 0 / -50 / 50 / 0 / Cor: (3) #717b87
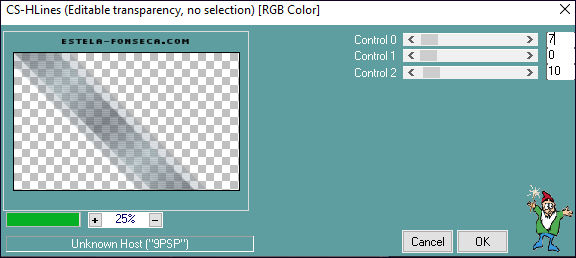
50- Effects / Plugins / Carolaine and Sensibility / CS_HLines: 7 / 0 / 10.
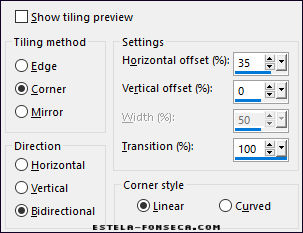
51- Effects / Image Effects / Seamless Tiling
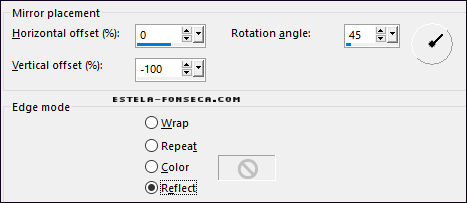
52- Effects / Reflection Effects / Rotating Mirror
53- Blend Mode / Hard Light
54- Ative o tube "TD_Texto_Dandelion" Copie e Cole como nova layer
55- Ferramenta "Pick Tool (K)" Posição de X (73,00) e Posição de Y (20,00) / Tecla "M" para desativar a Pick Tool.
56- Effects / 3D Effects / Drop Shadow: 1 / 1 / 100 / 1 / Cor: (4) #3e464e
57- Ative o tube "TD_Titulo1_Dandelion" Copie e Cole como nova layer58- Ferramenta "Pick Tool (K)" Posição de X (301,00) e Posição de Y (469,00) / Tecla "M" para desativar a Pick Tool.
59- Blend Mode / Soft Light
60- Ative o tube "TD_Titulo2_Dandelion" Copie e Cole como nova layer
61- Ferramenta "Pick Tool (K)" Posição de X (461,00) e Posição de Y (484,00) / Tecla "M" para desativar a Pick Tool.
62- Blend Mode / Multiply
63- Layers / New Raster Layer
Preencha com a cor branca #ffffff
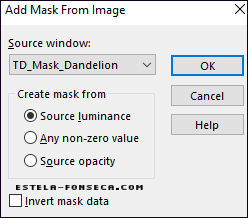
64- Layers / New Mask layer / From Image: "TD_Mask_Dandelion":
Layers / Merge / Merge GroupEffects / 3D Effects / Drop Shadow: 0 / 0 / 60 / 20 / Cor: (4) #3e464e
66- Image / Add Borders / Symmetric Marcado / 1 píxel cor (4) #3e464e
67- Copie68- Image / Add Borders / Symmetric Marcado / 3 Pixels cor #ffffff
Image / Add Borders / Symmetric Marcado / 1 píxel cor (4) #3e464e
Image / Add Borders / Symmetric Marcado / 12 Pixels cor #ffffff
Image / Add Borders / Symmetric Marcado / 1 Pixel cor (4) #3e464e
69- Selections / Select All
70- Image / Add Borders / Symmetric Marcado / 15 Pixels cor #ffffff
71- Selections / Invert72- Cole na seleção
73- Adjust / Blur / Radial Blur
74- Adjust / Sharpness / Sharpen More75- Selections / Promote selection to layer
76- Selections / Select None
77- Blend Mode / Multiply
78- Layers / Duplicate79- Blend Mode / Overlay
80- Image / Add Borders / Symmetric Marcado / 1 Pixel cor (4) #3e464e
Image / Add Borders / Symmetric Marcado / 40 Pixels cor #ffffff
81- Layers / New Raster LayerColoque a sua marca d'água ou o seu nome
82- Image / Add Borders / Symmetric Marcado / 1 Pixel cor (4) #3e464e
83- Image / Resize 950 Pixels de Largura ... Resize All Layers ... Marcado84- Adjustr / Sharpness / Unsharp Mask:
85- Adicione o © do tutorial adicionado ao material:
Nota: Se precisar alterar a cor , pode usar a ferramenta "Color Changer":
86- Salve seu trabalho como arquivo JPG otimizado.
FIM
Versão 2: Tube feito da art © Milica.
©Tutorial traduzido por Estela Fonseca em 05/06/2021.
Não alterar nem repassar sem autorização.


