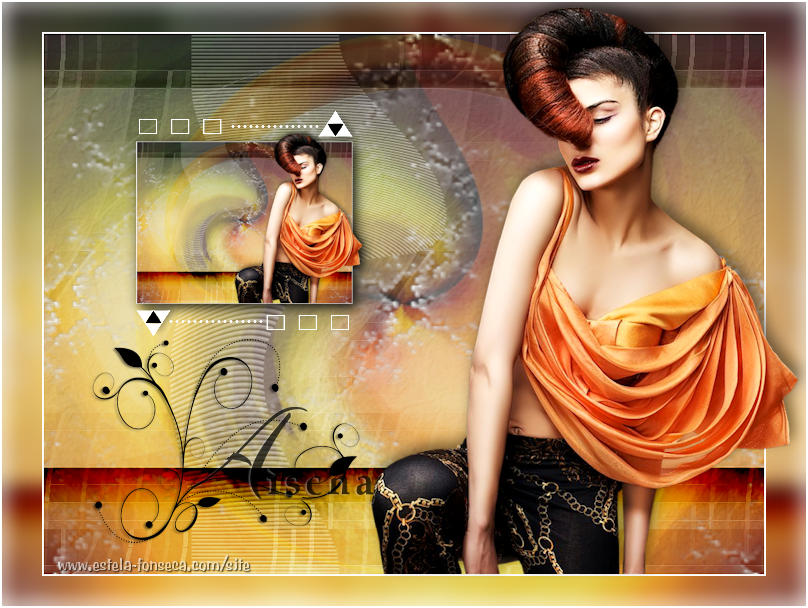
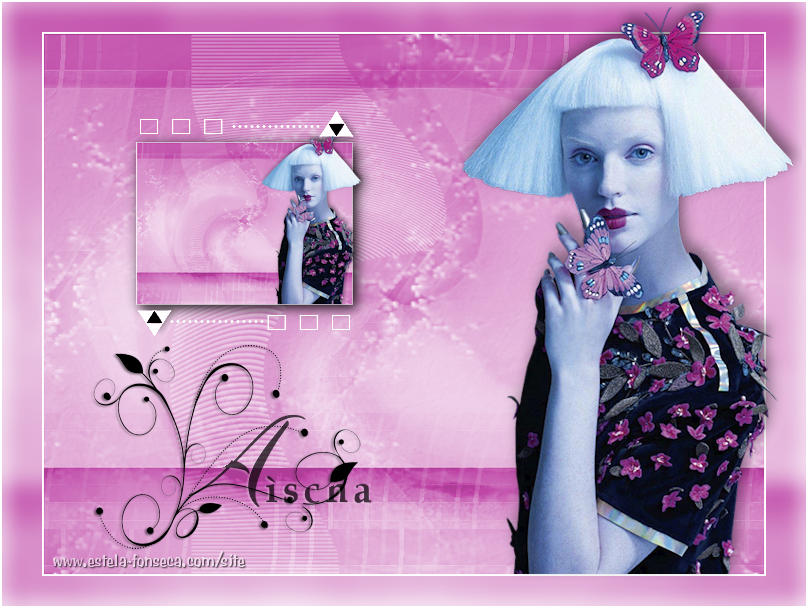
AISCHA
Tutorial de Regis , original, Aqui.
O tutorial foi realizado na versão Corel Paint sho Pro X8,
mas ele pode ser feito com outras versões.
Materiais Necessários:
Tube de Mary
Plugins Utilizados:
Filters Unlimited 2.0Transparency - Eliminate black
Alien Skin Eye Candy 5 Impact - Shadow
Flaming Pear - Flexify 2
Xero - Clarity
Preparação:
Abra os tubes no PSP, duplique e feche os originais
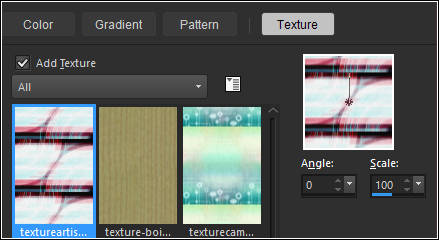
Coloque a Textura <<textureartisticXI3_camerontags>> Na Pasta de Texturas do PSP
01- Abra <<aischa-alpha-regis>>
Duplique e Feche o Original
02- Selections / Select All
Ative a imagem <<@nn_240313_bg_014_tdstudio >>
Copie e Cole na seleção
Nota: Se você usa cores diferentes, utilize esta imagem nesta etapa
Você pode colorir mais tarde.
Mantenha a Seleção!
03- Layers / New Raster layer
Ative <<texture @nn_160312_TXT_078_tdstudio>>
Copie e Cole na seleção
Selections / Select None
04- Effects / Plugin / Transparency / Eliminate Black.
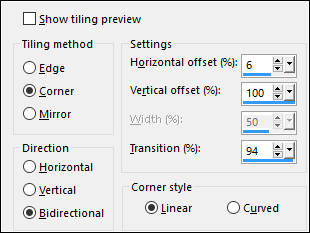
Effects / 3D Effects / Drop Shadow: 1 / 1 / 100 / 1,00 / #ffffffEffects / Image Effects / Seamless Tiling
Layers / New Raster layer
05- Primeiro Plano cor #ffffff
Configure <<Textura>> textureartisticX13-camerontags
Preencha a layer com a textura
Blend Mode / Soft Light
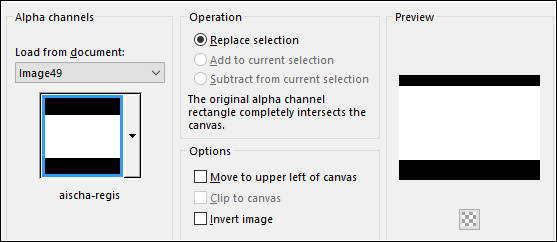
06- Selections / Load save selection / Load selection from Alpha Channel: aischa-regis
Selections / Promote Selection to Layer07- Effects / Plugin / Alien Skin Eye Candy 5 Impact / Perspective Shadow
preset Drop Shadow blurry
Effects / Image Effects / Seamless Tiling / Side by Side
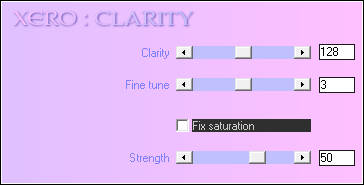
Blend Mode / Burn08- Effects / Plugin / Xero / Clarity / Default
Ative a Segunda layer á partir da Layer do topo ( Raster 3)Effects / Image Effects / Seamless Tiling / Side By Side
Ative a layer do topo09- Layers / New Raster layer
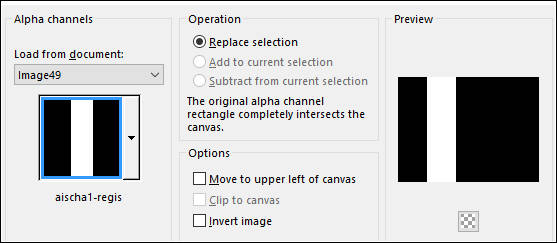
Selections / Load save selection / Load selection from Alpha Channel: aischa1-regis
Desfaça a Textura
Primeiro Plano cor #ffffff
Preencha a Seleção com a cor branca (#ffffff)
10- Effects / Texture Effects / Blinds:
Blend Mode / Soft LightEffects / Plugin / Xero / Clarity / Default
Selections / Select None
Effects / Distortion Effects / Twirl / Degrees 120
Ative a Layer do Fundo
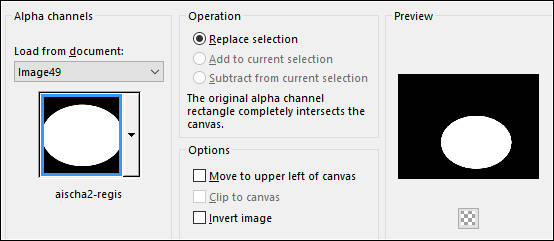
11- Selections / Load save selection / Load selection from Alpha Channel: aischa2-regis.
Selections / Promote selection to layerLayers / Arrange / bring to top
Adjust / Blur / Gaussian Blur / Radius 10
Layers / New Raster layer
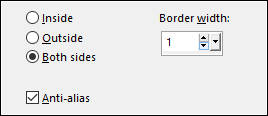
Selections / Modify / Select selection Borders
Preencha a Seleção com a cor branca (#ffffff)Selections / Select None
12- Layers / Merge / Merge Down
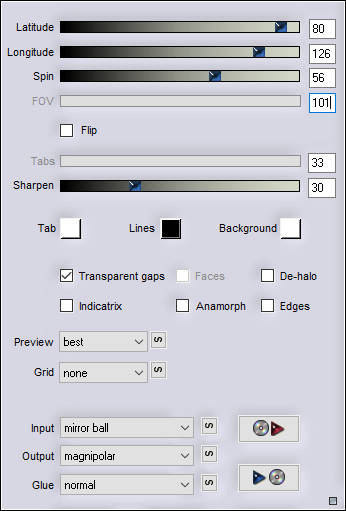
Effects / Plugin / Flaming Pear / Flexify 2.
Blend Mode / Soft LightOpacidade / 57%.
13- Image / Add Borders / Symmetric Marcado / 2 pixels cor #ffffff
Layers / Duplicate
Image / Resize / 90% ...Resize all layers desmarcado
Ative a Layer do Fundo ( a Layer original)
Adjust / Blur / Gaussian Blur / Radius 10
Ative a Layer do topo
14- Ative o tube <<Mary_1112-77>>
Copie e Cole como nova layer
Image / Resize / 85% ... Resize all layers desmarcado ( Repita mais 2 vezes)
Posicione à direita, sobre a Borda branca
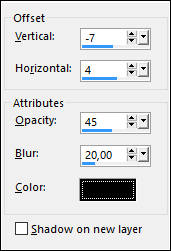
Effects / 3D Effects / Drop Shadow:
Layers / Merge / Merge Down
Layers / Duplicate
Image / Resize / 30%... Resize all layers desmarcado
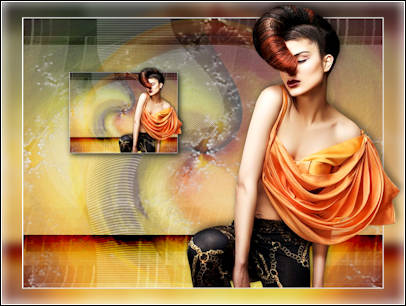
Posicione à esquerda e no alto como segue:
Effects / Plugin / Alien Skin Eye Candy 5 Impact / Perspective Shadowpreset Drop Shadow Lowest
14- Ative o tube <<deko-aisha.regis >>
Copie e Cole como nova layer
Posicione sobre a imagem pequena
15- Ative o tube <<volute>>
Copie e Cole como nova layer
Image / Resize / 55%... Resize all layers desmarcado
Posicione no canto inferior esquerdo
Selections / Select All
Selection / Float
Selections / Defloat
16- Layers / New Raster Layer
Preencha com a cor do Primeiro Plano (#000000)
Selections / Select None
Ative a Layer do tube Original e delete
Ative a layer do topo
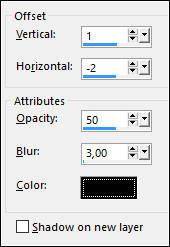
Effects / 3D Effects / Drop Shadow:
17- Ative o tube <<text-aischa-regis>>Copie e Cole como nova layer
Posicione como segue:
Assine seu trabalho
18- Image / Add Borders / Symmetric Marcado / 2 pixels cor branca (#ffffff)
Salve como JPG.
Versão com tube de Nicole:
©Tutorial traduzido por Estela Fonseca em 07/05/2017.
Não alterar nem repassar sem autorização.
