TOP NINFA
Tutorial de Narah - Original Aqui
Tutorial realizado na versão PSP X2.
Materiais Necessários:
Tubes: "anna.br_bird-poster_21-11-10.pspimage" de Anna.br
"anna.br_rede_04-09-09.psp" de Anna.br
Mask: "Marge-FopFade.jpg"
Seleção: "Narah_Sel44.PspSelection"
(Guarde na pasta de Seleções do PSP.)
"Preset_ColorBalance_Narah_Ninfa.PspScript"(Guarde na pasta de Presets do PSP.)
Marca d'água: "Narah's Designs"
Plugin Utilizados:
I.C.NET Software / Unlimited 2
1. Abra uma nova imagem transparente de 988 / 650 pixels.
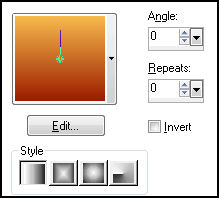
2. Preencha com um gradiente estilo Linear, Angle e Repeats 0. Utilizando as cores #9b1c00 e #f7b94c.
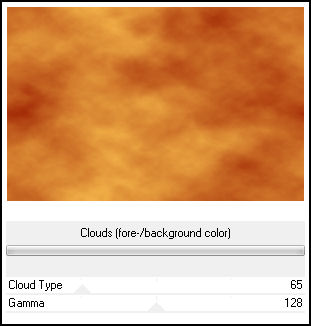
3. Effects / Plugin / Unlimited 2 / Render / Clouds (fore-/background color).
4. Layers / New raster layer.
Selections / Select all.
5. Copie e cole o tube "anna.br_bird-poster_21-11-10.pspimage" na seleção.
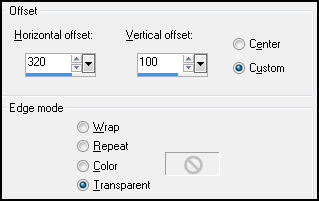
Selections / Select None.6. Effects / Image Effects / Offset:
7. Layers / Duplicate:
Image / Mirror
Layers / Merge / Merge Down.
Blend Mode / OverlayOpacidade / 85.
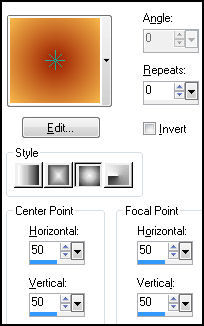
8. Layers / New raster layerPreencha com o gradiente Estilo Sunburst Angle e Repeats 0 , utilize as mesmas cores do passo 2.
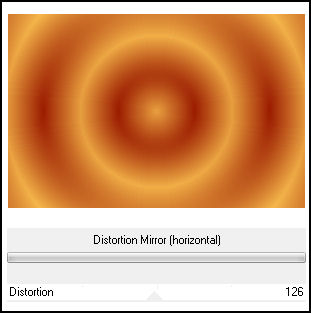
9. Efects / Plugin / Unlimited 2 / Tile & Mirror / Distortion Mirror (Horizontal) / Distortion 126
10. Adjust / Add Remove Noise / Add Noise:
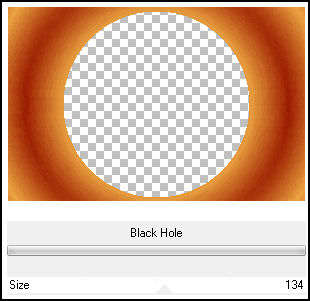
11. Effects / Plugin / Unlimited 2 / Distortion Filters / Black_Hole / 134
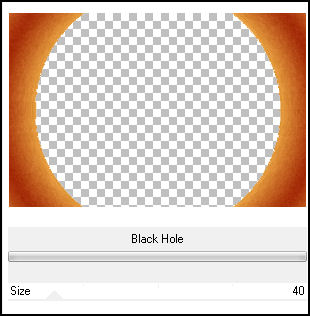
12. Effects / Plugin / Unlimited 2 / Distortion Filters / Black_Hole / 40.
13. Effects / 3D effects / Drop shadow: 5 / 5 / 45 / 35,00 / #000000
14. Repita a sombra: -5 / -5 / 45 / 35,00 / #000000
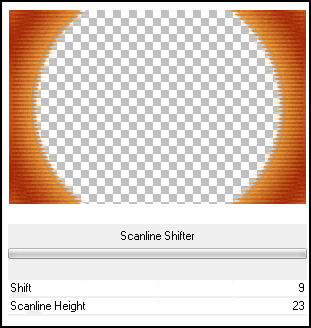
15. Effects / Plugin / Unlimited 2 / Distortion Filters / Scanline Shifter: 9 / 23
16. Effects / Plugin / Unlimited 2 / Distortion Filters / Scanline Shifter: 9 / 23.
17. Blend Mode / Multiply.
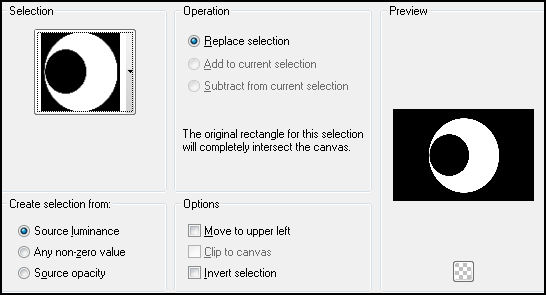
20. Layers / New raster layer.Selections /Load save selection / Load selection from disk:
Seleção "Narah_Sel44."
21. Preencha a seleção com o mesmo gradiente do passo 8.Selections / Select None
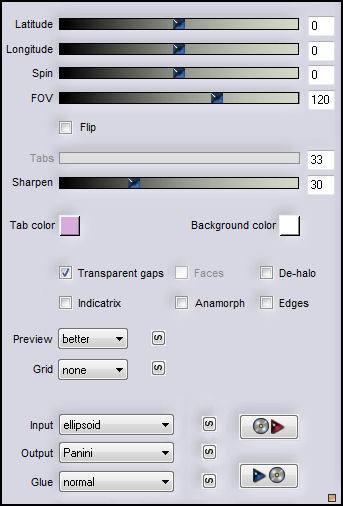
22. Effects / Plugin / Flaming Pear / Flexify 2:
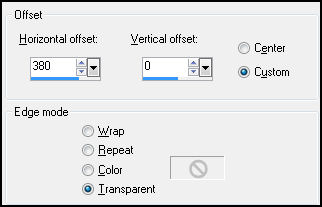
23. Effects / Image effects / Offset: 380 / 0
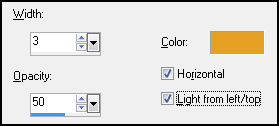
24. Effects / Texture Effects / Blinds: cor #e6a124
25. Layers / Duplicate
Image / Mirror
Layers / Merge / Merge Down.
26. Effects / 3D effects / Drop Shadow: 3 / 50 / 45 / 35,00 / #000000
Effects / 3D Effects / Drop Shadow: -3 / -50 / 45 / 35,00 / #000000
27. Layers / Arrange / Move down.Blend Mode / Overlay
opacidade / 80.
28. Ative a layer 2 da paisagem.Copie o tube "anna.br_rede_04-09-09.psp." e cole como nova layer
Image / Resize / 95%. (resize all layer desmarcado)
29. Adjust / Sharpness / SharpenAdjust / Add Remove Noise / Add Noise.
Image / Mirror
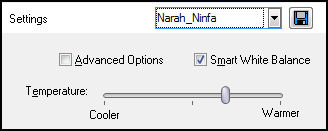
30. Adjust / Color Balance:
Localize o preset Narah_Ninfa e confirme
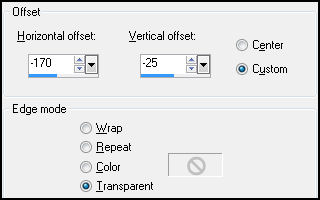
31. Effects / Image effects / Offset: -170 / -25
32. Na layer do tube da mulher:
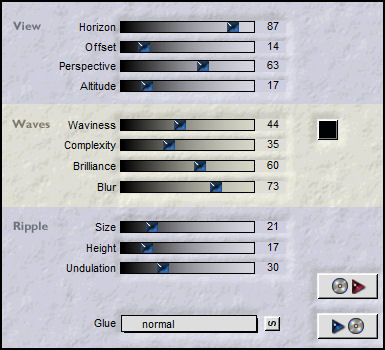
Effects / Plugin / Flaming Pear / Flood:
33. Effects / 3D Effects / Drop Shadow: -6 / 25 / 35 / 50,00 / #000000
34. Na layer Raster 2 , da paisagem:
Effects / Plugin / Flaming Pear / Flood:
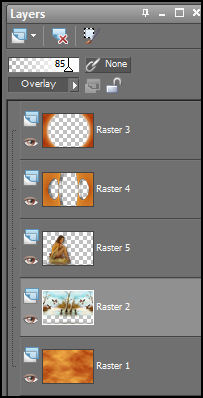
A sua paleta das layers agora deve estar assim:
35. Layers / Merge / Merge Visible.
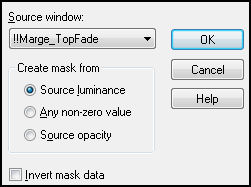
36. Layers / New mask layer from image:"Marge-TopFade.jpg".
Layers / Merge / MergeGroup.
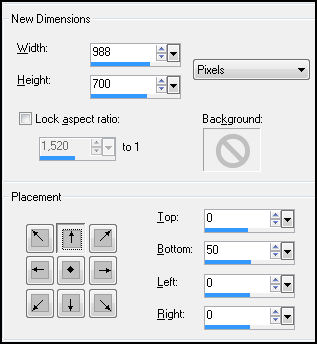
36. Image / Canvas Siza / 988 x 700:
37. Layers / New raster layer
Layers / arrange / Send to bottom
Preencha com o mesmo gradiente usado no passo 2
38. Layers / New raster layer
Coloque a marca d'água "Narah's Designs,"
Assine seu trabalho
Merge All.
Exporte como jpg.
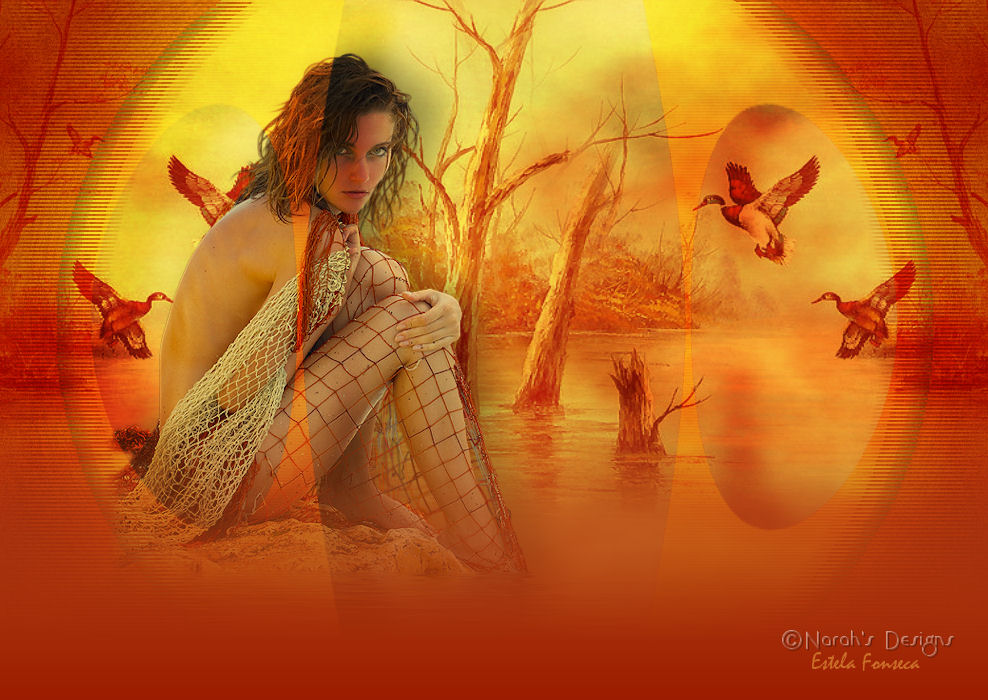
Versão 2:
© 2013 Tutorial criado por Narah e Traduzido por Estela Fonseca.
Não alterar nem repassar sem autorização.
