TUTORIAL 276
Tutorial de Mieke , original, Aqui.

Tutorial traduzido no PSP 2022 ULTIMATE mas pode ser feito em versões anteriores do PSP.
Materiais Necessários:
Plugins:Mehdi / Sorting Tiles
L en K landssiteofwonders /Elvida
Carolaine and Sensibility / cs-texture
Filters Unlimited 2.0 /Paper Textures
AAA Frames / Foto Frame
Abra os tubes no PSP , duplique e feche os originais.
Trabalhe nas cópias.
Primeiro Plano cor # f67150Plano de Fundo cor # 4e7c70
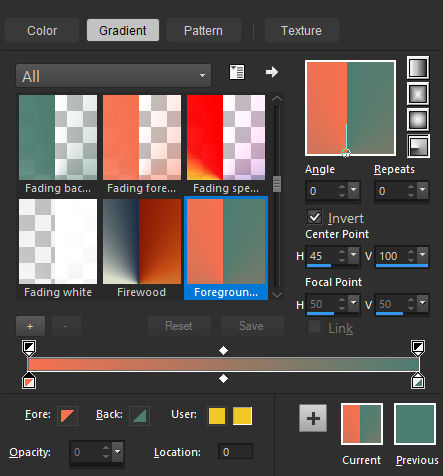
Prepare um Gradiente no primeiro plano / Radial configurado como segue:
1- Abra uma nova imagem transparente de 900/550 Pixels.Preencha com o Gradiente Radial
2- Effects / Image Effects / Seamless Tiling/ Default
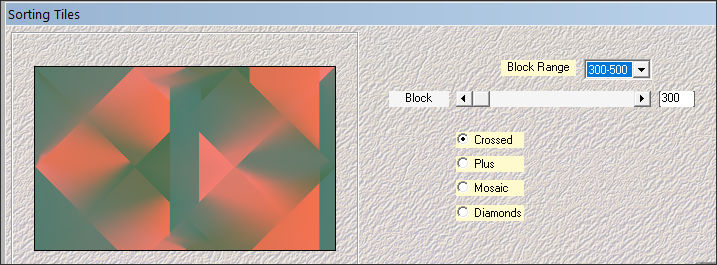
3- Effects / Plugins / Mehdi / Sorting Tiles:
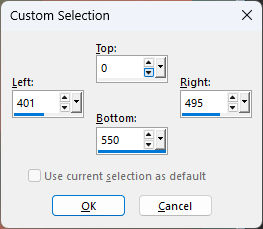
4- Selection Tool (S) / Custom Selection:
5- Layers / New Raster LayerPreencha a seleção com a cor do Plano de Fundo #4e7c70
Selections / Select None.
6- Ative a Layer do Fundo (Raster 1)
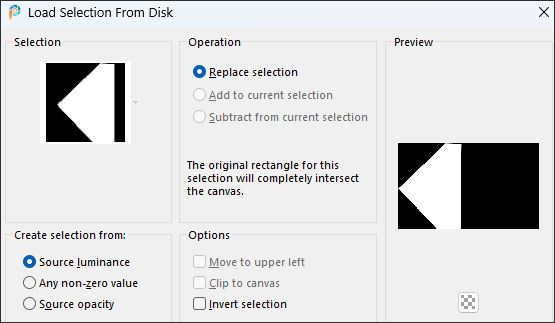
Selections / Load/Save selection / Load selection from disk: mb-276
Selections / Promote Selection to Layer
7- Effects / Plugins / L en K landssiteofwonders /Elvida: (Cor do Segundo Plano #4e7c70)
8- Selections / Edit Selection
9- Image / Mirror / Mirror Horizontal
10- Ative a layer do Fundo (Raster 1)
Selections / Promote Selection to Layer
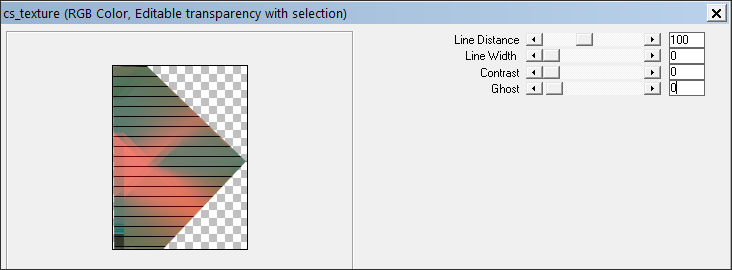
11- Effects / Plugins / Carolaine and Sensibility /cs-texture:
Selections / Select None
12- Ative a Segunda Layer a partir da layer do topo (Promoted Selection)
13- Layers / Merge / Merge Down
Effects / 3D Effects / Drop Shadow : 0 / 0 / 60 / 30 / Cor preta (#000000)
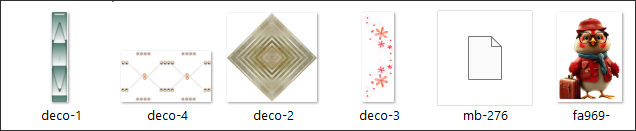
14- Abra o Tube deco-1.pngCopie e cole como nova layer
15- Layers / Arrange / Bring to Top.Blend Mode / Overlay
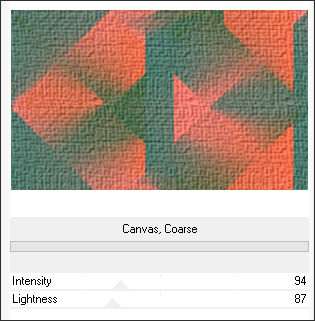
16- Ative a Layer do Fundo (Raster 1)Effects / Plugins / Filters Unlimited 2.0 /Paper Textures / Canvas Coarse:
17- Ative a layer do Topo
Abra o Tube deco-2.png
Copie e cole como nova layer
Blend Mode / Overlay
18- Abra o tube deco-3.png
Copie e cole como nova layer
19- Effects / Image Effects/Offset: 175 / 0 / Custom e Transparent marcado.
Effects / 3D Effects / Drop Shadow : 0 / 0 / 60 / 30 / Cor preta (#000000)
20- Abra o tube Tube deco-4
Copie e cole como nova layer
Blend Mode / Screen
21- Image / Add Borders / Symmetric Marcado / 2 Pixels / Cor do primeiro plano (Cor # f67150)
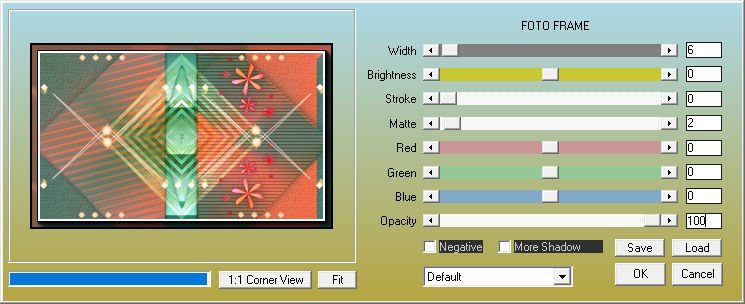
Effects / Plugins / AAA Frames / Foto Frame:
Selections / Select All
22- Image / Add Borders / Symmetric Marcado / 50 pixels cor #ffffff
Selections / Invert.
Preencha com o Gradiente
Selections / Promote Selection to Layer
Image / Mirror / Mirror Horizontal
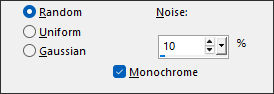
23- Adjust/ Add/Remove Noise/Add Noise:
24- Selections / InvertEffects / 3D Effects / Drop Shadow : 0 / 0 / 60 / 30 / Cor preta (#000000)
Selections / Select None
Layers / Merge / Merge All (flatten)
25- Effects / Plugins / AAA Frames / Foto Frame (Mesmos valores e antes)Abra o Tube fa969-.png.
Copie e cole como nova layer
Effects / 3D Effects / Drop Shadow : 0 / 0 / 60 / 30 / Cor preta (#000000)
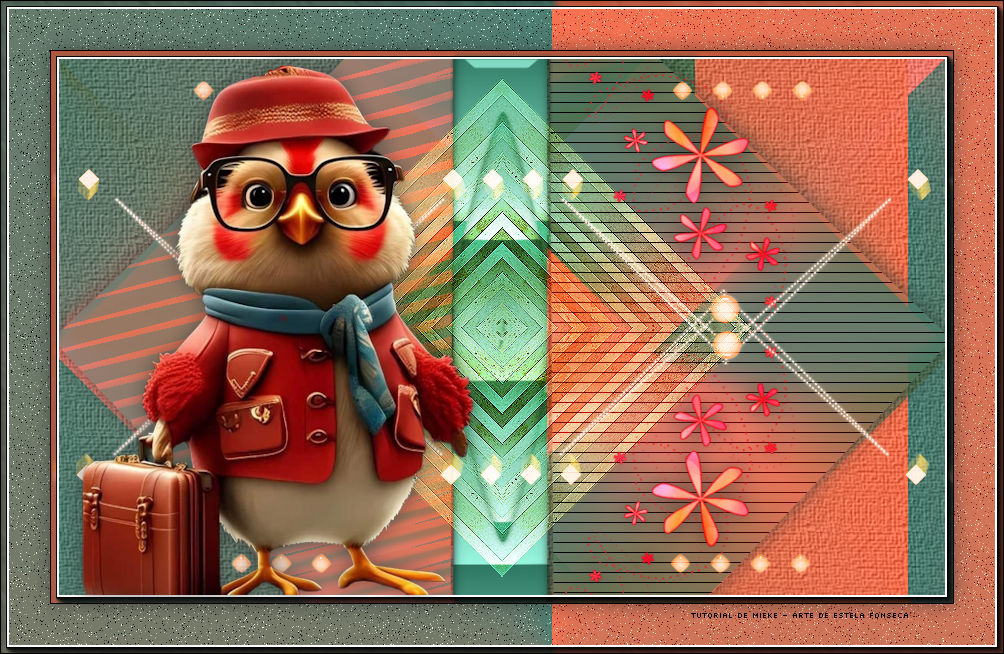
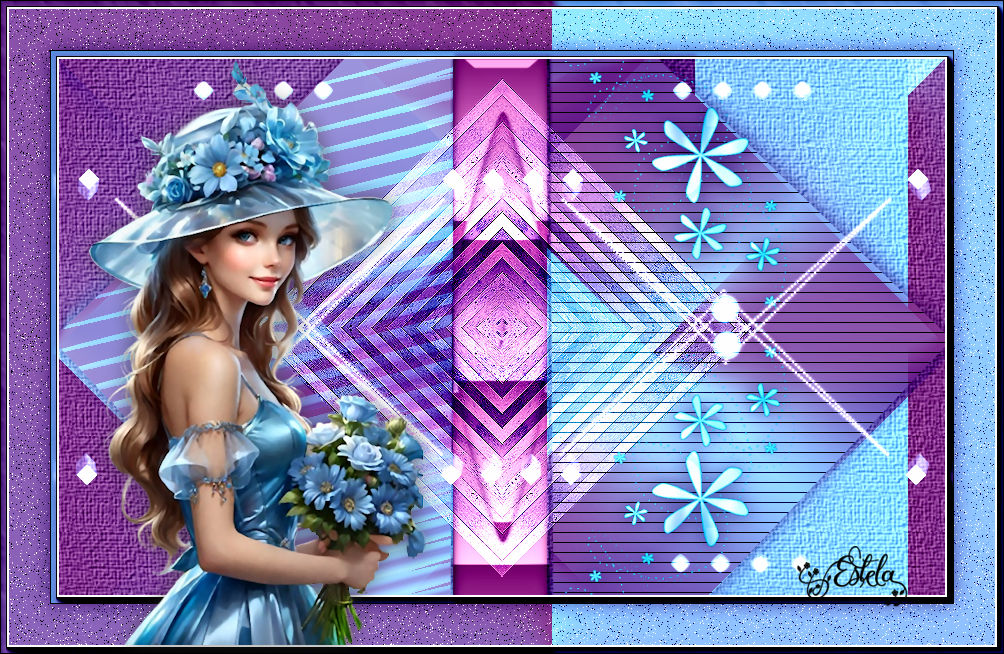
26- Mova o tube para a esquerda (Veja a imagem final)
Adicione o seu nome ou a sua marca d'água em uma nova layer.
Una as layers e salve seu trabalho como JPG.
FIM
Versão com tube de Silvie:
©Tutorial traduzido por Estela Fonseca em 16/02/2025.
Não alterar nem repassar sem autorização.