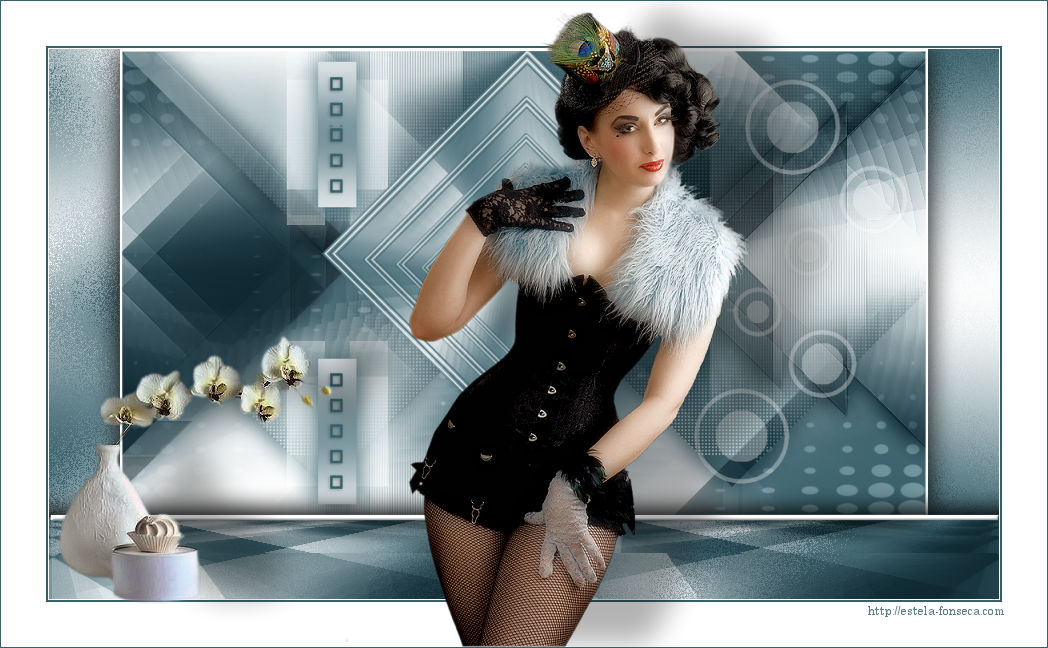
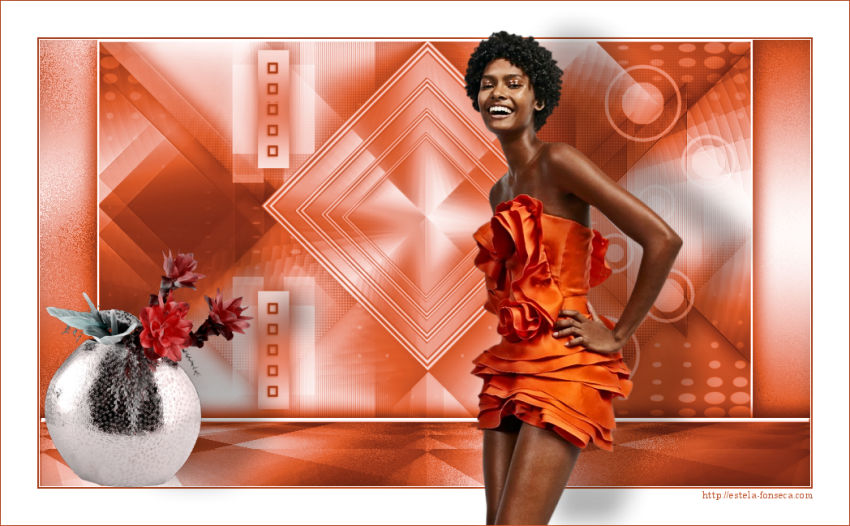
MAYA
Tutorial de ©Creative Graphic Original Aqui
Traduzido no PSP X9
Materiais Necessários:
Tubes de Crealine
Mask de Narah, AQUI.
Demais materiais de Crealine Graphic
Plugins Utilizados:
<I.C.NET Software> - Filters Unlimited 2.0
[AFS IMPORT] - sqborder2
Toadies - Blur em & What Are You?
Mehdi - Wavy Lab 1.1 & Sorting Tiles
&<Bkg Designer sf10 III> - Sectorize **
VanDerLee - Unplugged X - Defocus
Alien Skin - Eye Candy 5 - Impact - Gradient Glow
MuRa's Meister - Perspective Tiling
** Importado para o Unlimited 2.0
Preparação:
Abra os tubes no PSP, duplique e feche os originais.
Abra a Mask no PSP e Minimize.
Primeiro Plano cor #38606b / Segundo Plano cor #ffffff
1. Abra a layer << Alpha_Select_maya>> Duplique e feche a original
Traabalhe na cópia
Effects / Plugins / Medhy / Wavy Lab 1.1
2. Adjust / Blur / Gaussian Blur / Radius 30
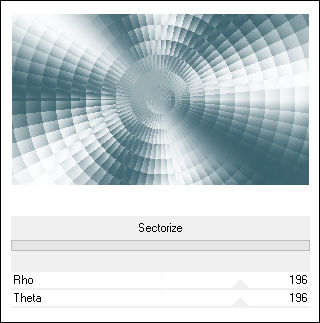
3. Effects / Plugins / <I.C.NET Software> Filters Unlimited 2/ BKg Designer sf10 III / Sectorize
4. Adjust / Sharpness / Sharpen
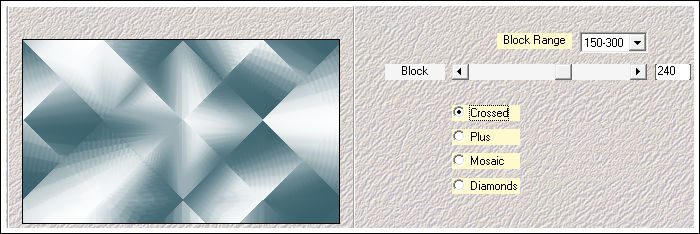
5. Effects / Plugins / Medhy /Sorting Tiles
6. Selections / Load/Save selection / Load selection from alpha channel: Selection #1
7. Selections / Promote Selection to Layer
8. Selections / Select None
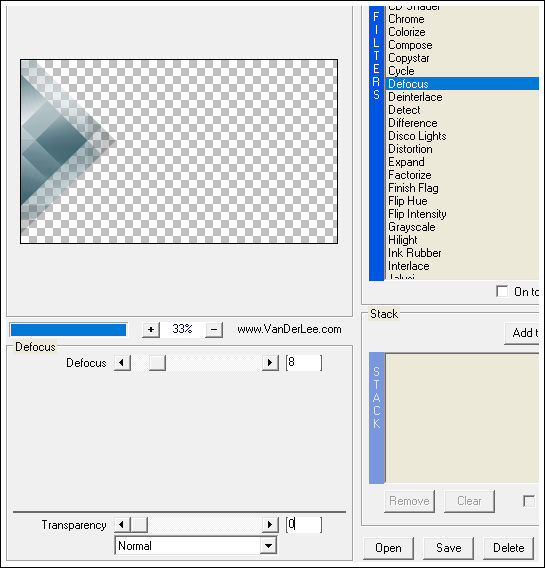
9. Effects / Plugins / Vanderlee / Unplugged X / Defocus
10. Adjust / Sharpness / Sharpen More11. Blend Mode / Multiply
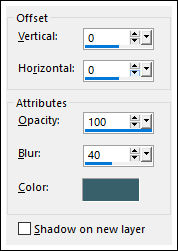
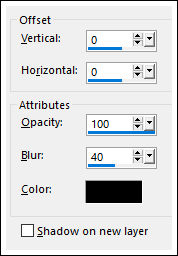
12. Effects / 3D Effects / Drop Shadow: 0 / 0 / 100 / 40 / Cor #38606b
13. Ative a Layer do Fundo (Raster 1)
14. Selections / Load/Save selection / Load selection from alpha channel: Selection #215. Selections / Promote Selection to Layer
16. Selections / Select None
17. Effects / Plugins / AFs Import /sqBorder 2
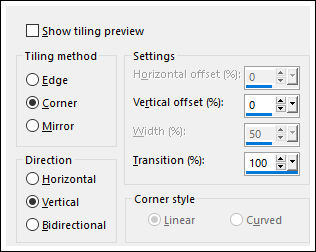
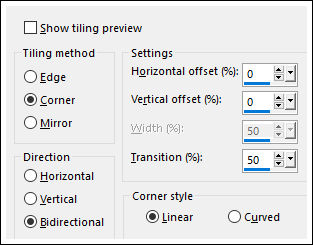
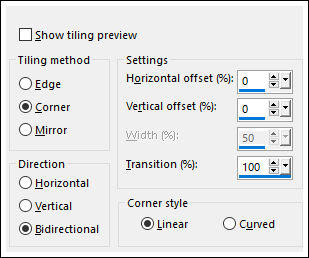
18. Effects / Image Effects / Seamless Tiling:
19. Blend Mode / Multiply
19. Effects / 3D Effects / Drop Shadow: 0 / 0 / 100 / 40 / Cor #38606b
20. Ative a Layer do Fundo (Raster 1 )
21. Selections / Load/Save selection / Load selection from alpha channel: Selection #322. Selections / Promote selection to Layer
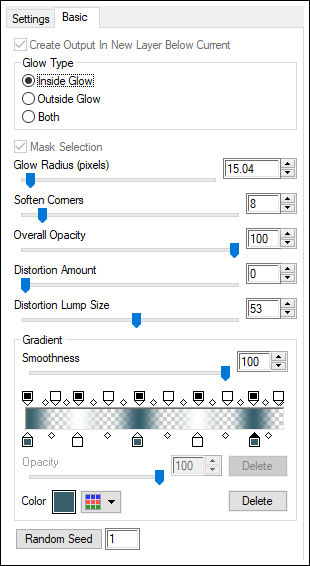
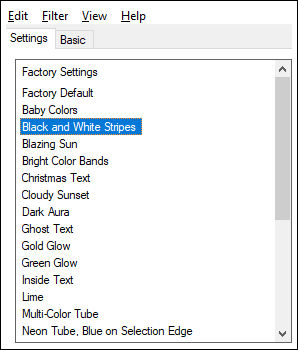
23. Effects / Plugins / Alien Skin Eyes Candy Impact 5 / Gardient Glow
24. Selections / Select None
25. Layers / Duplicate26. Image / Resize / 80% ... Resize All Layers ... Desmarcado
27. Repita a etapa 25 e 26
28. Repita de novo a etapa 25 e 26
29. Layers / Merge / Merge Down ( 2 Vezes)
30. Layers / Arrange / Bring to Top
31. Ative a Layer do Fundo (Raster 1)
32. Selections / Load/Save selection / Load selection from alpha channel: Selection #433. Selections / Promote selection to layer
34. Selections / Select None
35. Blend Mode / Multiply
36. Layers / Duplicate
37. Image / Resize / 80%... Resize All Layers ... Desmarcado38. Repita a etapa 35 e 36
39. Layers / Merge / Merge Down (2 Vezes)
40. Effects / 3D Effects / Drop Shadow: Cor do Primeiro Plano
41. Effects / Edge Effects / Enhance
42. Ative a Layer do Topo
43. Layers / New Raster Layer
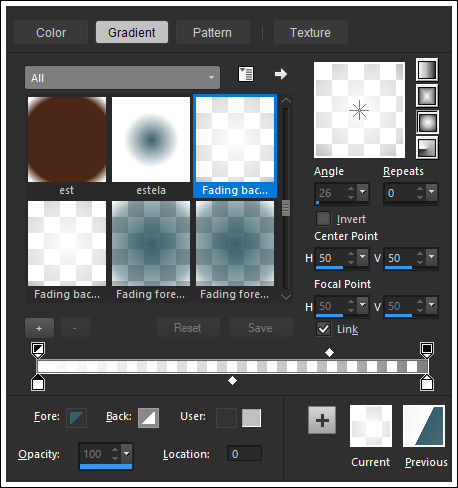
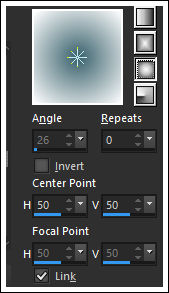
44. Selections / Load/Save selection / Load selection from alpha channel: Selection #545. Forme um Gradiente<<Fading Background>> Configurado como segue:
46. Preencha com o Gradiente
47. Selections / Select None
48. Effects / Plugins /Toadies /What Are You
49. Adjust / Sharpness / Sharpen More
50. Effects / Image Effects / Seamless Tiling
51. Layers / Arrange / Move Down
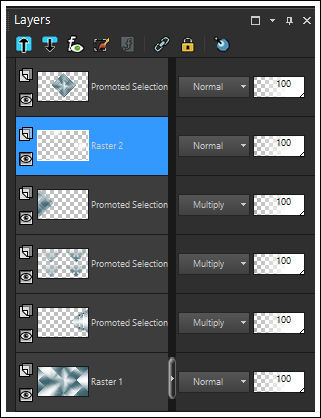
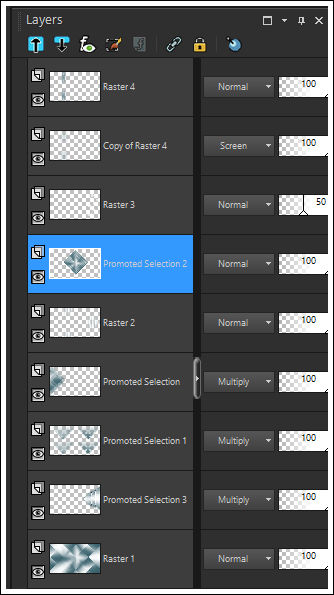
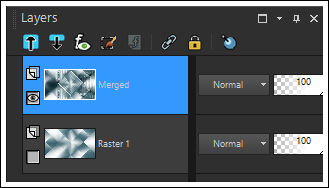
52. Neste ponto suas layers devem estar assim:
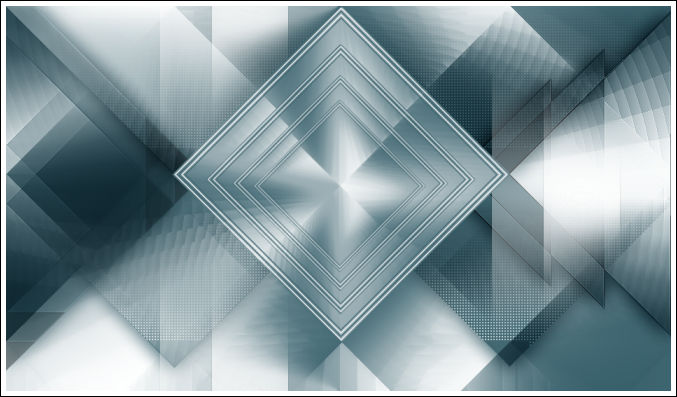
Resultado:
53. Effects / Texture Effects / Blinds:
54. Adjust / Sharpness / Sharpen
55. Ative a Layer do Topo
56. Layers / New Raster Layer
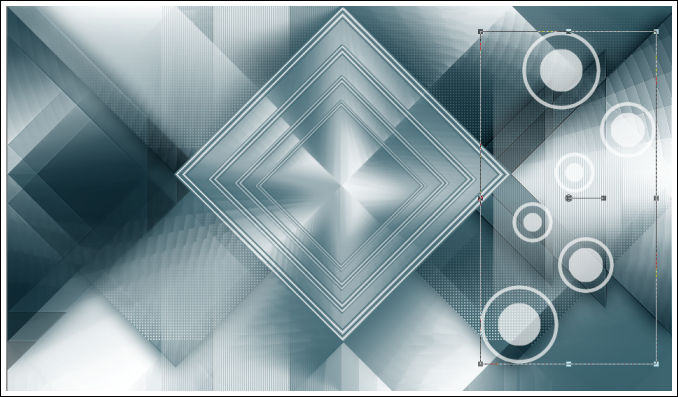
57. Ative o Brush <<brush_TG_Linette>>
58. Aplique com a cor do Segundo Plano #ffffff como segue:
58. Adjust / Sharpness / Sharpen
59. Opacidade /50
60. Layers / New Raster Layer
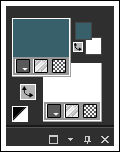
61. Selections / Load/Save selection / Load selection from alpha channel: Selection #662. Gradiente Sunburst configurado como segue:
63. Preencha a seleção com o Gradiente
64. Adjust / Blur / Gaussian Blur / Radius 3065. Selections / Select None
66. Layers / Duplicate
67.Image / Mirror / Mirror Vertical
68. Layers / Merge / Merge Down
69. Effects / 3D Effects / Drop Shadow: Cor do Primeiro Plano
70. Layers / Duplicate
71. Effects / Plugins / Toadies /What Are You
72. Adjust / Sharpness / Sharpen More
73. Layers / Arrange / Move Down74. Blend Mode / Screen
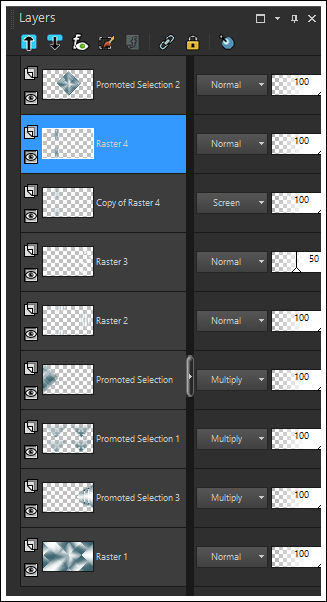
75. Ative a Layer <<Promoted Selection 2>>
76. Layers / Arrange / Bring to top77. Ative a Layer <<Raster 4>>
78. Layers / New Raster layer79. Selections / Load/Save selection / Load selection from alpha channel: Selection #7
80. Preencha a seleção com a cor do Primeiro Plano
81. Selections / Select None
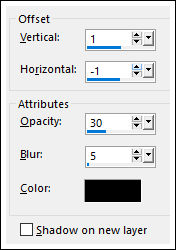
82. Effects / 3D Effects / Drop Shadow: 1/-1/30/5 Cor #000000
83. Ative a Layer do Fundo (raster 1 )
84. Layers / New Raster Layer85. Preencha com a cor do Segundo Plano #ffffff
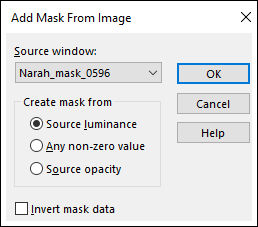
86. Layers / New Mask Layer / From Image: Narah_Mask_0596
87. Layers / Merge / Merge Group88. Effects / Image Effects / Seamless Tiling
89. Blend Mode / Soft Light
90. Ative a Layer do Fundo (raster 1)
91. Layers / Duplicate
90. Oculte a layer do Fundo91. Layers / Merge / Merge Visible
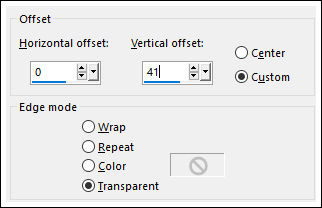
92. Image / Resize / 85 %... Resize All Layers ... Desmarcado93. Effects / Edge Effects / Offset
94. Volte a visibilidade da layer do fundo (Raster 1)
95. Ative a Layer do Fundo (Raster 1)
96. Selections / Load/Save selection / Load selection from alpha channel: Selection #897. Selections / Promote Selection to Layer
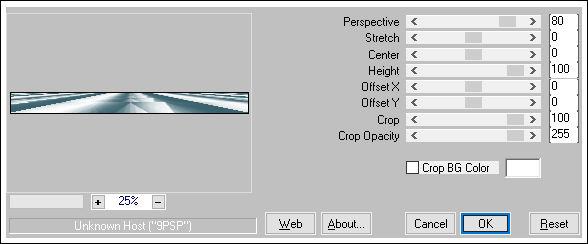
98. Effects / Plugins / Mura’s Meister / Perspective Tilling
99. Selections / Select None
100. Effects / 3D Effects / Drop Shadow: 0/0/100/40 Cor #000000
101. Blend Mode / Multiply
102. Effects / Image Effects / Seamless Tiling
103. Ative a Layer do Fundo (Raster 1)
104. Effects / Plugins /Toadies / Blur’em !...
105. Ative a Layer do Topo
106. Selections / Select All
107. Selections / Float
108-Selections / Defloat
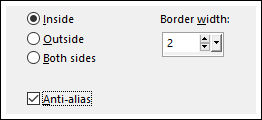
109. Selections / Modify / Select Selection Borders
110. Preencha com a cor branca #ffffff
111. Selections / Select None112. Effects / 3D Effects / Drop Shadow: 0/0/100/40 Cor #000000
113. Layers / Arrange / Move Down114. Ative a Layer do Topo
115. Layers / New Raster Layer
116. Selections / Load/Save selection / Load selection from alpha channel: Selection #9117. Preencha com a cor do Segundo Plano #ffffff
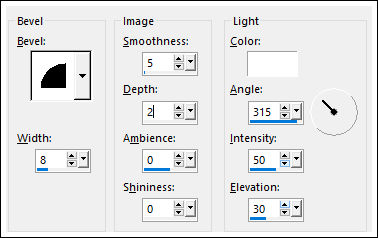
118. Effects / 3D Effects / Inner Bevel
119. Selections / Select None
120. Image / Add Borders / Symmetric Marcado / 1 Pixel cor #ffffff121. Image / Add Borders / Symmetric Marcado / 2 Pixels cor do Primeiro Plano
122. Image / Add Borders / Symmetric Marcado / 45 Pixels cor #ffffff
123. Ative o tube <<Woman _Crealine>> Copie e Cole como nova layer
124. Image / Resize / 80 %... Resize All Layers ... Desmarcado
125. Adjust / Sharpness / Sharpen
126. Posicione como no Modelo
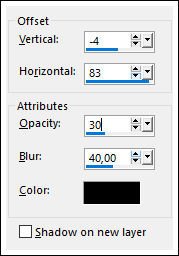
127. Effects / 3D Effects / Drop Shadow: -4/83/30/40 Cor #000000
128. Ative o tube <<Flowers_1_crealine>> Copie e Cole como nova layer
129. Image / Resize / 80%... Resize All Layers ... Desmarcado130. Posicione como no Modelo
131. Adjust / Sharpness / Sharpen
131. Effects / 3D Effects / Drop Shadow: -4/83/30/40 Cor #000000
132. Image / Add Borders / Symmetric Marcado / 1 Pixel cor do Primeiro Plano
133. Assine seu trabalho134. Layers / Merge / Merge All
135. Salve como JPG.
Versão 2: Tube da Personagem (Mentali) Tube Floral (Cibi Bijoux) Mask (Narah)
VOLTAR
©Tutorial Traduzido por Estela Fonseca 22/02/2020.
Obrigada Linette por me permitir traduzir seu trabalho.
