SENTIMENT
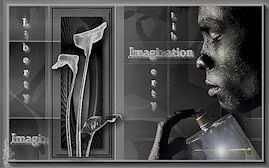
Tutorial de Liberty-Imagination , original, Aqui.
O tutorial traduzido no Corel Paint shop Pro X6.
Materiais Necessários:
Os tubes são de Nicole e Maryse
Plugins Utilizados: AQUIAAA frame
Simple
Toadies
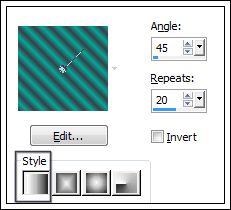
Prepare um Gradiente - Estilo Linear:
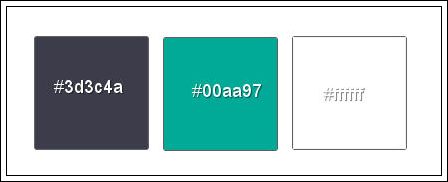
Foreground cor #3d3c4a
Baackground cor #00aa97
Atenção!!!!De acordo com suas cores, o blend mode e a opacidade podem mudar.
***01 - Abra uma nova imagem transparente de 900/600 pixels
Preencha com o gradiente.
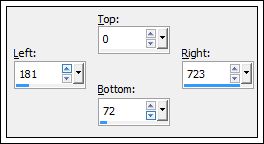
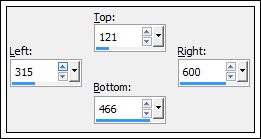
02- Ferramenta Selection Tool (S) / Custom Selection:
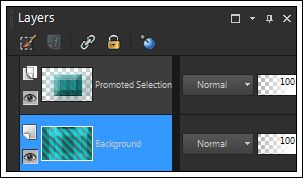
Selection / Promote Selection to layer
03- Effects / Plugin / Simple / Pizza slice mirror
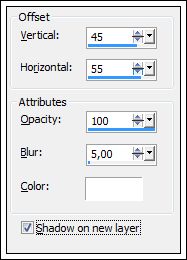
Effects / 3D Effects / Drop Shadow: 5/5/100/50 preta
Selections / Select None
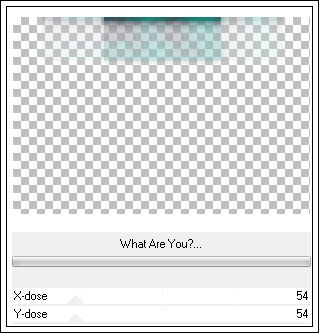
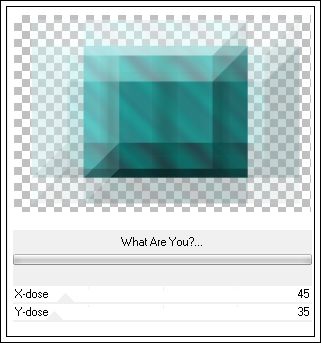
04- Effects / Plugin / Toadies / what are you: 54/54
Effects / Edge Effects / Enhance
Blend Mode / Overlay ou Outro.
05- Layers / Duplicate
Image / Flip
Layers / Merge / Merge Down
06- Layers / Duplicate
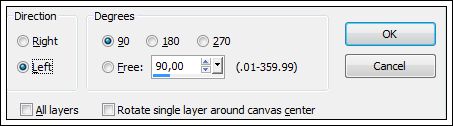
Image / Free Rotate / 90 / Left
Effects / Plugin / Toadies /what are you?: 27/27
Layers / Merge / Merge All
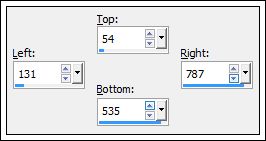
07- Ferramenta Selection Tool (S) / Custom Selection:
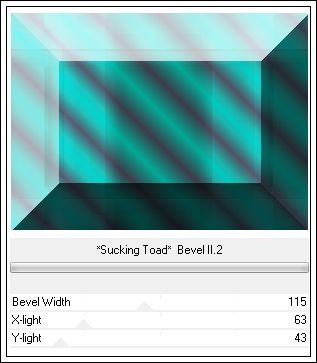
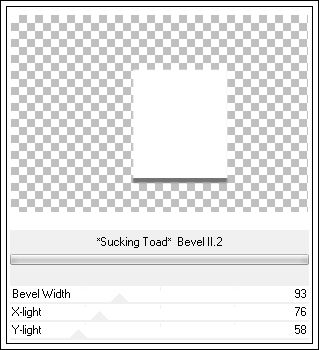
Selection / Promote selection to layer08- Effects / Plugin / Toadies / Shucking toad / bevel II.2
Selections / Select None
09- Effects / Plugin / Toadies / What are you? 45/35
10- Ative a layer do fundo:
Ferramenta Selection Tool (S) / Custom Selection:
Selection / Promote selection to layer
Layers / Arrange Bring to top
11- Adjust / Blur / Gaussian Blur / Radius 10
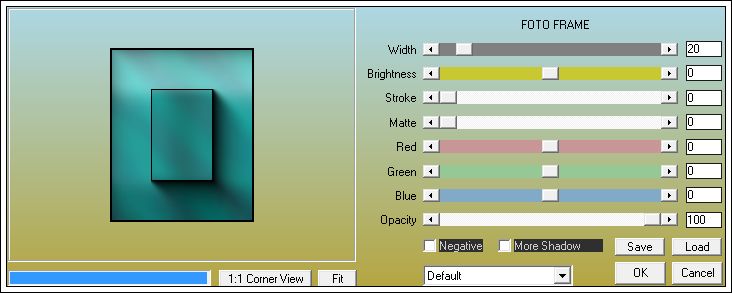
12- Effects / Plugin / AAA Frame / Foto Frame
13- Selections / Modify / Contract 40
14- Layers / New raster layer
15- Copie o background (JHanna_181_background.jpg)
Cole na seleção
Effects / Edge Effects / Enhance
Blend Mode / Luminance (Legacy)
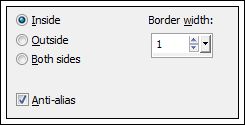
16- Selections / Modify / Select Selection Borders:
Preencha com a cor branca
Selections / Select None
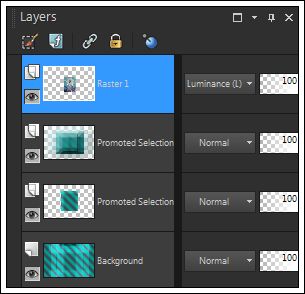
Sua Paleta das layers deve estar assim:
17- Layers / Merge / Merge Down.
18- Layers / Duplicate
Image / Resize / 55 % (resize all layers desmarcado)
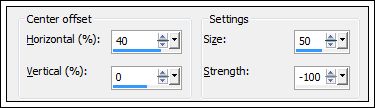
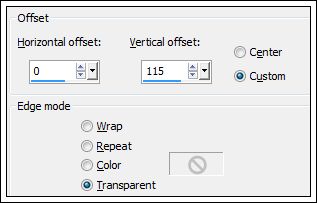
19- Effects / Image Effects / Offset:
20- Layers / Duplicate
Image / Mirror
Layers / Merge / Merge Down (2 vezes)
Você tem agora três layers.
21- Ative a layer do meio:
Effects / 3D drop shadow:
22- Na layer da sombra:
Effects / Plugin / Toadies / shucking toad / bevel II.2
23- Ative a layer do fundo
Layers / Duplicate
24- Effects / Distortion Effects / Warp
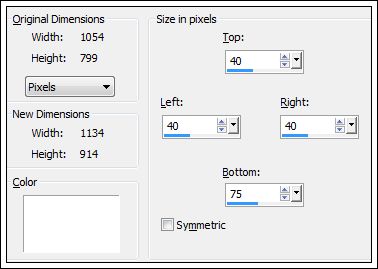
25- Image / Add Bordrs / Symmetric / 2 pixels cor branca
Copie
26- Image / Add Borders / Symmetric desmarcado / cor do background:
27- Ative a varinha mágica / Selecione essa borda
Cole na seleção
28- Effects / Plugin / Toadies / Shucking toad / Bevel II.2: 93 /76 /58
29- Selections / Invert
30- Effects / Plugin / Toadies / Shucking toad / Bevel II.2: 93 /76 / 58.
Selections / Promote Selection to layer
Selections / Select None
Image / Mirror
31- Ative a layer do fundo.
Layers / Duplicate
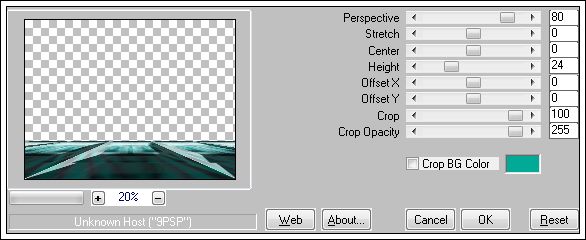
32- Effects / Plugin / Mura's Meister / Perspective tiling
Layers / Arrange / Bring to top33- Effects / Geometric effects / Cylinder Vertical:Strenght 50
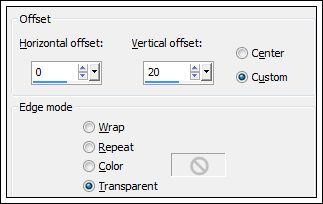
34- Effects / Image Effects / Offset:
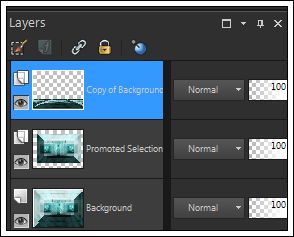
Suas layers estão assim:
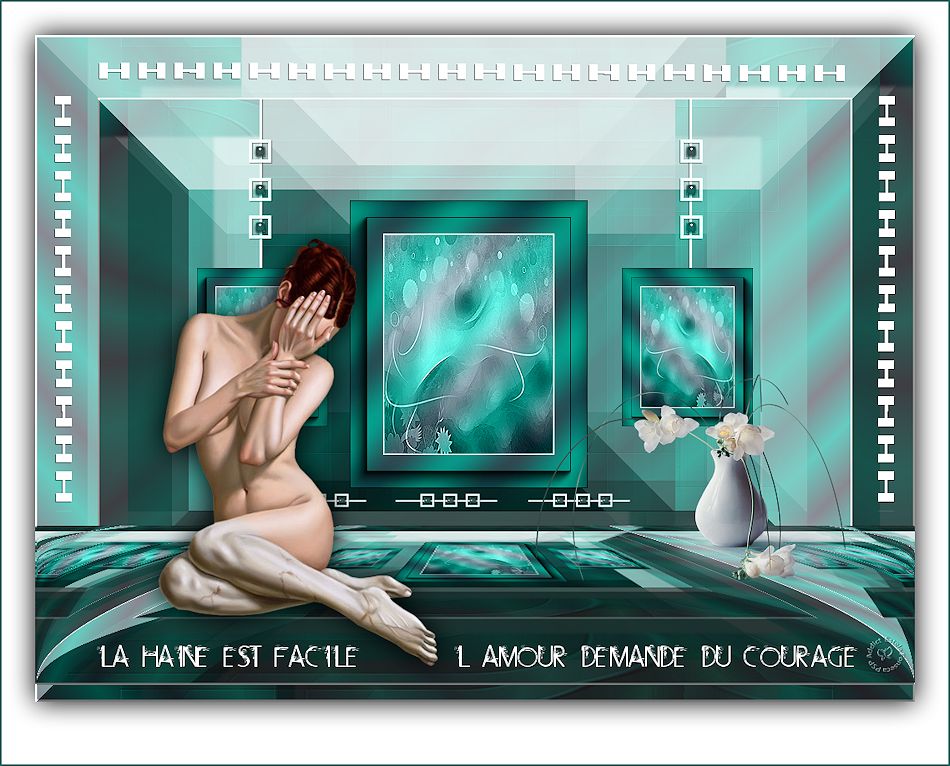
Sua tag deve estar assim:
Layers / Merge / Merge All
35- Selections / Select All
Image / Add Borders / Symmetric desmarcado / cor branca.
36- Effects / 3D Effects / Drop Shadow: 0/0/100/45 preto
Selections / Select None
37- Copie o tube << deco maxou >> cole como nova layer
Posicione como no modelo.
Blend Mode / Luminance (Legacy) ou Colorize
38- Copie o tube <<deco cadre maxou >> cole como nova layer
Effects / Image Effects / Offset:
Abra o tube <<nicole-femme88-2013.pspimage>>
Copie e cole como nova layer
Coloque como preferir
Effects / 3D Effects / Drop Shadow: 0 / 0 / 100 / 45 / #000000
39- Abra o tube <<MR_Still Life Orchidées.png>> Copie e cole como nova layer
Posicione
Redimensione e posicione como preferir.
40- Abra o tube << texte_maxou >>
Copie e cole como nova layer
41- Image / Add Borders / symmetric / 2 pixels cor do fundo.
Assine seu trabalho.
Image / Resize / 950 pixels
Salve como jpg
©Tutorial traduzido por Estela Fonseca em 24/06/2012.
Não alterar nem repassar sem autorização.