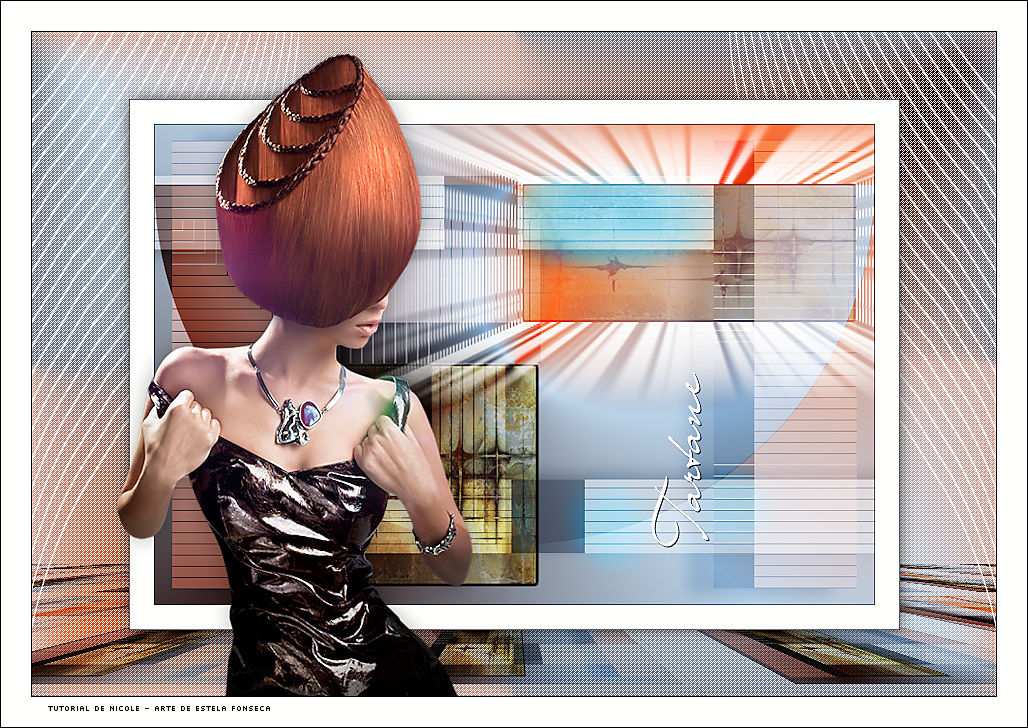
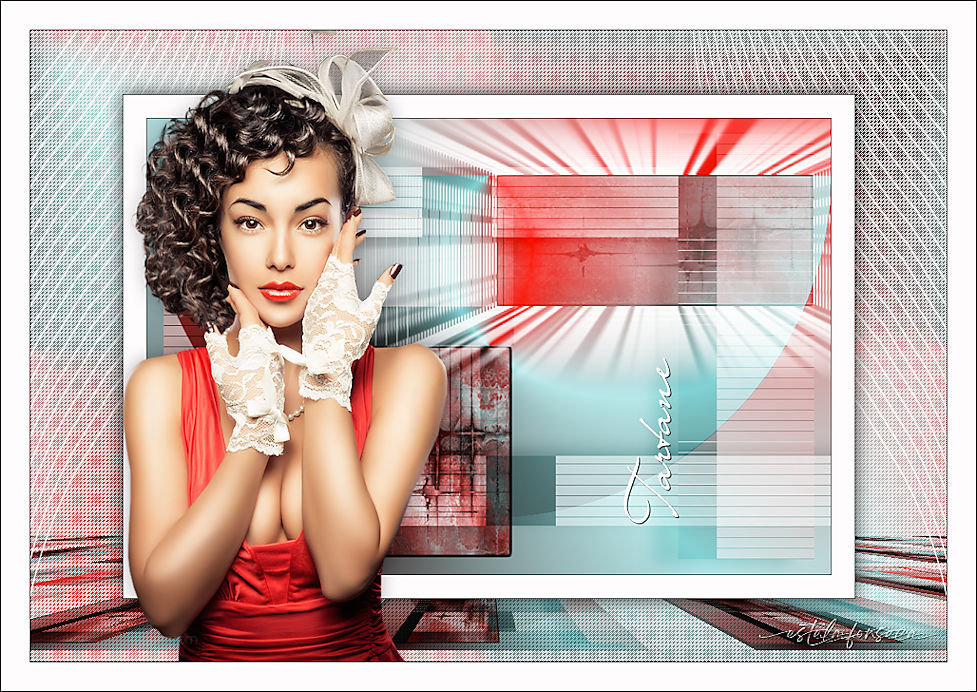
TARTANE
Tutorial de ©Le Monde de Bambou , original Aqui.
Obrigada Nicole por me permitir traduzir seus tutoriais!
Traduzido no Corel PaintShopPro 2021 Ultimate.
MATERIAL
Tube de Corine
PLUGINS:
Alien Skin Eye Candy 5 / Impact
Flaming pear
MuRa's Meister
L en K's
***Copie as seleções para a pasta de seleções do PSP.
Copie o Gradiente para dentro da Pasta de Gradientes do PSP.
Dê dois cliques sobre os presets do Alien Skin
e eles serão automaticamente colocados na pasta de configurações do Plugin.
***
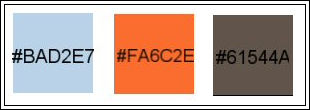
Cores:
1- Abra uma Nova Imagem transparente de 900/600 Pixels
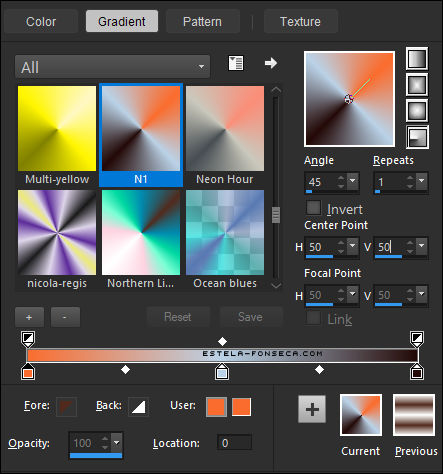
Coloque no Primeiro Plano o Gradiente <<N 1 >> estilo RADIAL Configurado como segue:
Altere as cores de acordo com o tube escolhido.
1- Preencha a Layer com o Gradiente2- Layers / Duplicate
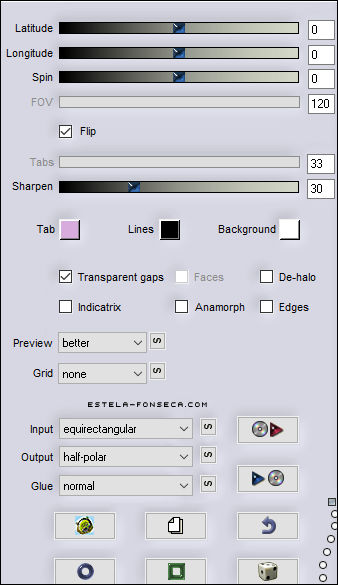
3- Effects / Plugins / Flaming Pear / Flexify-2
4- Layers / New Raster Layer
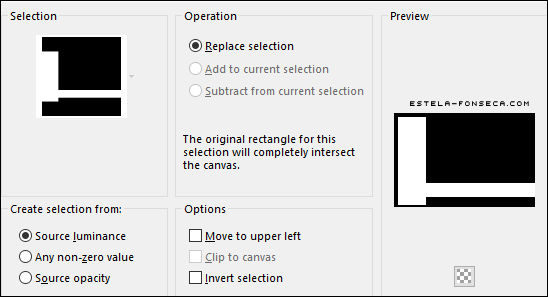
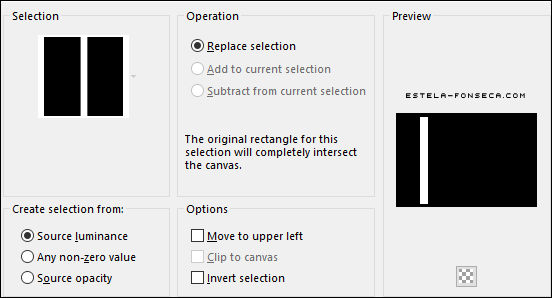
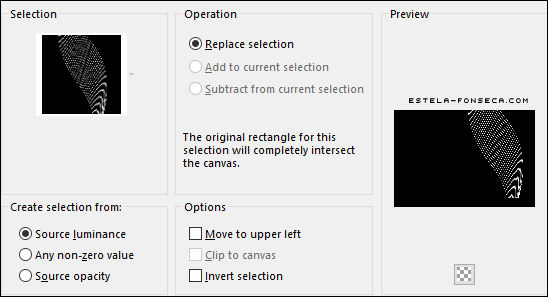
5- Selections / Load/Save Selection / Load Selection from disk: nicole-237
Mude no Primeiro Plano a configuração do Gradiente , o estilo LINEAR , configurado como segue:
Preencha com o Gradiente
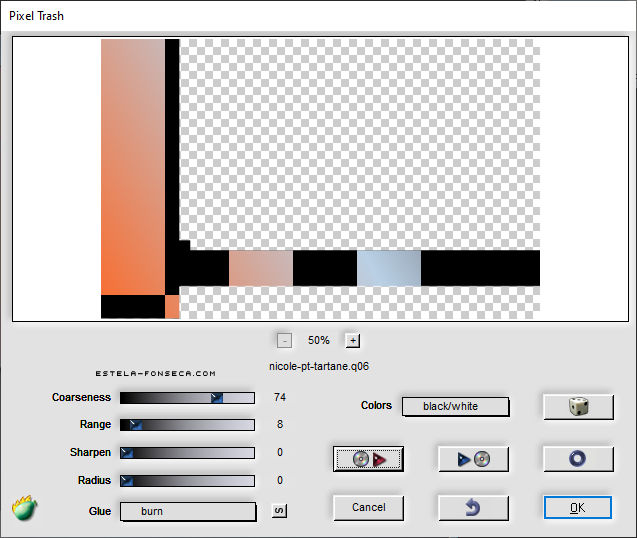
6- Effects / Plugins / Flaming Pear / Pixel Trash
Clique na seta (vermelha) para buscar o preset nicole-pt-tartane
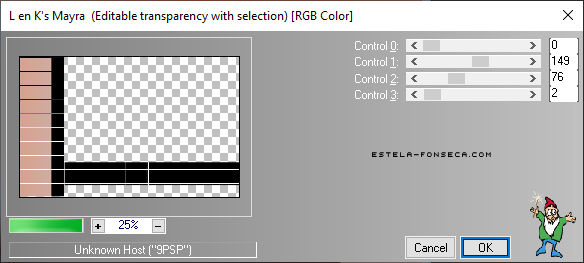
7- Effects / Plugins / L en K's / Mayra
8- Selections / Select None
Blend Mode / Soft Light
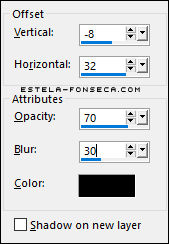
9- Effects / 3D Effects / Drop Shadow:
10- Layers / Duplicate
Image / Mirror / Mirror Horizontal
Image / Mirror / Mirror Vertical
11- Ative a Layer <<Raster 2>>
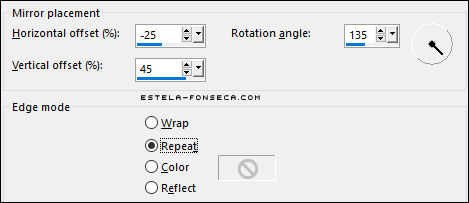
Layers / DuplicateEffects / Reflection Effects / Rotating Mirror
12- Ative a Layer do Fundo
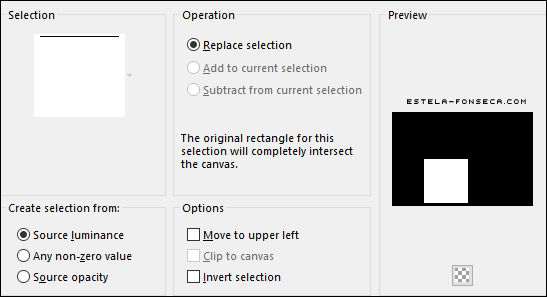
Selections / Load/Save Selection / Load Selection from disk:nicole-240
Selections / Promote selection to layerBlend Mode / Color (Legacy)
Selections / Select None
Ative a Layer <<Copy of Raster 1>>
Layers / Duplicate
Image / Mirror / Mirror Horizontal
13- Ative a Layer do Topo
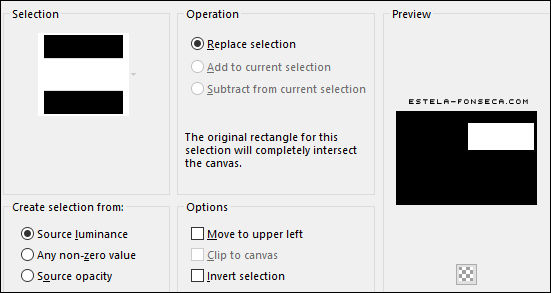
Layers / New Raster LayerSelections / Load/Save Selection / Load Selection from disk: nicole-238
Abra a <<Image-Tartane>> Copie e Cole na Seleção
Selections / Select NoneBlend Mode / Hard Light ou Overlay
Effects / Plugins / Alien Skin Eye Candy 5 / Impact / Bevel / preset <<nicole-tartane-bevel>>
14- Layers / New Raster Layer
Selections / Load/Save Selection / Load Selection from disk: nicole-239
Cole na seleção ( a imagem copiada ainda está na memória)
Selections / Select None
Blend Mode / Soft Light ( ou outro)Effects / Plugins / Alien Skin Eye Candy 5 / Impact / Bevel / preset <<nicole-tartane-bevel>>
15- Layers / New Raster Layer
Selections / Load/Save Selection / Load Selection from disk: nicole-239
Effects / Plugins / Alien Skin Eye Candy 5 / Impact /Backlight / preset <<nicole-tartane>>Selections / Select None
16- Image / Add Borders / Symmetric Marcado / 1 Pixel cor #000000
Image / Add Borders / Symmetric Marcado / 30 Pixels cor #FFFFFFImage / Add Borders / Symmetric Marcado / 1 Pixel cor #000000
Layer / Promote Background Layer
17- Image / Resize / 80% ... Resize All Layers ... Desmarcado
18- Layers / New Raster Layer
Preencha com o Gradiente Radial configurado como segue:
Layers / Arrannge / Move Down
19- Adjust / Blur / Gaussian Blur / Radius 20
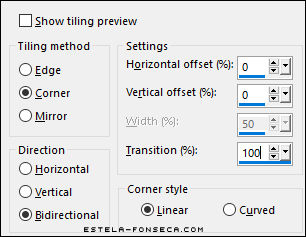
Effects / Image Effects / Seamless Tiling
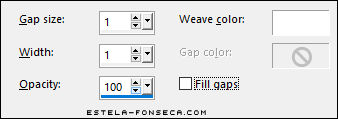
20- Effects / Texture Effects / Weave
21- Ative a Layer do Topo (raster1)
Layers / DuplicateImage / Resize / 50% ... Resize All Layers ... Desmarcado
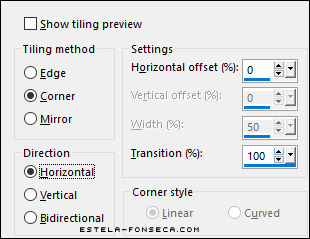
Effects / Image Effects / Seamless Tiling
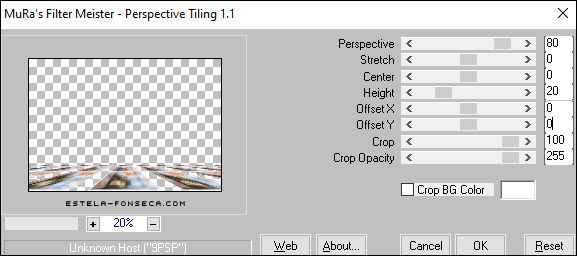
22- Effects / Plugins / MuRas Meister / Perspective Tiling
23- Layers / Arrange / Move Down
Blend Mode / Multiply24- Ative a Layer do Topo (raster1)
Effects / 3D Effects / Drop Shadow:
25- Layers / New Raster Layer
Selections / Load/Save Selection / Load Selection from disk: nicole-231
Preencha com a cor #FFFFFF
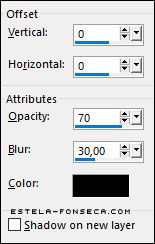
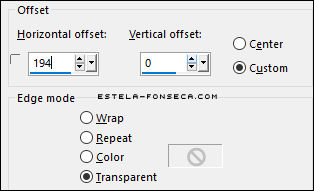
Selections / Select NoneEffects / Image Effects / Offset:
Layers / Arrange / Move Down
26- Layers / Duplicate
Image / Mirror / Mirror Horizontal
26- Ative a Layer do Topo
Abra o tube <<corinne.vicaire-femme-57-2012 >> Copie e Cole como nova Layer
Image / Resize / 95% ... Resize All Layers ... Desmarcado
Aplique uma sombra de sua preferência
27- Ative o texto copie e cole como nova layer
Posicione
28- Image / Add Borders / Symmetric Marcado / 1 Pixel cor #000000
Image / Add Borders / Symmetric Marcado / 30 Pixels cor #FFFFFFImage / Add Borders / Symmetric Marcado / 1 Pixel cor #000000
Adjust / Sharpness / Unsharp Mask:
Assine seu trabalho
Salve Como JPG.
FIM
Outra Versão tube de Athe:
© Tutorial Traduzido por Estela Fonseca em 17/02/2023.
Obrigada, Nicole por me permitir traduzir seu trabalho.