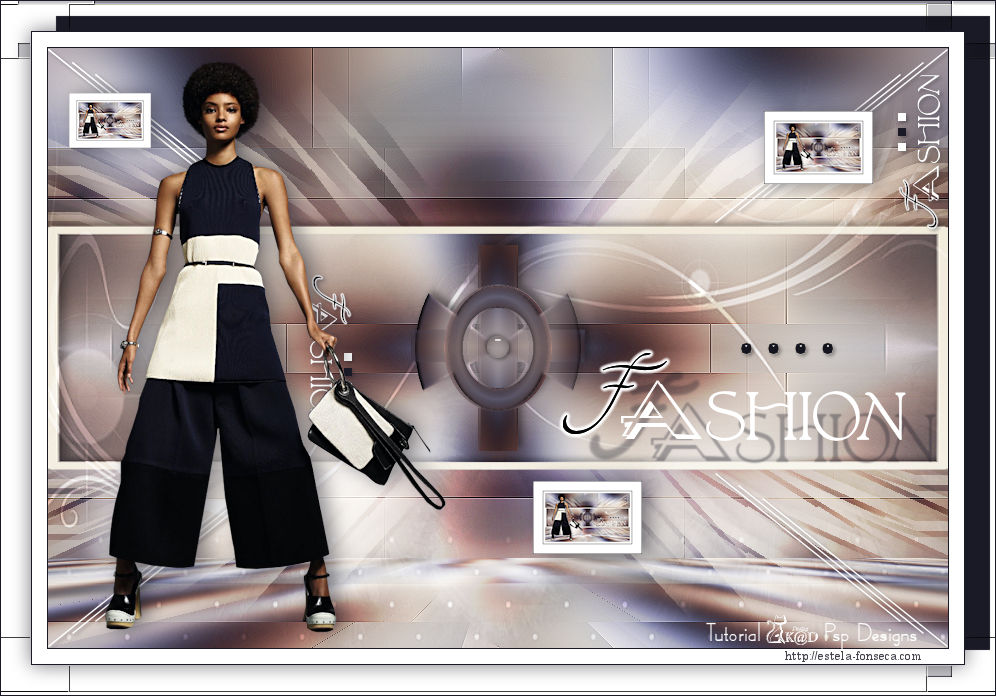
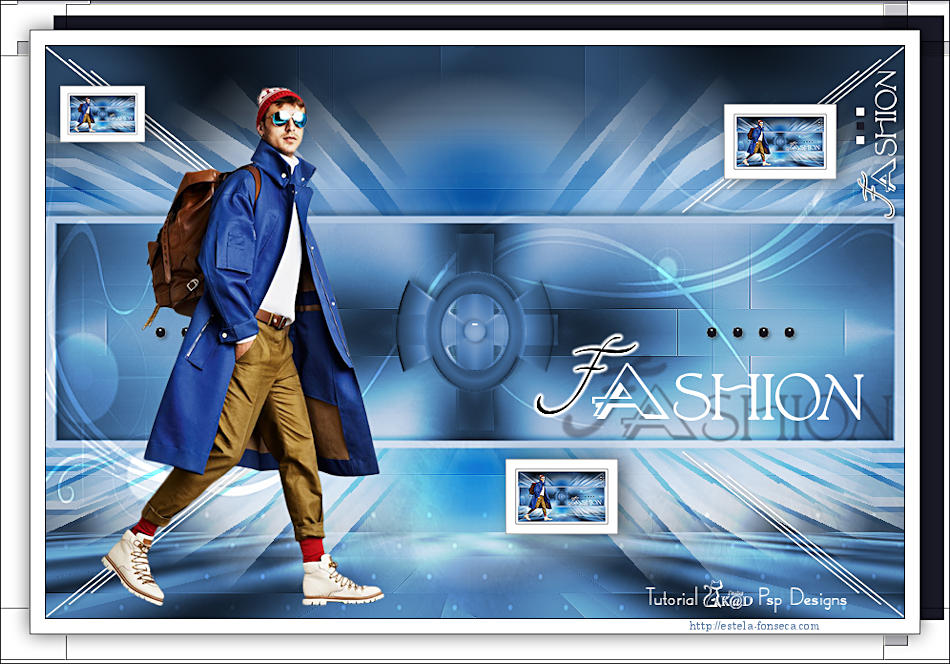
FASHION
Tutorial de KaDs , original, Aqui.
Esta lição foi feita com PSP 2019. Mas pode ser feita com outras versões.
Materiais Utilizados:
KaD_Woman_215
487_KaD_Element1
487_KaD_Frame_Alfakanaal
487_KaD_Text1
487_KaD_Alfakanaal (esta layer contém seleções em canal alfa)
Narah_mask_0619 ( abra no PSP e Minimize-a)
487_KaD_Kleuren
Plugins Necessários:
Mehdi / Wavy Lab 1.1
AAA Frames / Foto Frame
Unlimited 2.0 / Transparancy (**)
DSB Flux / Linear Transmission
Unlimited 2.0 / VM Toolbox (**)
Unlimited 2.0 / &<Background Designers sf10 I> / Cruncher (**)
Alien Skin Eye Candy 5 / Impact
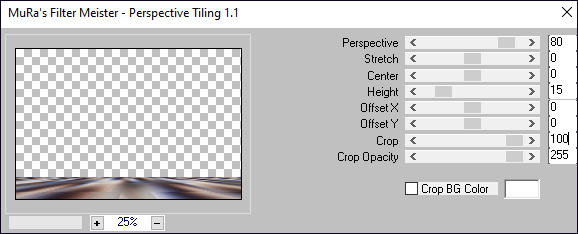
MuRa’s Meister / Perspective Tiling
(**) Importados para o Unlimited 2.0
Paleta de Cores:
Existem diferenças de cores nas diferentes versões do PSP.
Portanto, use os códigos html da paleta de cores para garantir que você tenha as mesmas cores.
Além disso, ao mesclar camadas, pode haver diferenças de cores.
Ao usar tubes e cores diferentes, o blend mode e/ou a opacidade da layer pode diferir.
Os termos:
Image / Mirror / Mirror Horizontal = Image / Mirror
Image / Mirror / Mirror Vertical = Image / Flip
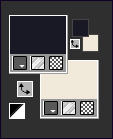
Cores:Primeiro Plano cor 1
Segundo Plano cor 2
01- Abra a layer <<alpha channel : 487_KaD_Alfakanaal>>
Window / Duplicate
Feche o original , continue na cópia
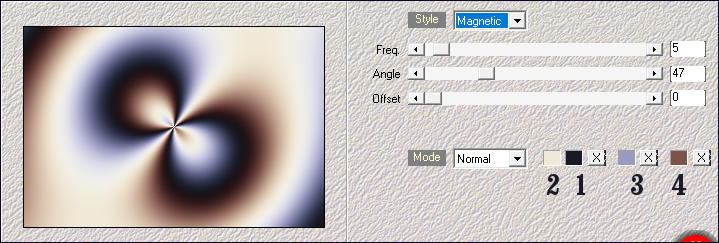
02- Effects / Plugins / Mehdi / Wavy Lab 1.1
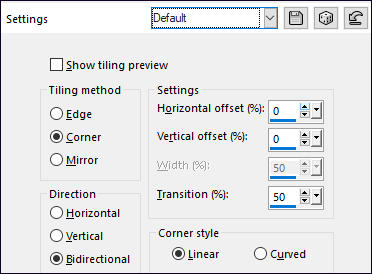
03- Effects / Image Effects / Seamless Tiling / DEFAULT
Adjust / Blur / Gaussian Blur : Radius 30
04- Layers / Duplicate
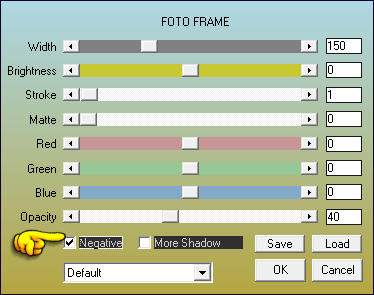
Effects / Plugins / AAA Frames / Foto Frame
05- Effects / Plugins / <I.C.NET Software> Filters Unlimited 2.0 / Transparancy / Eliminate White
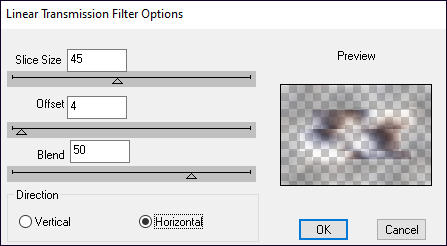
06- Effects / Plugins / DSB Flux / Linear Transmission
07- Effects / Image Effects / Seamless Tiling / DEFAULT
Layers / Merge / Merge Down (Raster 1)
Effects / Edge Effects / Enhance
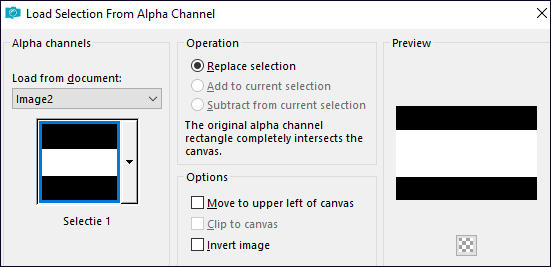
08- Selections / Load/Save Selection / Load Selection From Alpha Channel: Selectie 1
Selections / Promote selection to layer (Promoted selection)
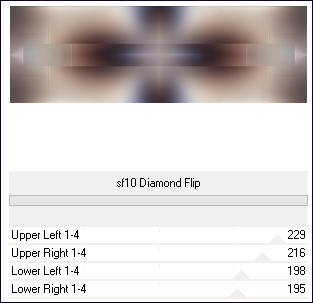
Effects / Plugins / <I.C.NET Software> Filters Unlimited 2.0 / &<Background Designers IV> / sf10 Diamond Flip
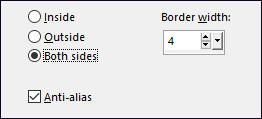
09- Selections/ Modify / select selection borders
Preencha a seleção com a cor do segundo plano
Effects / 3D Effects / Drop Shadow : -4 / 4 / 40 / 10 Cor #000000
Selections / Select None
10- Layers / Duplicate (Copy of Promoted selection)
Effects / Plugins / VM Toolbox / Zoom Blur
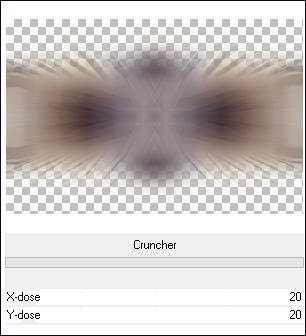
10-1- Effects / Plugins / <I.C.NET Software> Filters Unlimited 2.0 / &<Background Designers sf10 I> / Cruncher
Layers / Arrange / Move Down
Blend Mode / Hard Light
11- Ative a Layer do Topo (Promoted selection)
Effects / Distortion Effects / Pinch : Stringht 60
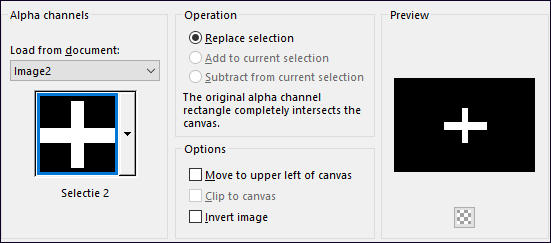
12- Selections / Load/Save Selection / Load Selection From Alpha Channel : Selectie 2
Selections / Promote selection to layer (Promoted selection 1)
Effects / Distortion effects / Polar coordinates
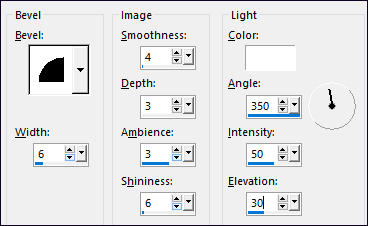
12-1- Effects / 3D Effects / Inner Bevel
Selections / Select None
13- Image / Resize / 75%... Resize All Layers ... Desmarcado
Image / Free rotate / Right / 90
Layers / Duplicate
Image / Mirror / Mirror Horizontal
Opacidade / 50%
Layers / Merge / Merge Down
Effects / 3D Effects / Drop Shadow : -4 / 4 / 40 / 10 Cor #00000014- Ative a Layer do FUNDO (Raster 1)
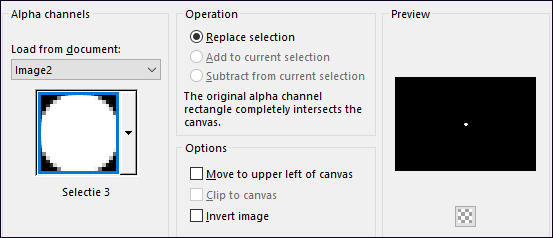
Selections / Load/Save Selection / Load Selection From Alpha Channel:Selectie 3
Selections / Promote selection to layer (Promoted selection 2)
Layers / Arrange / Bring to top
Effects / Plugins / Alien Skin Eye Candy 5 / Impact / Glass : CLEAR NO DROP SHADOWSelections / Select None
14-1- Effects / 3D Effects / Drop Shadow : 2 / 2 / 35 / 5 Cor #000000Effects / 3D Effects / Drop Shadow : -2 / -2 / 35 / 5 Cor #000000
15- Layers / New Raster layer (Raster 2)
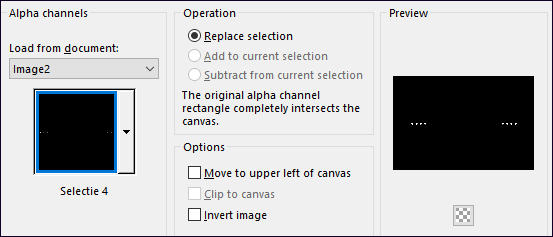
Selections / Load/Save Selection / Load Selection From Alpha Channel: Selectie 4
Preencha a seleção com a cor do Segundo Plano
Selections / Modify / Contract : 1 Pixels
Preencha com a cor do Primeiro Plano
Selections / Select None
Effects / Plugins / Alien Skin Eye Candy 5 / Impact / Glass : CLEAR NO DROP SHADOW
15-1- Effects / 3D Effects / Drop Shadow : 2 / 2 / 35 / 5 Cor #000000
16- Ative e Copie <<487_KaD_Text1>> Cole como nova layer (Raster 3)
Pick (K) Posição X (510,00) Posição Y (300,00) / Tecla <<M>> para desativar a Pick
Effects / 3D Effects / Drop Shadow : 22/ 30 / 35 / 2 / Cor 117- Mude a cor do Segundo Plano para a cor 5 (#ffffff)
Layers / New Raster layer
Preencha com a cor do Segundo Plano
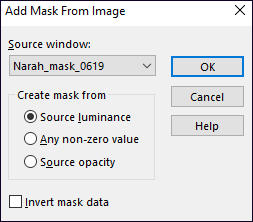
Layers / New Mask layers / From image: <<Narah_mask_0619>>
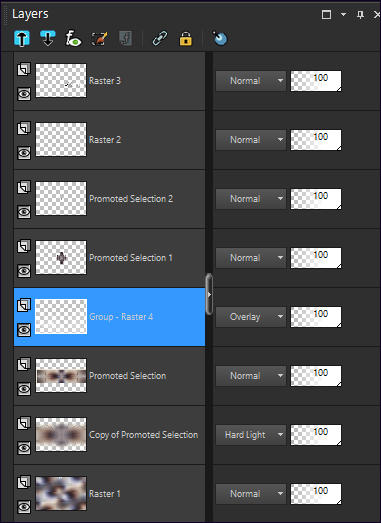
Layers / Merge / Merge Group (Group Raster 4)
Layers / Arrange / Move down ( 4 vezes)
Blend Mode / Overlay
Resultado:
18- Ative e Copie <<487_KaD_Element1>>
Cole como nova layer (Raster 4)
Layers / Arrange / Bring to top
Não Mova!
Effects / 3D Effects / Drop Shadow : 2 / 2 / 35 / 5 / Cor #000000
19- Ative a Layer do FUNDO <<Raster 1>>
Layers / Duplicate
Effects / Plugins / MuRa’s Meister / Perspective Tiling
Effects / 3D Effects / Drop Shadow : 0 / 0 / 60 / 30 / Cor #00000020- Ative a Layer do TOPO (Raster 4)
Ative e Copie <<KaD_Woman_215>> Cole como nova layer (Raster 5)
Image / Mirror / Mirror Horizontal
Image / Resize / 70%... Resize All Layers ... Desmarcado
Pick (K) Posição X (57,00) Posição Y (12,00) / Tecla <<M>> para desativar a Pick
Effects / 3D Effects / Drop Shadow : 0 / 7 / 50 / 30,00 / Cor #000000Adjust / Sharpness / Unsharp Mask :
Edit / Copy Special / Copy Merged
21- Abra << 487_KaD_Frame_Alfakanaal>> Duplique e feche a original
Continue com a cópia
Observe que há uma seleção ativa
Cole na seleção
Adjust / Sharpen / Sharpen More
Selections / Select None
Copie
22- Volte ao seu trabalho
Cole como nova layer (Raster 6)
Image / Resize / 60% ... Resize All Layers ... Desmarcado
Pick (K) Posição X (716,00) Posição Y (63,00) / Tecla <<M>> para desativar a Pick
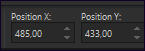
23- Layers / DuplicatePick (K) Posição X (485,00) Posição Y (433,00) / Tecla <<M>> para desativar a Pick
22- Layers / DuplicateImage / Resize / 75%... Resize All Layers ... Desmarcado
Pick (K) Posição X (21,00) Posição Y (45,00) / Tecla <<M>> para desativar a Pick
Adjust / Sharpness / Sharpen
Layers / Merge / Merge Down ( 2 vezes)
Effects / 3D Effects / Drop Shadow : 0 / 7 / 50 / 30,00 / Cor #000000
23- Image / Add Borders / Symmetric Marcado / 1 Pixel cor 1
Image / Add Borders / Symmetric Marcado / 15 Pixels cor 5
Image / Add Borders / Symmetric Marcado / 1 Pixel cor 1
Selections / Select All
Image / Add Borders / Symmetric Marcado / 30 Pixels cor 5
24- Effects / 3D Effects / Drop Shadow: -15 / 25 / 100 / 1 / Cor 1
Selections / Invert
Selections / Promote selection to layer
Effects / Plugins / <I.C.NET Software> Filters Unlimited 2.0 / &<Background Designers sf10 I> / Cruncher : 20 – 20
24-1- Effects / Edge Effects / Enhance MoreBlend Mode / Multiply
Layers / Merge / Merge down
25- Selections / Invert
Effects / 3D Effects / Drop Shadow : 0 / 0 / 60 / 30 / Cor #000000
Selections / Select None
26- Adicione a Marca d'água de KaDs
Adicione seu nome ou a sua marca d'água
27- Image / Add Borders / Symmetric Marcado / 1 Pixel cor 1
Image / Resize / Width 900 Pixels / Resize all Layers Marcado
Adjust / Sharpness / Unsharp Mask : 2 – 30 – 2 – nada marcado
Salve como JPG.FIM
Versão com tube de Malaka Tubes:
©Tutorial traduzido por Estela Fonseca em 07/12/2020.
Não alterar nem repassar sem autorização.