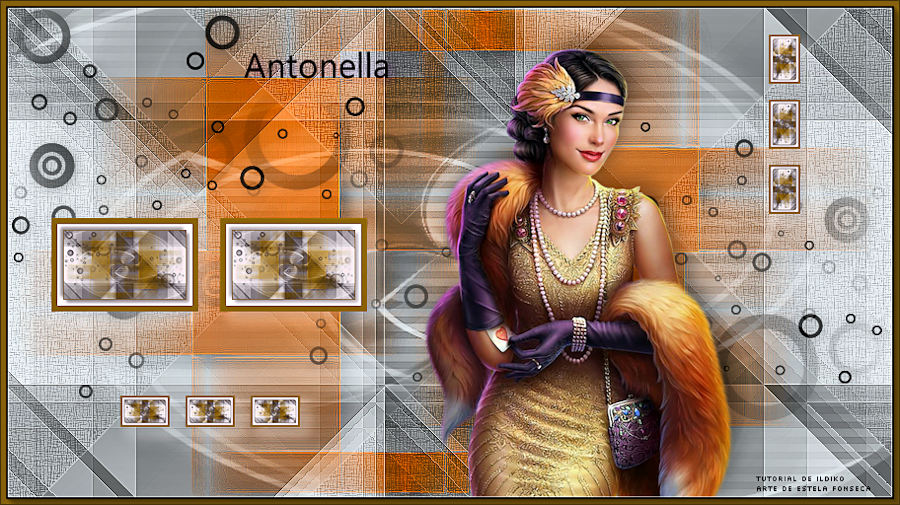
antonella
Tutorial de ©Ildikó , original AQUI.
Este tutorial foi traduzido no Corel PaintShop Pro 2019 Ultimate.
Material Necessário:
ildikokjk_antonella_mask_01-05
ildikokjk_antonella_women
ildikokjk_antonella_color
ildikokjk_signo
Plugins
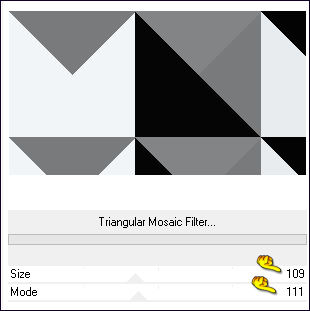
< I.C.NET Software > Filters Unlimited 2 / Filter Factory Gallery A / Triangular Mosaic Filter
< I.C.NET Software > / Filters Unlimited 2 / Filter Factory Gallery A / Zoom In
< I.C.NET Software > / Filters Unlimited 2 / Paper Textures / Papyrus
MuRa's Filter / Copies
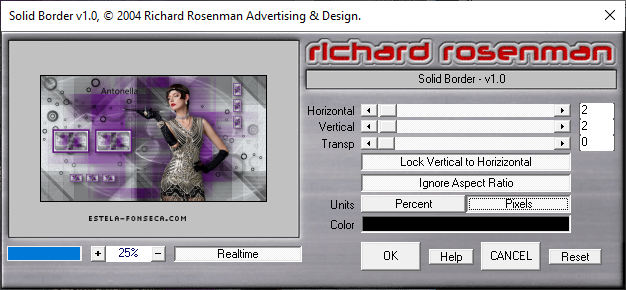
Richard Rosenman / Solid Border
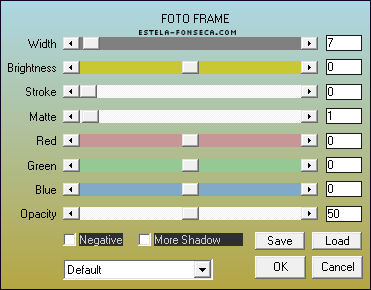
AAA Frames / Foto Frame
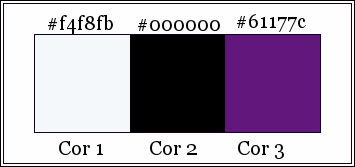
Cores:
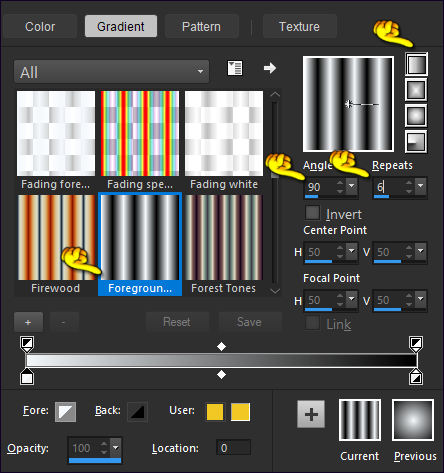
Gradiente : Corel_06_029 (Foreground_Background)
Primeiro Plano cor (1) #f4f8fb / Segundo Plano cor (2) #000000
Forme no Primeiro Plano um gradiente LINEAR configurado como segue:
01- Abra uma Nova imagem transparente de 900/500 Pixels
Preencha com o Gradiente
Effects / Plugins / < I.C.NET Software > / Filters Unlimited 2 / Filter Factory Gallery A / Triangular Mosaic Filter
Effects / Plugins / < I.C.NET Software > / Filters Unlimited 2 / Filter Factory Gallery A / Zoom In / Default
Effects / Edge Effects / Enhance
Layers / Duplicate
02- Image / Flip / Flip VerticalImage / Mirror / Mirror Horizontal
Layers / Properties : Blend mode / Normal : Opacity / 40
Resultado:
Layers / Merge / Merge Down
Layers / Duplicate
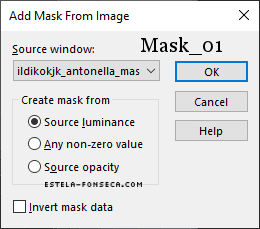
03- Layers / New Mask Layer / From Image : ildikokjk_antonella_mask_01
Layers / Merge / Merge Group
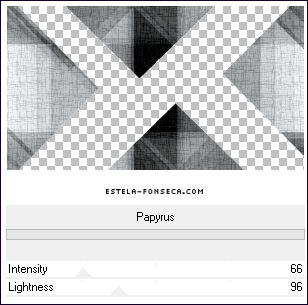
Effects / Plugins / < I.C.NET Software > / Filters Unlimited 2 / Paper Textures / Papyrus / Default
Effects / Edge Effects / Enhance More
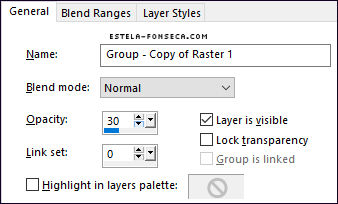
Layers / Properties : Blend mode / Normal : Opacidade / 30
Layers / New Raster Layer02- Preencha com a cor (1) #f4f8fb
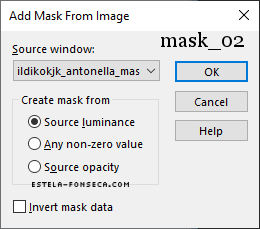
Layers / New Mask Layer / From Image : ildikokjk_antonella_mask_02
Layers / Merge / Merge Group
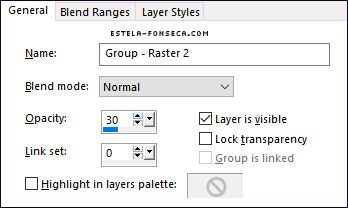
Layers / Properties : Blend mode / Normal : Opacity / 30
Layers / New Raster Layer05- Preencha com a cor (1) #f4f8fb
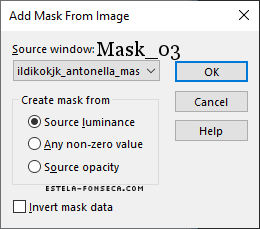
Layers / New Mask Layer / From Image : ildikokjk_antonella_mask_03
Layers / Merge / Merge Group
Layers / Duplicate
Layers / Properties : Blend mode / Normal : Opacidade / 30
Layers / New Raster Layer06- Preencha com a cor (3) #61177c
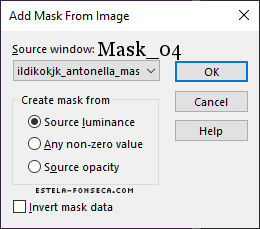
Layers / New Mask Layer / From Image : ildikokjk_antonella_mask_04
Layers / Merge / Merge Group
Effects / Edge Effects / Enhance
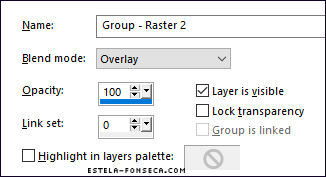
Effects / 3D Effects / Drop Shadow : 8/8/42/26/#000000Layers / Properties : Blend mode / Overlay : Opacity / 100
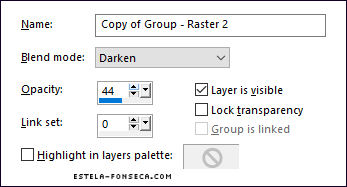
Layers / Duplicate
Layers / Properties : Blend mode / Darken : Opacidade / 44
Layers / New Raster Layer07- Preencha com a cor (2) : #000000
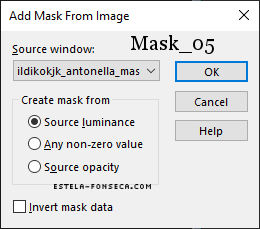
Layers / New Mask Layer / From Image : ildikokjk_antonella_mask_05
Layers / Merge / Merge Group
Effects / 3D Effects / Drop Shadow : 3/3/42/18/#000000
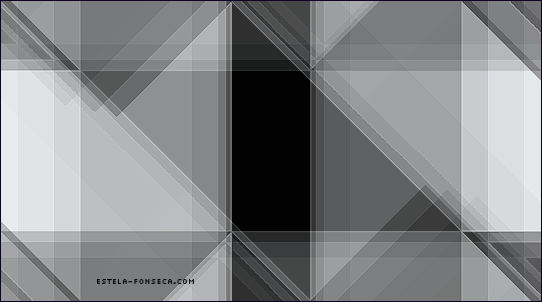
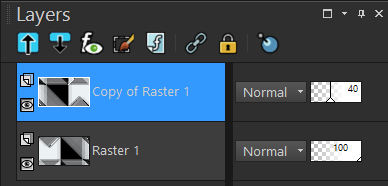
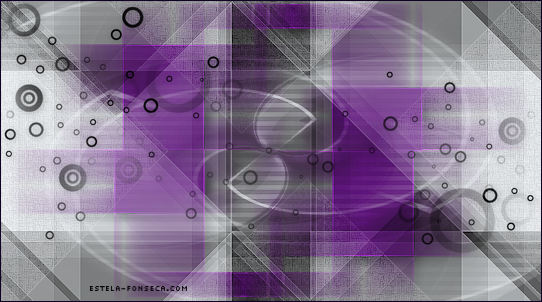
Resultado:
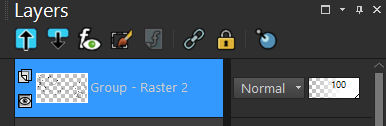
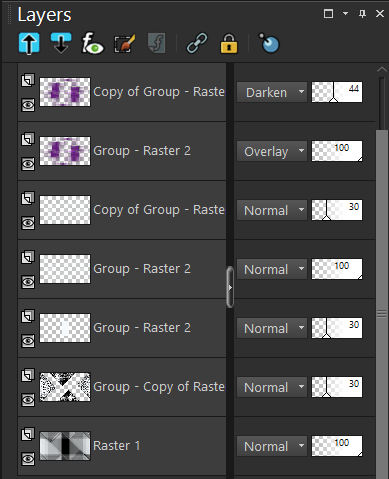
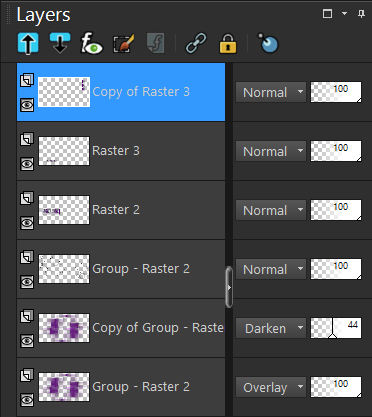
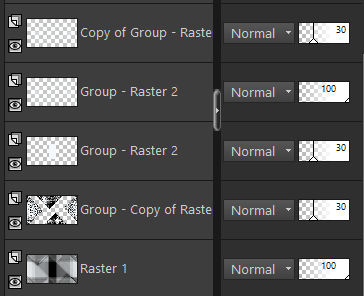
Paleta das Layers:
Window / Duplicate
08- Continuaremos trabalhando nesta cópia
Layers / Merge / Merge Visible
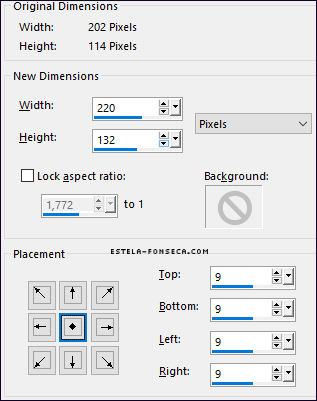
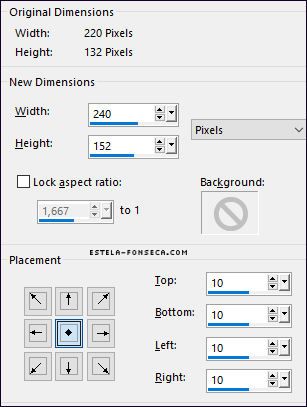
Image / Add Borders / Symmetric Marcado / 1 Pixel cor (3)Image / Resize:
Layers / Promote Background Layer
Layers / New Raster Layer
Layers / Arrange / Send to Bottom
Image / Canvas Size
Preencha a Layer com a cor (1) #f4f8fb
Ative a Layer do TOPO (Raster 1)
Layers / New Raster Layer
Layers / Arrange / Send to BottomImage / Canvas Size:
Preencha a Layer com a cor (3) #61177c
Ative a Layer do TOPO (Nessa imagem pequena que trabalhamos agora)
Effects / 3D Effects / Drop Shadow : 5/5/40/9/#000000
Effects / 3D Effects / Drop Shadow : -5/-5/40/9/#000000
Layers / Merge / Merge Visible
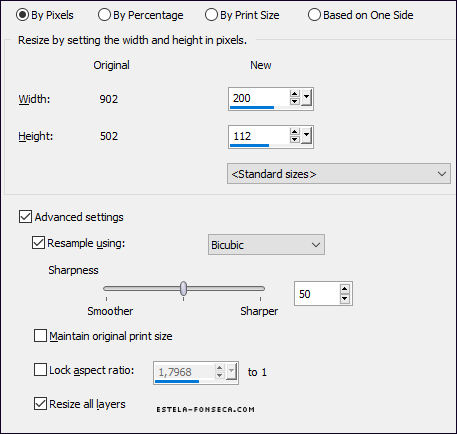
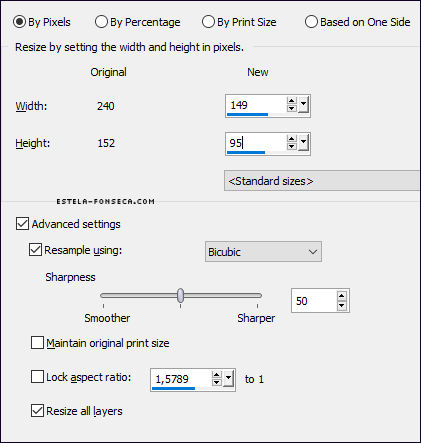
Image / Resize
Window / Duplicate
Image / Resize
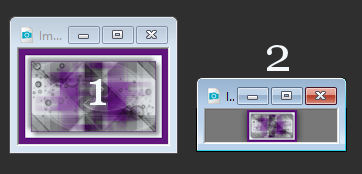
Agora você tem duas imagens pequenas.
Ative a Imagem 1 ( a maior) Copie e Cole como nova layer em seu trabalho original
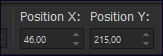
Pick Tool (K) Posição X : 46 / Posição Y : 215 / Tecla "M" desativa a Pick
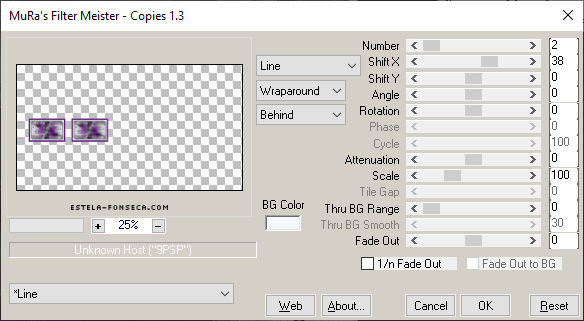
Effects / Plugins / MuRa's Filter / Copies
Effects / 3D Effects / Drop Shadow : 8/8/40/20/#000000
09- Ative e Copie a imagem nº2 ( a imagem menor)
Volte ao seu trabalho original e cole como nova layer
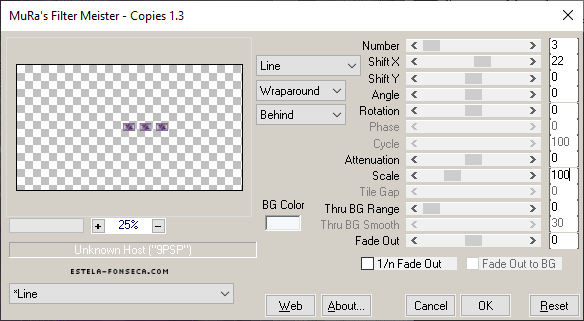
Effects / Plugins / MuRa's Filter / Copies
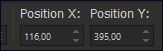
Pick Tool (K) Posição X : 116 / Posição Y : 395 / Tecla "M" desativa a Pick
Layers / Duplicate
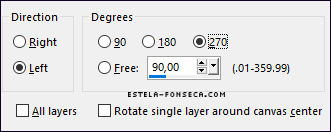
Image / Free Rotate:
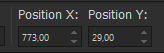
Pick Tool (K) Posição X : 773 / Posição Y : 29 / Tecla "M" desativa a Pick
Effects / 3D Effects / Drop Shadow : 8/8/40/20/#000000
Ative a Layer <<Raster 3>>
Effects / 3D Effects / Drop Shadow : 8/8/40/20/#000000
Ative a Layer do Topo
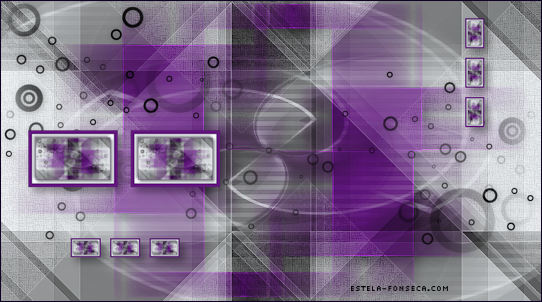
Veja o Resultado até este momento:
11- Ative o tube <<ildikokjk_antonella_women>> Copie e Cole Como Nova Layer
Pick Tool (K) Posição X : 323 / Posição Y : 31 / Tecla "M" desativa a Pick
Effects / 3D Effects / Drop Shadow : -10/8/40/30/#000000
Layers / Merge / Merge Visible12- Ferramenta <<Tex Tool > Fonte : Microsoft PhagsPa / Size : 12 / Cor : #000000 / Antonella
Para mim o tamanho foi 8 Points.
Layers / Convert to Raster Layer
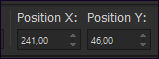
Pick Tool (K) Posição X : 241 / Posição Y : 46 / Tecla "M" desativa a Pick
Effects / 3D Effects / Drop Shadow : 3/3/42/14/#61177c
Layers / Merge / Merge Visible13- Effects / Plugins / Richard Rosenman / Solid Border
Image / Add Borders / Symmetric Marcado / 6 Pixels cor (3) #61177c
Effects / Plugins / AAA Frames / Foto Frame
14- Assine e Salve como arquivo JPG.
Fim
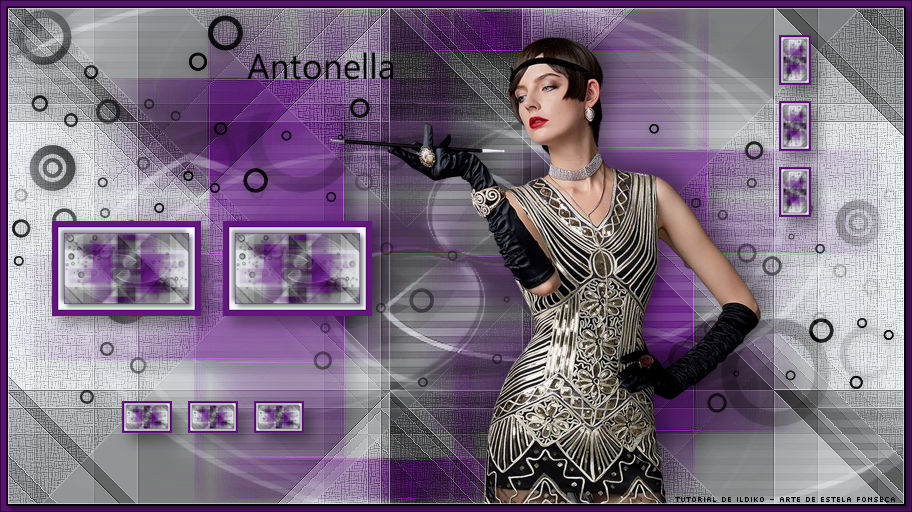
Versão com tube de Tine:
© Tutorial Traduzido por Estela Fonseca em 06/07/2022.
Obrigada, Ildikó por me permitir traduzir este trabalho.