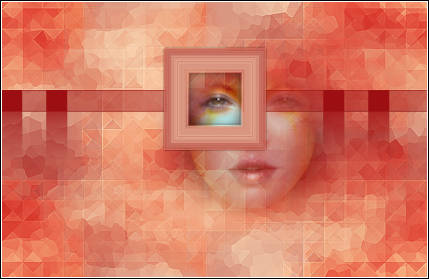
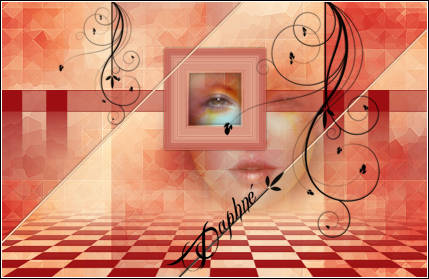
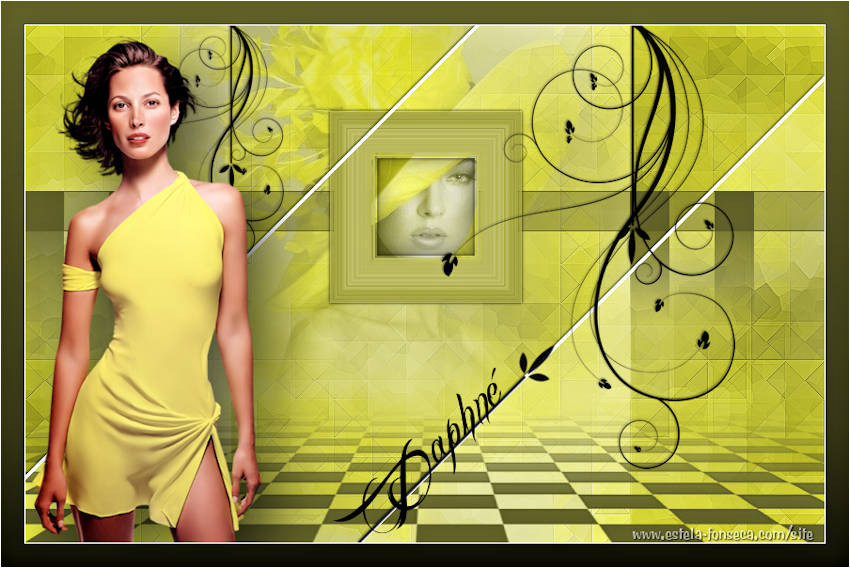
DAPHNÉ
Este tutorial é uma tradução da criação de Veró. Original Aqui.
Este tutorial foi traduzido no PSP X8, mas pode ser feito em versões anteriores.
Materiais Necessários:
Tube de Tyna Reagen: "TReagen_2504"
Son groupe de tubes: "https://fr.groups.yahoo.com/group/TRTubes"
e seu site: https://www.tynareagen.com
Plugins Utilizados:I.C.Net Software / Filters Unlimited 2.0
Pixellisation / Cristallisation
Factory A / Triangular Mosaic Filter Télécharger
Eye Candy 4000 / Motion Trail
Alien Skin Eye Candy 5 Impact / Perspective Shadow
Preparação:
Abra os tubes no PSP. Duplique, minimize e feche os originais.Copie as seleções para a pasta de seleções do PSP
Copie as Masks para a pasta de Masks do PSP
Escolha uma cor escura e uma cor clara do seu tube principal, Minhas Cores
Cor Escura # 9c0f12
Cor Clara # f6d2b2
Nota: Se o tube não é muito colorido, escolha cores que complementem seu trabalho.
01- Primeiro Plano cor # 9c0f12 / Segundo Plano cor # f6d2b2
02- Abra uma Nova Imagem transparente de 850/550 pixels
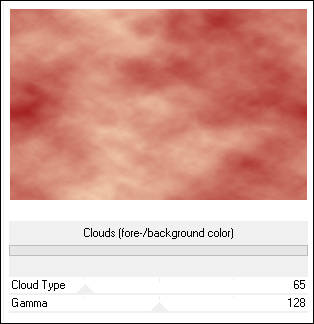
Preencha com a cor do Primeiro Plano
Effects / Plugin / I.C.Net Software / Filters Unlimited 2.0 / Render / Default
Layers / Merge / Merge All (Flatten)
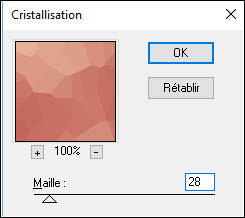
Effects / Plugin / Pixellisation / Cristallisation:
Effects / Edge Effects / Enhance
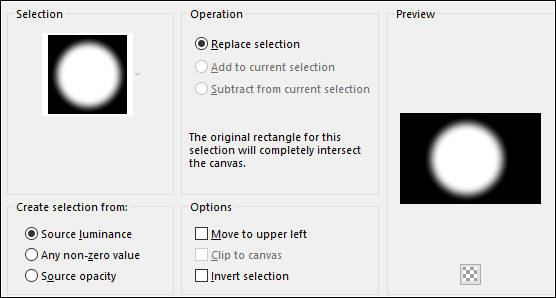
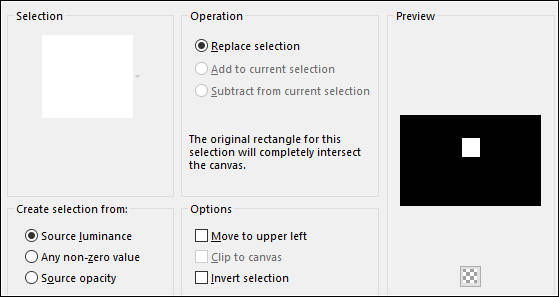
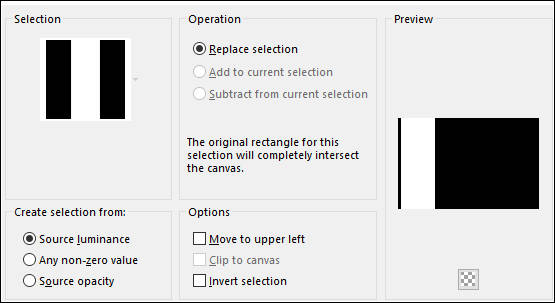
Selections / Load Save Selection / Load selection /from DisK: Exkizz_Sel_Daphne 1
Selections / Promote Selection to Layer
Mantenha a Seleção!!
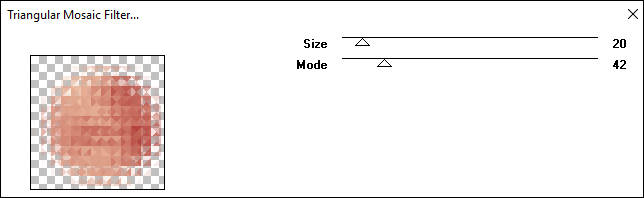
Effects / Plugin / Filter Factory Gallery A / Triangular Mosaic / Defaut : 20 / 42
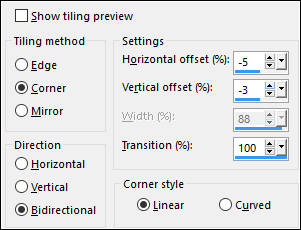
Selections / Select NoneEffects / Image Effects / Seamless Tiling
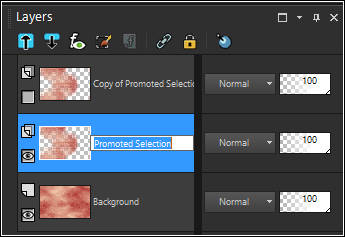
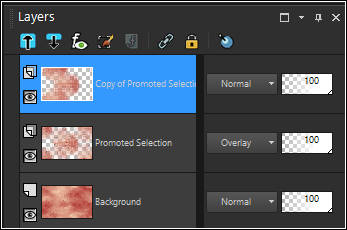
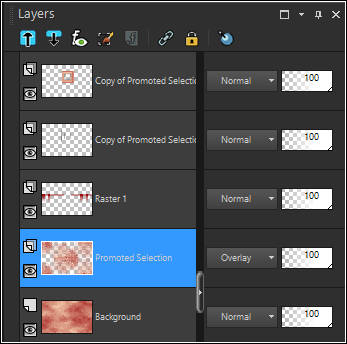
Layers / Duplicate
Tire a visibilidade da Layer <<Copy of Promoted Selection>>
Ative a Layer << Promoted Selection>>
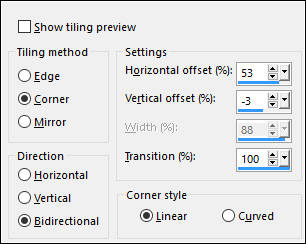
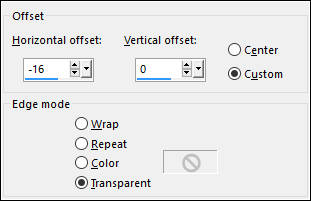
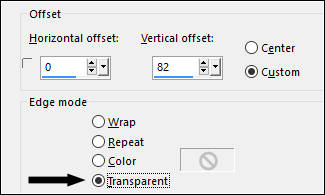
Effects / Image Effects / Offset:
Effects / Image Effects / Seamless Tiling
Effects / Edge Effects / Enhance
Blend Mode / Overlay
03- Ative e torne Visível a Layer <<Copy of Promoted Selection>>
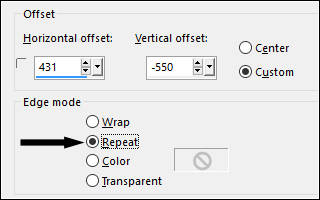
Effects / Image Effects / Offset:
Effects / Reflection Effects / Kaleidoscope:
Selections / Load Save Selection / Load selection /from DisK: Exkizz_Sel_Daphne 2
Selections / Invert
Delete no teclado
Selections / Select None
Image / Resize / 50%....Resize All layers , Desmarcado
Effects / Image Effects / Offset
Adjust / Sharpness / Sharpen
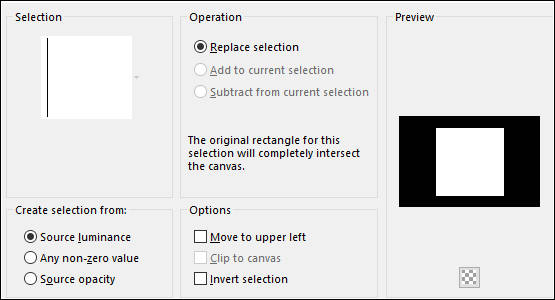
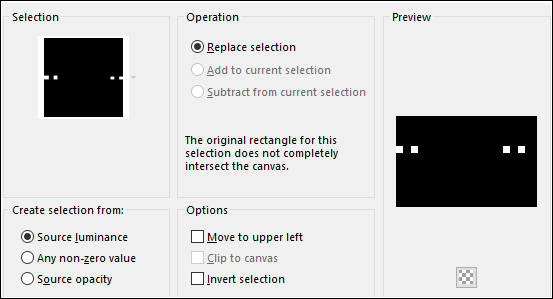
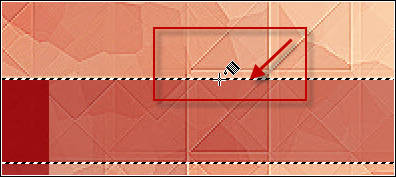
Ative a Varinha Mágica, configurada como segue:
Clique dentro e fora do quadro, como segue:
Selections / Invert
Effects / 3D Effects / Drop Shadow: Cor #000000
Selections / Select None
Ative a Layer do Topo <<Copy of Promoted Selection>>
Ative a Varinha Mágica (Mesmas Configurações de antes)
Clique dentro do quadro
Effects / 3D Effects / Cutout:
Selections / Select None
04- Ative a Terceira Layer a Partir da Layer do Topo << Promoted Selection>>
Layers / New Raster Layer
Selections / Load Save Selection / Load selection /from Disk: Exkizz_Sel_Daphne 3
Preencha a seleção com a cor do Primeiro Plano # 9c0f12
Selections / Select NoneLayers / Duplicate
Ative a Layer <<Raster 1>>
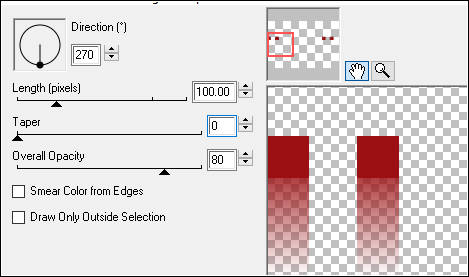
Effects / Plugin / Eye Candy 4000 / Motion Trail:
Ative a Layer da Cópia <<Copy of Raster 1>>Effects / Plugin / Eye Candy 4000 / Motion Trail:
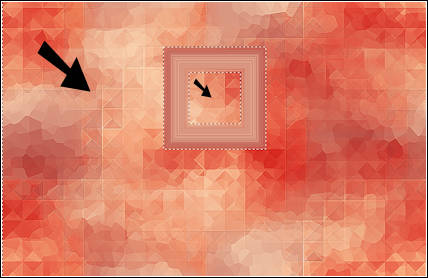
Layers / Merge / Merge DownSelections / Load Save Selection / Load selection /from Disk: Exkizz_Sel_Daphne 4
Dê um Zoom de 200% ou 400%
Baldinho de Pintura configurado como segue:
Preencha com a cor do Primeiro Plano # 9c0f12
Selections / Select None
Ainda Nesta Layer
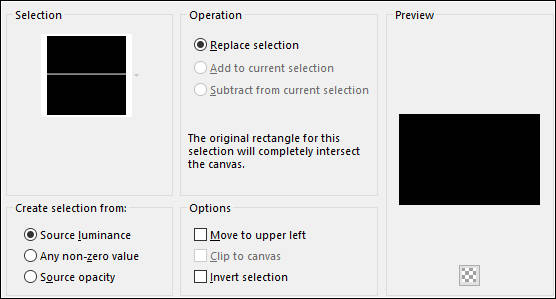
Selections / Load Save Selection / Load selection /from Disk: Exkizz_Sel_Daphne 5
Delete no seu teclado
Selections / Select None
05- Ative a Segunda layer à partir da Layer do Fundo << Promoted Selection>>
Abra o tube <<TReagen_2504>>
Copie e Cole como nova layer
Image / Resize / 45%....Resize all layers desmarcado
Adjust / Sharpness / Sharpen
Ferramenta Move Tool (M) Posicione comosegue:
Opacidade / 55%Selections / Load Save Selection / Load selection /from Disk: Exkizz_Sel_Daphne 5
Selections / Promote Selection to layer
Selections / Select None
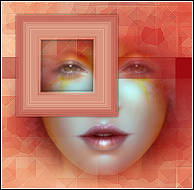
Resultado:
06- Ative a Layer <<Promoted Selection>>
Layers / New Raster layer
Preencha com a cor do Primeiro Plano # 9c0f12
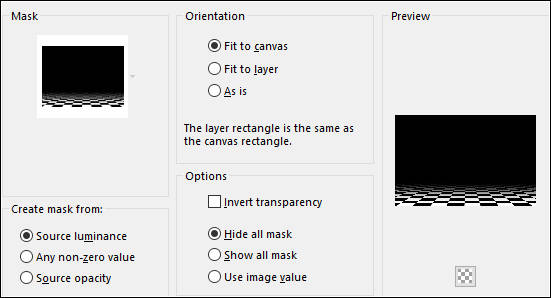
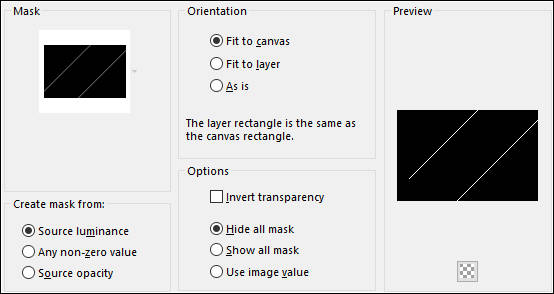
Layers / Load Save Mask / Load Mask from Disk: Exkizz_Mask_Daphne 1
Adjust / Sharpness / Sharpen More
Layers / Merge / Merge Group
Opacidade / 70%
07- Ative a Layer do Fundo
Layers / New Raster Layer
Selections / Load Save Selection / Load selection /from Disk: Exkizz_Sel_Daphne 6
Preencha com a cor do Segundo Plano # f6d2b2
Selections / Select NoneEffects / Image Effects / Seamless Tiling
Blend Mode / Hard Light
Layers / Duplicate
Image / Mirror / Mirror Horizontal
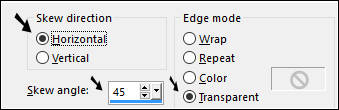
Effects / Geometric Effects / Skew
08- Ative a Layer do Topo << Copy of promoted Selection>>
Layers / New Raster Layer
Preencha com a cor do Segundo Plano # f6d2b2
Layers / Load Save mask / Load Mask From Disk: Exkizz_Mask_Daphne 2
Adjust / Sharpness / Sharpen More
Layers / Merge / Merge Group
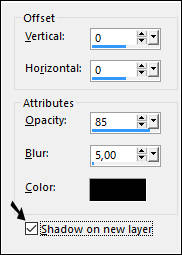
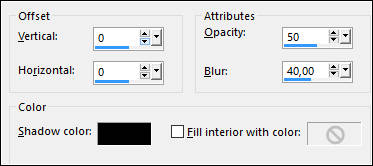
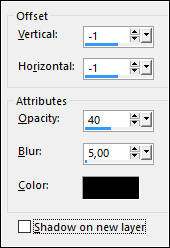
Effects / 3D Effects / Drop Shadow: - 1 / - 1/ 40 / 5 / preto (# 000000)
09- Layers / New Raster Layer
Mude a cor do Primeiro Plano para preto # 000000
Ferramenta <<Paint Brush Tool>> Configurada como segue:Selecione o Brush <<Exkizz_Daphne_Brush 1>>
Aplique à direita como segue:
Reposicione , se necessário
Layers / New Raster Layer
Ferramenta <<Paint Brush Tool>> Selecione o Brush <<Exkizz_Daphne_Brush 2>>
Aplique o Brush com a cor do Primeiro Plano como segue:
Layers / Merge / Merge DownEffects / 3D Effects / Drop Shadow: Cor #000000
10- Layers / New Raster Layer
Ferramenta <<Paint Brush Tool>> Selecione o Brush <<Exkizz_Daphne_Brush 3>>
Aplique o Brush com a cor do Primeiro Plano como segue:
Reposicione se necessário
Nota: Se você pode escrever seu texto, a fonte que utilizáda aqui é <<Billy Argel Trial>>
Para a letra "D" Tamanho: 120 Pixels e para as outras letras Tamanho 100 pixels
Apliquei uma rotação de 45° à esquerda
11- Abra o tube <<Dama_de_Rojo_2>>
Copie e Cole como Nova layer
Image / Resize / 65% ....Resize all layers desmarcado
Adjust / Sharpness / Unsharp Mask:
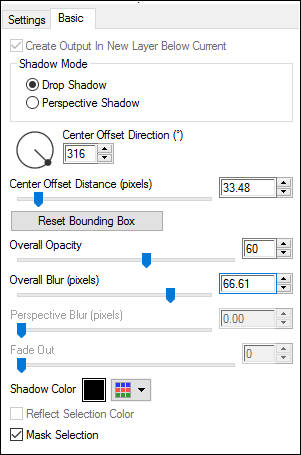
Posicione à esquerdaEffects / Plugin / Alien Skin Eye Candy 5 / Impact / Perspective Shadow / preset "Drop Shadow, Blurry"
Em "Basic" configure <<Overall Opacity>> 60
12- Image / Add Borders / Symmetric Marcado / 1 pixel cor clara # f6d2b2
Layers / Promote Background LayerImage / Canvas Size: 902 / 602
Layers / New Raster LayerPreencha com a cor do Primeiro Plano # 000000
Layers / Arrange / Move DownLayers / New Raster / Layer
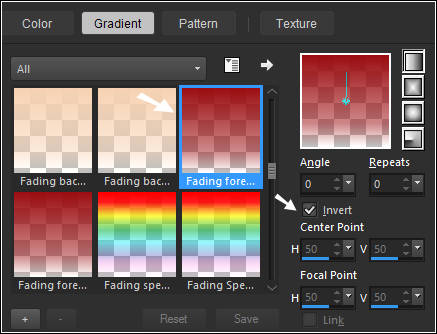
Primeiro Plano cor escura # 9c0f12
Gradiente <<Fading Foregraund>> estilo <<Linear>>
Preencha com o Gradiente
Image / Add Borders / Symmetric Marcado / 1 pixel cor clara # f6d2b2
Assine seu trabalhoLayers / Merge / Merge All (Flatten)
Salve como JPG.
Versão com tube principal de Guismo e tube de Yoka:
©Tutorial traduzido por Estela Fonseca em 12/05/2017.
Não alterar nem repassar sem autorização.